How to navigate different forms based on a criteria
Two options are available for form navigation .They are :
1. By using the rule ‘ LoadForm’.
Step 1 : Create a form ‘ frmQADepartment ‘ with a label control in it as shown in figure 1. Similarly create forms for Development and configuration department respectively.

Figure 1
Step 2 : Create a form with a text-box control as shown in figure 2.
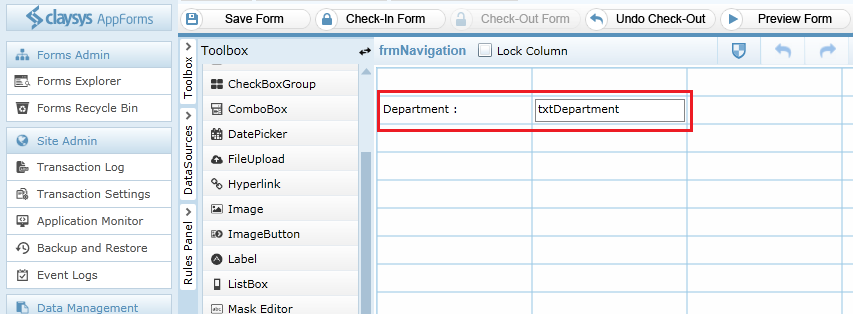
Figure 2
Step 3 : Create a rule on text-box control ‘txtDepartment’ . By clicking on the ‘txtDepartment’ control, a popup appears click on ‘Rules/Attribute’ tab and then click on ‘Create Rule’ option .

Figure 3
Step 4 : Define the rule for loading the corresponding form by checking the input value in ‘txtDepartment’ control . If the input value in ‘txtDepartment’ control is “QA” then load the form which is the home page of QA. Here in the rule ‘LoadForm(Test.frmQADepartment) ‘ , ‘Test’ is the root folder name in which the form ‘ frmQADepartment ‘ is present . Root folder name and form name is separated by dot operator.

Figure 4
Step 5 : Similarly define rule for Development and configuration department as shown in figure 5 .
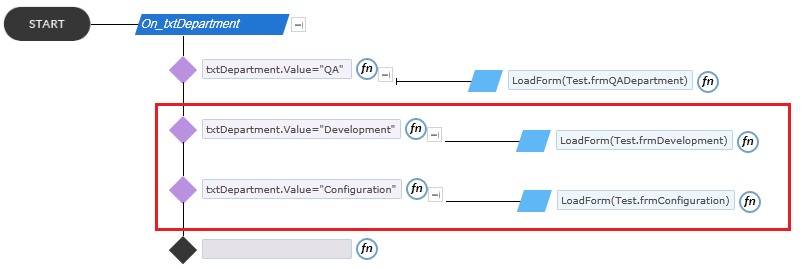
figure 5
Preview :
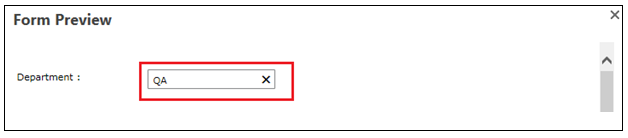
figure 6
Enter an input value in the department text box . for example give ‘QA’ as the input value then the QA home page will be loaded as shown in figure 7.
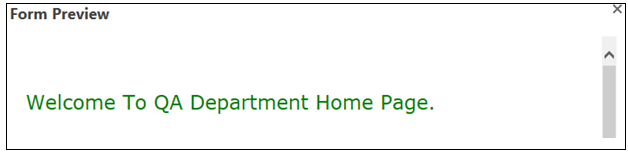
Figure 7
2. By Invoking Buttons
Step 1 : Create a form ‘ frmQADepartment ‘ with a label control in it as shown in Figure 8. Similarly create forms for Development and configuration department respectively.
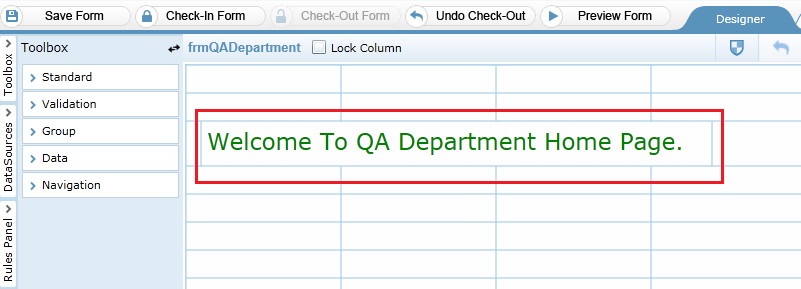
Figure 8
Step 2 : Create a form with a text-box control and 3 buttons as shown in figure 9. We use each button to invoke respective forms.
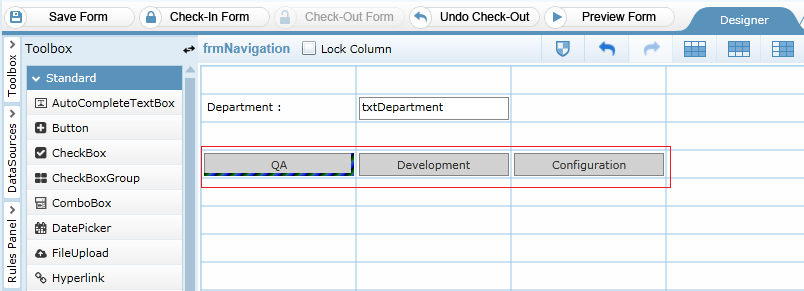
Figure 9
Step 3 : Click on ‘QA’ button . From the button properties at right side of designer , choose ‘Click Action’ option as ‘LoadForm’ . And then click on Navigate URL icon.
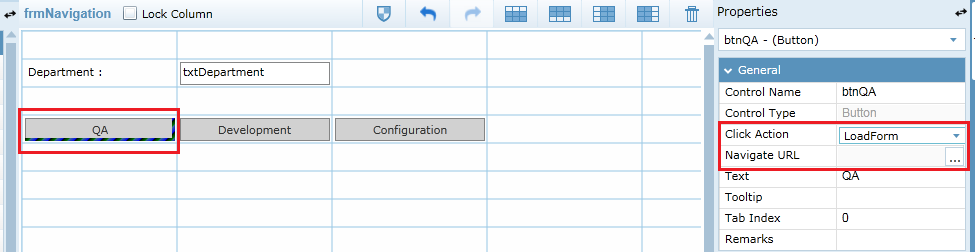
Figure 10
Step 4 : On clicking Navigate URL icon a ‘Navigation Form’ popup appears . Select the form to be loaded . Here we select ‘frmQADepartment’ which is the home page of QA department. Un-check the ‘use parameters’ option since we don’t want to pass parameter to the form. Click ‘Ok’ button. Similarly set navigation for Development and configuration buttons .
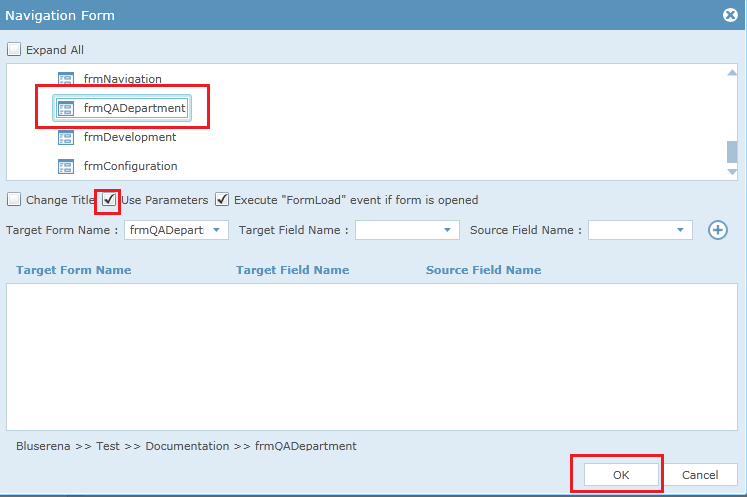
Figure 11
Step 5 : Create a rule on ‘txtDepartment’ . By clicking on the ‘txtDepartment’ control, a popup appears click on ‘Rules/Attribute’ tab and then click on ‘Create Rule’ option .
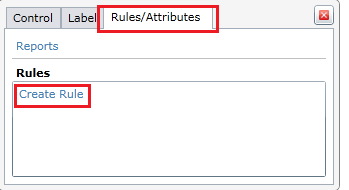
Figure 12
Step 6 : Define the rule for loading the corresponding form by checking the input value in ‘txtDepartment’ control . If the input value in ‘txtDepartment’ control is “QA” then load the form which is the home page of QA. To load form we use the rule ‘InvokeClickAction(btnQA)’ to invoke the button QA. The control name of button ‘ btnQA ‘ is passed as parameter to InvokeClickAction( ) .

Figure 13
Step 7 : Similarly define rule for Development and configuration department as shown in figure 14 .
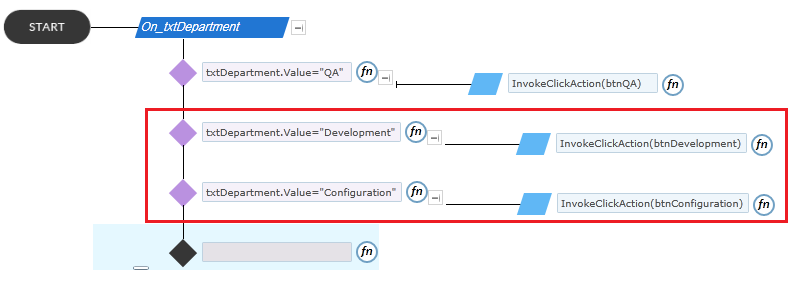
Figure 14
Preview :

Figure 15
Enter an input value in the department text box . for example give ‘QA’ as the input value then the QA home page will be loaded as shown in figure 16 .
