Installing AppForms Enterprise Version
Pre-installation Tasks
The latest version of the ClaySys AppForms Enterprise Edition must be downloaded to the server where installation is to be done. All the pre-requisites should be satisfied as per the minimum system requirements document.
Browser Client
EDGE chromium, Google Chrome and Fire Fox browsers are supported. Safari is supported for iOS devices.
SINGLE TIER INSTALLATION
First Time Installation
- Before running the Installer, ensure you are logged in as the Administrator into the machine.
- Right click the installer file (.exe) and select the “Run as administrator”.
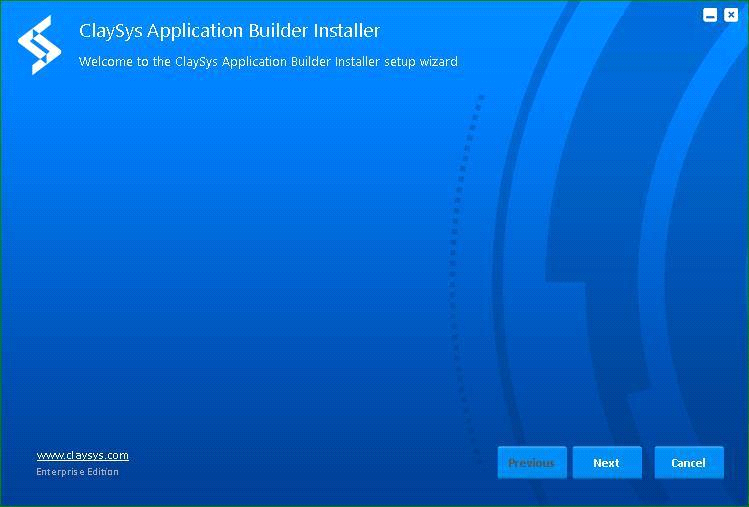
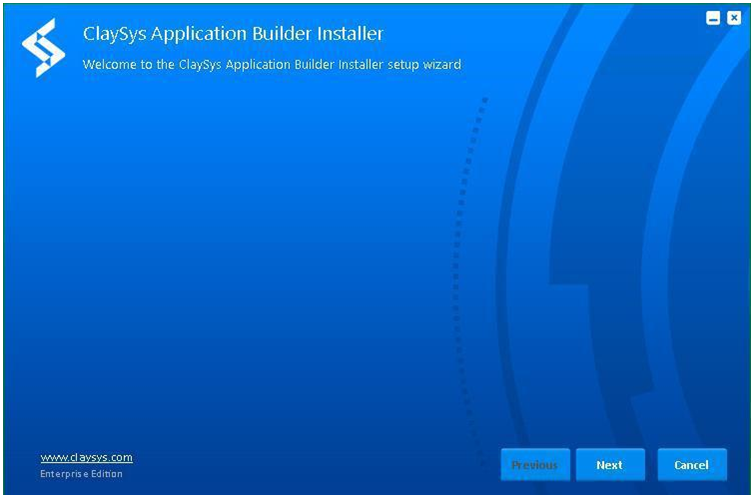
- The ClaySys AppForms Management Console screen will show up. Click the ‘Next’ button to start installation
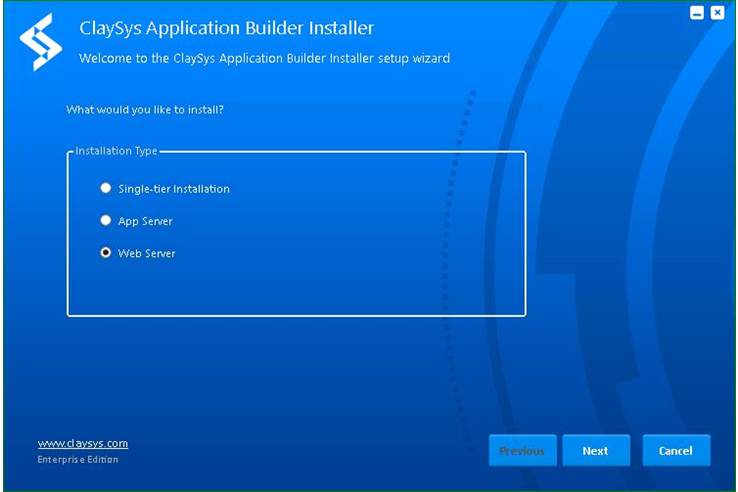
- For a Single-tier installation select the “Single – tier Installation” Radio button.
- Click “Next” button
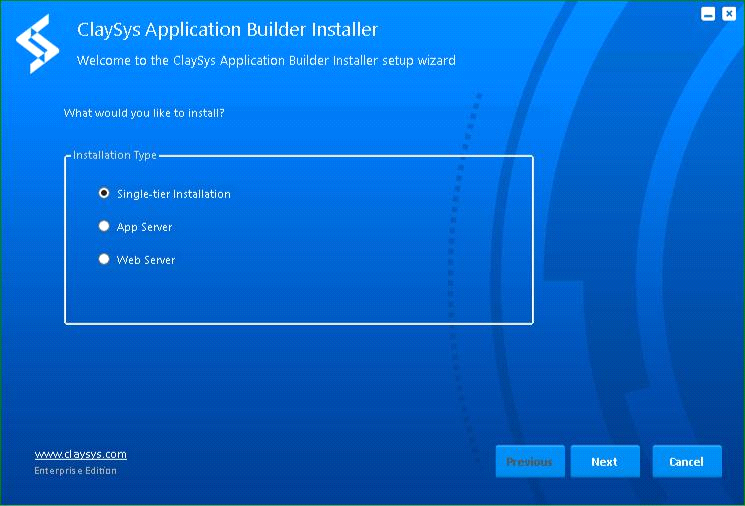
- If the user needs to install AppForms in a single machine, user should select the “Single-tier-Installation” radio button and click Next button.
- If the user needs to install AppForms as Multi-tier (where App Server and Web Server are in separate machine), user will have to independently install App Server in the App Server environment and Web server in the Web server environment, by selecting the corresponding radio button option and performing the installation.
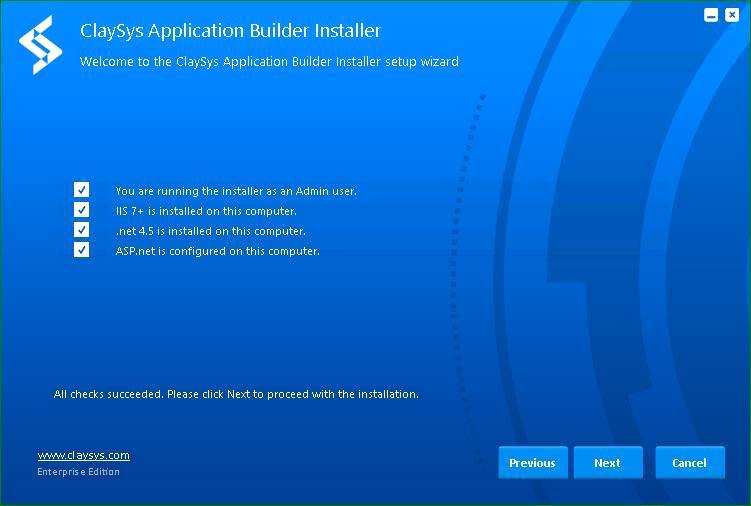
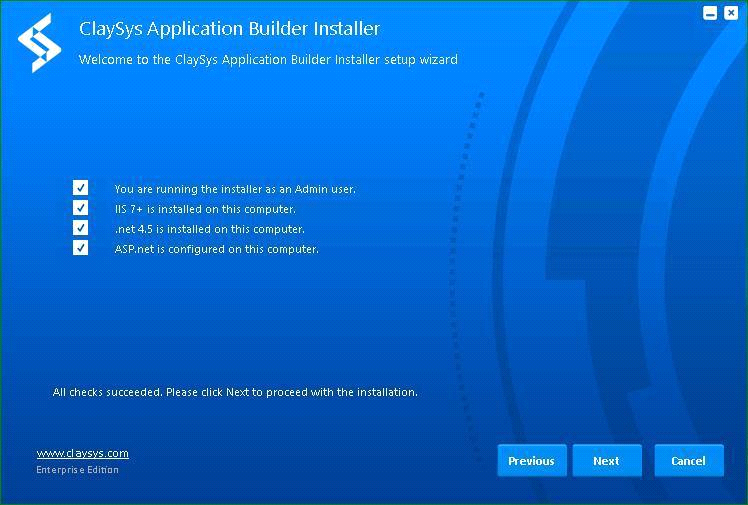
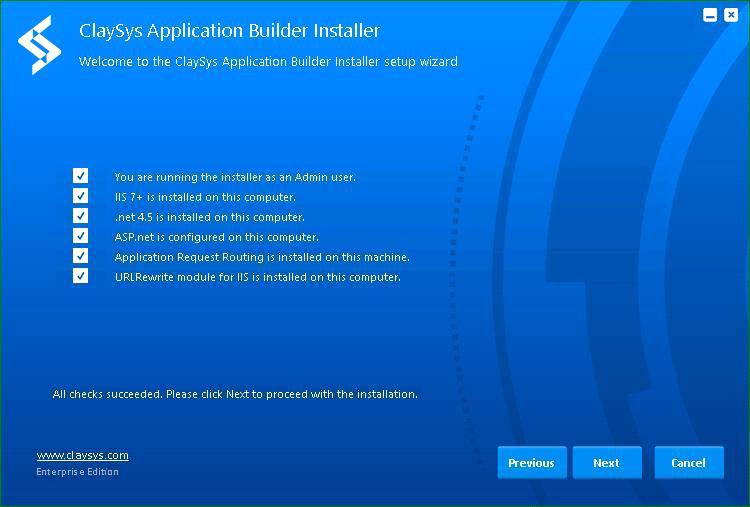
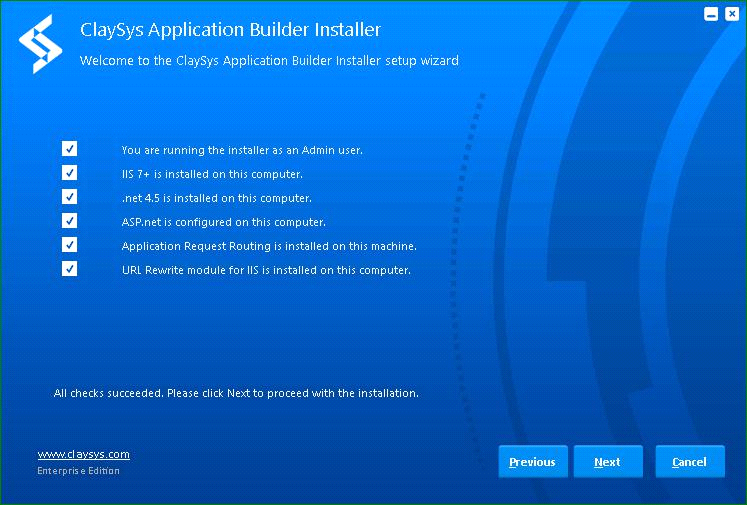
- Prerequisites will get automatically started.
- Click on “Next”.
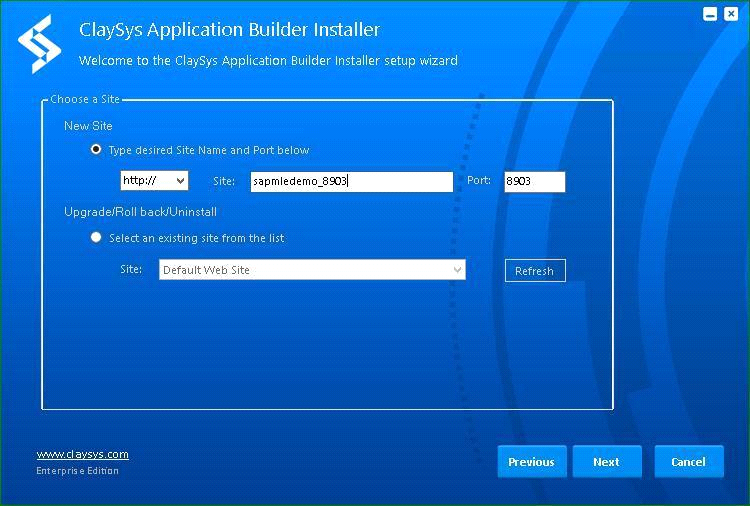
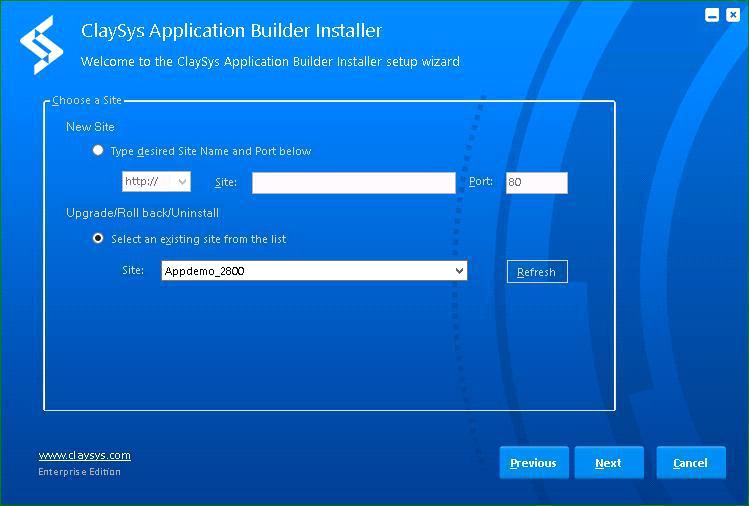
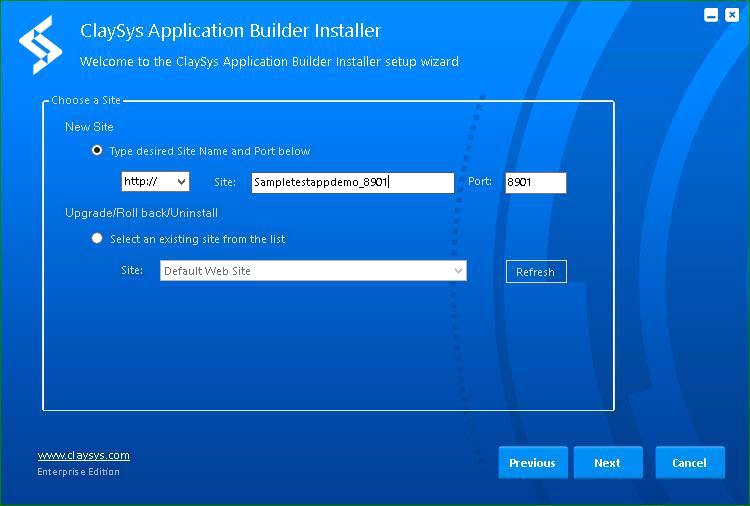
- For a fresh installation, select the desired DNS type. By default the DNS type will be in “Http” protocol.
- Create a new site name.
- Install the site to a unique port.
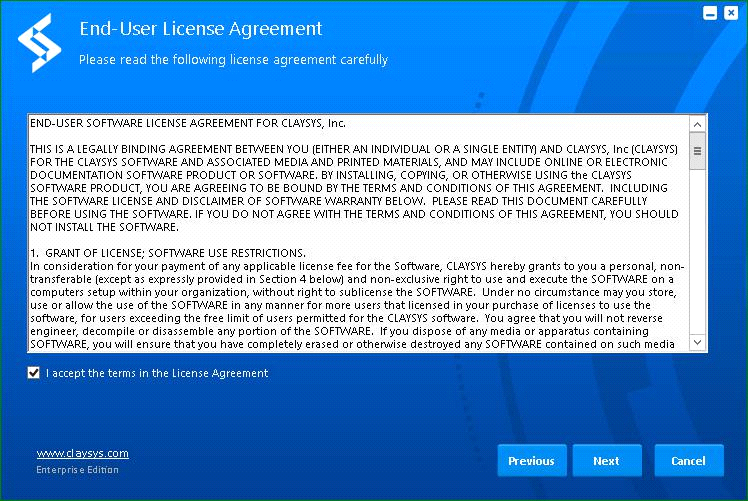
- On Click of Next button opens the End – User License Agreement page.
- Accept the License by enabling the Check Box and Click Next button.

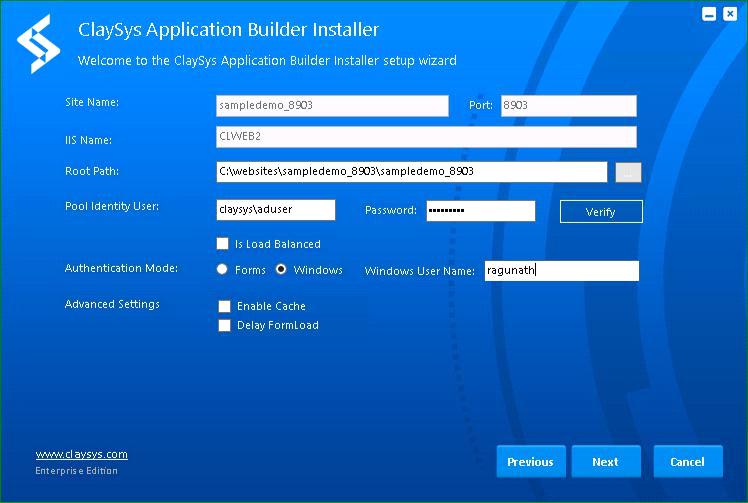
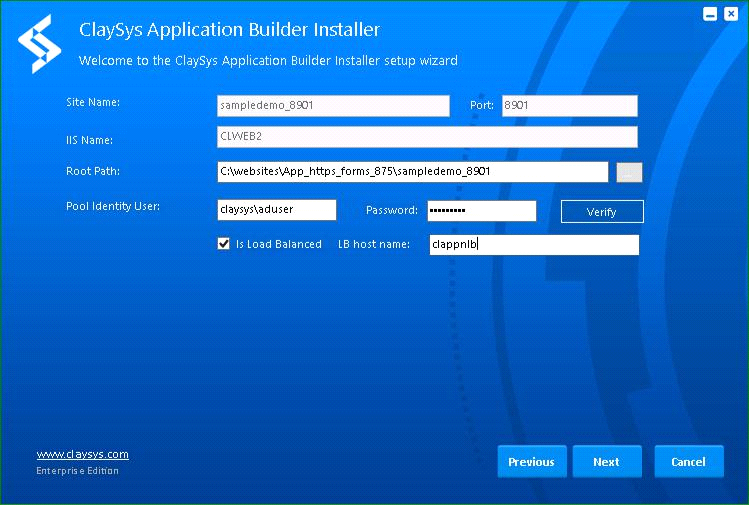
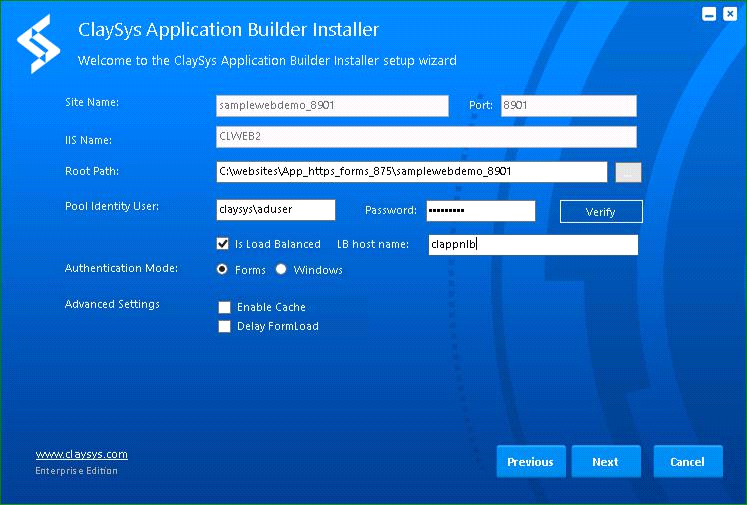
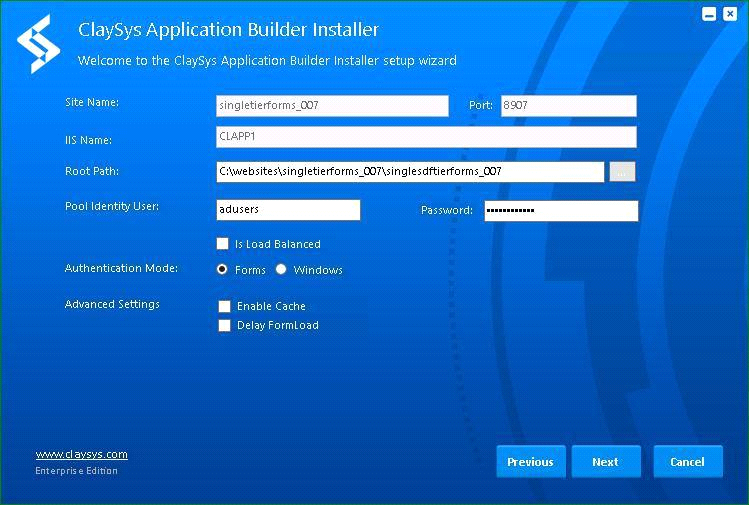
- On click of “Next” button opens a new wizard were Site Name, Port & IIS Name will be default.
- User should specify a Root Path; create a Root path where IIS should have the permission (Create the folder inside drives).
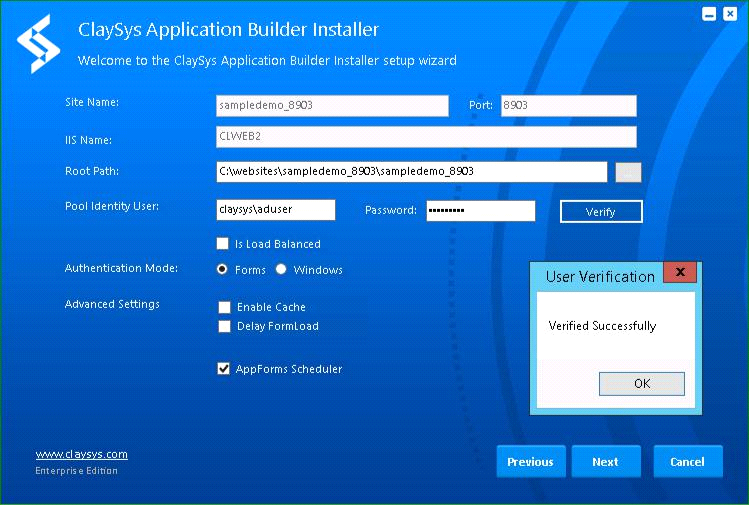
- Provide “Pool Identity User” and “Password”.
- Pool Identify User should have the administrative level permission. On click of verify button will validate the provided Pool Identity User and Password.
- User can either choose “Forms” or “Windows” Authentication.
- By default installation follows through “Forms” authentication.
- AppForms Scheduler helps end user to run tasks at scheduled time and at scheduled intervals. The interface is accessible from “Links” pane in AppForms designer.
- In order to get scheduler into any environment, user can do so by checking the “AppForms Scheduler” checkbox prompted during the install/update package wizard of ClaySys AppForms Installer. This will make sure the required services and binaries are installed in the respective machine (site in case of Enterprise version).
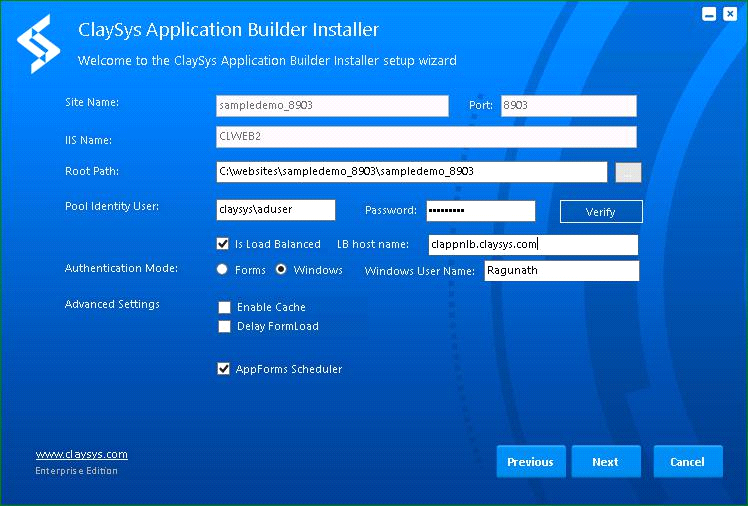
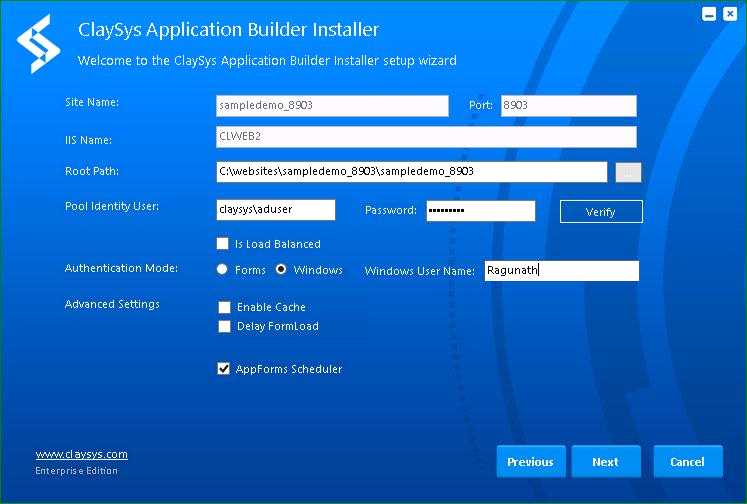
- If windows authentication is selected, you need to specify a valid windows user which will be used as the default user for initially logging into ClaySys AppForms. You can add/remove users later using AppForms designer.
- Click the “Next button”.
- If user wishes to distributes network traffic among multiple servers or virtual machines within a cluster to avoid overloading any one host and improve performance User could perform Network Load Balancing *NLB+ operation by enabling ‘Is Load Balanced’ check box and provide NLB host URL/Name.
- Enable the Check box AppForms Scheduler in order to activate the Scheduler service.
- If Delay FormLoad is enabled then FormLoad rule will work only after the form is rendered, this is helpful while pulling large amount of data in the FormLoad rule.
- Enabling ‘Enable Cache’ check box makes the rendering of forms much faster.
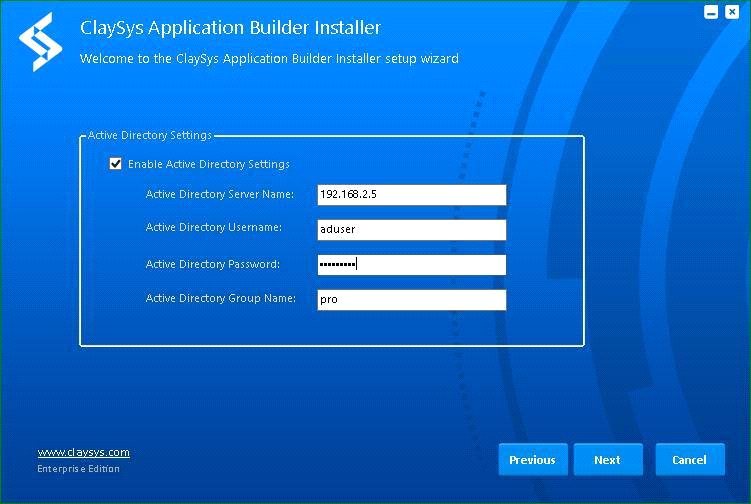
- If user wants to sync a particular group of users from your Active Directory, then enable the Active Directory settings check box.
- Provide the “Active Directory Server Name”.
- Provide the “Active Directory User Name”.
- Provide the “Active Directory Password”.
- Provide the “Active Directory Group Name”.

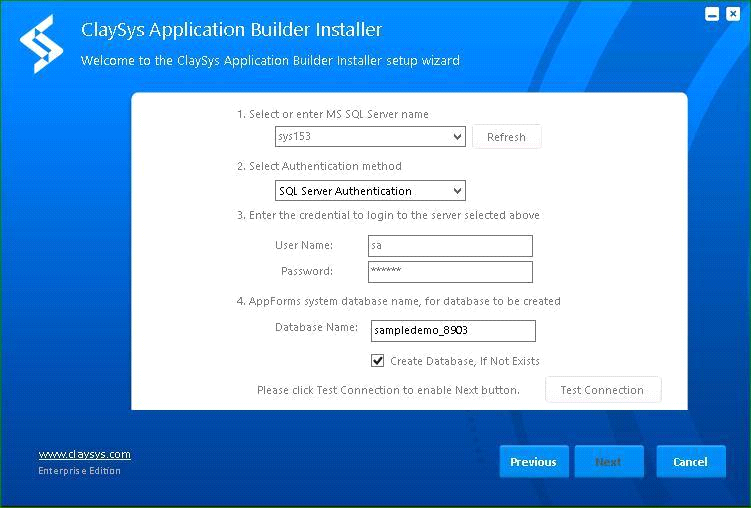
- If the ‘Refresh” button is available, click on refresh button otherwise enter Database manually.
- From the Drop down button, select the MS SQL Server name.
- User could either select Authentication Method as “SQL Server Authentication” or “Windows Server Authentication”.
- If the user selects the “SQL Server Authentication”, provide the corresponding “User Name “and “Password”.
- User can either create the New DB or else could install to existing DB.
- If the User needs to create new DB, provide the DB name and enable the check box.
- Click on Test Connection button to verify the created connection.
- Once the connection is established successfully, alert message informing the successful connection will be displayed.
- Only then the “Next” button will be enabled.
- Click on the “Next” button.
- Click on “Test Connection”.
- If the connection is successfully established, following message will be displayed.
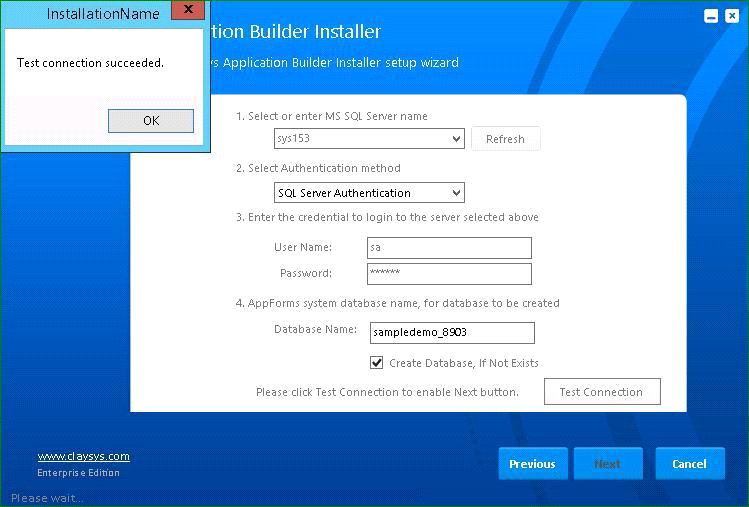
- Click on “Ok” button enables the “Next” button.
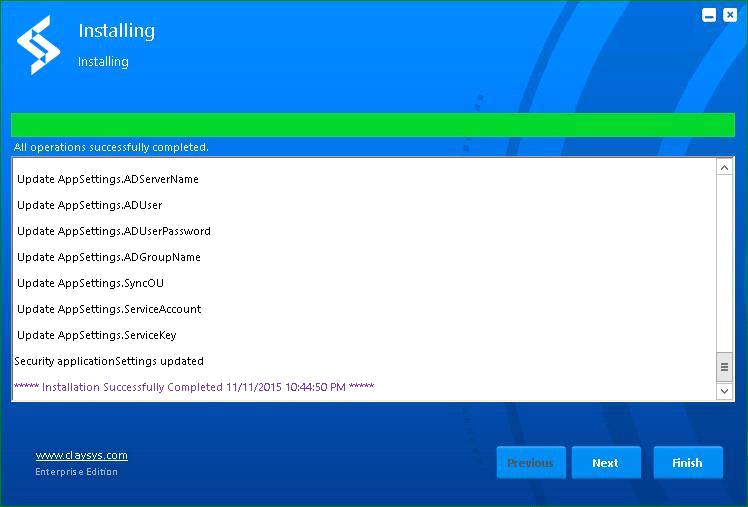
- Click on “Next” button will start the installation automatically.
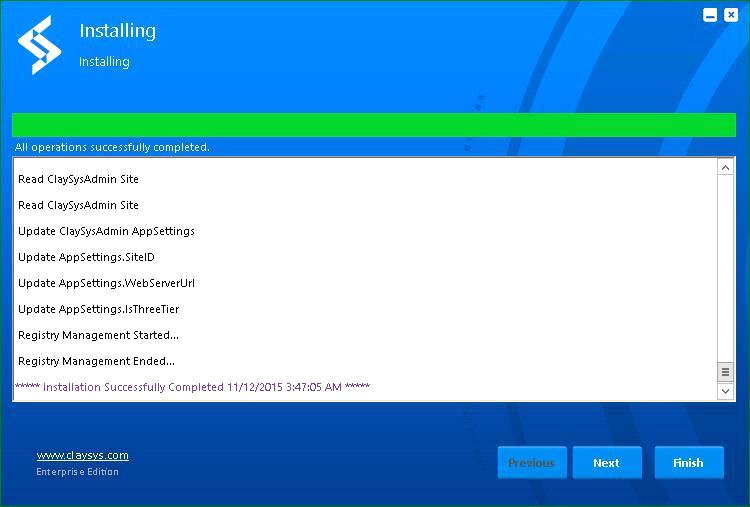
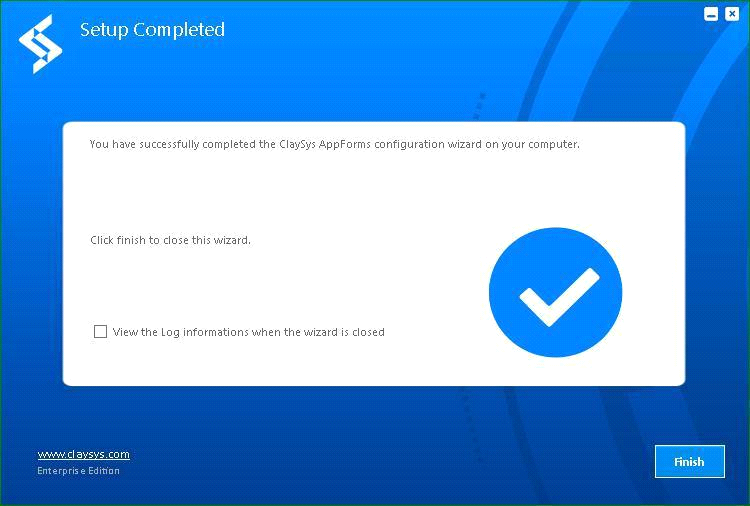
- Click “Finish” button.
- If the Application is under Forms authentication, by default the username will be “admin” and password will be “123’.
- Page redirects to License page.
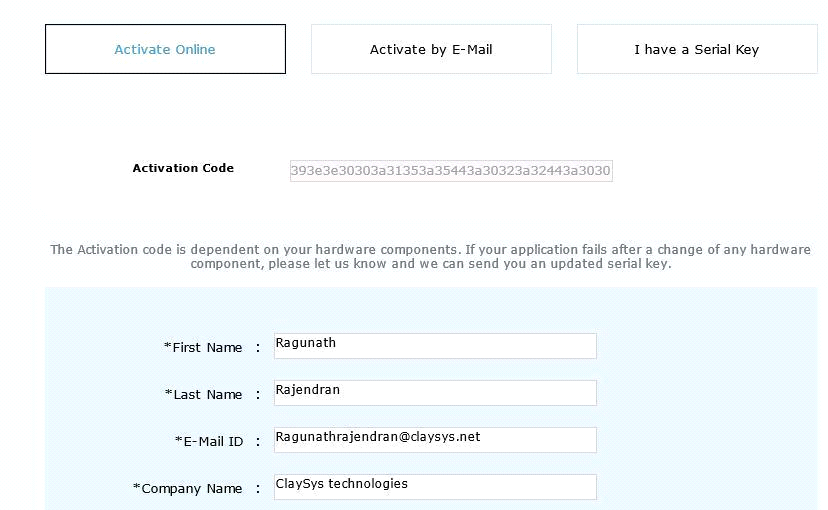
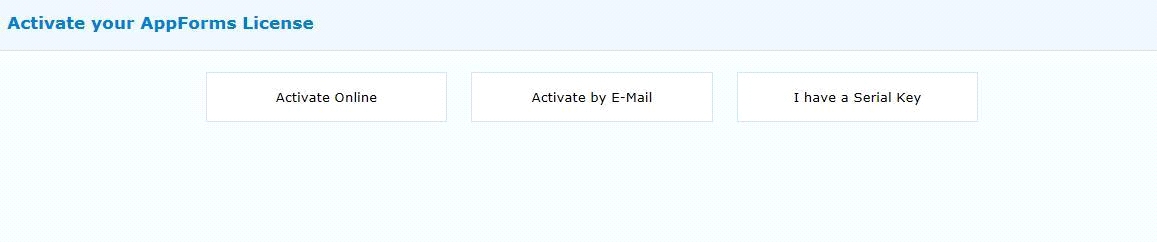
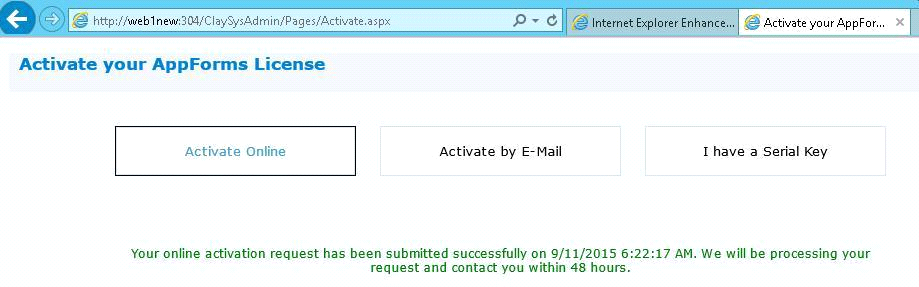
- Now the page directs to App Forms activation page.

- User can update the license through clicking “Activate Online” or “Activate by E-mail”.
- On Click of the “Activate Online” button / “Activate by E-Mail” button, system generates the MAC address.
- Fill the required fields and click “Submit” button.
- Once after the successful submission, a message will be displayed like below.

- Once we receive the Activation serial key, we will generate the license updating key.

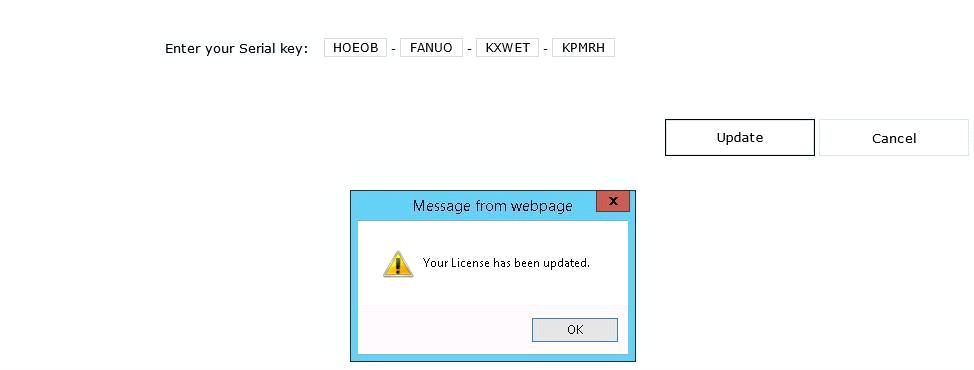
- Provide the Keys in the respective columns and Click Update button.

- Provide the required credential and page redirects to AppForms designer page.
REPAIR/UPGRADE
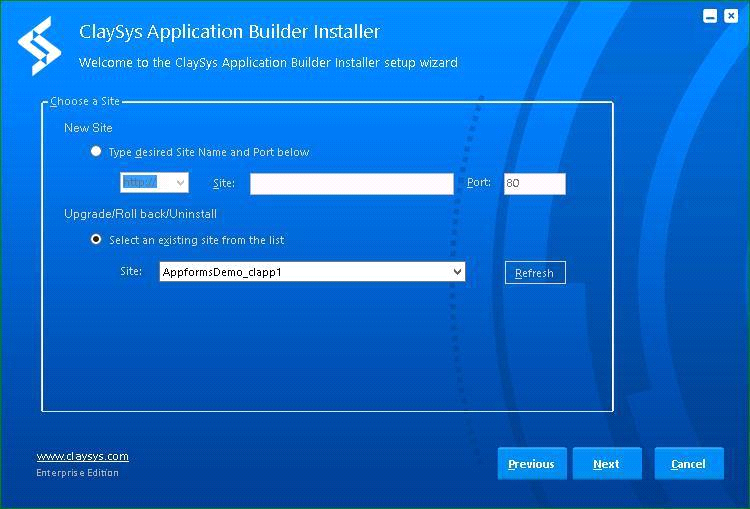
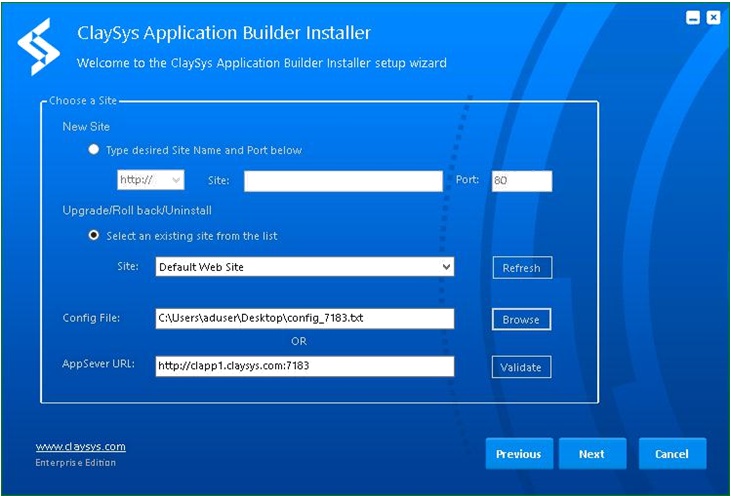
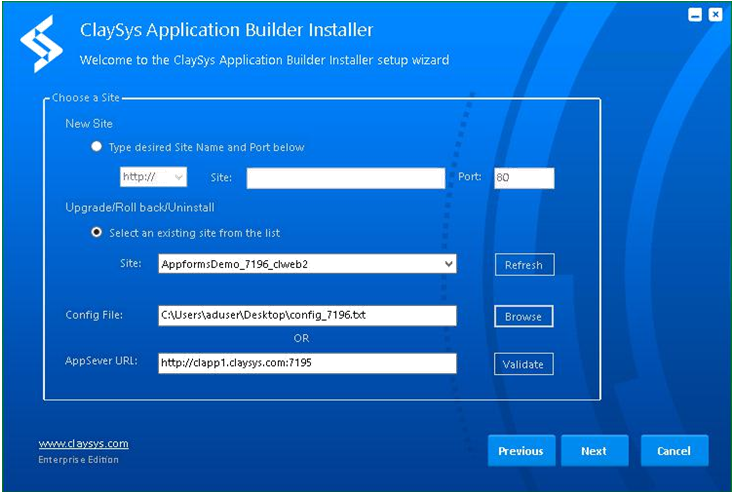
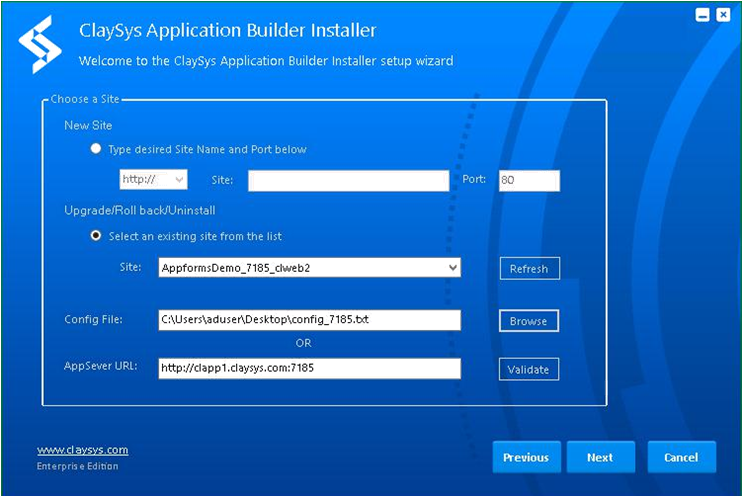
- If the user needs to Repair/Upgrade the AppForms version, enable the radio button “Select an existing site from the list”.
- Select a site from the Drop down.
- Click “Next” button.
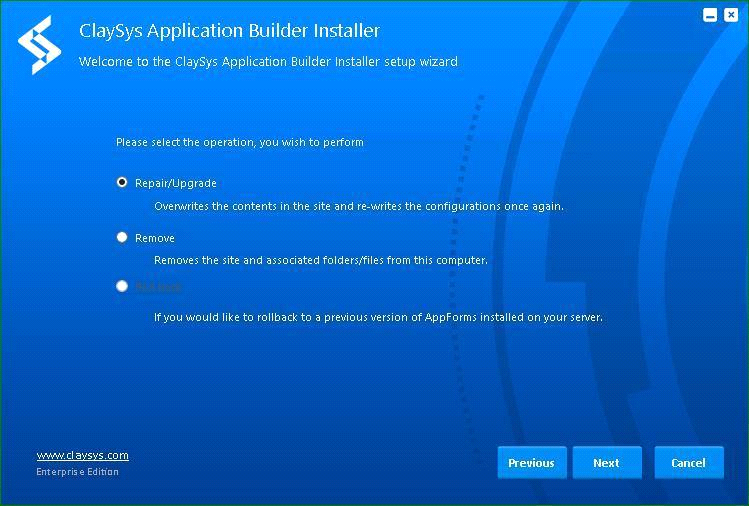
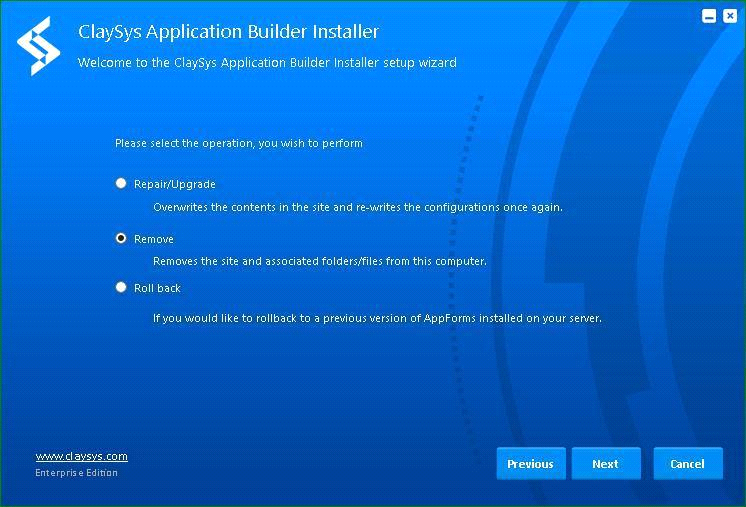
- Select the “Repair/Upgrade” radio button.
- Click the “Next” button.

- Verify the Port that has been used for the site.
- Information regarding the site will be filled automatically.
- Click “Next” button.
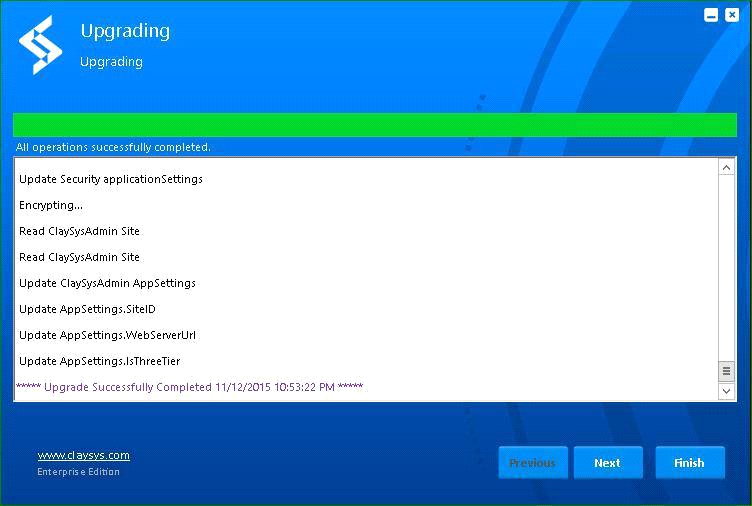
- On Click of “Next” button starts Up-gradation automatically.

UNINSTALL
- User can uninstall the created site from the list.
- Run the exe.
- Enable the Radio button “Select an existing site from the list”.
- Choose the created site from the Drop down list.
- Click “Next”.
- Enable the “Remove” radio button.
- Click “Next”.

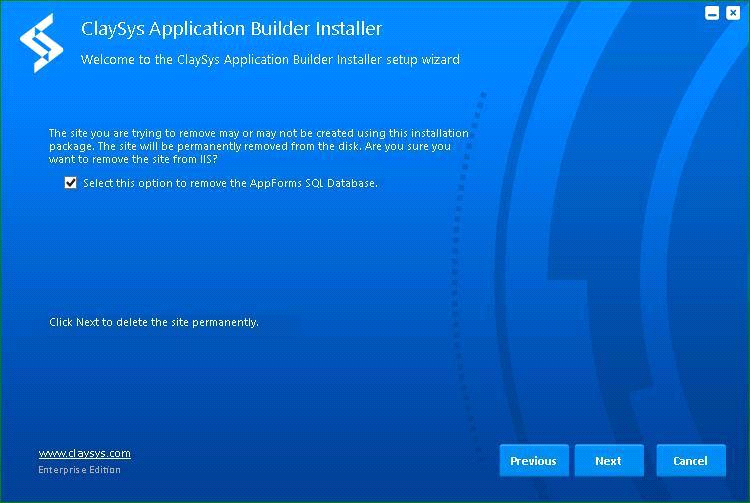
- Enable the Check box so that the site selected will get removed. Once the check box is enabled, the AppForms will be deleted along with data base.
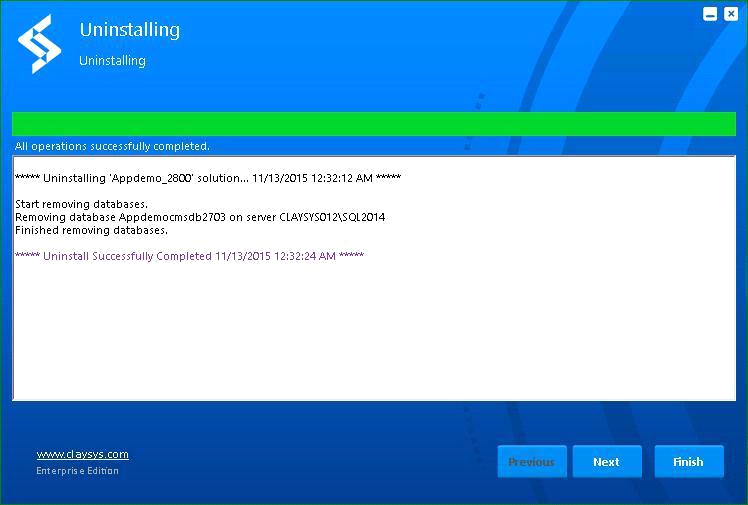
- Click on “Next” button will remove the site automatically
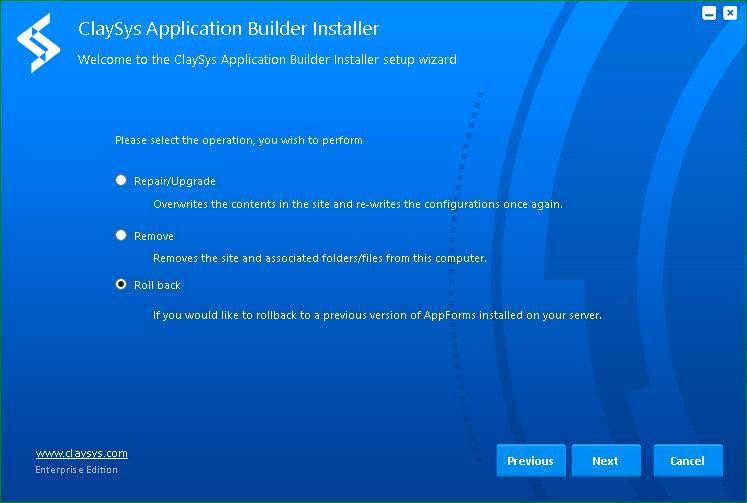
ROLLBACK
- In case of any failure of the current version, user could roll back the current version to any of the previously installed versions.
- Run the exe.
- Enable the Radio button “Select an existing site from the list”.
- Select the site from the Drop down list.
- Enable the Radio button “Roll back”.
- Click “Next” button.
- Select the checkbox for rolling back to that version.

MULTI TIER INSTALLATION
First Time Installation
Enterprise Edition App Server Installation
- Right click the installer file (.exe) and select the “Run as administrator”.
- The ClaySys AppForms Management Console screen will show up. Click the ‘Next’ button to start installation.

- For a Multi tier installation user should start the installation in App Server.
- Select the App Server radio button for App Server installation.

- Prerequisites will start executing automatically.
- Click on “Next” button.
- User should accept the End – User License Agreement by enabling the check box and click Next button.
- For a fresh installation, select the desired DNS type. By default the DNS type will be in “Http” protocol.
- Create a new Site name and specify a unique port.
- Click “Next” button.
- Now a new wizard window opens with a default Site name, Port & IIS Name.
- User should specify a Root path; create a Root path where IIS should have the permission (Create the folder inside drives).
- Provide the Pool Identity User & corresponding password.
- Pool Identify User should have the administrative level permission.
- If the user wishes to have App Server as a Load balanced server, enable the ‘Is Load Balanced’ check box and provide the NLB URL/Host name.
- Verify the pool identity permission by clicking on Verify button.
- Click on “Next” button.
- Provide the “Active Directory Server Name”.
- Provide the “Active Directory User Name”.
- Provide the “Active Directory Password”.
- Provide the “Active Directory Group Name”.
- If the ‘Refresh” button is available, click on refresh button otherwise enter Database manually.
- From the Drop down button, select the MS SQL Server name.
- User could either select Authentication Method as “SQL Server Authentication” or “Windows Server Authentication”.
- If the user selects the “SQL Server Authentication”, provide the corresponding “User Name “and “Password”.
- User can either create the New DB or else could install to existing DB.
- If the User needs to create new DB, provide the DB name and enable the check box.
- Click on Test Connection button to verify the created connection.
- Once the connection is established successfully, alert message informing the successful connection will be displayed.
- Only then the “Next” button will be enabled.
- Click on “Next” button.

- Once the Connection is successfully created, on click of “Next” button will start the installation automatically.

- Click “Next” button.
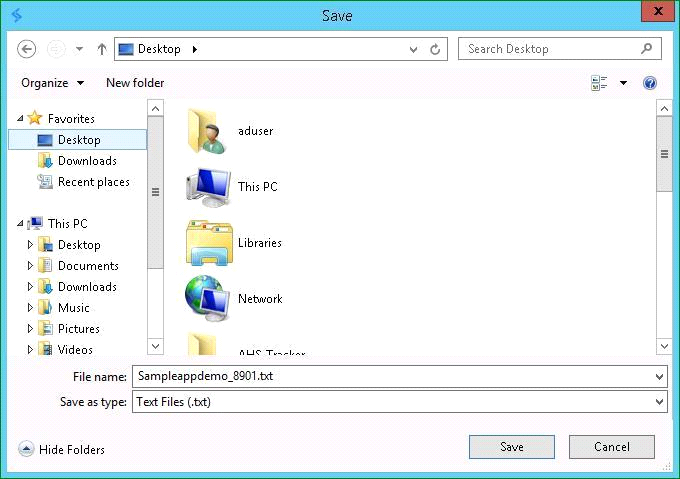
- A link will be displayed, which does contain the App Server Configuration file.
- On click of the Link displayed in the wizard automatically starts downloading the configuration file for App Server.

- Save the File in the App Server machine.
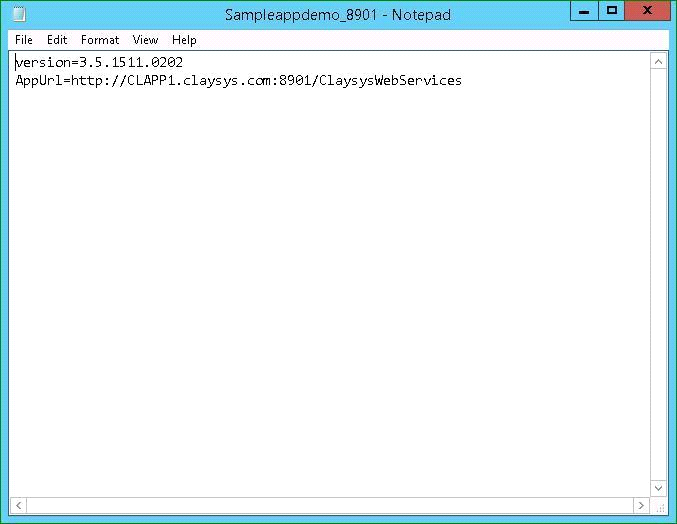
- Open the Configuration File and verify the Connection App URL.
- App URL should contain the machine name along with the Port.
Enterprise Edition Web Server Installation
- Web server installation in the second step of Multi-tier installation.
- For ever changes in the App Server installation should have the perspective change in Web server machine.
- Copy and paste the “exe file” in the Web server.
- Right click and run the “exe file” as Administrator.
- Copy and paste the App server Configuration file into Web server machine.
- Select the “Web Server” radio button.
- Prerequisites will start executing automatically.
- Click on “Next” button.
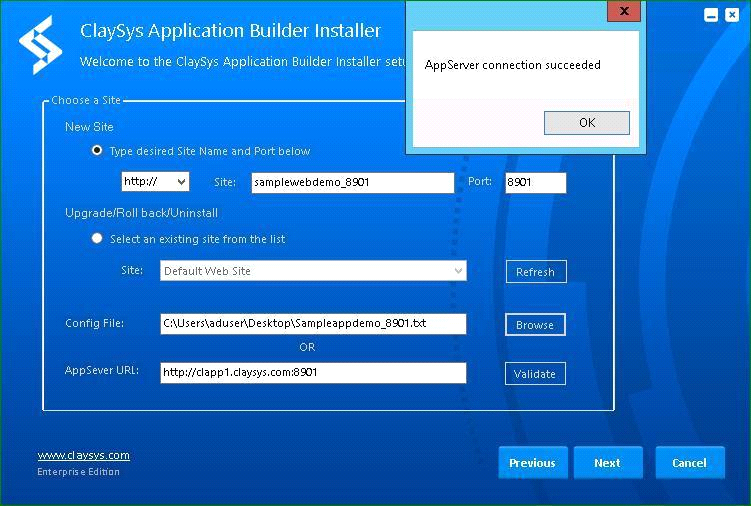
- For a fresh installation, select the desired DNS type. By default the DNS type will be in “http” protocol.
- Create a Site name.
- Define a unique port for the installation.
- User can either choose the configuration file by clicking the “Browse” button or provide the App URL in corresponding column of App server URL. Copy and paste the App URL up to the port (http://clapp1.claysys.com:8901).
- Click “Validate” button, if the entered URL is correct the user will get information pop up regarding the successful connection.
- “Next” button will be enabled.
- Click on “Next” button.
- After clicking the Next button a wizard will get displayed where the user should accept End User License Agreement page.
- Click on Next button.

- User should specify a Root Path; create a Root path where IIS should have the permission (Create the folder inside drives).
- Pool Identity user and the corresponding password should be provided. On click of Verify button will validate the Pool Identity User and password.
- Pool Identity User should have the Administrative level permission.
- User can either choose Forms or Windows Authentication mode.
- By default Forms authentication mode is enabled.
- If the web server is under Load balanced environment, provide the NLB host URL/name.
- If the User selects Windows authentication, Windows User name should be provided.

- Click on “Next” button will start installation automatically.
- Click “Finish” button once the installation is complete.
- Now the page directs to AppForms activation page
- User can update the license through clicking “Activate Online” or “Activate by E-mail”
- On Click of the “Activate Online” button / “Activate by E-Mail” button, system generates the MAC address.
- Fill the required fields and click “Submit” button

- Once after the successful submission, a message will be displayed like below.
- Once we receive the Activation serial key, we will generate the license updating key.
- Provide the necessary credential and Page redirects to App forms designer page.
REPAIR/UPGRADE
- Run the exe.
- Prerequisites will start it automatically.
- Select the radio button “Select an existing site from the list” and choose the site to which it has to be Upgraded or Repaired.
- Select the “Repair/Upgrade” radio button.
- Click “Next” button.
- Verify the Port that has been used for the site.
- Information regarding the site will be filled automatically.
- Click “Next” button.
- On Click of “Next” button starts Up-gradation automatically.
- Once after the successful ‘up gradation ‘in App Server, user should perform the same in web server too
REMOVE
User can uninstall the created site from the list.
- Run the exe.
- Enable the Radio button “Select an existing site from the list”.
- Choose the created site from the Drop down list.
- Click “Next”.
- Select the “Repair/Upgrade” radio button.
- Click the “Next” button.
- Enable the Radio button so that the site selected will get removed. Once the check box is enabled, site along with its DB will be cleared.
- Click on “Next” button will remove the site automatically.
- Once after the successful ‘Uninstalling ‘in Appserver, user should perform the same in web server too.


- In case of any failure of the current version, user could roll back the current version to any of the previously installed versions.
ROLLBACK
- Run the exe.
- Enable the Radio button “Select an existing site from the list”.
- Select the site from the Drop down list and configure the config file.
- Enable the check box “Roll back”.
- Click “Next” button.

- Select the Check box for which the version should get rolled back to.
- On Click of “Next” button will starts to roll back the version automatically.
- Once after the successful ‘Roll back ‘in Appserver, user should perform the same in web server too.
COMMAND LINE SINGLE TIER INSTALLATION
General Help Command
Open the Command Prompt and copy the Installation exe into it. Provide a space and follow the command “/?” press enter to get whole Single Tier installation user guide.
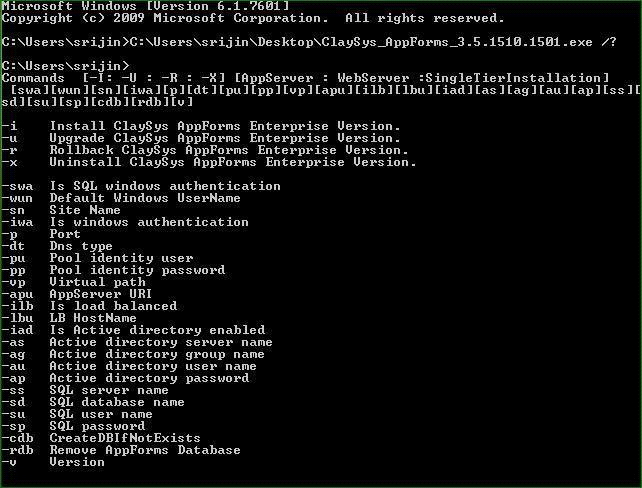
- –i Install ClaySys AppForms Enterprise Version): Specifically denotes for Installation package key, if we need to install a new build we should specify the “-I” command at the starting of command.
- –u (Upgrade ClaySys AppForms Enterprise Version): If you need to upgrade the version of the site, use the key word (-U) at the command start. Version of the site will be upgraded to latest version.
- –r (Rollback ClaySys AppForms Enterprise Version): If the site is supposed to be a failure at any point and the user is supposed to use the previous version. User has an option to Rollback to any version which has been installed in the system.
- –x (Uninstall ClaySys AppForms Enterprise Version): User wishes to remove any site they could perform Uninstall operation using key (-x) at the starting of the command for Un-installation.
- –sn (Site Name): User should specify a unique port name. Port name defines the site owned for a port.
- –iwa (Is Windows Authentication): If the user needs windows authentication, – iwa should be enabled.
- –p (Port): User should create unique ports for every new site.
- –dt (DNS type): By default the dns will be ‘http: //’ protocol.
- –pu (Pool Identity User): Pool Identity User should have the Administrative Level Permission.
- –pp (Pool Identity Password): Password for Pool Identity User.
- –vp (Virtual Path): Virtual defines the path for site folder.
- –apu (AppserverURL): Specifies the URL defined for Appserver.
- –ilb (Is Load Balance): User can choose either the network should be a load balanced system or not.
- –lbu (LB URL): If the user chooses –ilb as True, -lbu should be specified.
- –iad (Is Active Directory Enabled): By default active directory will be in disabled mode.
- –as (Active Directory Server Name): Provide the Server name for the Active Directory defined.
- –ag ( Active Directory Group Name): Provide the Group name for the Active Directory defined
- –au (Active Directory User Name) : Provide the user name for the Active Directory defined
- –ap (Active Directory Password) : Provide the Password for the Active Directory defined
- –ss (SQL Server Name) : Provide the server name for the DB
- –su (SQL User Name) : Provide User name for the DB
- –sp (SQL Password) : Set Password for DB
- –cdb (Create DB If Not Exist): Create a new DB if the DB doesn’t exist, default value will be true.
- –rbd (Remove AppForms Database) : User command to remove the Database.
- –swa (Is SQL Windows Authentication): By default value is False, Provides command to get the SQL operation enabled.
- –wun (Default Windows Username): User should provide the default user name once (Is windows Authentication) -iwa is True.
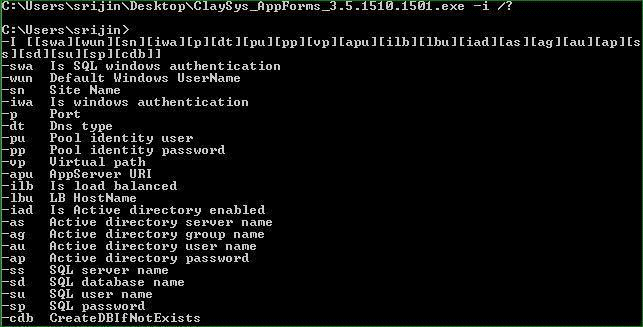
Install Help Command
Open the Command Prompt and copy the Installation exe into it. Provide a space and follow the command “-I /?” press enter to get whole single tier user guide for installation.
Upgrade Help Command
Open the Command Prompt and copy the Installation exe into it. Provide a space and follow the command “-u /?” press enter to get whole single tier user guide for Upgrade.

Remove Help Command
Open the Command Prompt and copy the Installation exe into it. Provide a space and follow the command “-x /?” press enter to get whole single tier user guide for Site Removal.

Rollback Help Command
Open the Command Prompt and copy the Installation exe into it. Provide a space and follow the command “- r /?” press enter to get whole single tier user guide for Rollback.

Installation
- Locate the File location and copy the .exe file for installation.
- Open Command Prompt.
3. Paste the exe into the command prompt window.
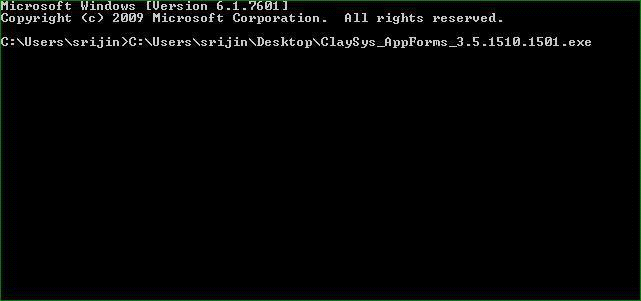
4. Follow the Command Line code for the installation of App Forms.
5. Here we use Command “ -I : Installation Command; -Single Tier Installation : Mode of Operation; -sn: Site Name; -p : Port; -vp : Virtual Path; -pu : Pool Identity User; -pp : Pool identity Password; -ss : SQl Server Name; -sd : SQL Database Name; -su : SQL User Name; -sp: SQL Password ”.
6.User can have either Forms Authentication or Windows Authentication. By default the service run by Forms authentication, If the user need to make the service as windows. Authentication command “-iwa: True” should be enabled. If the Authentication Type is Windows, User should specify Default Windows User Name. i.e.; -wun.
7.User can choose for SQL Authentication and should provide data base user name and password (–swa: True, -ss: Sql Server Name, -sd: Sql Database Name).
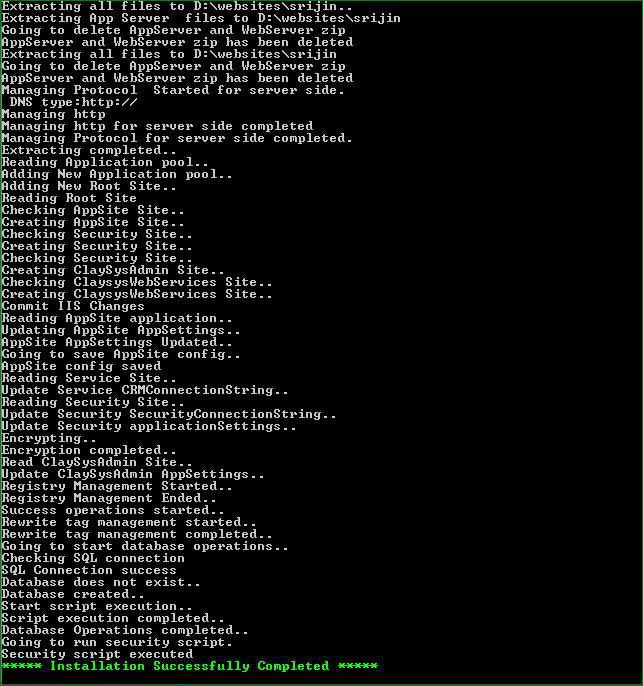
8. A set of Prerequisites will be verified and the installation process continuous.
9. After the Installation a successful message will be displayed.
10. If user selects Forms authentication, default user name will be “admin” and password will be “123”.

11. Click “Activate Online”.
12. MAC address of your machine will be displayed as an activation code.

13. After filling all the mandatory fields click “Submit” button. Successful message will be displayed like below.

14. Once we received an activation code, we would send the serial key.
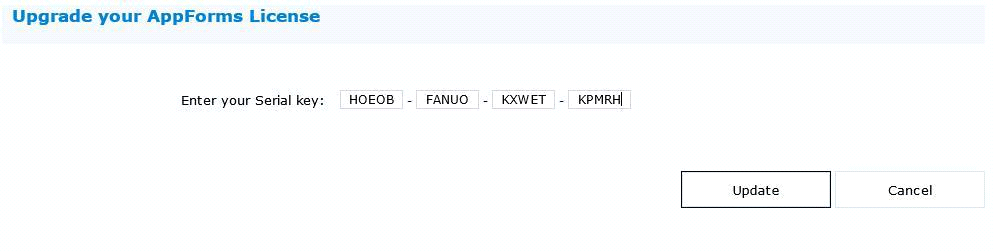
15. After entering the serial key, click “Update” to activate the license.

16.Verify the Created site from the “Internet Information Services”.
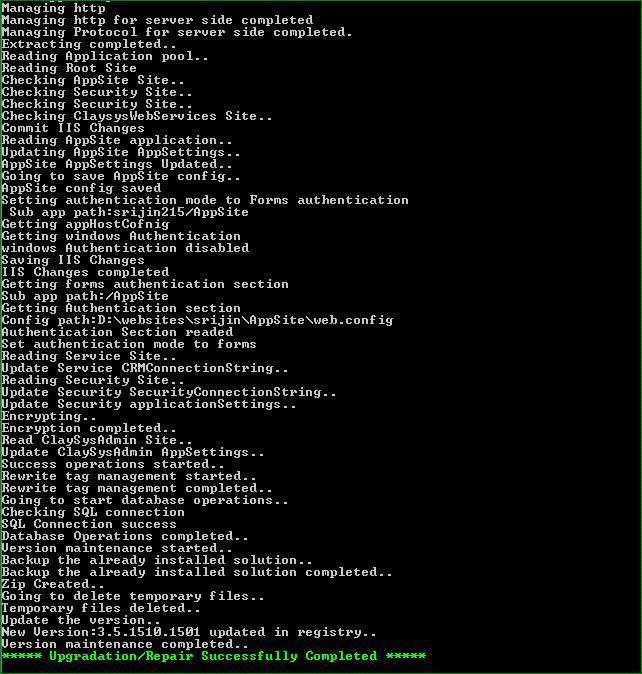
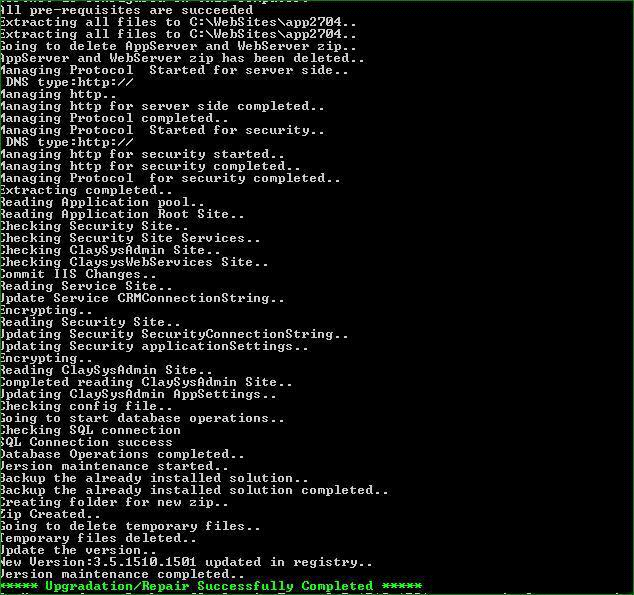
Upgrade/Repair
- User can upgrade/repair the installed version.
- Open Command prompt & Paste the exe into the command prompt.
- Use the command.
- Here “-u is the key used for the installation; -Single tier Installation: Mode of Operation; -sn: Site Name.
- After the verification of certain Prerequisites, a successful message will be displayed.

Remove
- Open Command prompt & Paste the exe into the command prompt
- Use the command

3. Here“–x: Removal Command code; -Single Tier Installation; -sn: Site Name”.
4. After the verification of certain Prerequisites, a successful message will be displayed

Rollback
- User can upgrade/repair the installed version.
- Open Command prompt & Paste the exe into the command prompt.
- Use the command:

4. Here” –r: Rollback command; -Single Tier Installation: Mode of Operation; -sn: Site Name; – v: Version”.
COMMAND LINE MULTI TIER INSTALLATION
General Help Command
Open the Command Prompt and copy the Installation exe into it. Provide a space and follow the command “/?” press enter to get whole single Tier installation user guide.

27. -i (Install ClaySys AppForms Enterprise Version): Specifically denotes for Installation package key, if we need to install a new build we should specify the “-I” command at the starting of command.
28. –u (Upgrade ClaySys AppForms Enterprise Version): If you need to upgrade the version of the site, use the key word (-U) at the command start. Version of the site will be upgraded to latest version.
29. –r (Rollback ClaySys AppForms Enterprise Version): If the site is supposed to be a failure at any point and the user is supposed to use the previous version. User has an option to Rollback to any version which has been installed in the system.
30. –x (Uninstall ClaySys AppForms Enterprise Version): User wishes to remove any site from the directory they could perform Uninstall operation using key (-x) at the starting of the command for Un-installation.
31. –sn (Site Name): User should specify a unique port name. Port name defines the site owned for a port.
32. –iwa (Is Windows Authentication): By default the service is in windows authentication = True mode.
33. –p (Port): User should create unique ports for every new site.
34. –dt (DNS type): By default the Dns will be ‘http: //’ protocol.
35. –pu (Pool Identity User): Pool Identity User should have the Administrative Level permission.
36. –pp (Pool Identity Password): Password for Pool Identity User.
37. –VP (Virtual Path): Virtual defines the path of site folder.
38. –apu (App server URL): Specifies the URL defined for Appserver.
39. –ilb (Is Load Balance): User can choose either the network should be a load balanced system or not.
40. –lbu (LB URL): If the user choose –ilb as True, -lbu should be specified.
41. –iad (Is Active Directory Enabled): By default active directory will be in disabled mode.
42. –as (Active Directory Server Name): Provide the Server name for the Active Directory defined.
43. –ag ( Active Directory Group Name): Provide the Group name for the Active Directory defined.
44. –au (Active Directory User Name) : Provide the user name for the Active Directory defined.
45. –ap (Active Directory Password) : Provide the Password for the Active Directory defined .
46. –ss (SQL Server Name) : Provide the server name for the DB.
47. –su (SQL User Name) : Provide User name for the DB .
48. –sp (SQL Password) : Set Password for DB.
49. –cdb (Create DB If Not Exist) : Create a new DB if the DB doesn’t exist.
50. –rbd (Remove AppForms Database) : User command to remove the Database.
51. –swa (Is SQL Windows Authentication): By default value is False, Provides command to get the SQL operation enabled.
52. –wun (Default Windows Username): Once SQl connection is enable, user should provide the default user name.
53. User can have either Forms Authentication or Windows Authentication. By default the service run by Forms authentication, If the user need to make the service as windows Authentication command “-iwa: True” should be enabled.
54. If the Authentication Type is Windows, User should specify Default Windows User Name. I.e.; -wun.
55. User can choose for SQL Authentication and should provide data base user name and password( –swa: True, -ss: Sql Server Name, -sd: Sql Database Name).
Install Help Command
Open the Command Prompt and copy the Installation exe into it. Provide a space and follow the command “-I /?” press enter to get whole single tier user guide for installation.

Upgrade Help Command
Open the Command Prompt and copy the Installation exe into it. Provide a space and follow the command “-u /?” press enter to get whole single tier user guide for Upgrade.

Remove Help Command
Open the Command Prompt and copy the Installation exe into it. Provide a space and follow the command “-x /?” press enter to get whole single tier user guide for Site Removal.

Rollback Help Command
Open the Command Prompt and copy the Installation exe into it. Provide a space and follow the command “-r /?” , press enter to get whole single tier user guide for Rollback.

App Server Installation
- Open the App server machine.
- Copy and execute the exe.
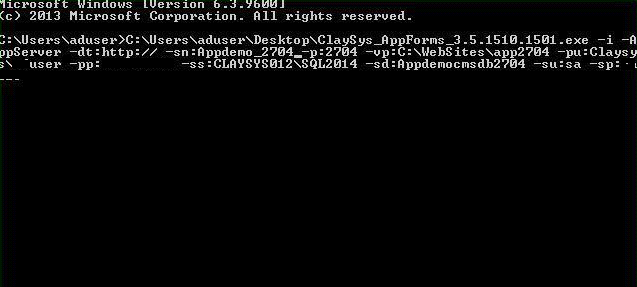
- Use the command for App server installation:
“ -i-App Server -dt:http:// -sn:Appdemo_2704 -p:2704 -vp:C:\WebSites\app2704 -pu: Claysys\USER -pp:PASSWORD -ss:CLAYSYS012\SQL2014 -sd:Appdemocmsdb2704 -su:sa – sp:SQLPASSSWORD “
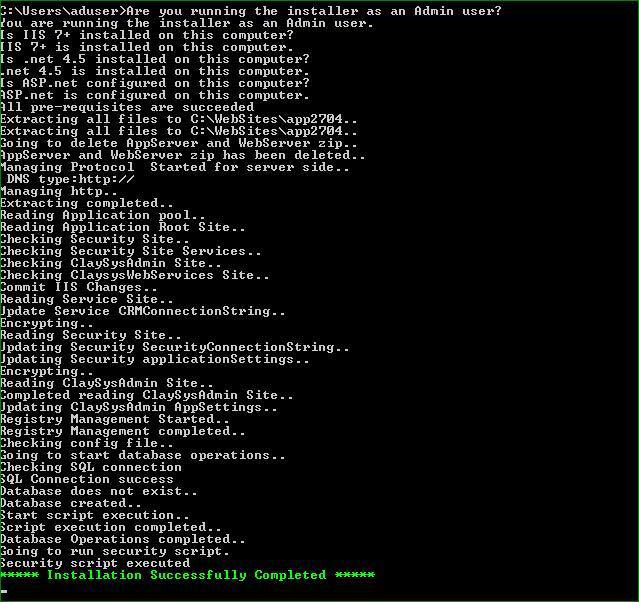
4. After successful verification of Prerequisites, Appserver will be installed and a message will be displayed.
5. Copy the App Server config file from App Server IIS.
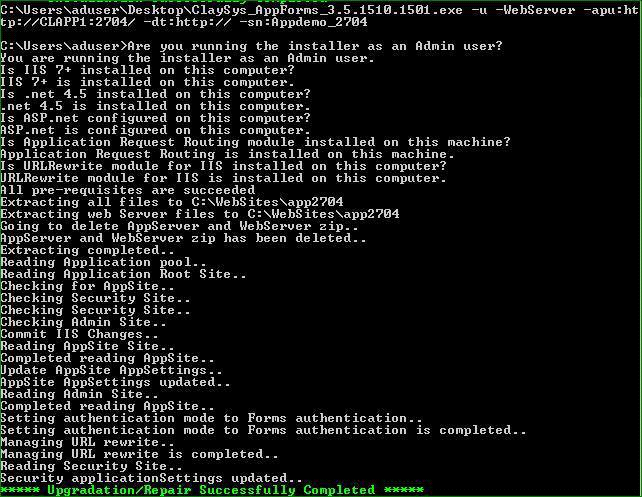
Web server Installation
- Open the App server machine.
- Copy and execute the exe.
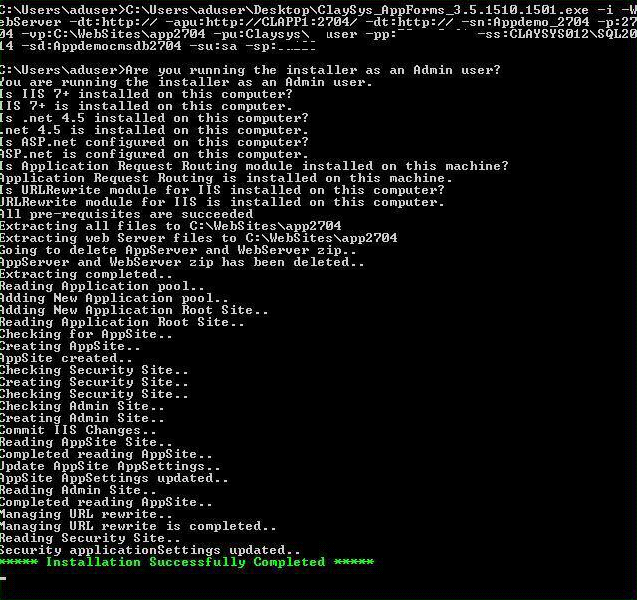
- Use the command for Web server installation.
“ -i -Webserver -dt:http:// -apu:http://CLAPP1:2704/ -dt:http:// -sn:Appdemo_2704 – p:2704 -vp:C:\WebSites\app2704 -pu: Claysys\USER-pp:PASSWORD – ss:CLAYSYS012\SQL2014 -sd:Appdemocmsdb2704 -su:sa -sp:SQLPASSWORD “
4. Copy the Appserver URL file from the Appserver, and run the URL in webserver command (-apu: http://CLAPP1:2704).
5. After Verification of the Prerequisites a successful message will be displayed.
6. User will be redirected to AppForms Activation Page.
7. If user selects Forms authentication, default user name will be “admin” and password will be “123”.

8. Click “Activate Online”. MAC address of your machine will be displayed as an activation code.

9. After filling all the mandatory fields click “Submit” button. Successful message will be displayed like below.

10. Once we received an activation code, we would send the serial key.

11. After entering the serial key, click “Update” to activate the license.
App Server Upgrade/Repair
- In Multi Tier Environment user need to upgrade both Appserver and web server for the operation of Upgrade & Repair version.
- Open the Appserver and execute:

3. Now Appserver will be upgraded.
Web server Upgrade/Repair
- Open the Web server and execute:

2. In Web server user should mention the Appserver URL of the respective version.
App Server Remove
- Open the Appserver and execute the command:

2. Site gets removed
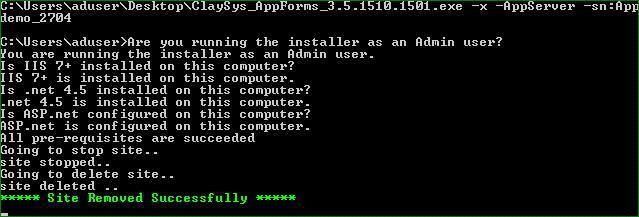
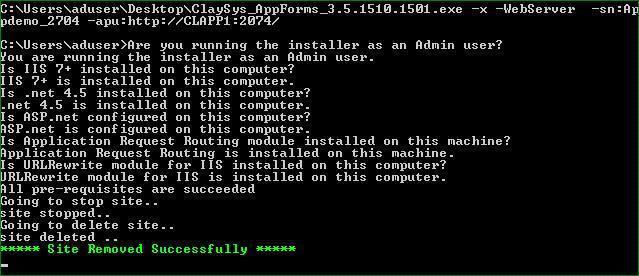
Web server Remove
- .Open the Web server and execute the command:

2. Site gets removed
App Server Roll back
- Open the App server and execute the command

2. Site gets rolled back from the current version to defined version (e.g.: 3.5.1511.1901 to 3.5.1511.0202)
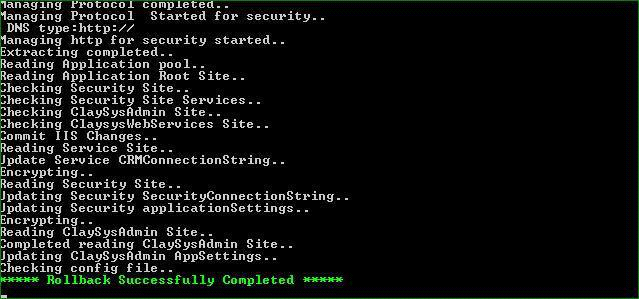
Web server Roll back
- Open the Web server and execute the command

2. Site gets rolled back from the current version to defined version (e.g.: 3.5.1511.1901 to 3.5.1511.0202)
