Second Example
Introduction
External form is one of the features in ClaySys AppForms, which helps to display an already existing AppForm into the current form. By using this feature multiple numbers of forms can be displayed as it is within the single form. Using External Form, we can perform the actions such as ‘repeat’, ‘remove’ and ‘view change’ of the form and thereby the performance of the current form can be increased.
Below mentioned are the steps to configure an External form in order to achieve those features.
External Form – Configuration
Step 1: Select the Feature AppForms as shown in Figure 1
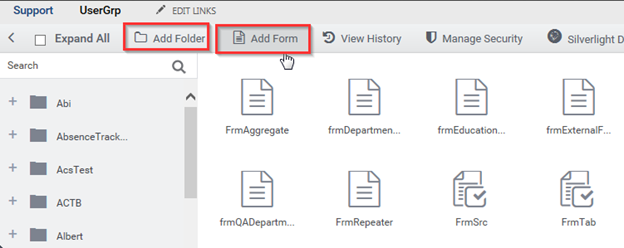
Step 2: Create a New Folder and within that folder create a New Form.
Step 3: As shown in the figure 3, in the ‘Group’ from the ‘Toolbox’, select the Control ‘External Form’.
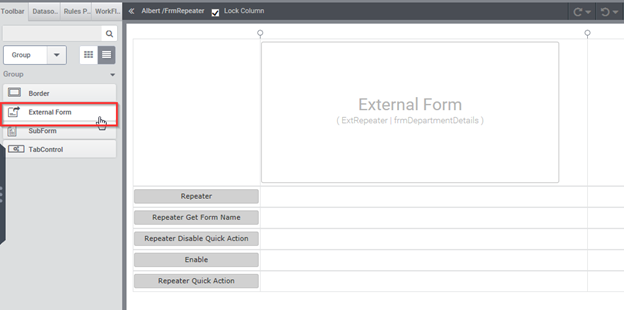
Step 4: Create a form as shown below, by dragging the control, External Form.
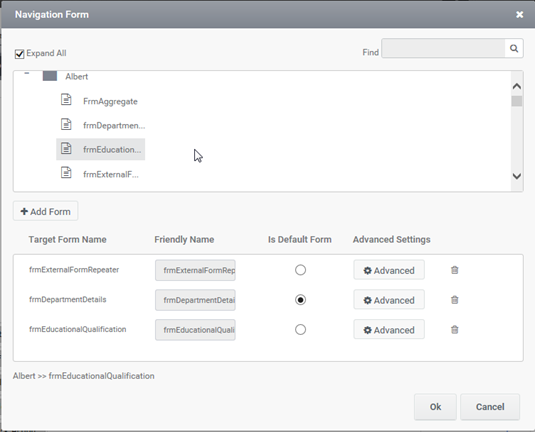
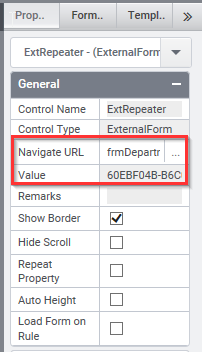
Step 5: In the ‘Properties (General)’ section of the External form, click on the ‘Navigate URL’ and select the required forms from the ‘Navigation Form’ window. If multiple forms are selected, select the form that has to be set as default in the Preview, as shown in figure 6.

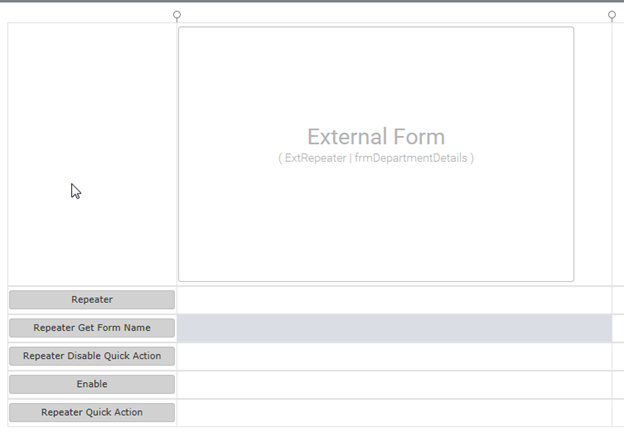
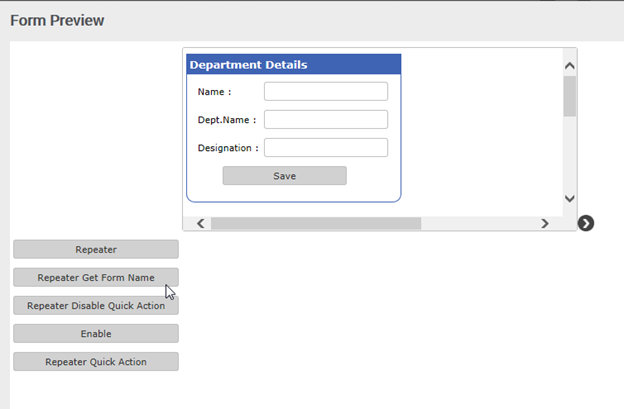
1 .Repeater
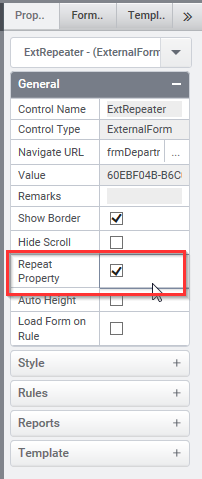
In the ‘Properties’ section of the External form, click the checkbox of Repeat Property, as shown in figure 9 and thereby the form’s repeat feature and its rules can be implemented in the current form.
Various actions and rules are included, in the feature called External Form Repeater.
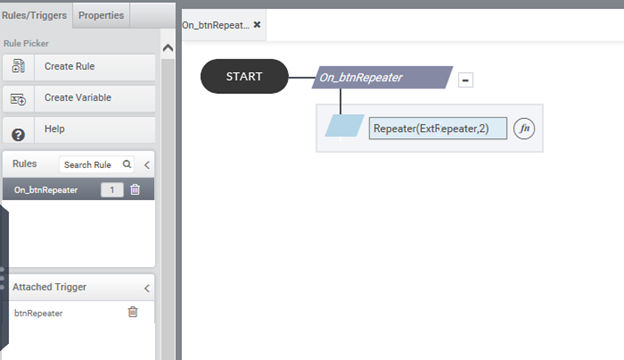
This rule repeats the form with the current view based on the number mentioned in the count.
Step 1: Enter the rule which is same as the below mentioned syntax and append a button trigger (‘Repeater’) to it.
Syntax: Repeater(ExternalFormName,Count)
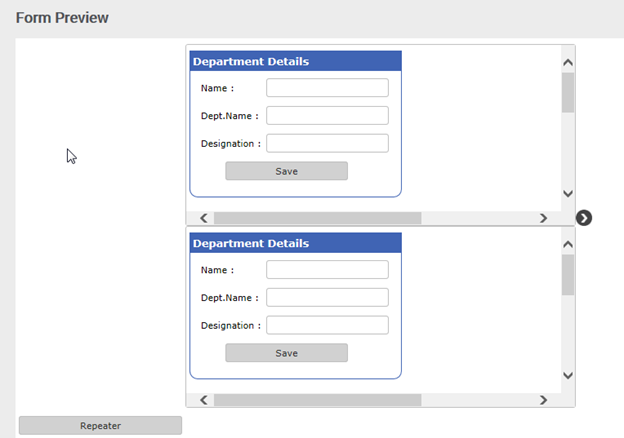
Example: Repeater(ExternalFormRepeater,2)
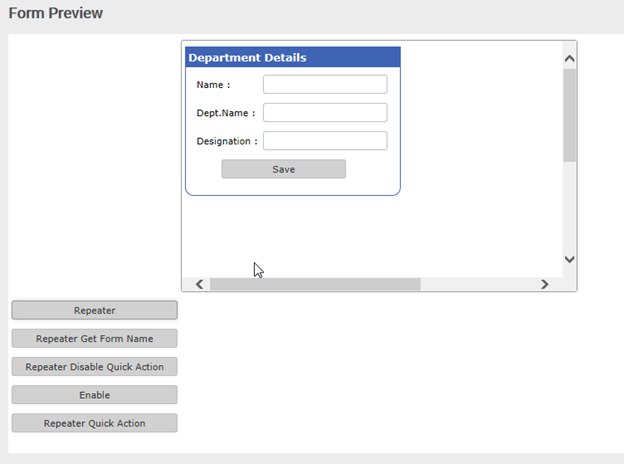
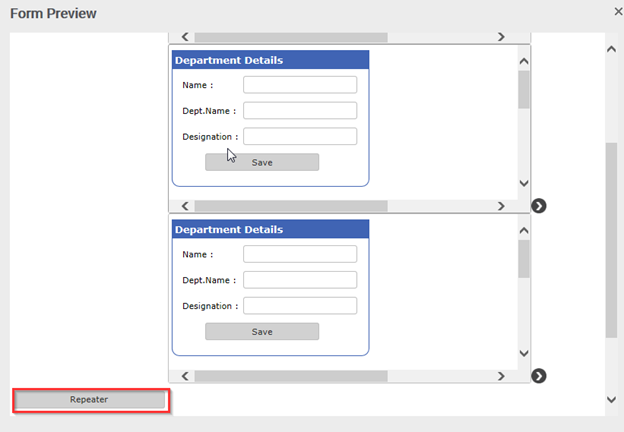
Step 2: In the Preview, on clicking on the button (‘Repeater’), the form will be repeated as per the count mentioned in the rule.
2 . RepeaterGetFormName
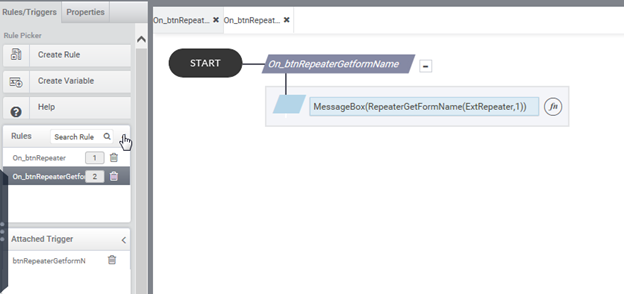
It will give the form name appended with the form index.
Step 1: Enter the rule which is same as the below mentioned syntax and append a trigger (‘RepeaterGetFormName’) to it.
Syntax : RepeaterGetFormName(FormName,Index)
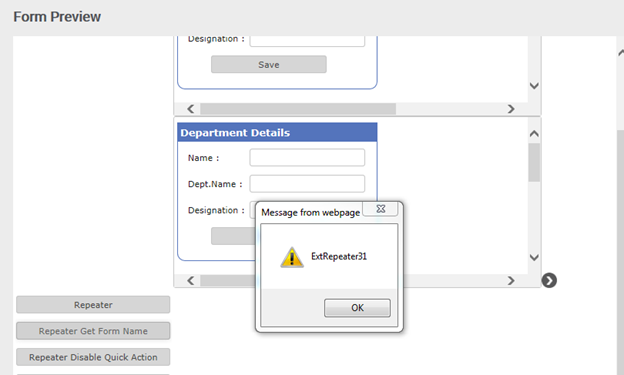
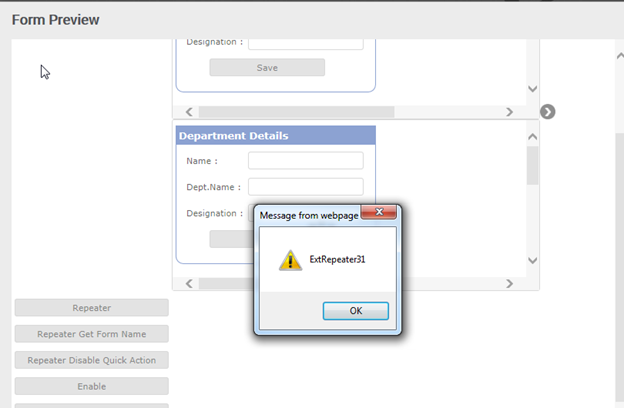
Example : MessageBox(RepeaterGetFormName(ExternalFormRepeater,1))
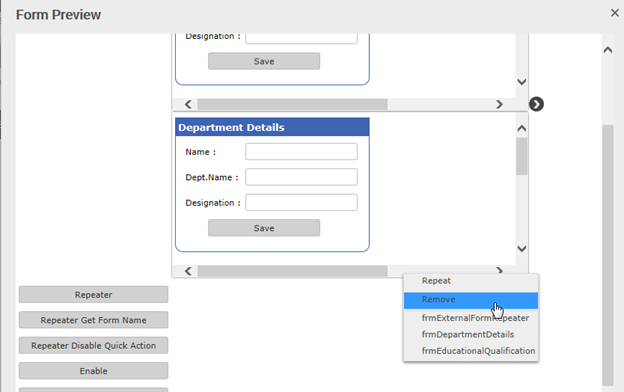
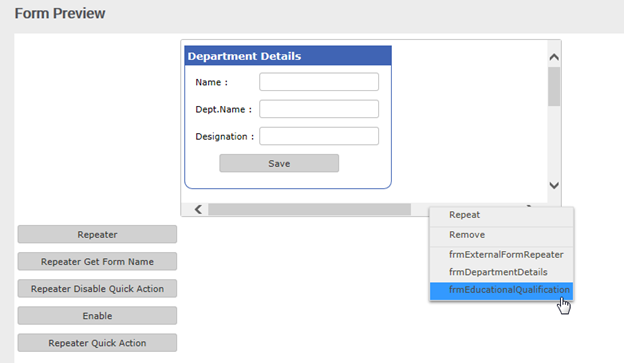
Step 2: While checking the preview, an arrow sign as shown in the figure 13 can be viewed and by clicking this symbol, a window appears having the actions namely, ‘Repeat’, ‘Remove’ and the selected form names which is termed as ‘View’.
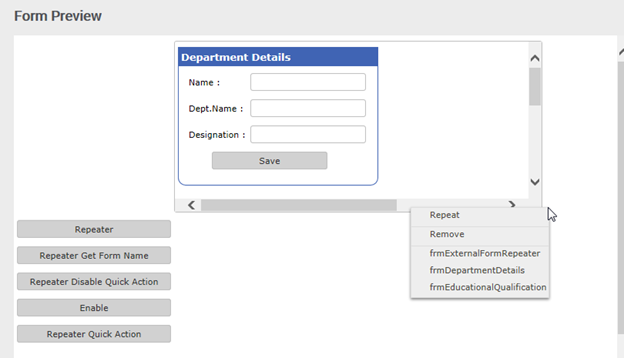
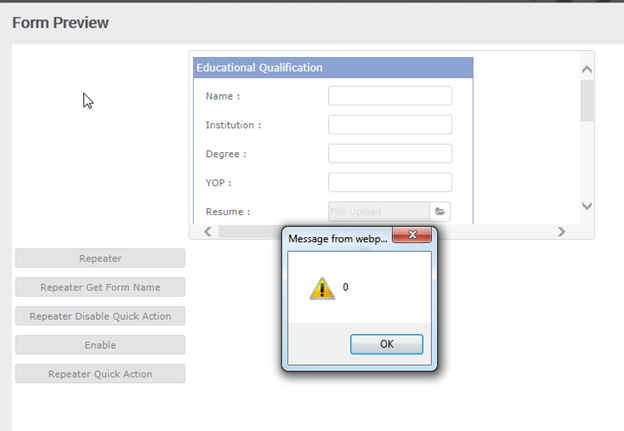
Step 3: Click the action called ‘Repeat’ and thereafter, on clicking the button (‘RepeaterGetFormName’), the message box appears showing the form name appended with the index (‘ExternalFormRepeater1’).
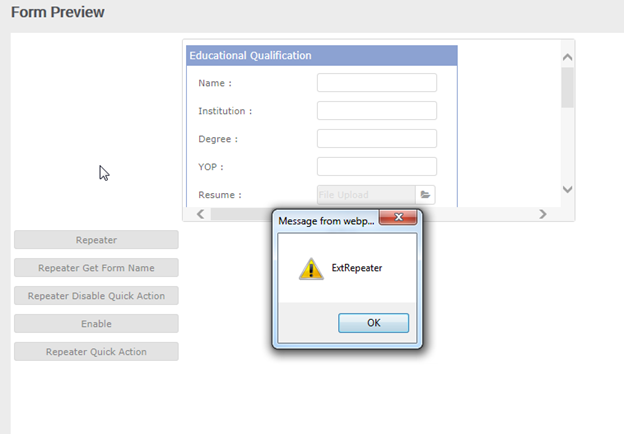
3 . RepeaterQuickAction
We can enable or disable the repeating property of the external form by using this rule, instead of designer.
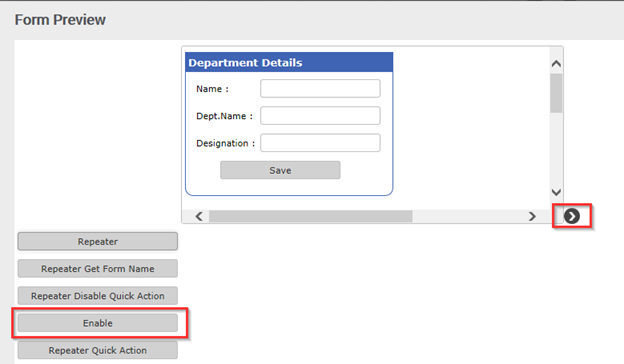
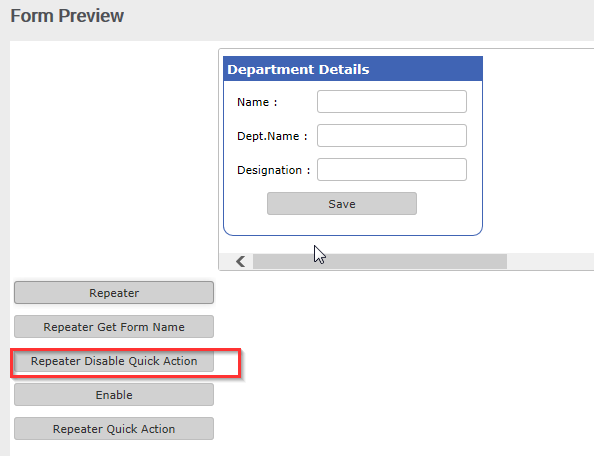
Step 1: Enter the rule as per the below mentioned syntax and append a button trigger (‘RepeaterDisableQuickAction’ and ‘Enable’) to it.
Syntax: RepeaterEnableQuickAction(ExternalFormName,True/False)
Step 2: If enable quick action is true then the actions, repeat/ remove/ change view should perform and if the enable quick action is false then none of the quick menu actions should take place. Here , if the check box of the ‘Repeat Property’ is clicked in the designer, then the condition in the rule is set as false and if the same checkbox is unchecked, then the condition is set as ‘true’ and it is triggered using the buttons , ‘RepeaterDisableQuickAction’ and ‘Enable’ respectively.
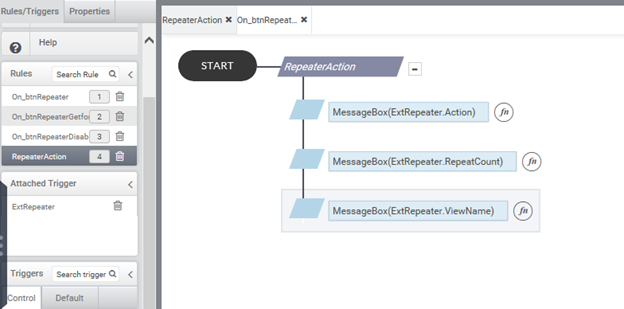
4 . External form repeat properties
a) Action : This rule specifies which is the current action that occurred in the external form
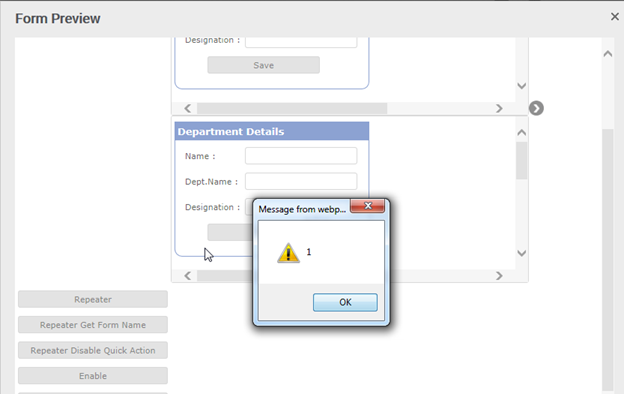
b) RepeatCount : This rule specifies the total number of times the form has being loaded.
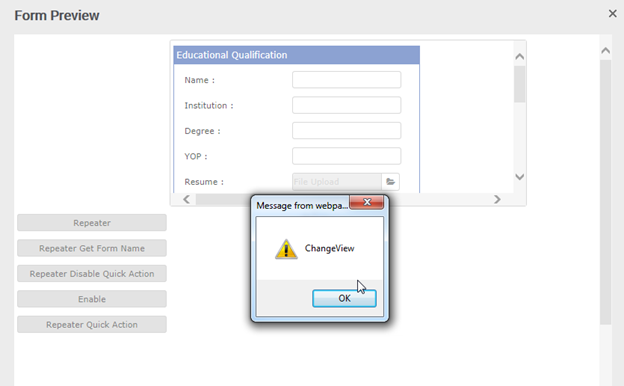
c ) ViewName : This rule specifies the name of the current view that is shown in the form. In the Preview, click on the arrow symbol and click the action ‘Repeat’ and thus the rule get executed in the form load as per the below given Figures (Figure 18 – Figure 30). Similarly when the action ‘Remove’ is clicked, the same rule gets executed in the below displayed format.
For the Actions, Repeat and Remove, the trigger is performed ‘First’ and the action (Repeat/Remove) is performed as the next second step. Whereas when View Change is done, the action i.e. the change in the view (form that is selected) is performed as the first step and the trigger is performed as the second step.
[Below given figures(Figure 18 – Figure 30) , explains the various actions (‘repeat’, ‘remove ‘and ‘view change’) and the execution of rules shown in Figure 17 in the respective manner]
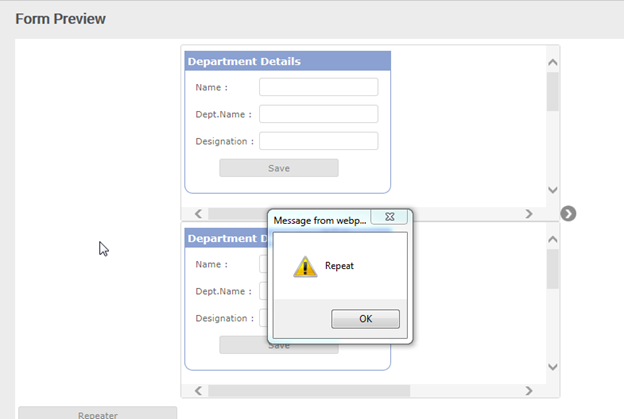
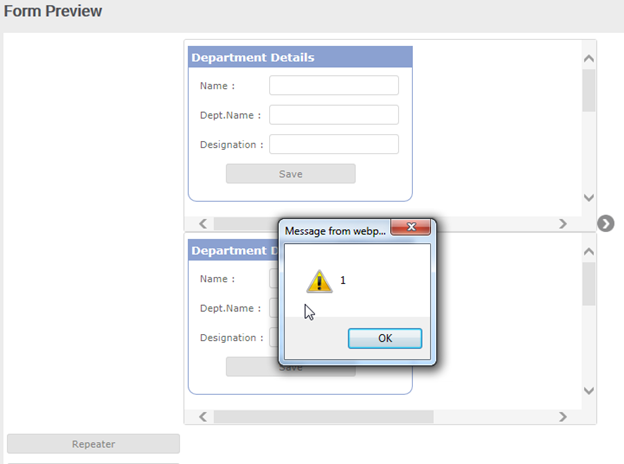
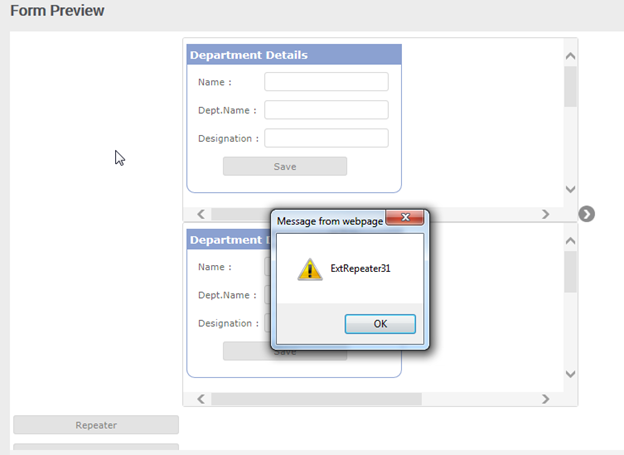
ACTION: REPEAT
Message box 1:
Message box 2:
Message box 3:
Result:
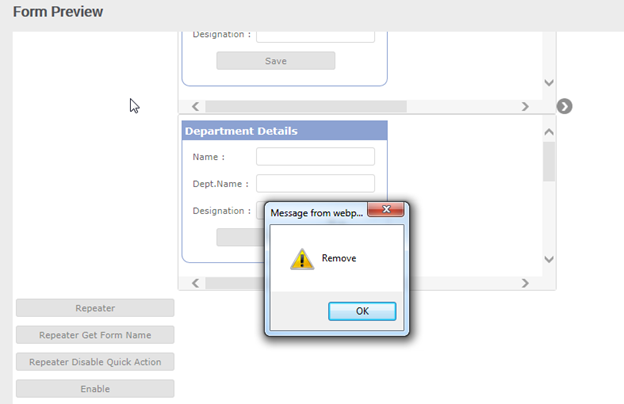
ACTION: REMOVE
Message box 1:
Message box 2:
Message box 3:
Result
ACTION: CHANGE VIEW
Message box 1:
Message box 2:
Message box 3: