Form Validation
Me.IsValid
In our day to day life, we come across many forms from different multitudes. Some may have very few details to fill up while others will have much more to be entered with many mandatory fields. A cash deposit form in a bank is an example of a form with many fields which are labeled as mandatory. ClaySys AppForms we can check if the field is valid or not by simply checking the rule ‘Me.IsValid’. This is a rule which will check if the mandatory fields are filled or not, if all the mandatory fields are filled ‘true’ value will be assigned to it, in case if any field is blank then ‘Me.IsValid ‘will be ‘false’.
Step1:
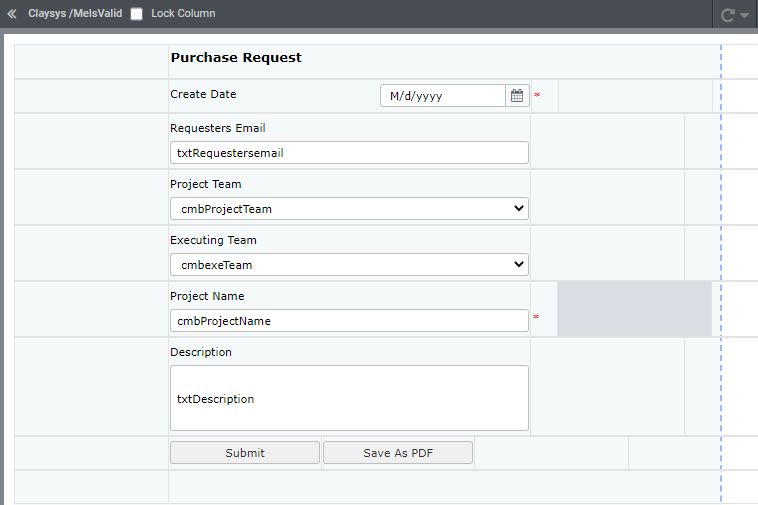
As an example consider a form for ‘Purchase Request’ and create a corresponding table also. Form in designer will look like as in Figure1.
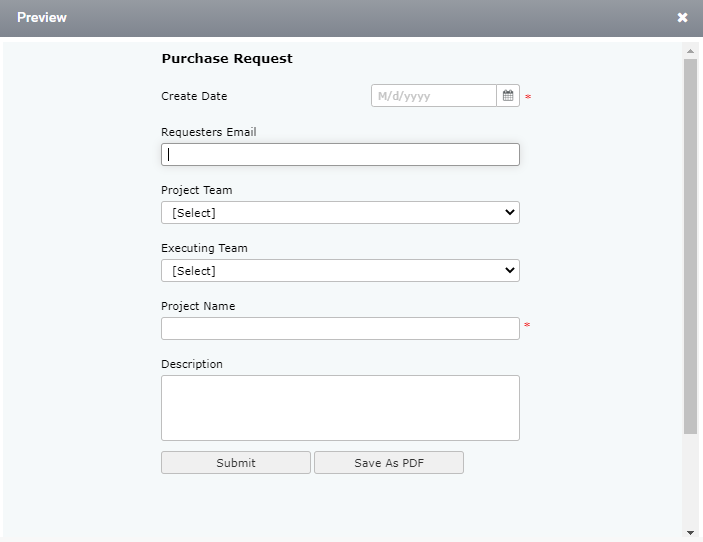
The Preview of the form is given in Figure2
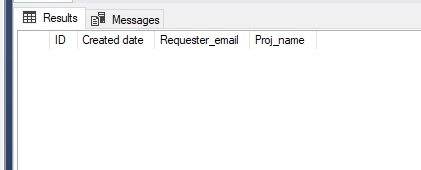
A snapshot of the table we created is given in Figure3; we have created columns for Mandatory fields only.
Step2:
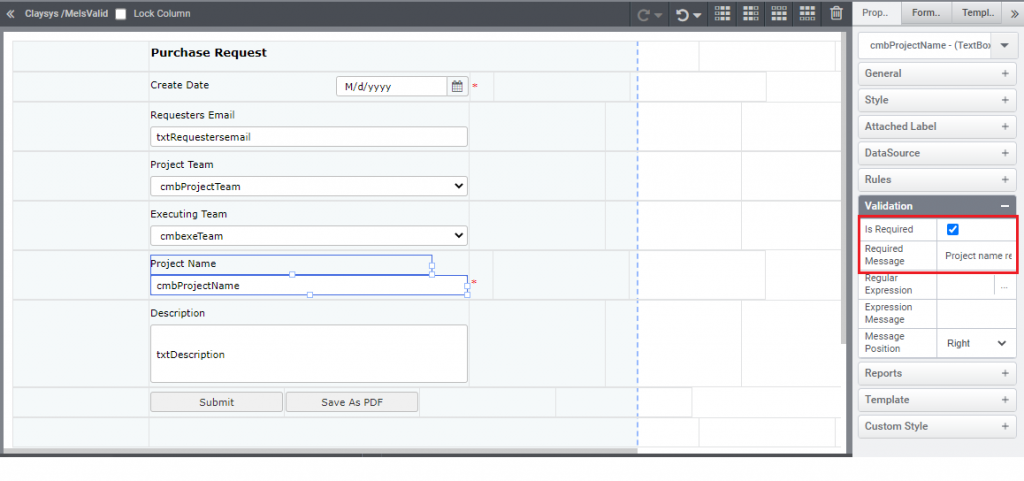
Click on the mandatory field ‘Project Name’ and open validation tab on right side as shown in Figure 4. Tick the checkbox ‘is required’ and write a message to be displayed in the Required Message Section. Here we have given ‘Project Name Required’.
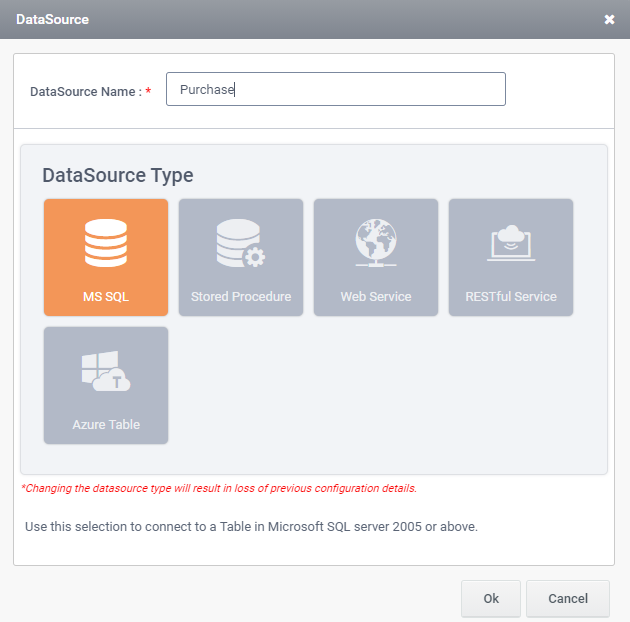
- Next step is the creation of a DataSource, Click on the tab on left side ‘DataSources’, now click on the ‘Create Datasource’ button.
- Now Follow the Figure 5 for details. Give a ‘Datasource Name’ and select ‘MS SQL’ as ‘Datasource Type’. Click ‘OK’ button.
- Now select the table we created for this form as if here selects ‘PurchaseList’ and click ‘next’ button.
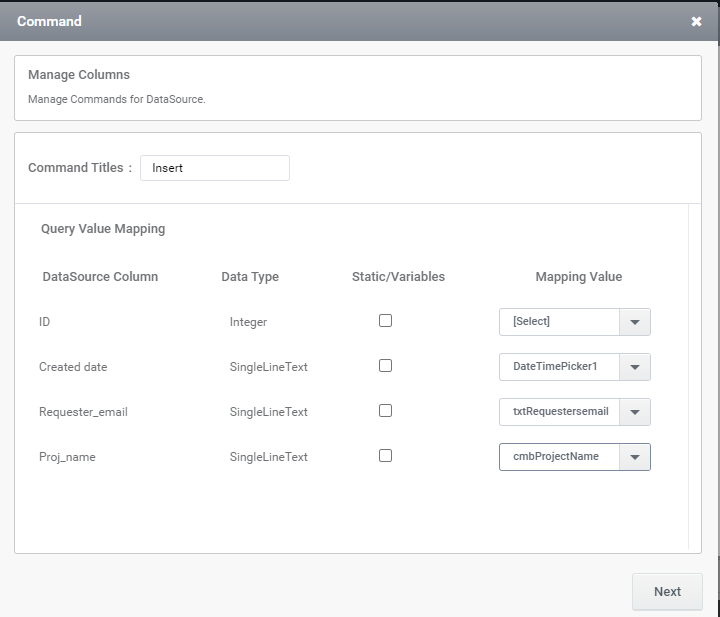
- Select the command ‘Insert’ and then click ‘add ‘.
- Give the Proper Controls name in the appropriate column as in Figure6.Click ‘OK’.
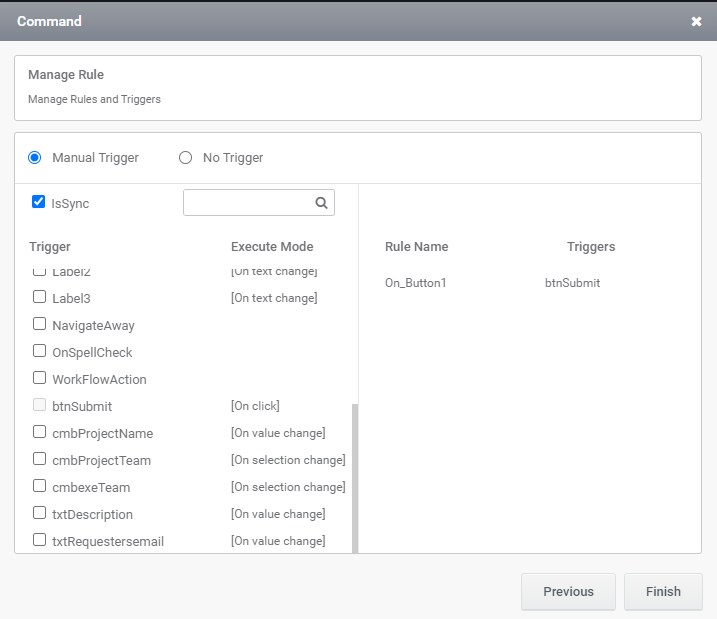
- Add trigger in the next page.Tick the checkbox near the ‘btnSubmit’.
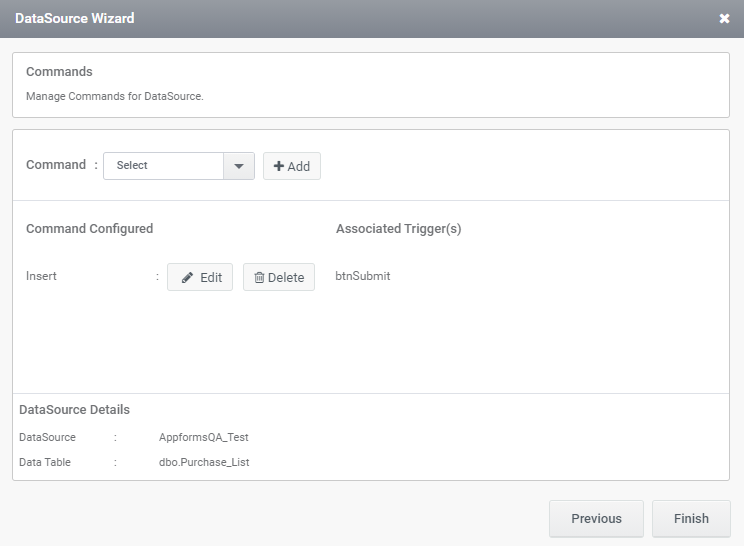
- Now press ‘finish’.
Step3:
Now we can see a rule created with the name ‘on_btnSubmit’.
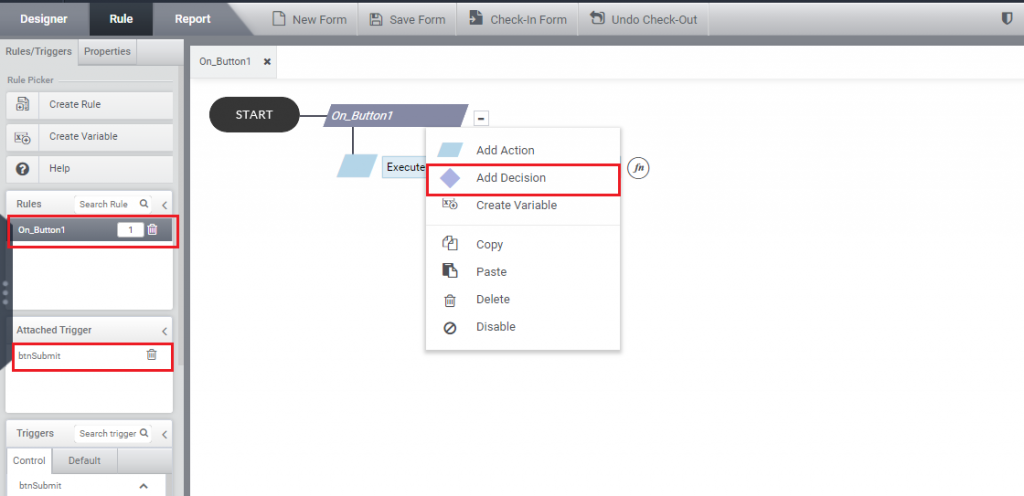
Right Click on the Rule name and select ‘Add Decision’ as in Figure9.
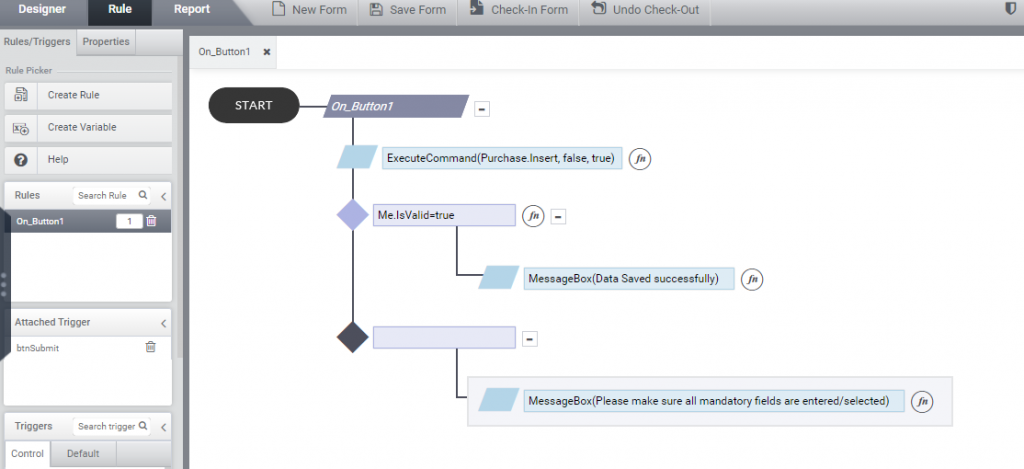
Continue as in Figure 10.
Step4:
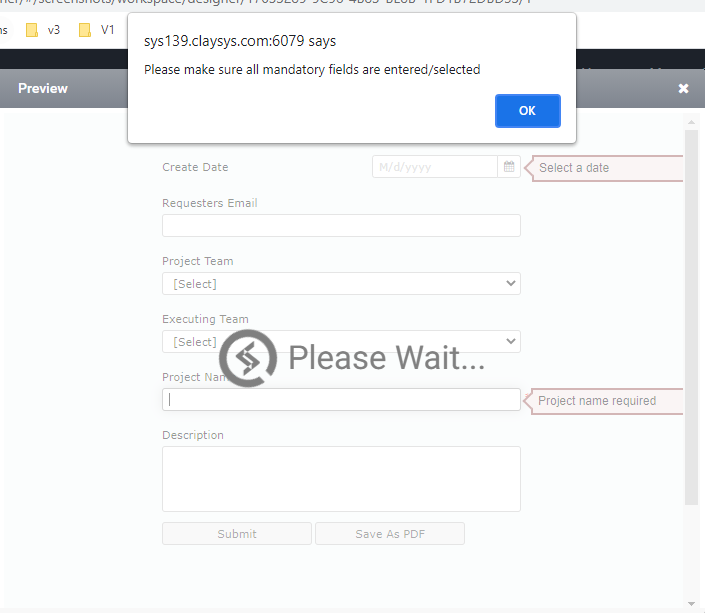
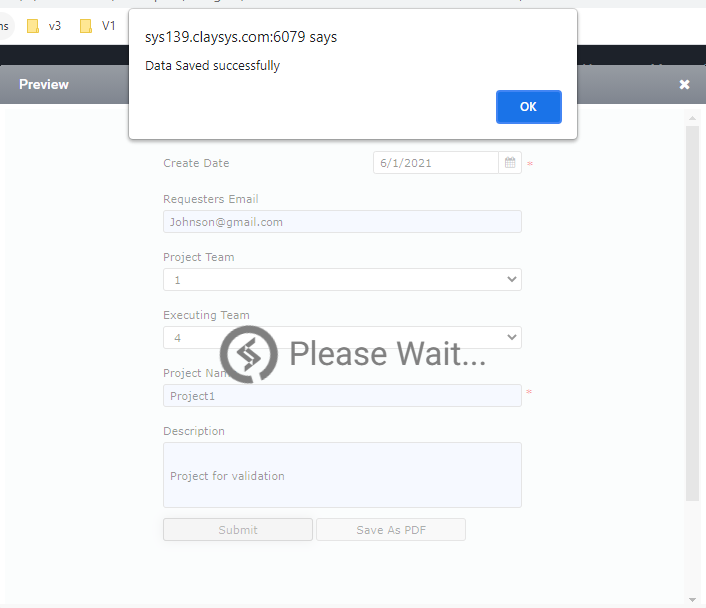
Now take the preview and click ‘Submit’. Result is shown in Figure11, Figure 12.
Step5:
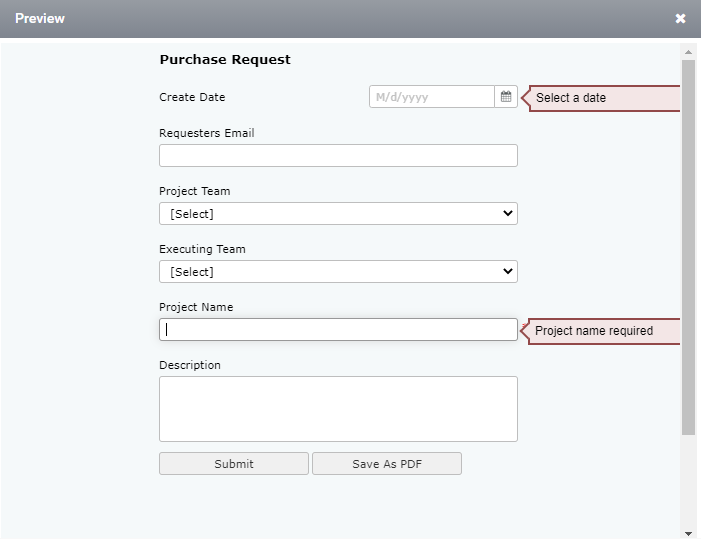
Fill the fields and again click on the Submit button. Result is shown in Figure 11.
Note: We can Apply Me.IsValid only after an Execute command.