External SharePoint List/Library
Configuring a collection control to display values from a ‘External SharePoint’.
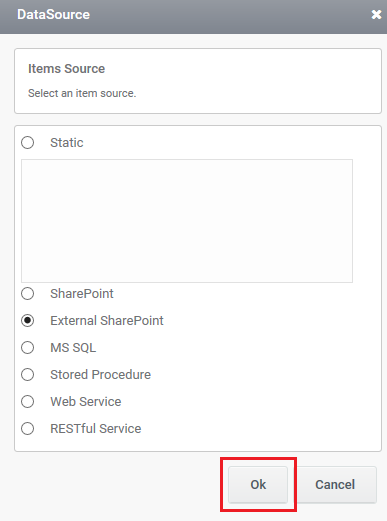
- A ‘Datasource’ window will pop up. Select the datasource type as ‘External SharePoint’ and click on ‘OK’ button to proceed with the wizard.
2. A ‘DataSource wizard ‘will pop up.
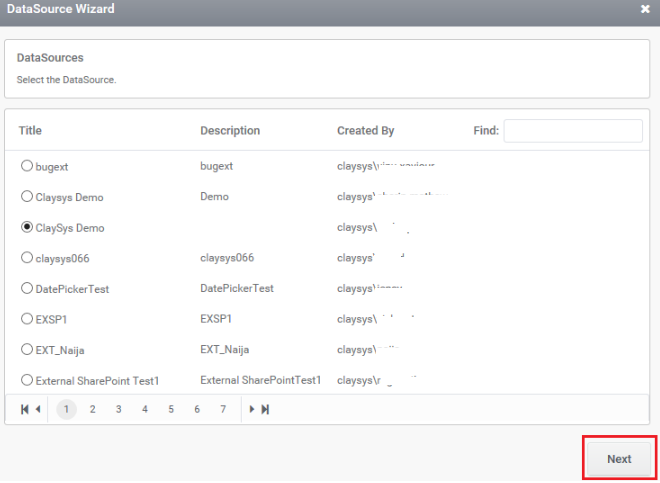
3. A new window gets open up.
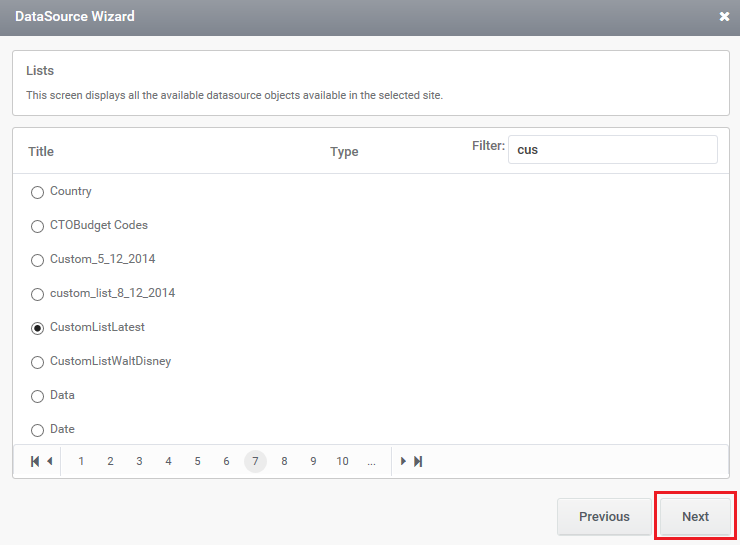
- Select the list from the window to which the ListBox control has to be configured.
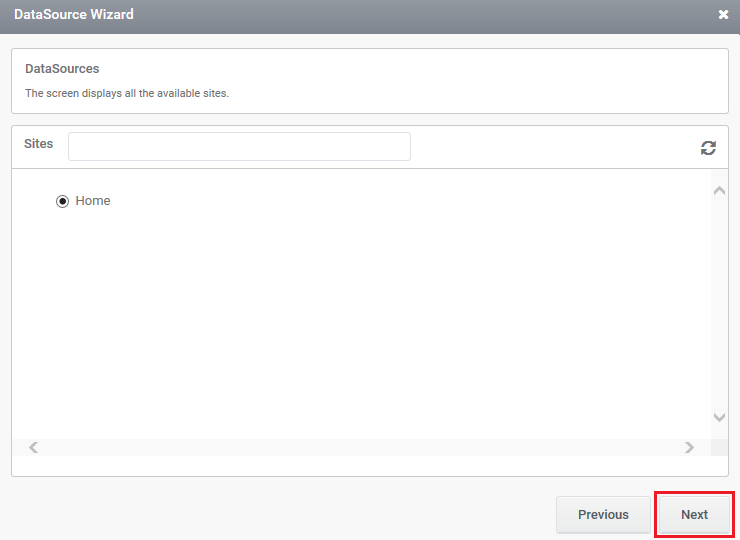
- Click on ‘Next’ button to proceed with the wizard.
- Make use of the ‘Filter’ option to search for the desired list .
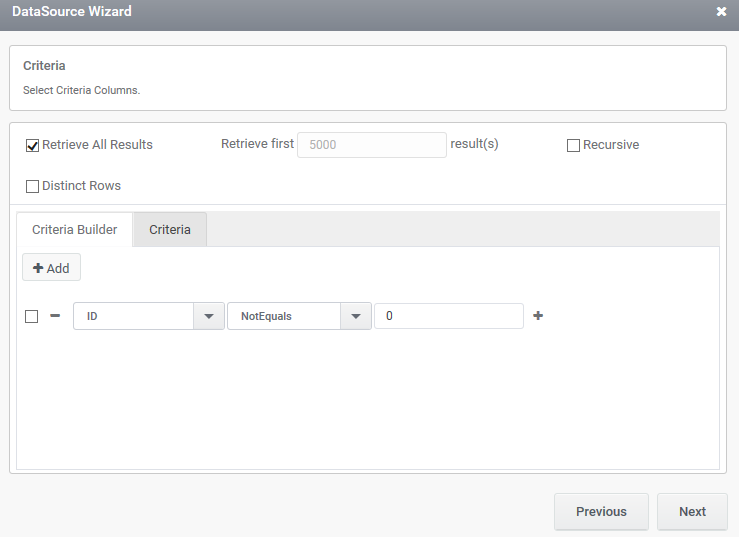
4. A ‘Criteria Builder’ window gets pop up.
- Manage the criteria based on which the ListBox control has to be loaded in preview.
- The criteria section has to be specified with a condition or value in a control configured in the form based on which selection has to be done.
- The first drop down will contain all the column names of the list. Select the column name based on which criteria has to be created.
- The second drop down will contain a list of operators that are applicable for criteria satisfaction.
- The third auto complete field when typed in will display the control name from which the list value has to be obtained.
- Multiple criteria can be joined using ‘AND’ and ‘OR’.
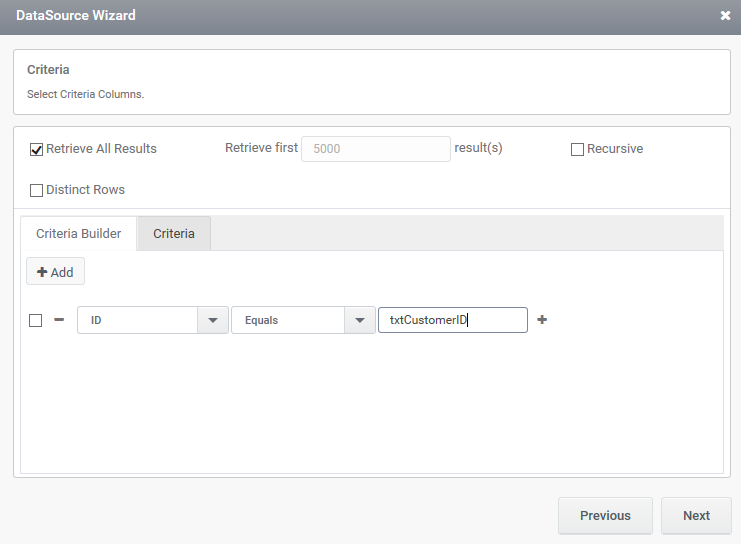
NB: All the mapping value fields are drop downs which when text is typed in, the control names in the form are shown.
- In this window the number of resultant rows that has to be displayed in the preview can also be managed.
- By default the checkbox against ‘Select All Results’ will be selected ,so that all resultant rows will be loaded in the ListBox.
- On unchecking the same checkbox,the user can manually enter the desired number of resultant rows that has to be displayed.
- Now click on ‘Next’ button to continue with the wizard.
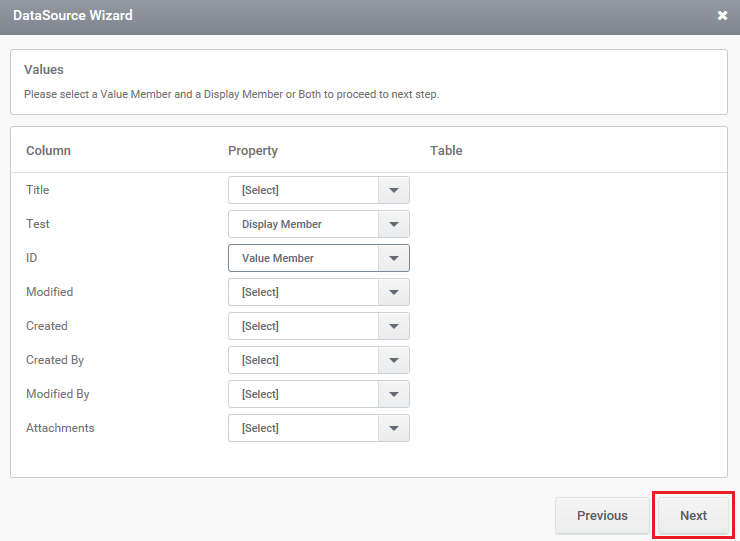
5. A ‘Values wizard’ will pop up.
- Set a column in the list as ’Value Member’.
- Set another column in the list as ‘Display Member’.
- A ‘Both’ option is also available to set the same column in the list as both ’ Value Member’ and ‘Display Member’.
- Click on ‘Next’ button to proceed with the wizard.
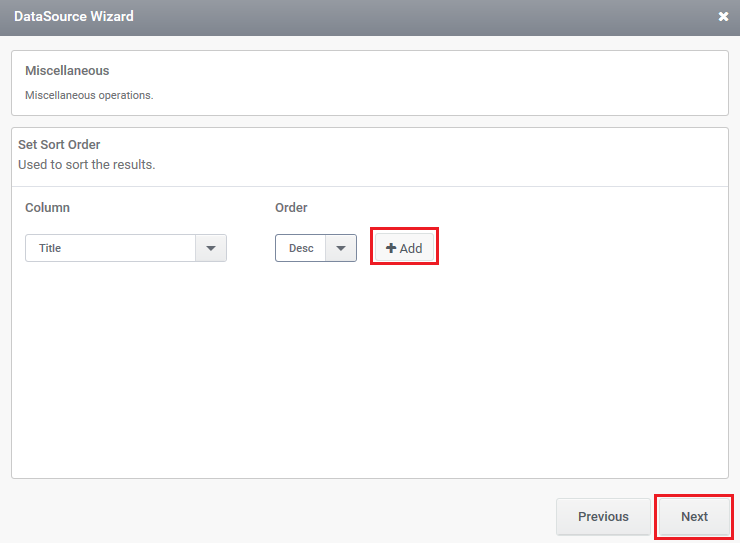
6. A ‘Miscellaneous window’ will pop up.
- Sort order for columns can be managed.
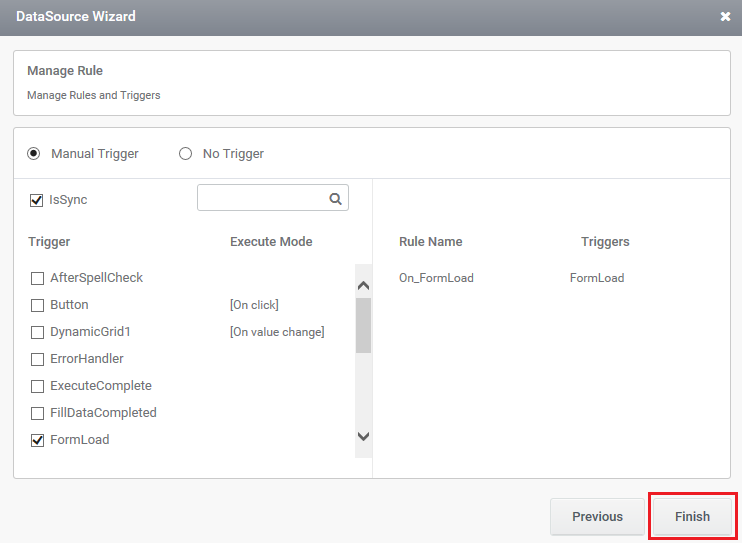
- Trigger to fill the control can also be managed using ‘Add ’ button.
- Managing the trigger to fill the control using ‘Add’ button has been already explained in the section ‘Configuring ListBox with MSSQL’.
- Click on ‘Finish’ button.
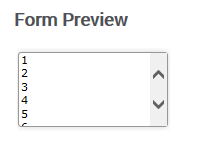
7. In Preview,
- ListBox control gets populated with the data based on the criteria.