Template Management
Administrators can create a set of permissions as a template and assign it to users or groups.
When a permission template is assigned to a user or group, it will override any existing permissions they have.
Let’s now explore how to configure Template Management.
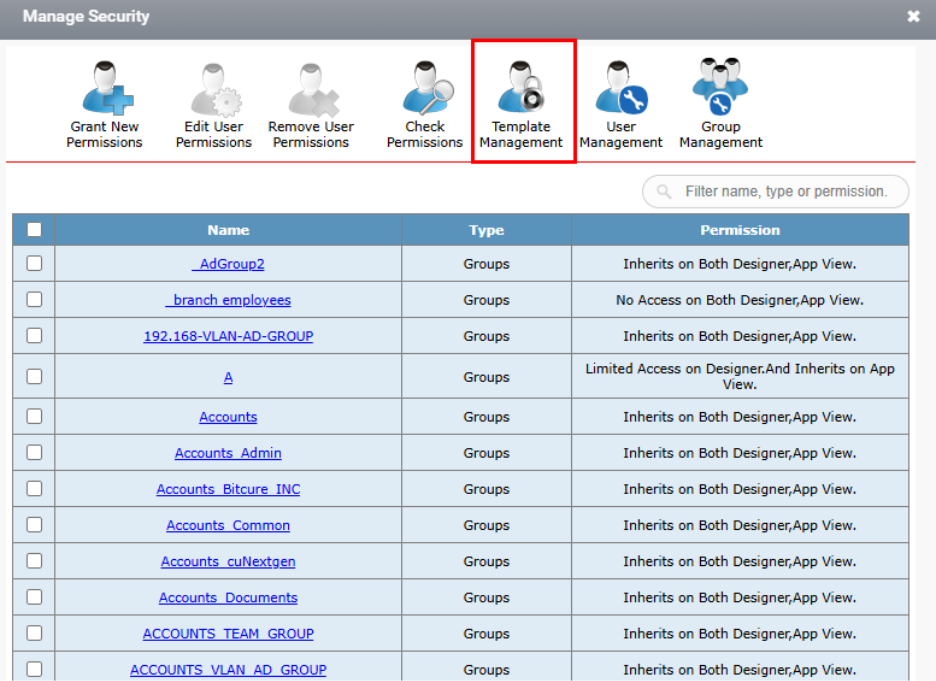
Step 1: Click the Manage Security option, as shown in the image below.

Step 2: Once the Manage Security window opens, choose the Template Management option, as illustrated in the image below.
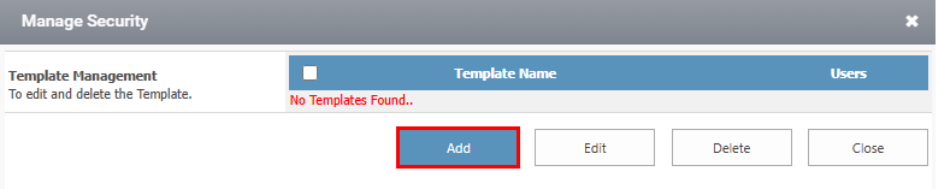
Step 3: Template Manage window opens as shown in the image.

1. Add Template
To add a new template, click the Add button, as shown in the image below.
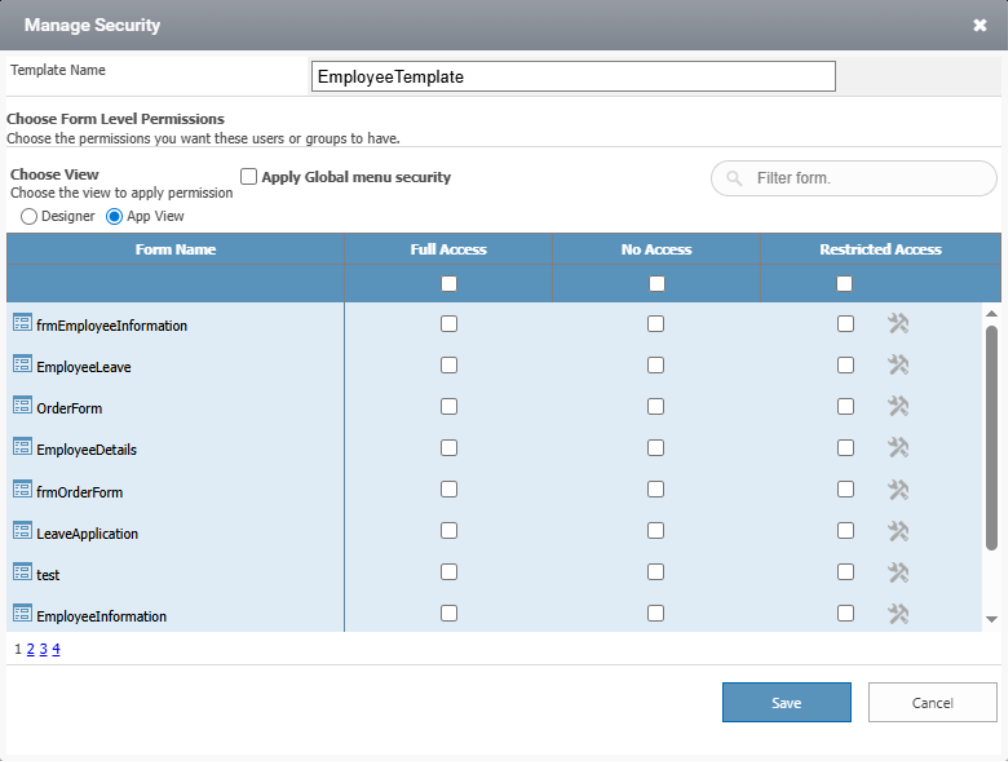
The following window opens as demonstrated in the image below.
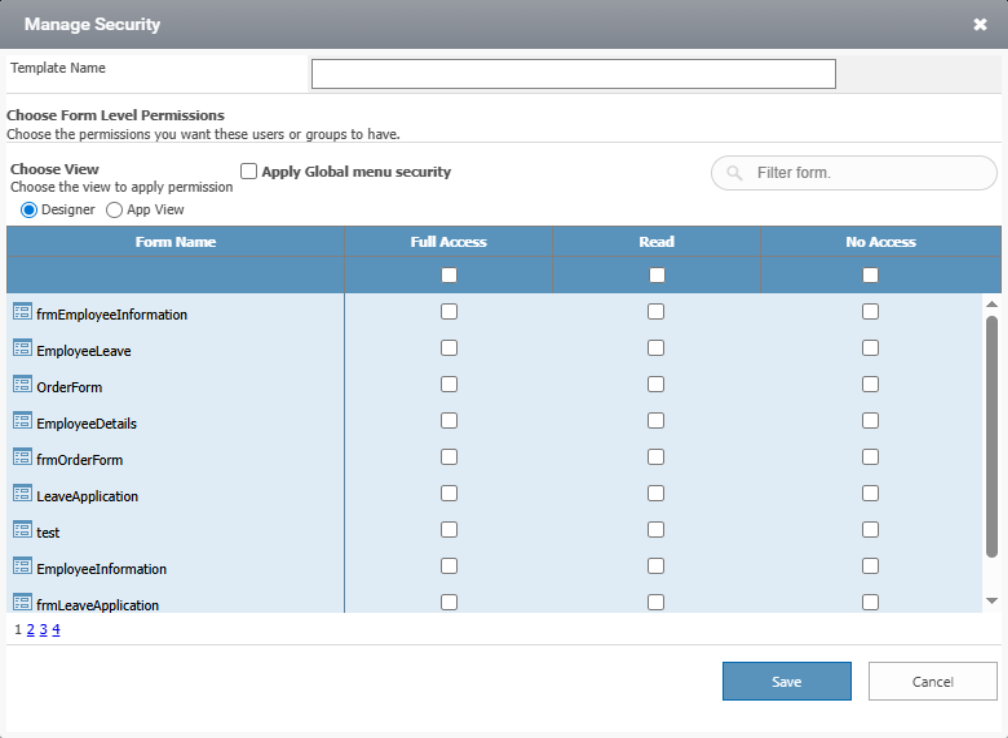
Template Name: Enter the desired name for the template.
Apply Global Menu Security: Use this option to apply security settings to the global menu.
Choose View: Permissions can be assigned to either Designer or AppView. Select the appropriate view to apply the permissions.
The Designer has three levels of access:
Full Access: The user has complete permissions to the form.
Read Access: The user can only view the form.
No Access: The user is denied access to the form.
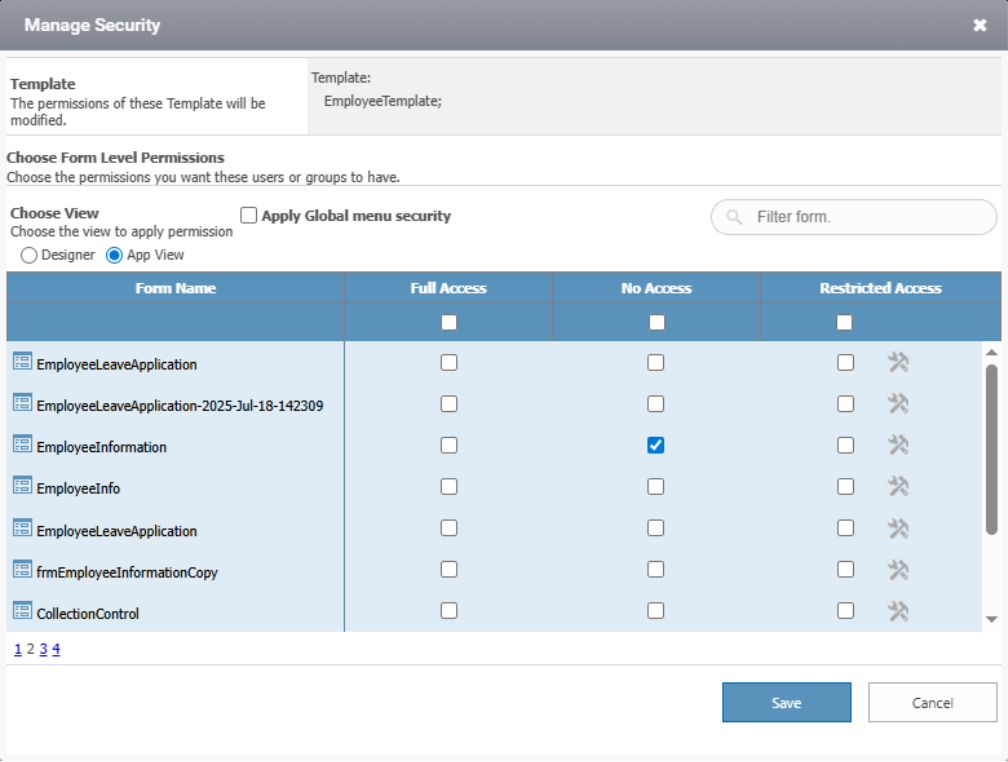
The AppView includes three types of access, as shown in the image below.
- Full Access: The user has complete permissions to the form.
- No Access: The user is denied access to the form.
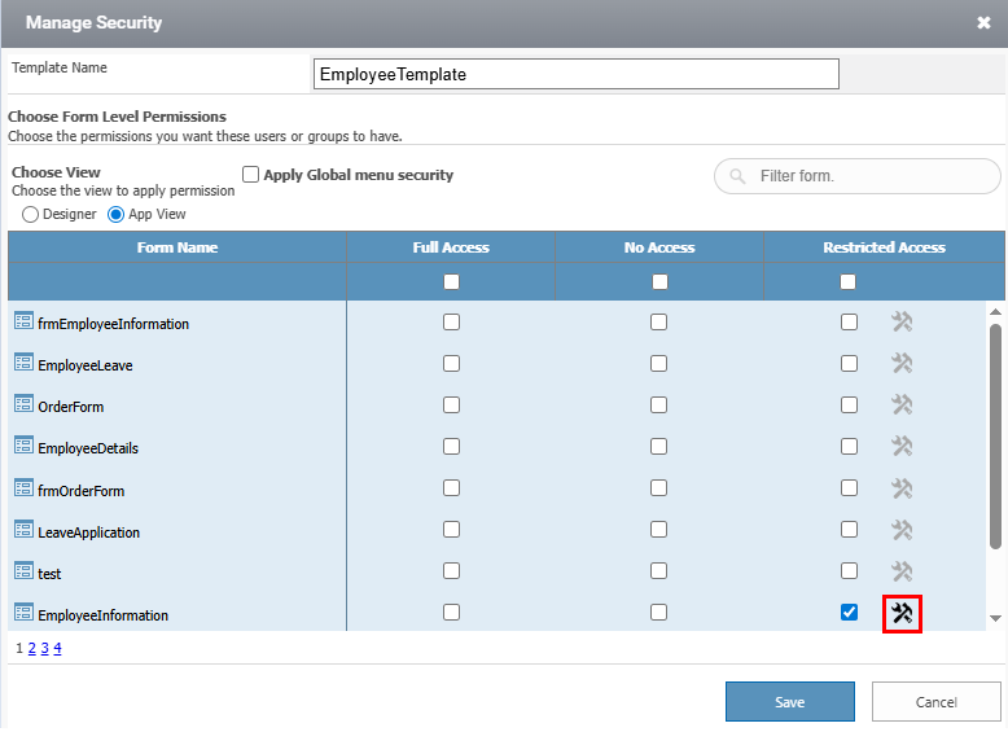
- Restricted access: Restricted access can be given to the controls in the form. It has three types of permission. Select the restricted and click on settings icon as shown in the image below.
The following window has controls in the form and permission on side of each control as shown in the image below.
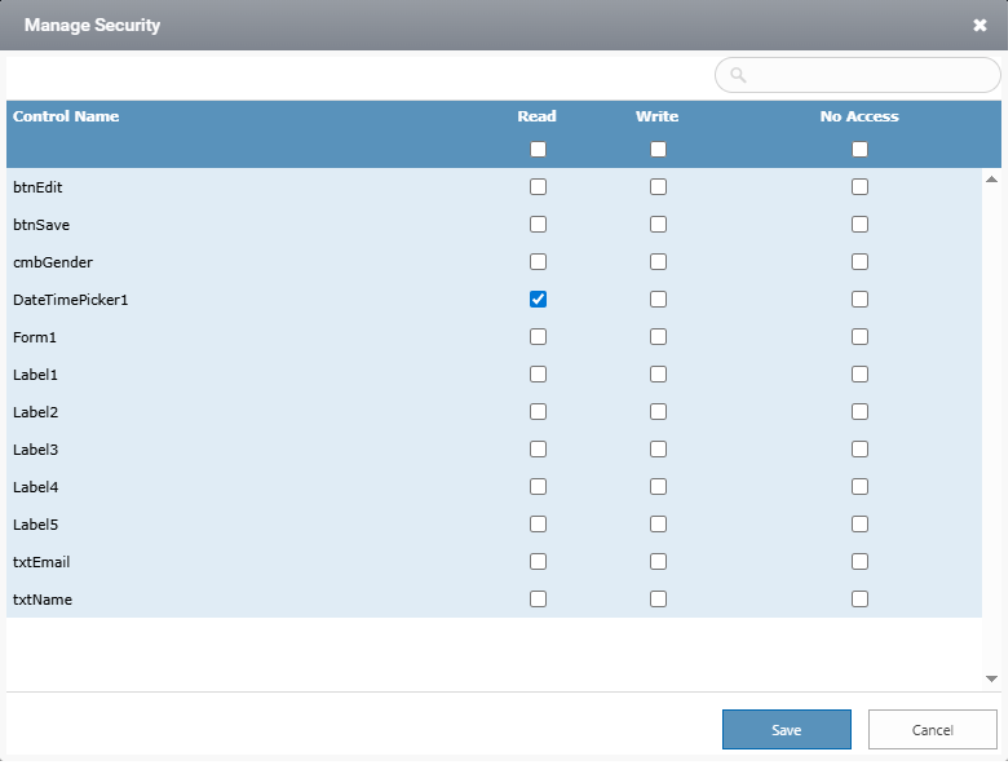
Write: The user has complete permissions to the control.
Read: The user can only view the control.
No Access: The user is denied to access the control.
2. Edit Template
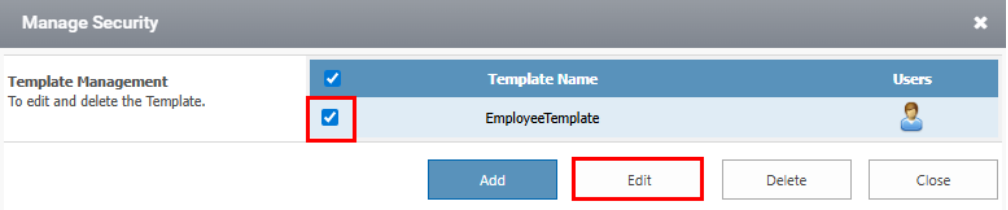
- Select the template you want to delete and click on the Edit button as shown in the image below.
- Choose the view to apply permission.
- Edit the permissions.
- Click on the save button.
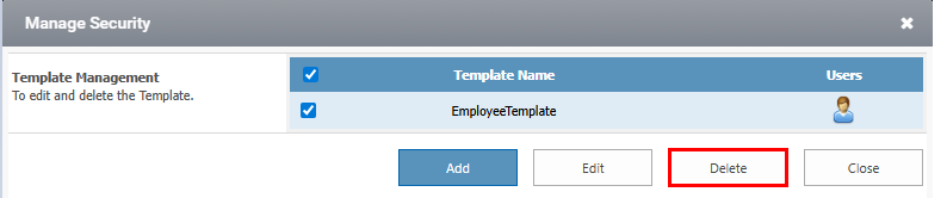
3. Delete Template
- Select the template you want to delete and click on the delete button as shown in the image below.
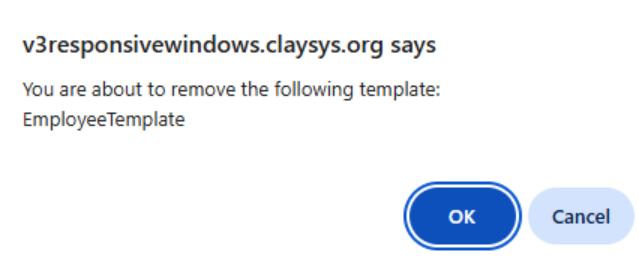
- The confirmation popup appears as shown in the image below.
- Click Ok.
4.To add user
To assign a specific template to a user:
- Select the user from Manage Security.
- Click Edit User Permission.
- Choose the tenant and click Restricted Access.
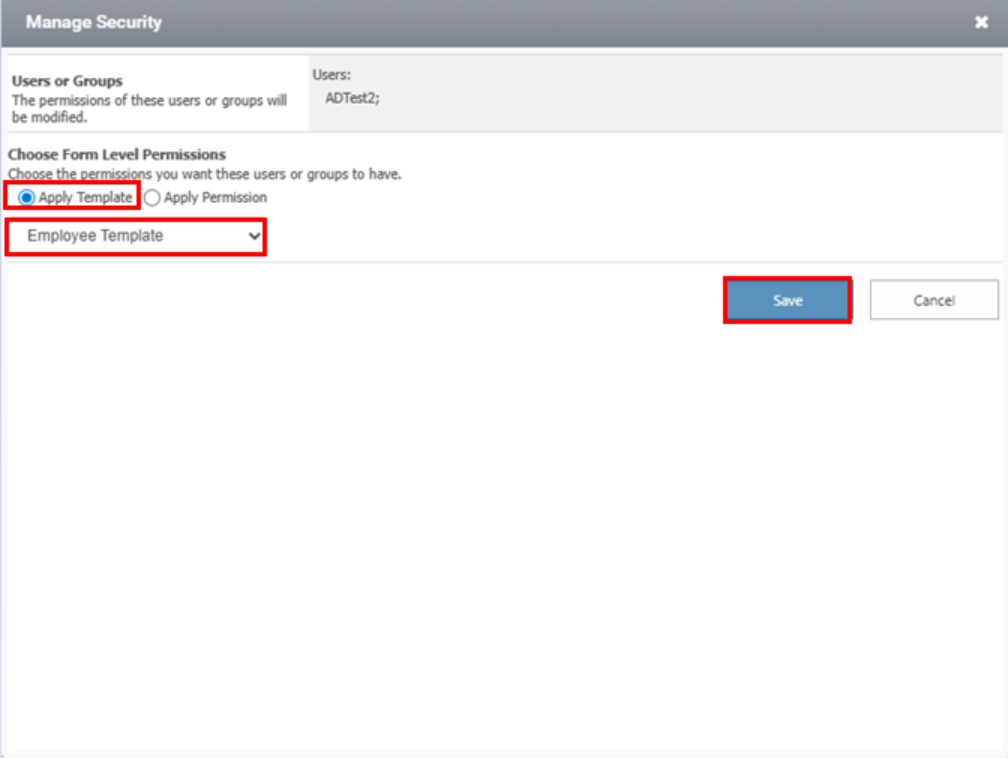
- In the window that appears, select Apply Template.
- Choose the desired template and click Save.
5. Remove User
- To remove user for a particular template
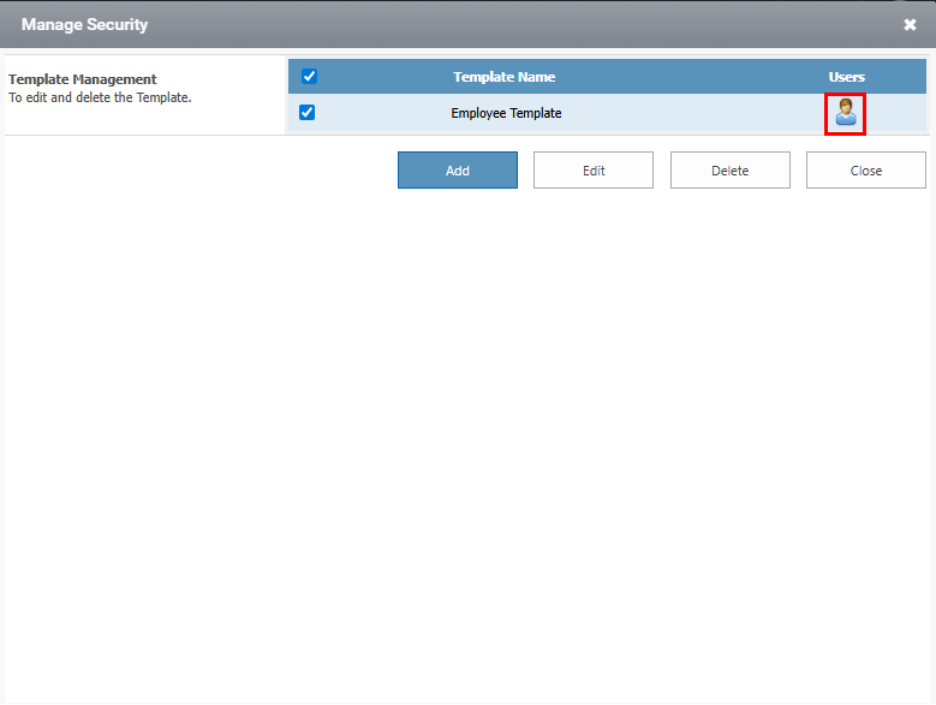
- Click on Template Management option
- Select the required template.
- Click on the User icon corresponding to the template as shown in the image below.
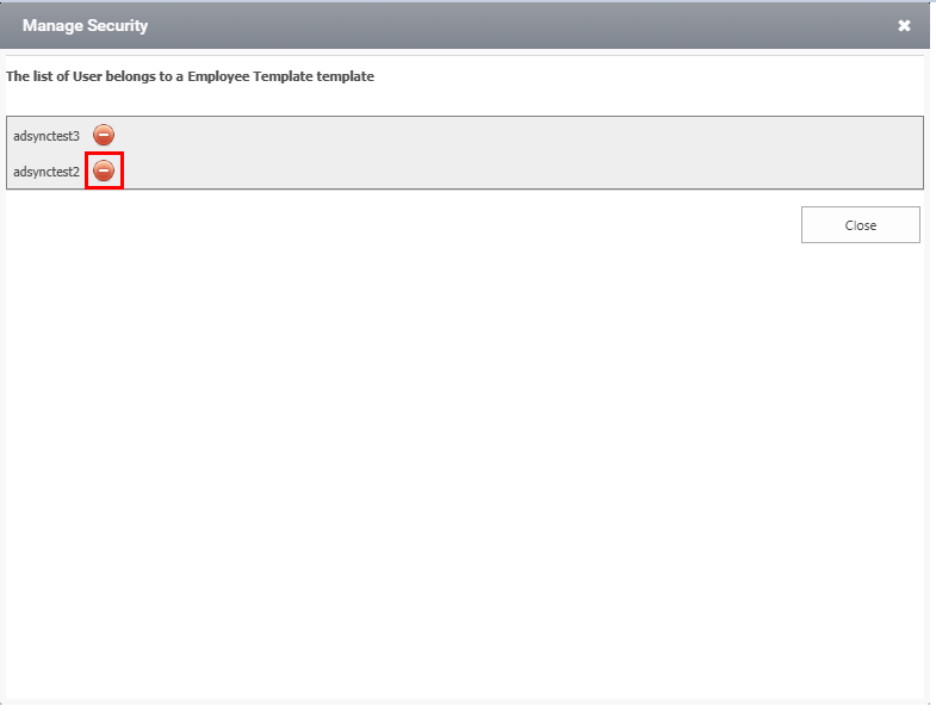
- The list of users added to the template will be shown in the window. Click on minus icon corresponding to the user as shown in the image below.
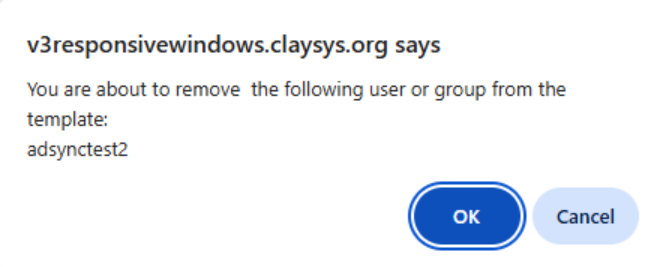
- A confirmation popup appears as shown in the image.
- Click Ok.
- The user will be removed from the list of users.