Template Builder
The Template Builder creates styles for individual controls, making it easy to apply and reuse them across forms. These styles act as default appearances for controls but can be customized or overridden as needed. You can modify the Default template to adjust the default control styles.
Let’s explore how the Template Builder works.
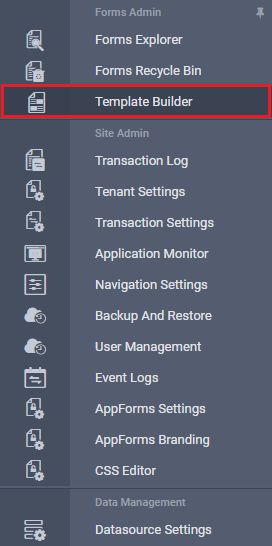
Once the “Show Template Builder” option is enabled in Beta Version settings, the Template Builder link becomes visible in the left navigation menu, as shown below.
Options available in Template Builder
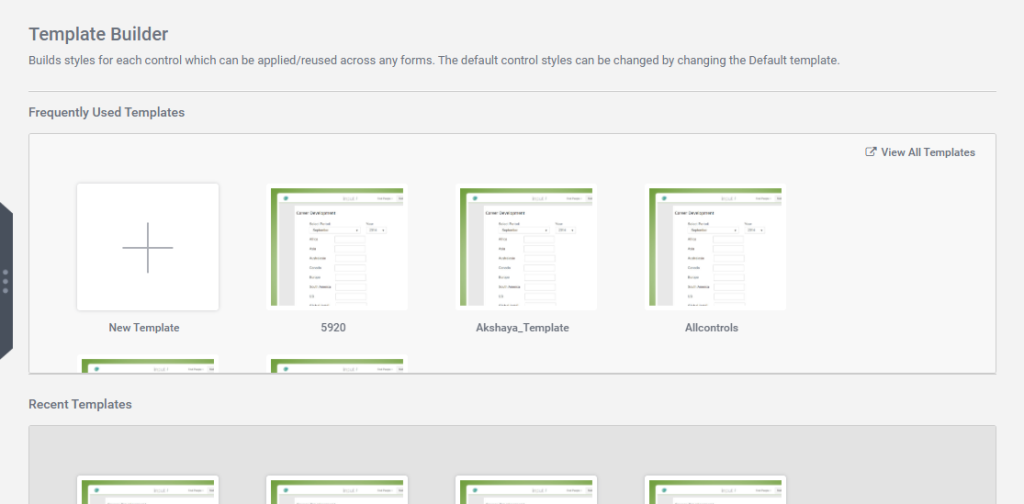
Clicking on Template Builder takes you to the Template Builder page, which includes several options that we will explore individually.
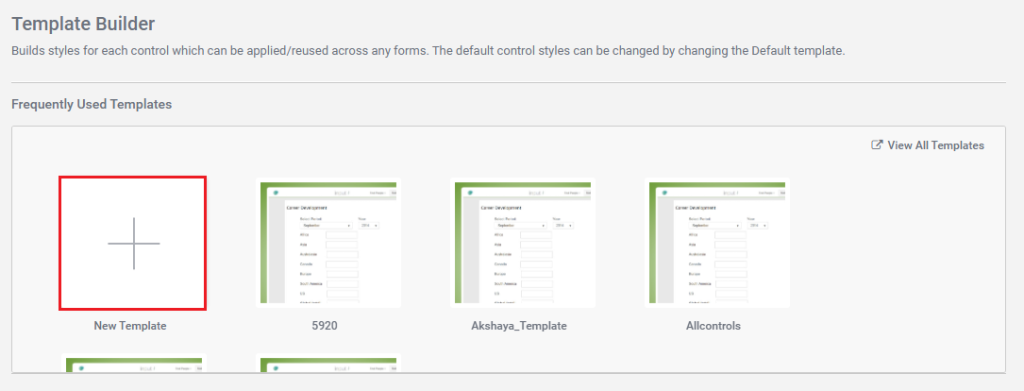
1. Frequently used Templates and Recent Templates:
a) Frequently Used Templates: This section displays the templates that are used most often.
b) Recent Templates: This section shows the templates that were used most recently.
Frequently used templates and Recent Templates will be displayed as shown in the image below.
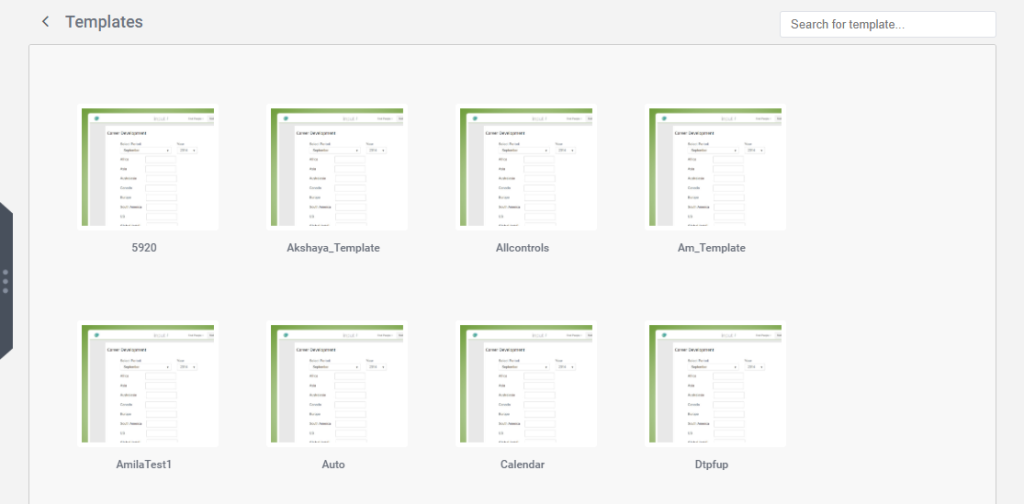
2. View All Templates:
The “View All Templates” option displays all available templates.
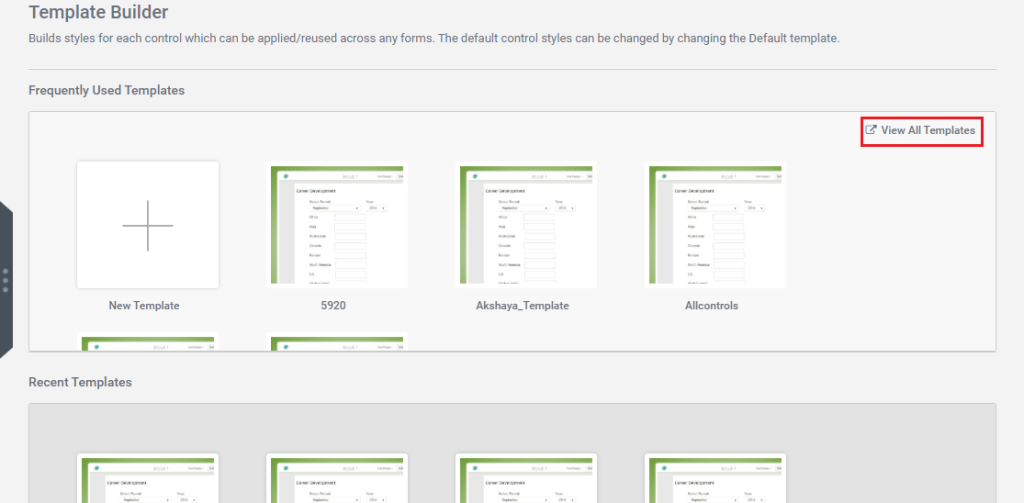
Clicking the View All Templates option will display all templates on the Templates page, as shown in the image below.
3. Download, Edit, Delete Option:
Selecting a template allows users to easily access options to download, edit, or delete as shown in the image below.

- Download: Click the download icon to save the template as a ZIP file.
- Edit: Click the edit icon, make changes, and click Save.
- Delete: Click the delete icon to remove the selected template.
Steps to create a New Template:
Step 1: To create a new template, click the New Template option, as shown in the image below.
Step 2: The Create Template page will appear, as shown in the image below.
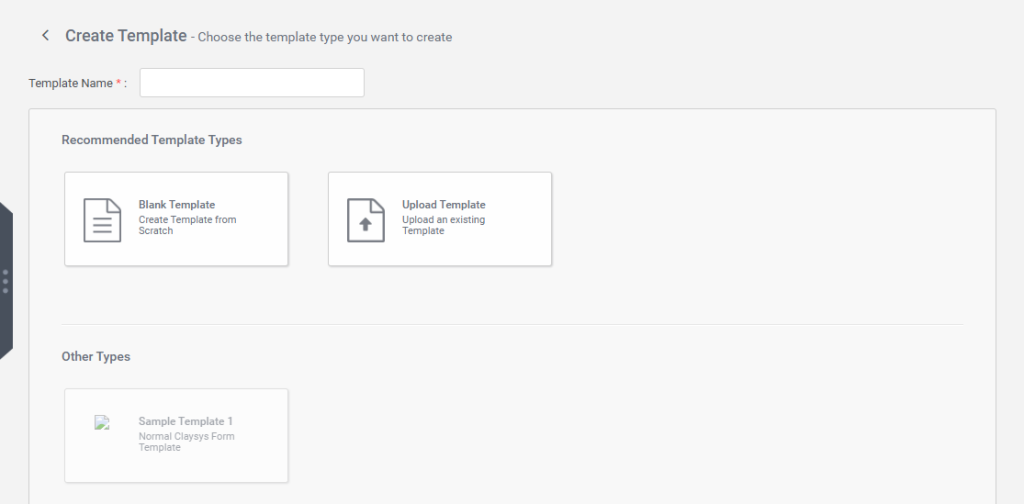
Step 3: Enter the required template name in Template name field.
Step 4: Select the template type. There are three types of templates.
- Blank Template: Allows you to create a new template from scratch.
When the Blank Template option is selected, the template creation page will be displayed, as shown in the image below.
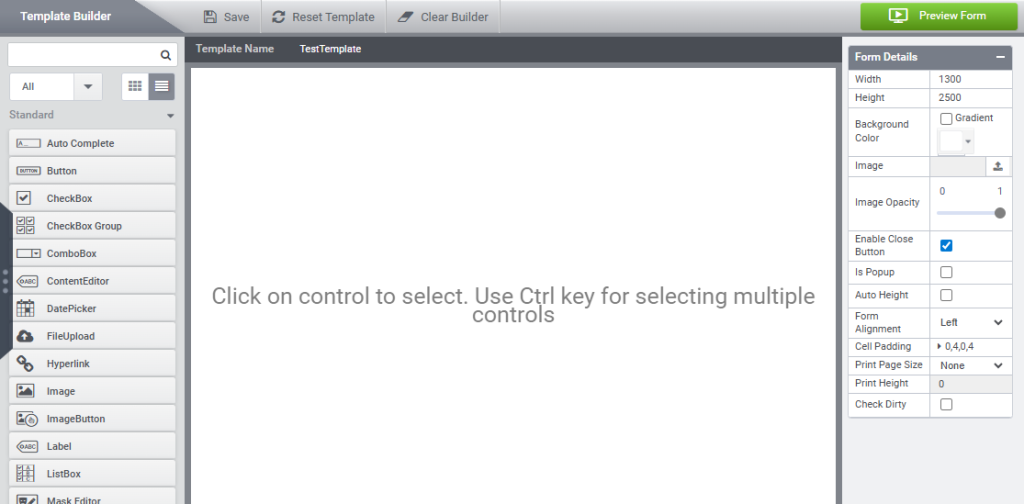
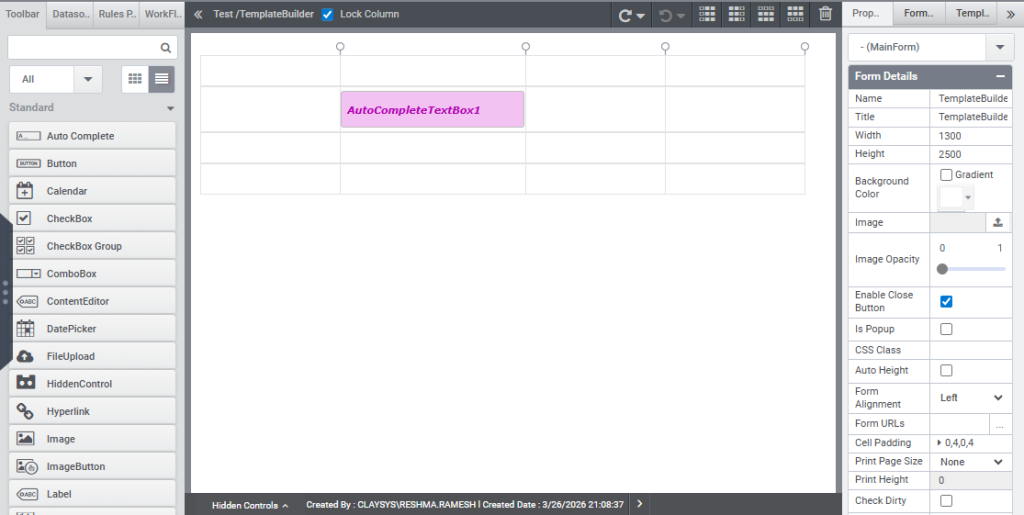
The left panel contains the control panel, the center section is the design area, and the right panel features the property panel for adding properties.
In order to design the template, Selection of control can be done by clicking on the control with Ctrl key and the control will be added in the designer area as shown in the image below.
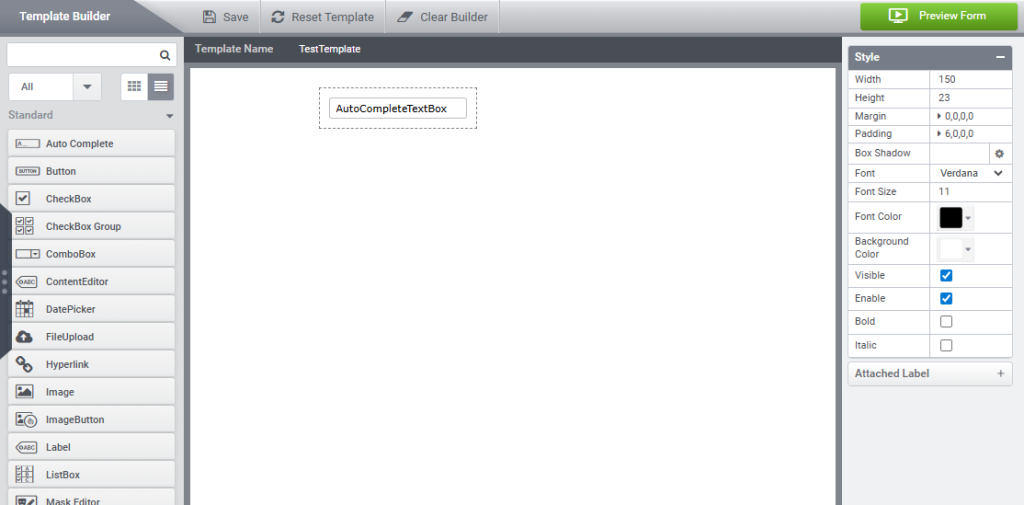
The property can be added from the property panel as shown in the image below.

After applying the styles, be sure to save the template by clicking save button as shown in the image below.

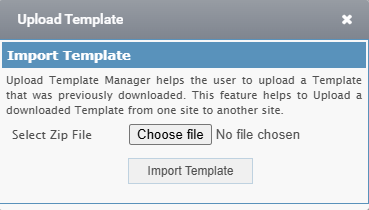
2.Upload Template:
This option lets you upload an existing template. Click on Upload Template, and the upload dialog box will appear, as shown in the image below. Select the file by clicking the Choose File button, then click Import Template to complete the upload.
3.Sample Template:
A standard Claysys form template can be created by choosing the Sample Template option.
How to apply a template to a form:
Step 1: Open the required form.
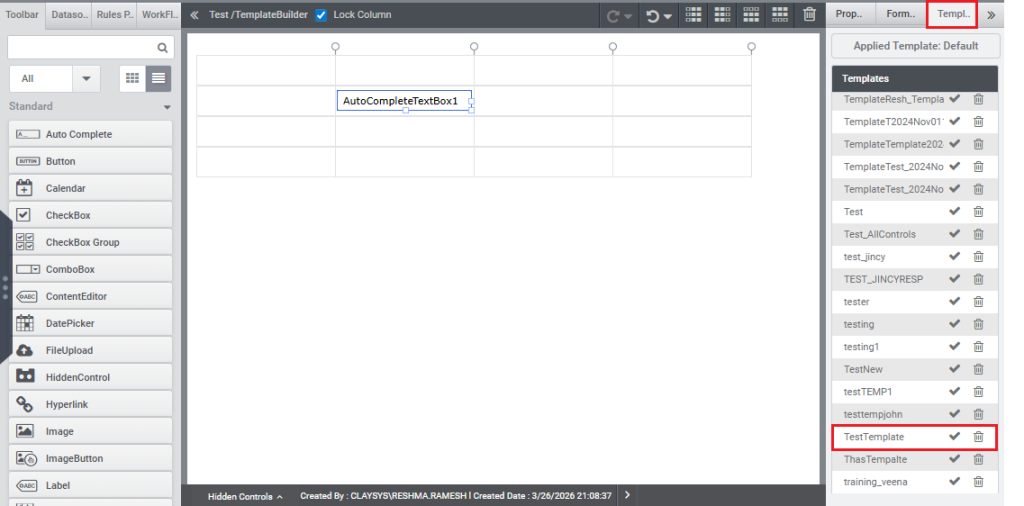
Step 2: Select the Template Tab from the Right Panel.
Step 3: Select the required Template to be applied as shown in the image below.
Step 4: Select the tick symbol corresponding to the template.
Step 5: A confirmation message box is displayed, as shown in the image below.
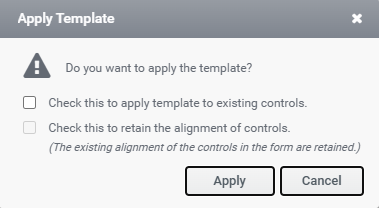
There are two options available in the confirmation message box.
- Check this to apply template to existing controls: When this checkbox is enabled, the template will be applied to the existing controls in the form.
- Check this to retain the alignment of controls: Enabling this option retains the existing alignment of the controls in the form.
Step 6: Select the required option and click the Apply button.
Step 7: The selected template will be applied to the form controls as shown in the image below.