CSS Editor
The CSS Editor and Publish feature improves styling flexibility by enabling tenant-specific customization with a user-friendly interface for creating, editing, previewing, and publishing CSS in real-time.
Key Highlights
- Custom CSS Creation:
- Users can create and manage custom CSS directly from the designer through the integrated CSS Editor.
- Styles are specific to each tenant, allowing for unique branding and layout configurations.
- User-Based Styling:
- The CSS Editor is accessible to users, enabling individuals or teams to modify styles without backend involvement.
- This empowers design and UI teams to make quick, independent updates.
- Live Preview:
- Style changes can be previewed in real time using the check-in option.
- Immediate visual feedback helps users verify changes before applying them.
- Publish Capability:
- Once finalized, styles can be published directly from the editor.
- Publishing both saves and deploys the CSS, making it instantly available in the application.
- Tenant-Specific Loading:
- Published styles are automatically applied based on tenant context.
- This ensures isolated and consistent styling for each tenant, with no impact on others.
- Force Check-In Functionality:
- Force Check-in option is displayed in the Editor Actions section only when the editor is currently open by another user.
- The previously saved data by the other user remains intact and stored in the database, and the latest content is accurately loaded and displayed in the editor after the force check-in.
- Version History: Rollback & Compare:
- A version history feature has been included to support rollback and comparison of CSS changes, enabling better tracking of updates that is particularly useful when multiple users are editing the same content.
- When changes are published, a publish history is maintained for auditing and tracking purposes.
Accessing the CSS Editor from HTML Designer
A “CSS Editor” link is available in the side navigation panel in the HTML Designer, offering quick access to the CSS editing interface.
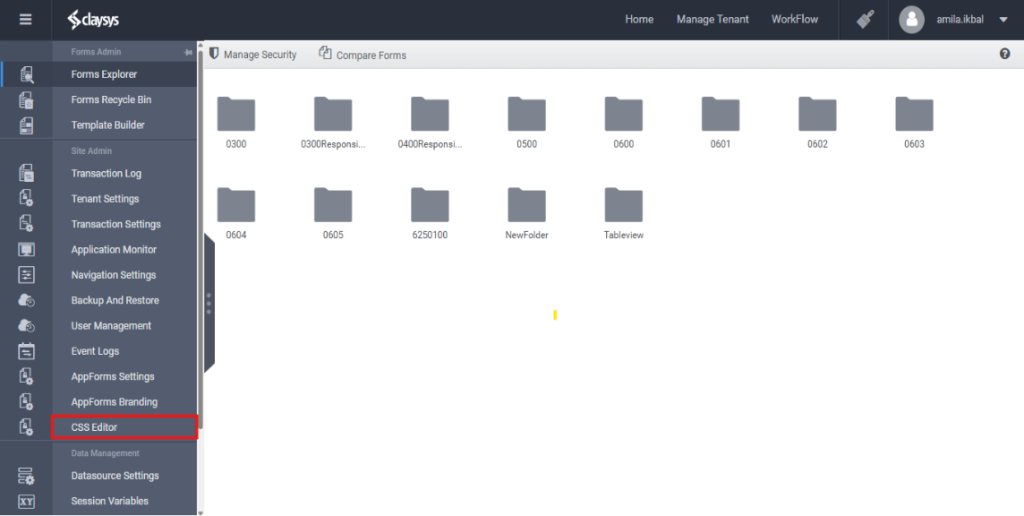
The “CSS Editor” link is in the left-hand navigation panel of the HTML Designer. Clicking this link directs users to a dedicated CSS Editor page, which is tenant-specific, ensuring that styles are both isolated and customizable for each tenant. From this page, users can create, edit, and preview custom styles tailored to the selected tenant.
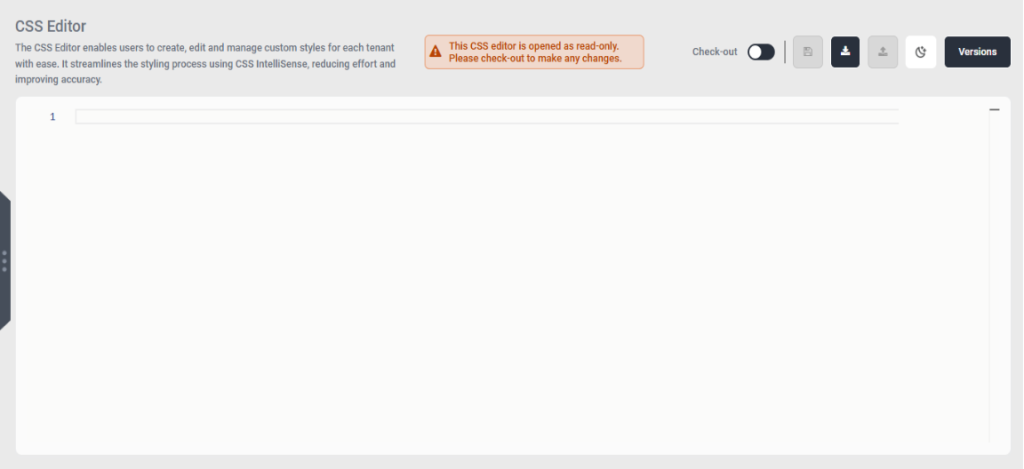
The CSS Editor page offers multiple options to edit and manage tenant-specific styles. To ensure proper version control and prevent conflicts, the editor follows a checkout mechanism. Here’s a breakdown of the options and workflow:
Checkout and Edit Mechanism
- Checkout the Editor:
- To begin editing, the user must first check-out the editor. This action locks the file for editing, ensuring that only one user can edit the file at a time.
- Once checked out, the user gains exclusive access to modify the CSS file.
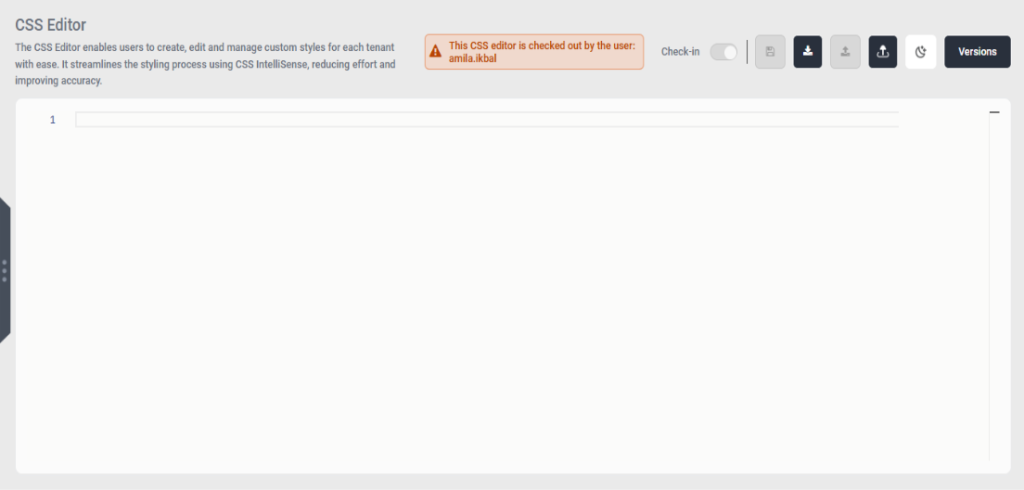
- Editing the CSS File:
- After checking out the file, the user can freely edit the CSS as required.
- The editor provides an interface for making both minor and major style changes to the tenant-specific CSS file.
Available Actions
- Save:
- The Save option stores the current changes locally in the editor as well as to the DB but does not yet publish or deploy them to the application.
- Download:
- The Download option allows the user to download the current CSS file to their local machine for backup or further use.
- Upload:
- The Upload option allows the user to upload the CSS files.
- Dark Mode:
- The CSS Editor loads with the light theme by default, and users can switch to dark mode when needed
- Force Check-In:
- Ensure that the “Force Check-in” option appears in the Editor Actions section only when the editor is currently open by another user.
- This condition prevents unnecessary check-ins and ensures proper coordination when multiple users access the editor.
- Versions:
- On clicking the “Versions” button in the editor, a Version History window appears, displaying all available saved versions. A new version is added to the editor’s version history with each edit and check-in; however, no version is created if the editor is checked in without any modifications.
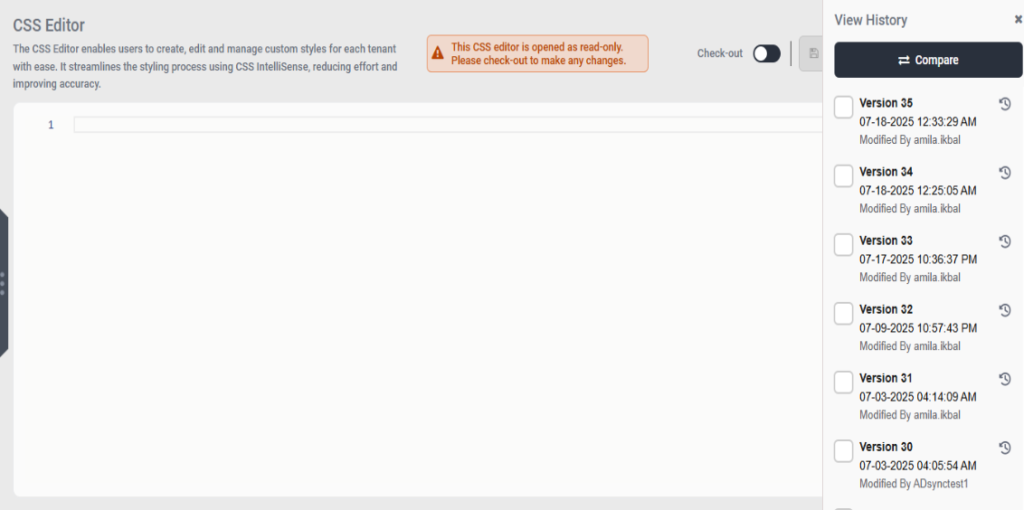
- The user can roll back to any previous version by clicking the rollback option available in the version history.
- When two versions are selected from the version history and the Compare option is clicked, a Comparison window opens displaying the differences between the selected versions clearly highlighted.
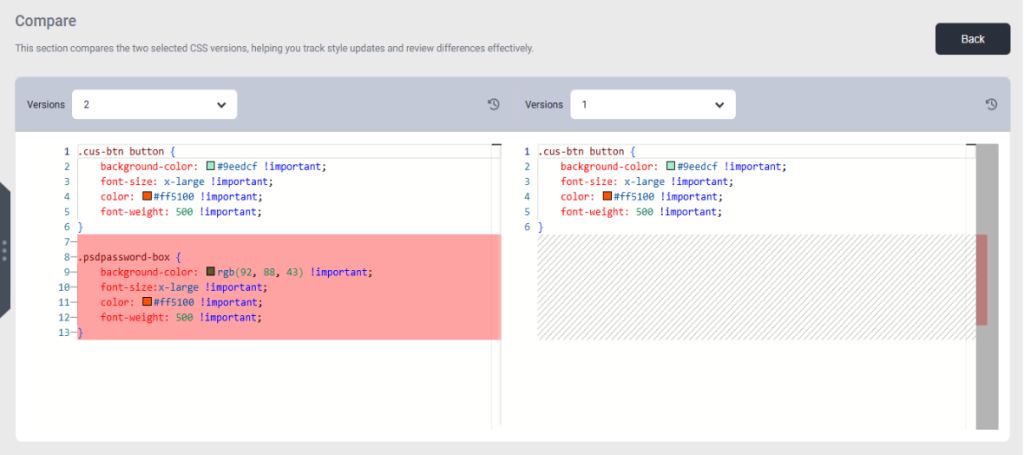
- The Compare functionality works only when exactly two versions are selected, and it remains disabled if fewer or more versions are chosen to prevent invalid comparisons.
- Use the Rollback option and the Version Change ComboBox to switch between versions and restore any previous version if needed.
Live Changes in Preview or Webpart
The CSS Editor includes a Live Preview feature that allows users to see changes in real time as they edit, dynamically updating the styled form or control within the same browser without needing a page reload.
How the Live Preview Works
- CSS Class Updates:
- When a user adds or modifies a CSS class in the editor, the changes are applied directly to the control or form on the page.
- The live preview displays the updated styling in the same browser, reflecting the changes immediately as they are made.
- Real-Time Changes After Checkout or Publish:
- Once the user checks out the CSS, the changes are instantly triggered in the live form view.
- There is no need to reload the page—the form updates automatically to reflect the latest CSS modifications.
- Seamless Experience:
- The Live Preview feature ensures a seamless and immediate visual feedback loop, allowing users to fine-tune styles and see their effects in real-time without interrupting the workflow.
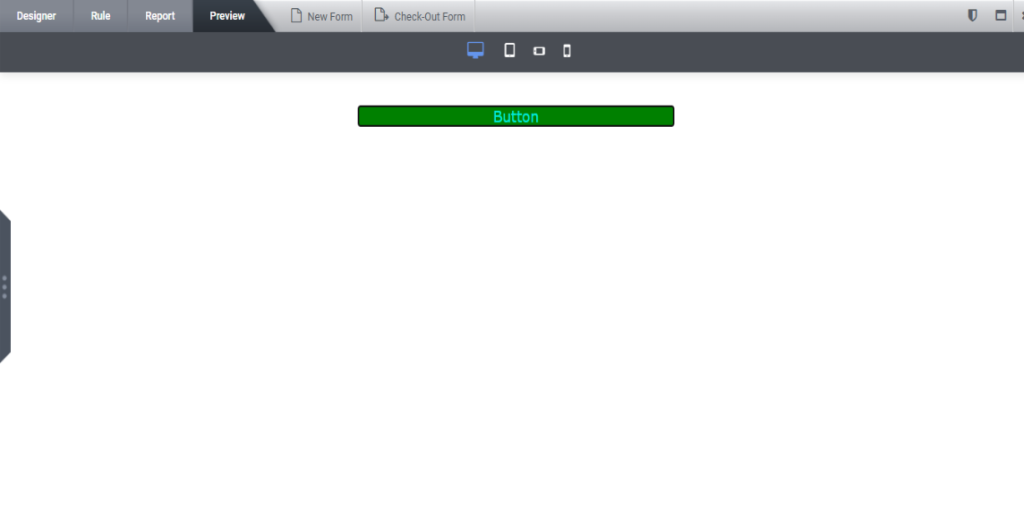
Example: Styling a Button Using the CSS Editor
How to Use the CSS Editor
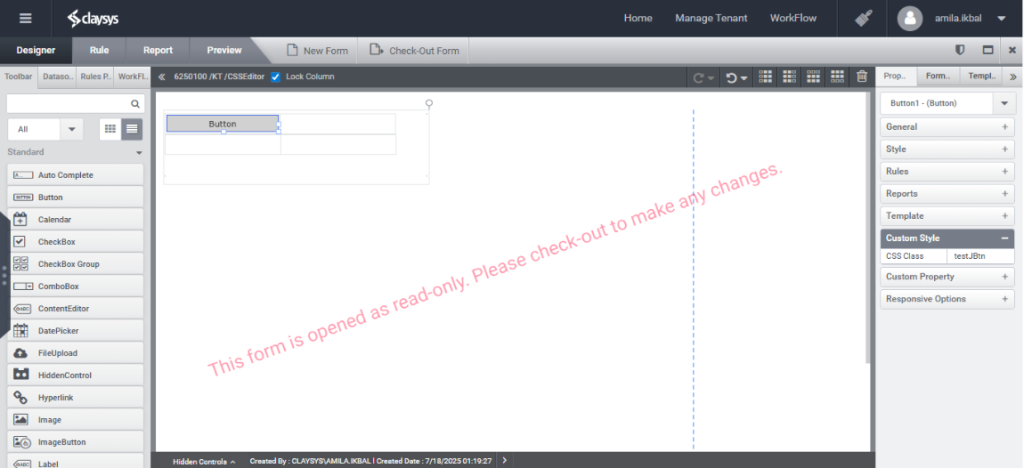
- Create a Form and Add a Button:
- In the HTML Designer, create a new form and add a button control to it.
b. In the form’s Custom Style panel, assign a unique class name to the button.
(e.g., .testJBtn).
- Save and Open the Form in a New Tab:
- Save the changes and open the form in a separate browser tab to test and verify the button’s initial appearance.
- Navigate to the CSS Editor:
- In the HTML Designer’s side navigation, click the CSS Editor link to open the CSS Editor page.
- Checkout the Editor:
- In the CSS Editor page, click Check-out to lock the file and enable editing.
- Style the Button:
- In the CSS Editor, add the following CSS code to style the button using the class you created (.testJBtn):
.testJBtn button {
color: rgb(0, 234, 218) !important;
background-color: green !important;
font-size: large !important;
}
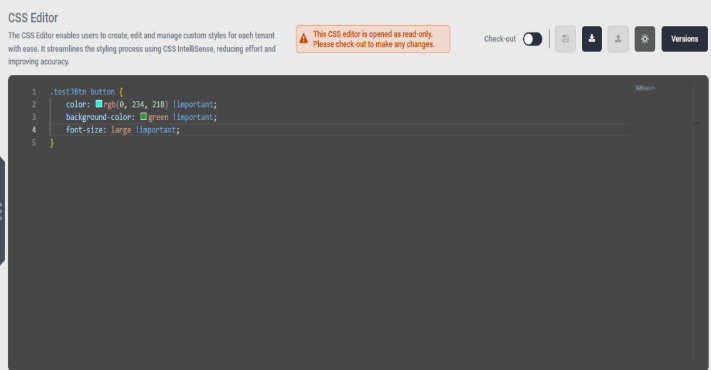
- The button will now have the specified styles, including cyan text, green background, and large font size.
- Click Check-in:
- After applying styles, perform a Check-in in the CSS Editor.
- The CSS file is saved to the database and deployed to the site, making the changes live.
- View the Updated Button Style:
- Return to the form previously opened in the new tab to observe that the button’s style has been updated based on the applied changes.
- The updated button style is applied instantly after check-in, with no need to reload the page, as the changes take effect immediately.