Grant Permissions
In AppForms, the Grant Permission feature enables administrators to control access to forms and their components based on user roles or groups. This functionality ensures that the right users have the appropriate level of access, helping maintain data security and streamline user experiences across applications.
Permission can be given for Tenant and Form.
1.Grant Permission for Tenant
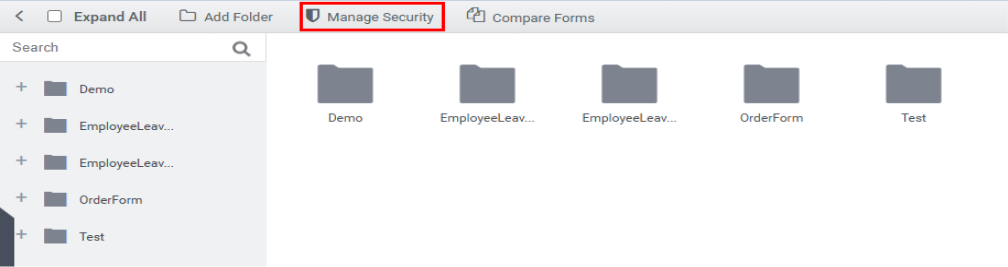
Select Manage Security option from the top bar in Form Explorer as shown in the image below.
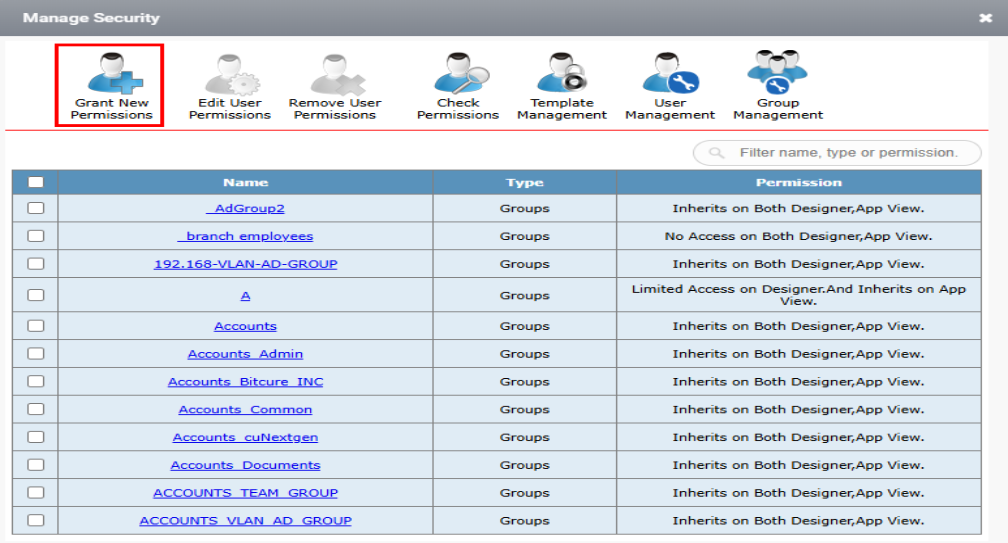
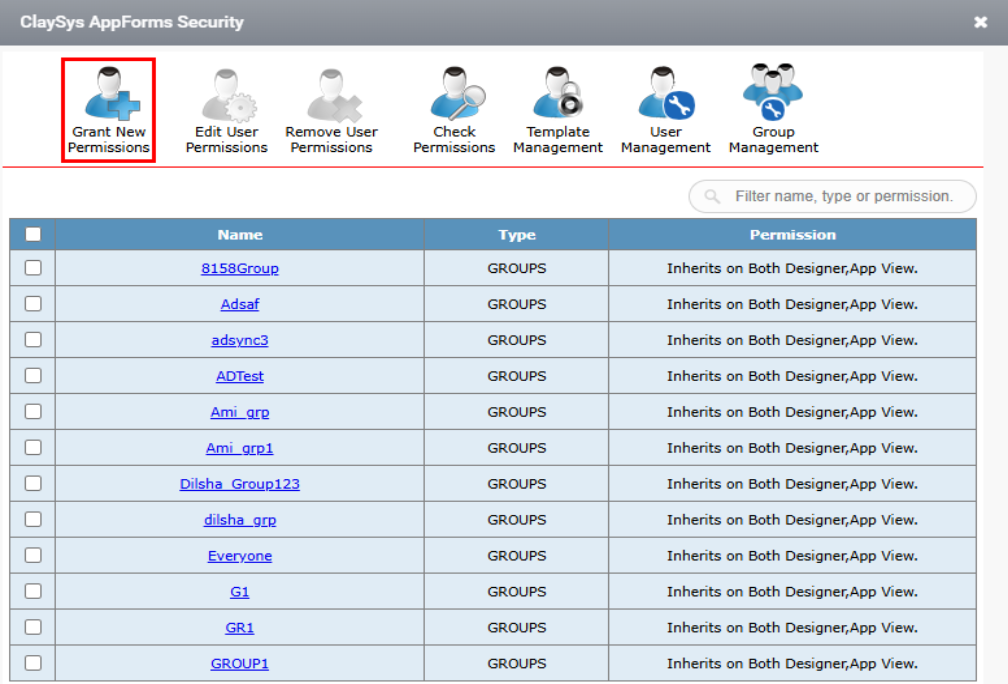
The Manage Security window appears, Select Grant Permission option as shown in the image below.
A message box appears stating that existing permissions for the selected users will be removed, as shown in the image below. Click OK to proceed.
The following page is displayed, as shown in the image below.

Select User: Enter the user(s) for whom you want to assign permissions in this field. You can select users using the book icon, and multiple users can be added by separating them with semicolons.
Tenant Level permission can be set for Designer and Webpart.
Both Designer and App view (Webpart) can be set in three different permissions.
- Full Access
- No Access
- Restricted Access
1.Full Access
The Full Access permission level grants a user or group complete access to all forms within a specific tenant. This includes the ability to view, read, submit, modify, and manage all form data and configurations.
Assigning Full Access is typically reserved for administrators or users who require unrestricted control over forms and related operations within the tenant.
To grant Full Access, select the user from the Select Users field, enable the Full Access option next to the corresponding tenant, and click the Save button in the Manage Security window, as shown in the image below.
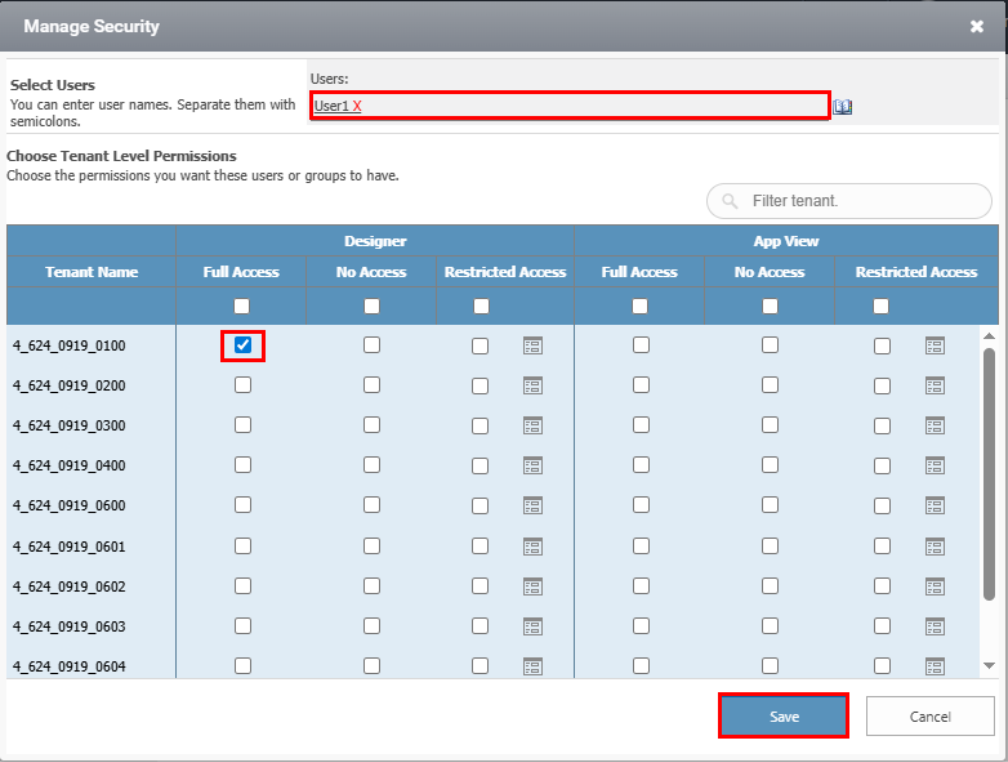
Full access will be granted to the User1 for the specified tenant. This means the user will have permission to view, read, submit, modify, and manage all form data and configurations.
2.No Access
The No Access permission level is used to explicitly restrict a user or group from accessing any forms or data within a specific tenant. When this permission is applied, the selected user will be unable to view, read, or interact with any content associated with that tenant.
This setting is useful for enforcing strict access control and ensuring that sensitive or irrelevant information remains hidden from unauthorized users.
To grant No Access, select the user from the Select Users field, enable the No Access option next to the corresponding tenant, and click the Save button in the Manage Security window, as shown in the image below.
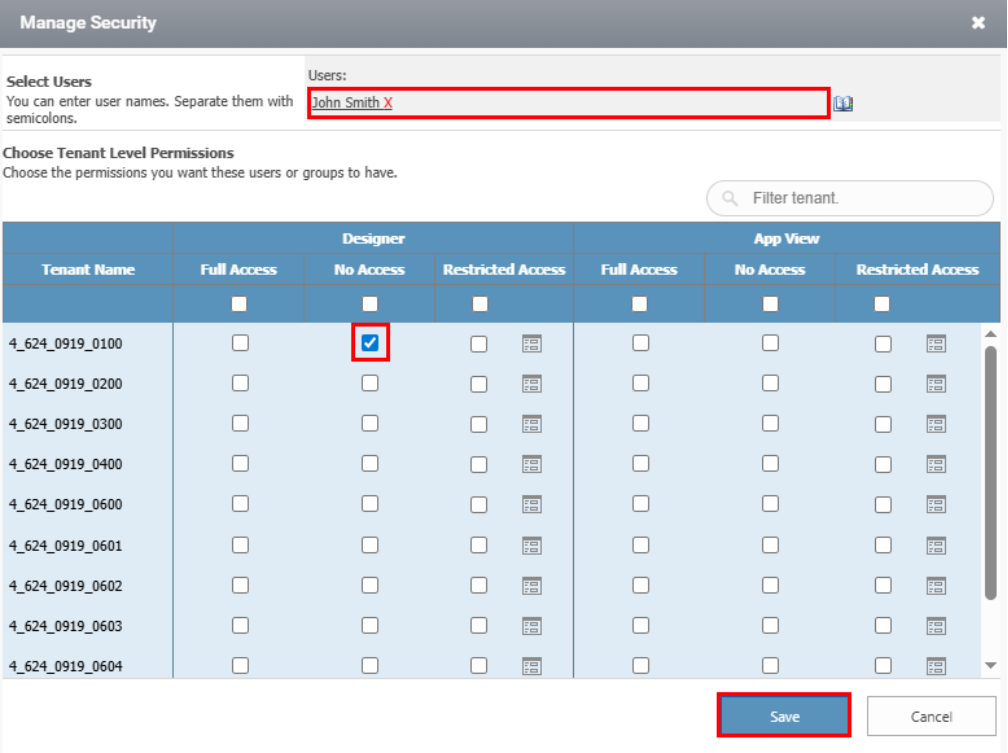
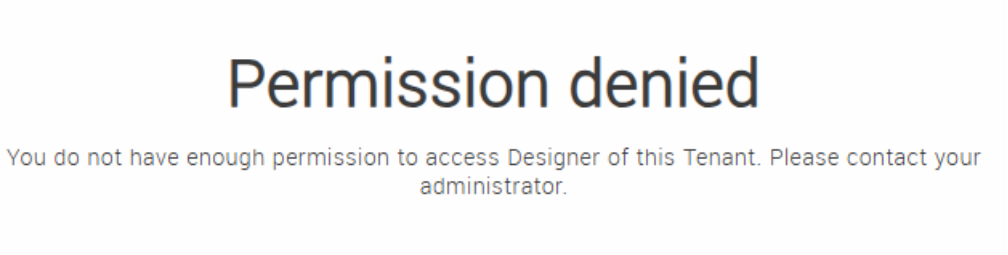
Now, when the user John Smith attempts to access the tenant, a Permission Denied message will be displayed on the page, as shown in the image below.
3.Restricted Access
The Restricted Access permission level allows users to access only specific forms or functionality within a tenant. Unlike Full Access, users with Restricted Access can view or interact with only the items explicitly assigned to them.
This level of access is ideal for scenarios where users should have limited visibility and control based on their role, responsibilities, or department, helping enforce data security and reduce clutter in the user interface.
To grant Restricted Access, select the user from the Select Users field, enable the Restricted Access option next to the relevant tenant, and click the form icon to configure form-level access, as shown in the image below.

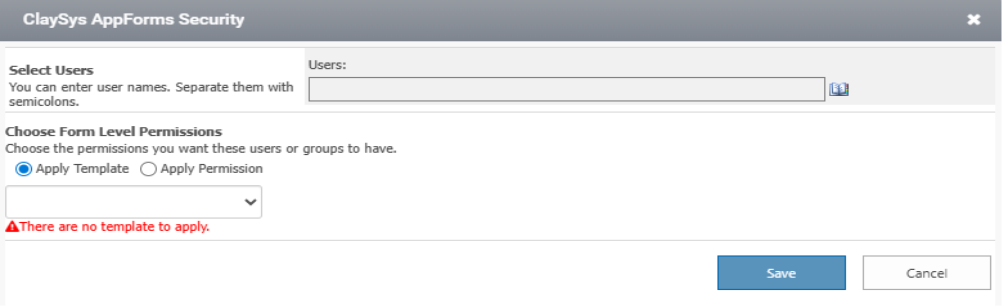
Another popup appears Select the user as shown in the image below,
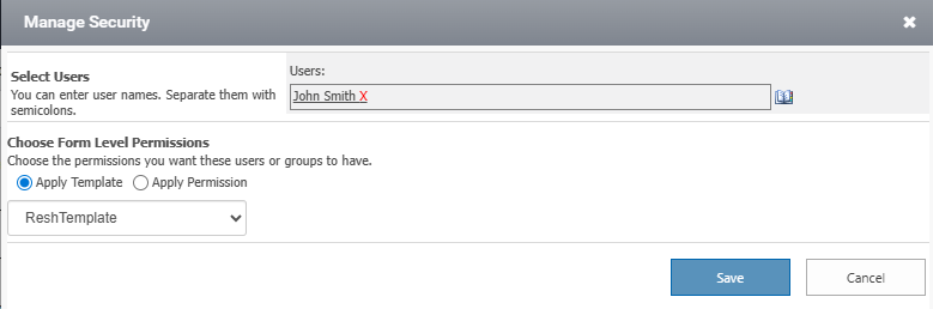
Form Level Permission can be set through two options.
- Apply Template
Users/groups have the Template permissions (Templates are explained in Template management).
- Apply Permission
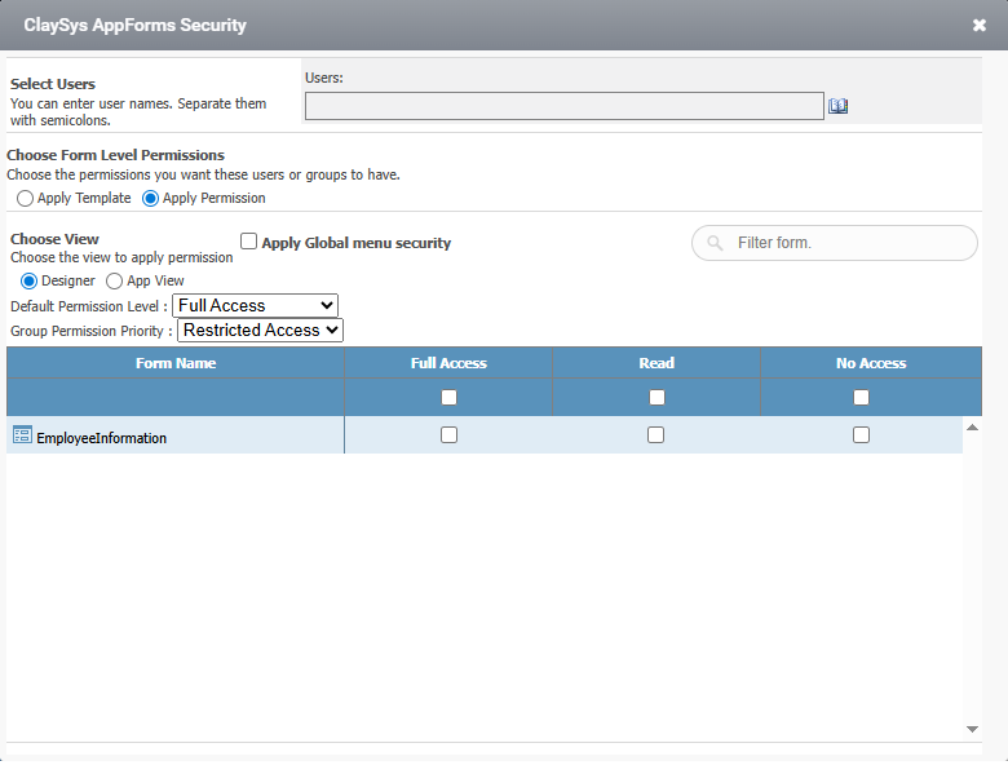
Select Apply Permission option, list of forms and available permissions will appear as shown in the image below.
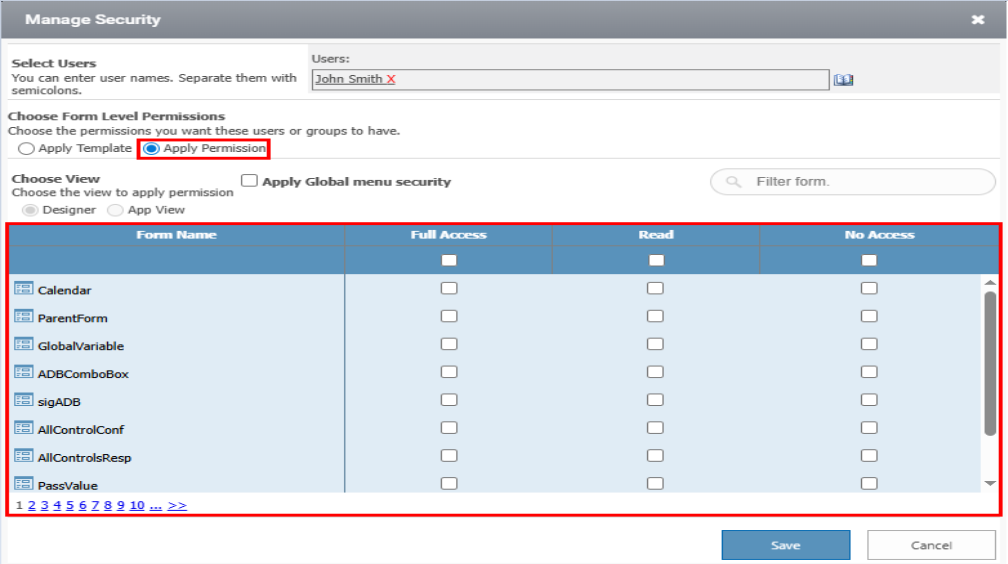
- Full Access – Users or groups have complete permission for the selected form, including viewing, editing, and submitting.
- Read – Users or groups have permission only to view the selected form; no edits or submissions are allowed as shown in the image below.
- No Access – Users or groups have no permission to access the selected form; it will not be visible to them.
2.Grant Permission for Form
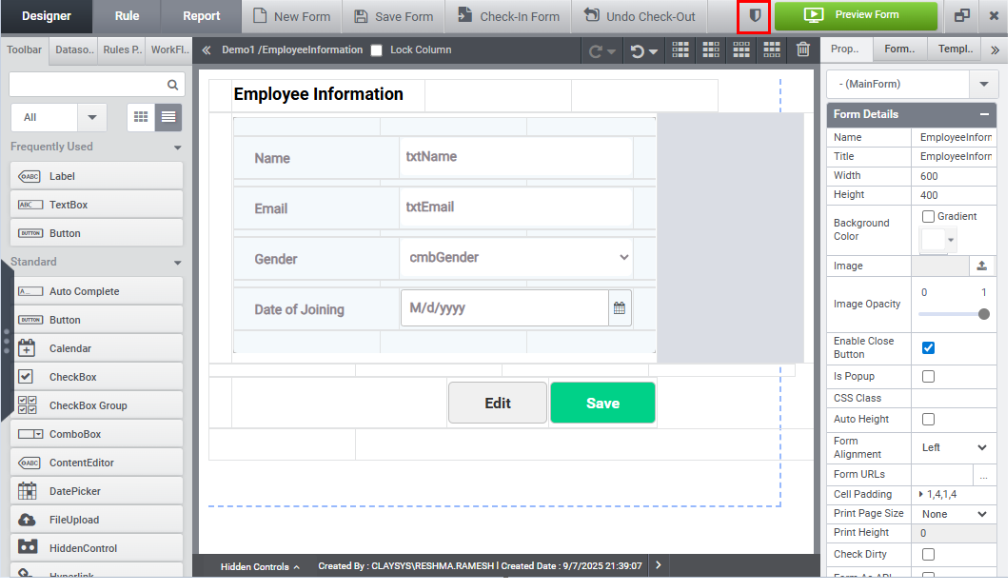
Select manage security icon from the required form as shown in the image below.
Claysys Appforms Security window appears. Select Grant Permission option as shown in the image below.
A message box appears stating that existing permissions for the selected users will be removed, as shown in the image below. Click OK to proceed.
The following page is displayed, as shown in the image below.
Select User: Enter the user(s) for whom you want to assign permissions in this field. You can select users using the book icon, and multiple users can be added by separating them with semicolons.
Form Level Permission can be set through two options.
- Apply Template
Users/groups have the Template permissions (Templates are explained in Template management).
- Apply Permission
Select Apply Permission option, two types of view will be displayed as Designer and Appview
The Table display Form Name, Permission as shown in the image below.
Note: Designer Level permission can be applied only for users with role Designer.
Select App view option to set permission for Webpart.
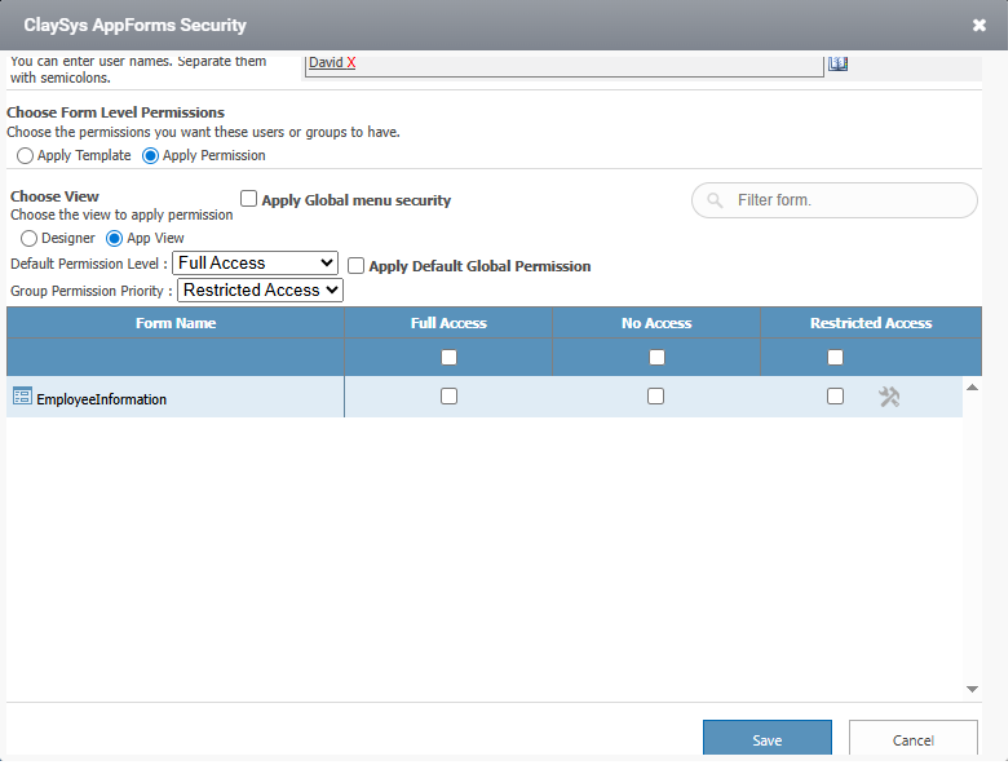
Full Access – The user or group has complete access to the selected form, including viewing, editing, and submitting.
No Access – The user or group is not allowed to access the selected form at all. When the user opens the form in the web part, a “Permission Denied” message is displayed on the page, as shown in the image below.

Restricted Access – The user or group has limited access to the selected form, based on specific permissions.
On enabling Restricted Access, the tools icon will be enabled as shown in the image below.
When you click the Tools icon, a page appears displaying all the controls in the form, along with the corresponding permissions for each control.
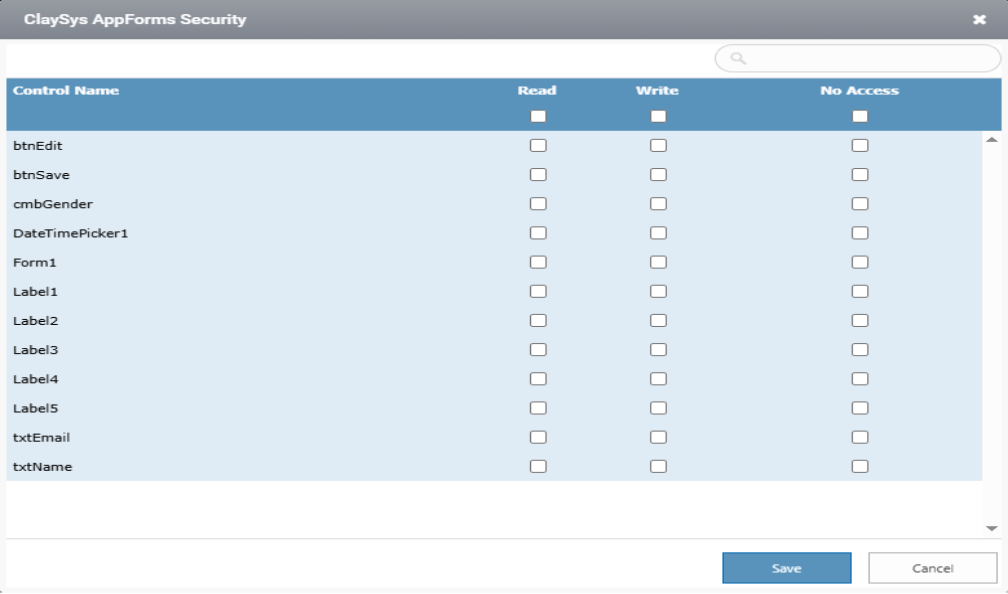
Read – Users or groups are granted permission to view only the selected control.
Select read permission for all controls and click Save button as shown in the image below.

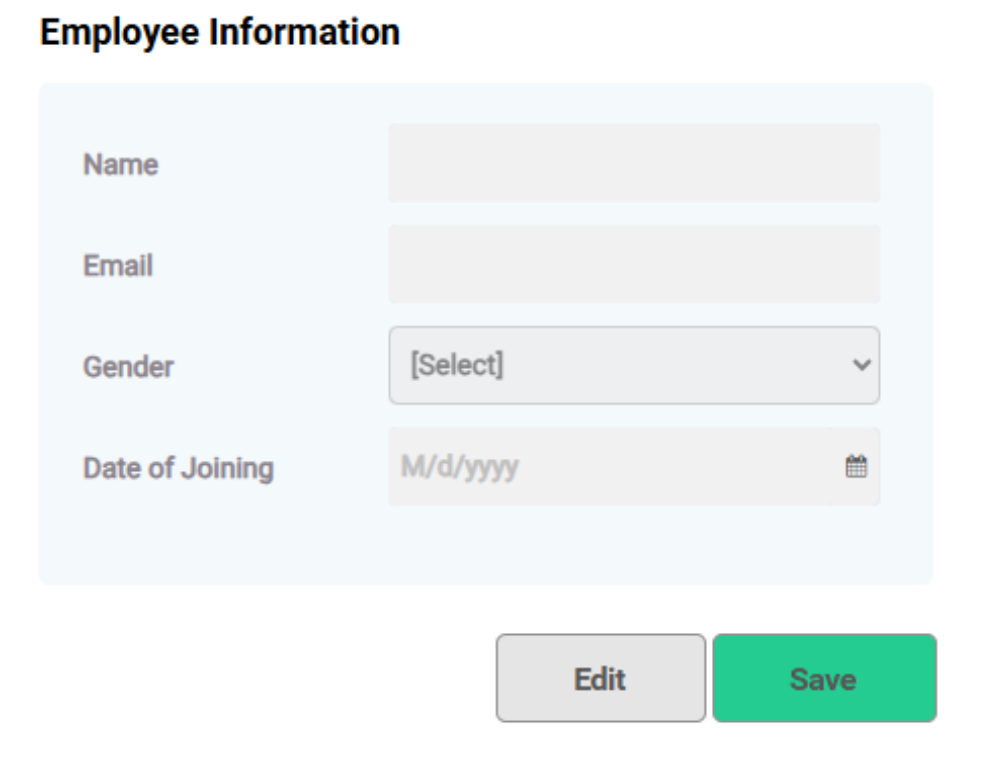
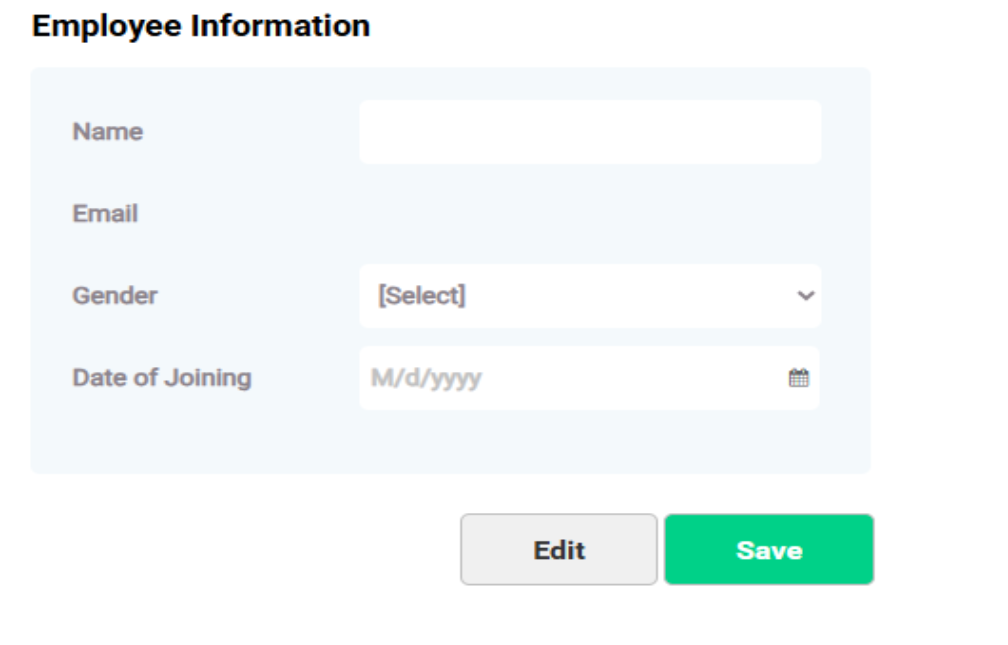
When the user accesses the form, the controls will be in readable format that means the controls will be masked as illustrated in the image below.
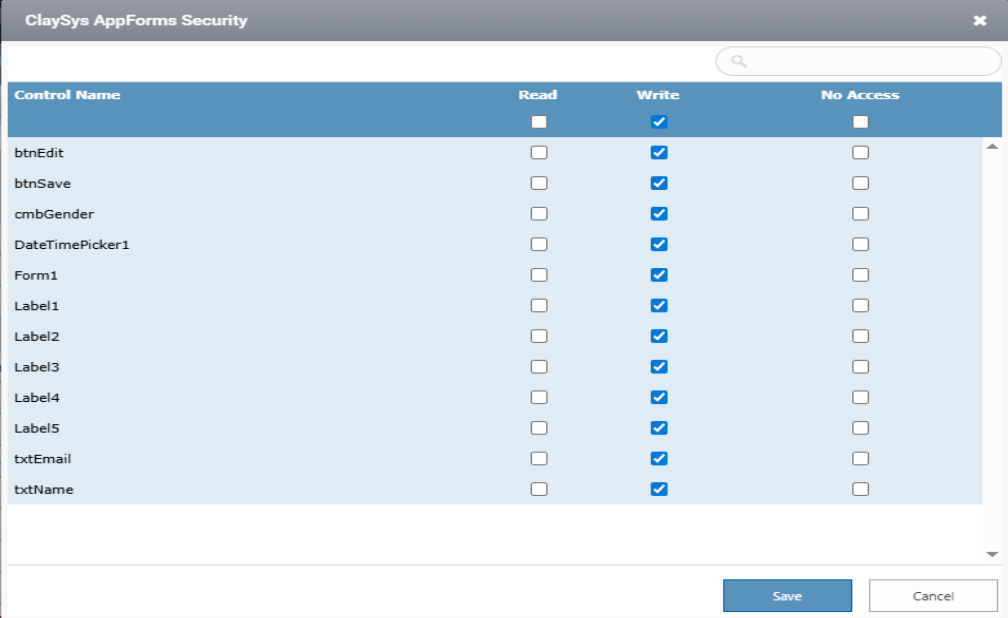
Write – Users or groups are allowed to modify the selected control.
Select write permission for all controls and click Save button as shown in the image below.
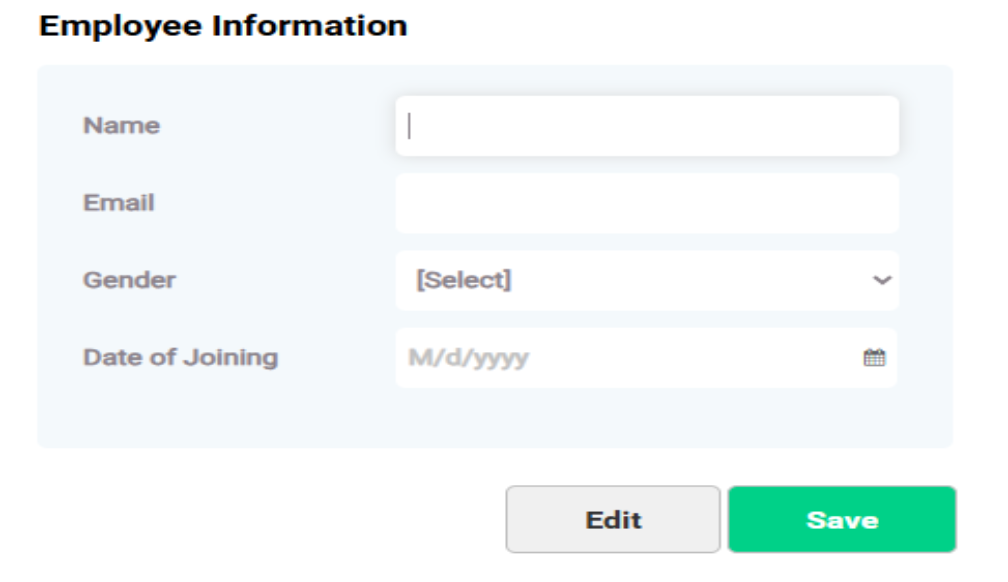
When the user accesses the form, the controls will get access to edit the controls in the form as shown in the image below.
No Access – Users or groups have no permission to access the selected control. The control will be hidden from view.
Select no access permission for any controls and click Save button as shown in the image below.
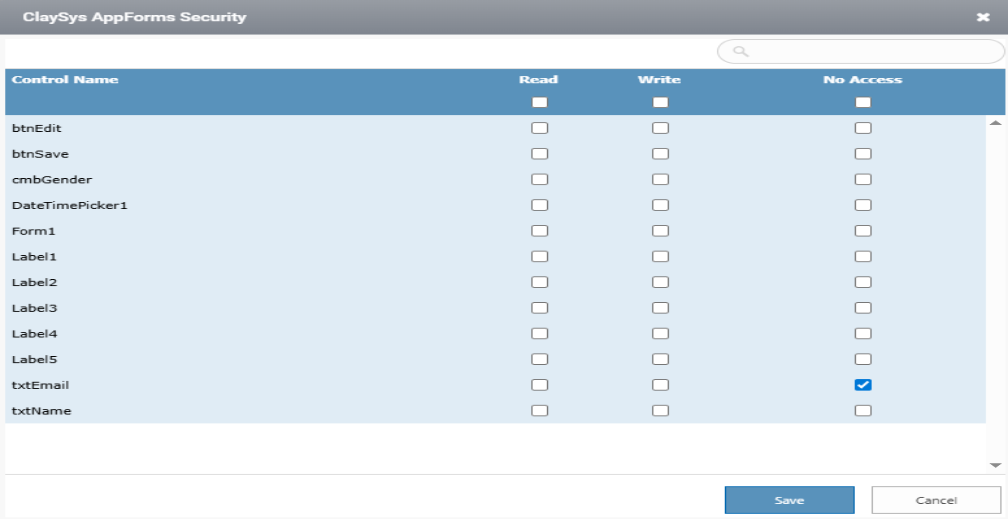
When the user accesses the form, the controls will not be visible as shown in the image below.
There are two levels of permission as shown in the image below.
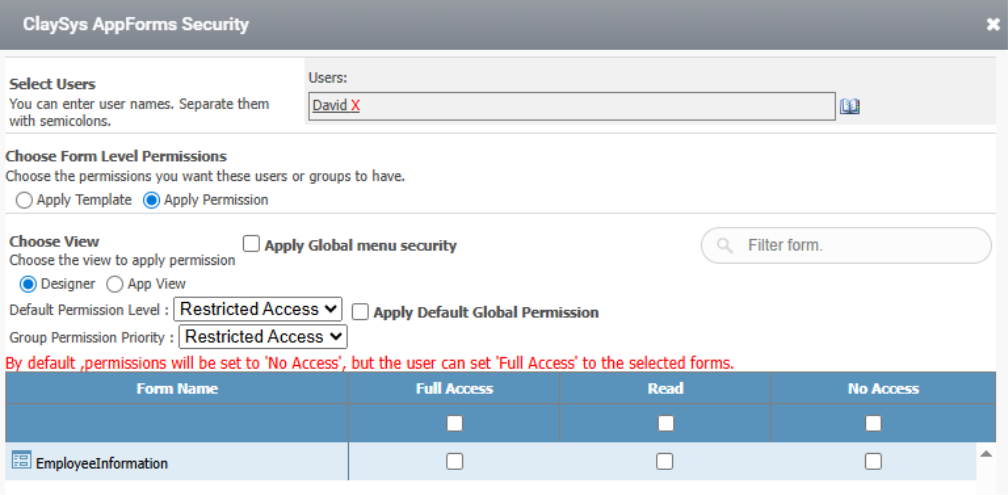
Default Permission Level – By default, Permissions will be set toNo Access, but the user can set Full Access to the selected forms.
Group Permission Priority -By default, the lowest privilege for group permissions will be considered when setting permissions for form, but the user can change the highest privilege for the selected tenant.
Apply Global Menu Security
Selecting the Apply Global Menu Security option ensures that the security settings configured for the form are also applied to its corresponding item in the global menu (if the form is part of a global menu node).
Apply Global Menu security is shown in the image below.
