Creating and Managing List Form in SharePoint
SharePoint Lists include default forms for viewing, editing, and creating entries. With AppForms, you can replace these default forms with fully customized forms. You can also auto-generate forms for any list or library within your SharePoint site using AppForms.
Below are the steps to generate list forms using AppForms.
1. Creation of List Forms
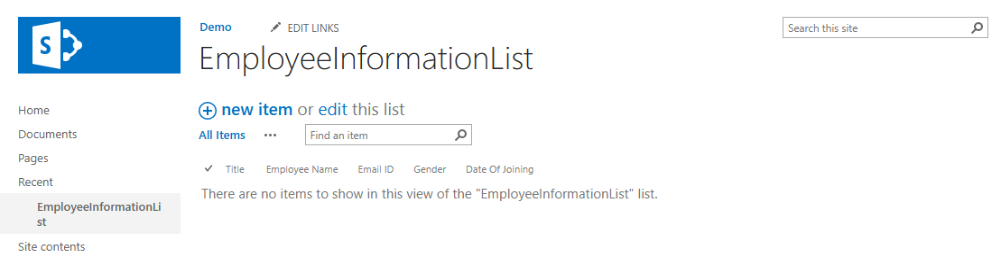
- Open the list you want to convert into ListForms as shown in the image below.
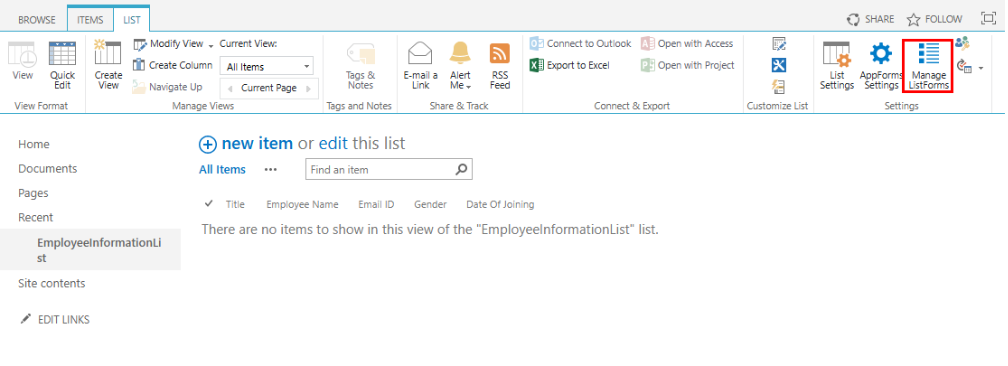
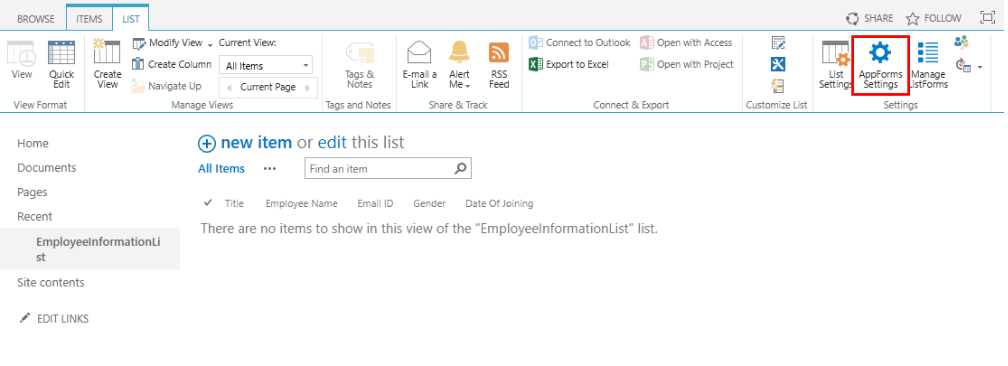
- Click the “List” tab, then select the “Manage ListForms” option from the top menu, as shown in the image below.
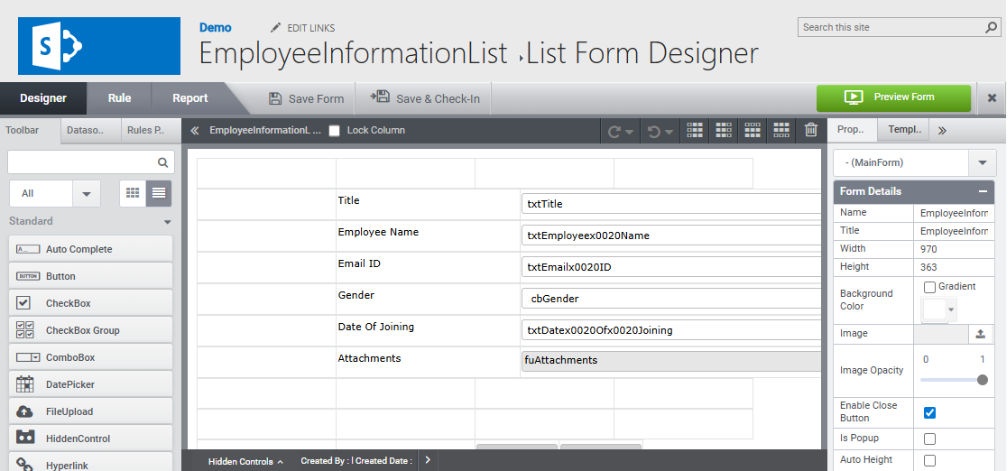
Now the user will be automatically redirected to the designer.
- A list form will be automatically generated in the designer based on the newly created list (‘Employee Information List’) as shown below.
2. Edit List Form
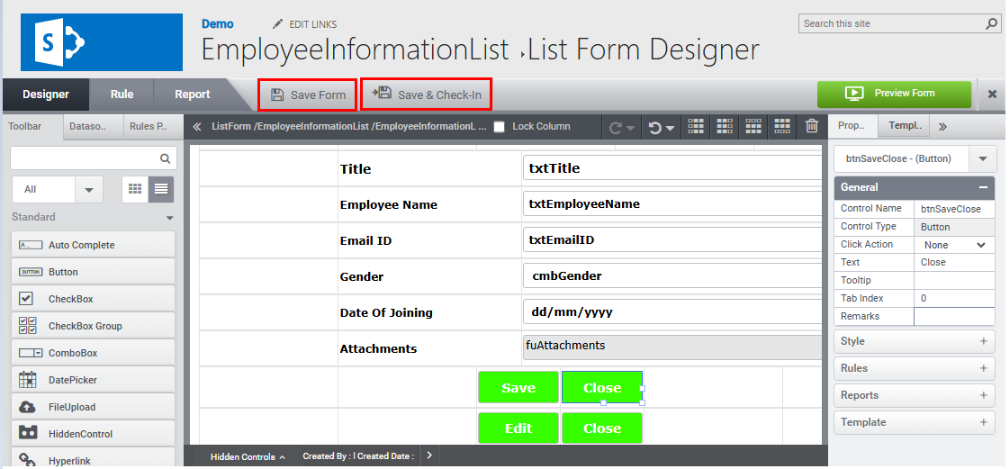
- Modify the list form as needed as shown in the image below.
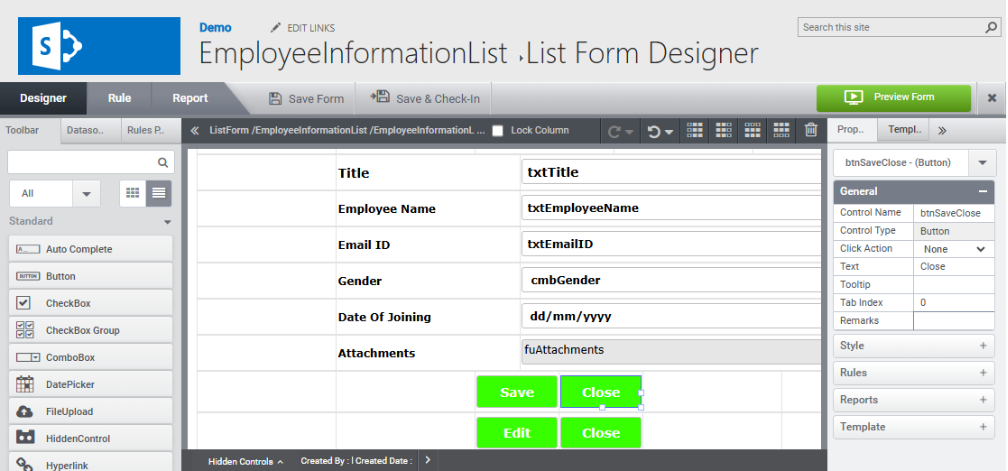
- Click the ‘Save Form’ button to save your changes.
- To save and check in the form, click the ‘Save & Check-In’ button.
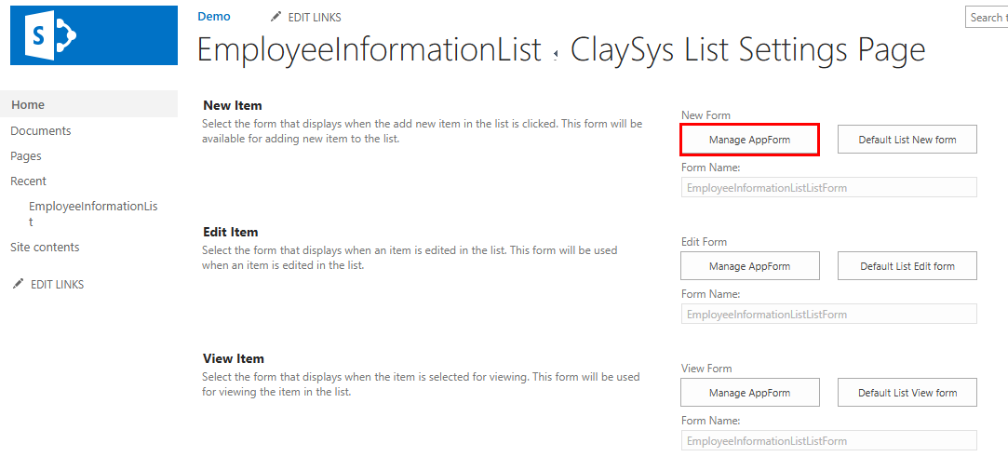
Click on the Appform Settings option as shown in the image below.
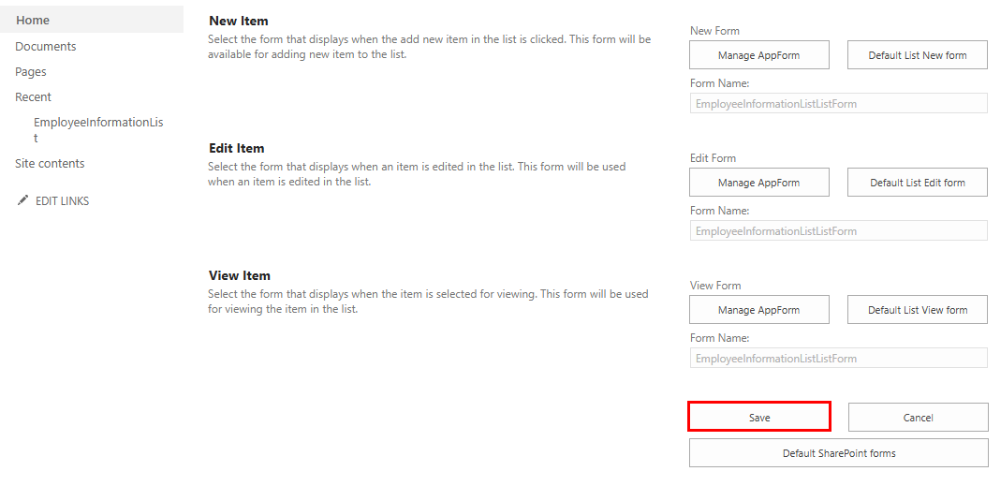
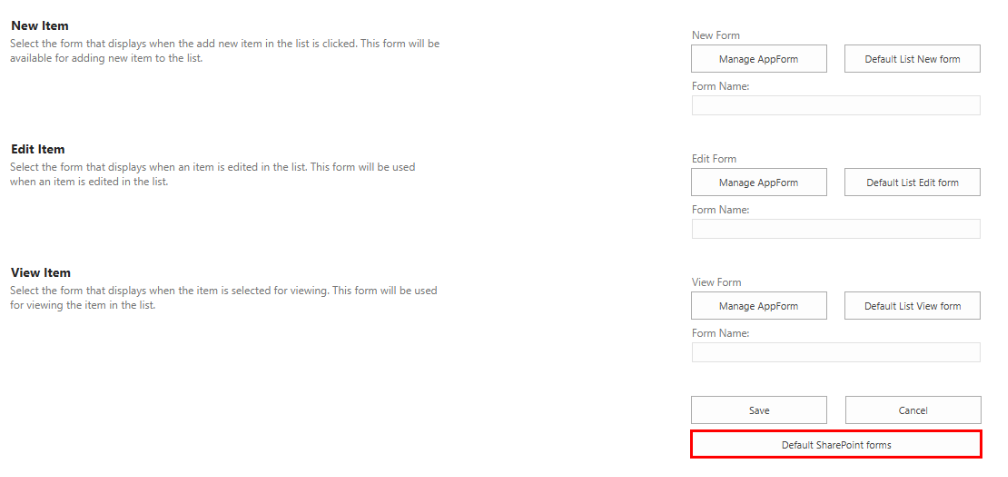
The Claysys List Settings page will appear, as shown in the image below
- In AppForms Settings, you can manage the New Item, Edit Item, and View Item forms of a list.
- After ‘Check –In ‘the ListForm, by default the ListForm gets added to ‘New Item’, ’Edit Item’ and ‘View Item’ of the list.
3. New Item, Edit Item, View Item buttons of List
a) New Item
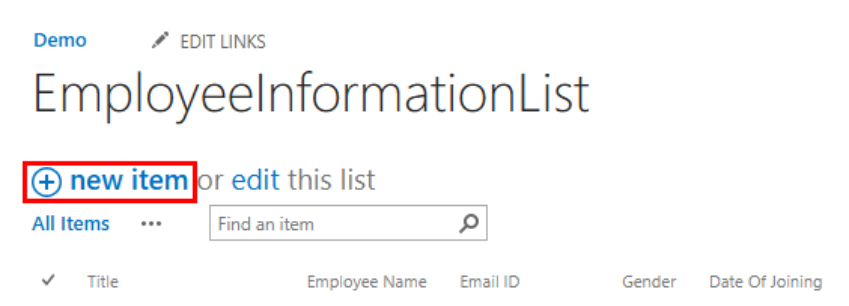
- Click on the ‘New Item ‘button as shown in the image below.
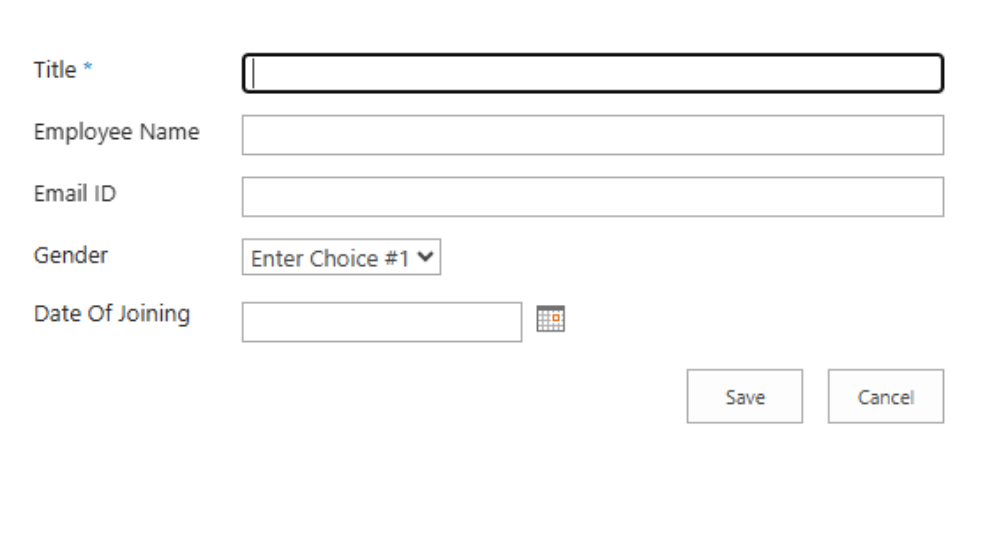
ListForm opens as shown below.
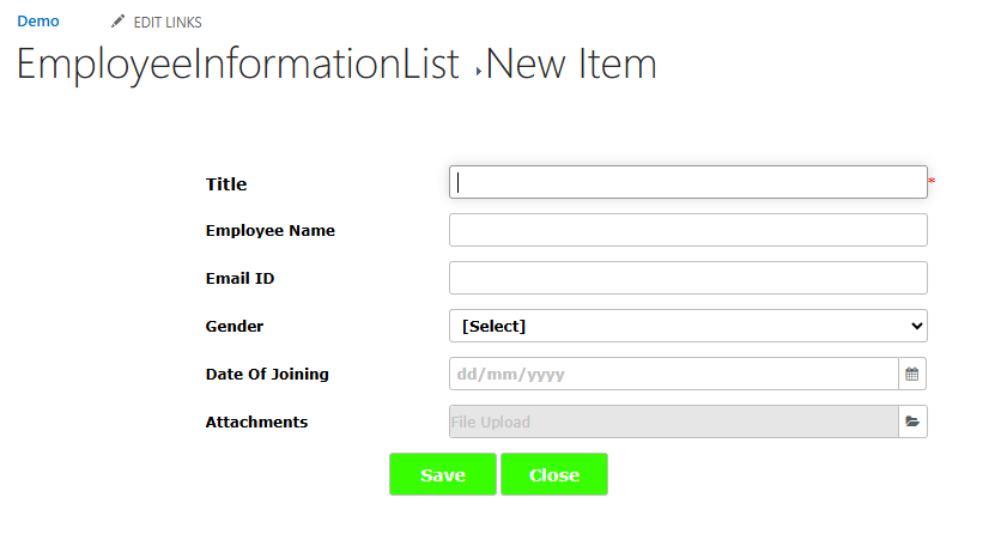
Fill in the necessary details in the fields and click the Save button to add the item to the listform as illustrated in the image below.
b) Edit Item
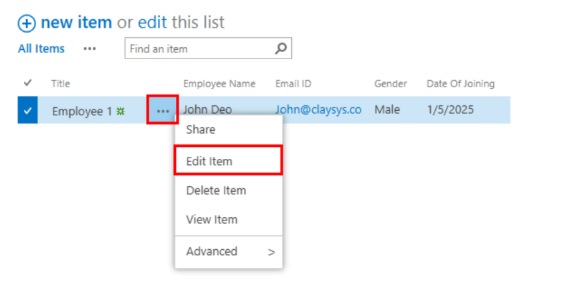
- Click the three dots next to the item you want to edit, as shown in the image below.
The form opens as shown below.

- Make the necessary changes (e.g., update the Email ID), as shown in the image below.
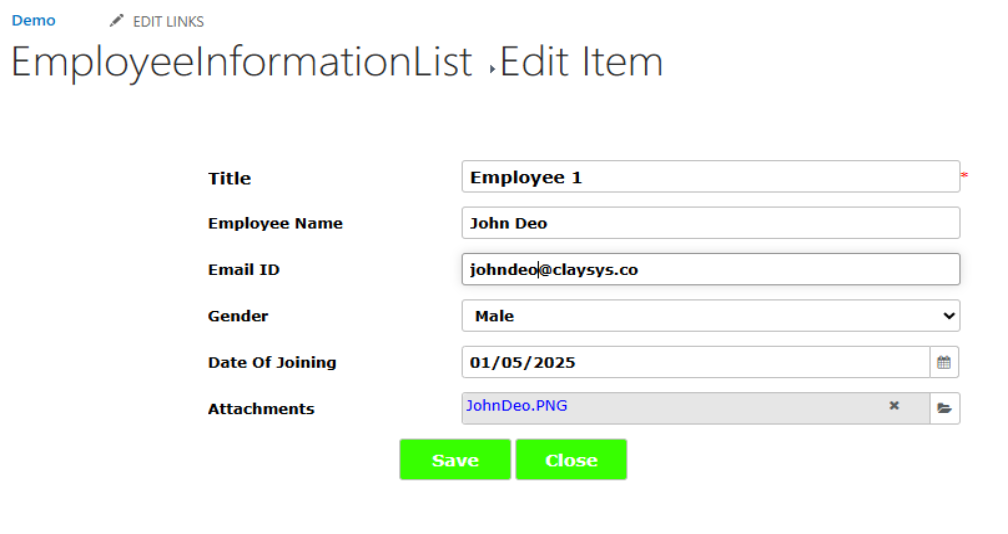
- Click the save button.
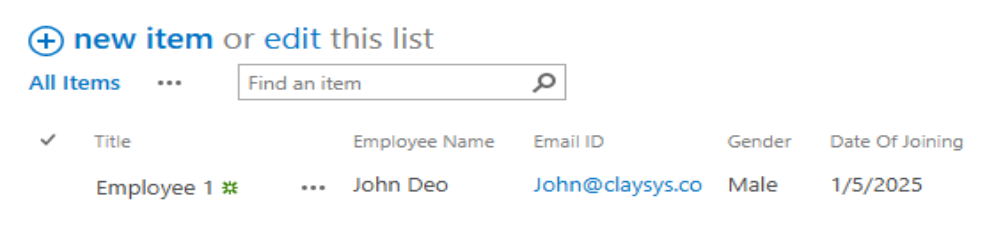
The item will be updated in the list as shown in the image below.
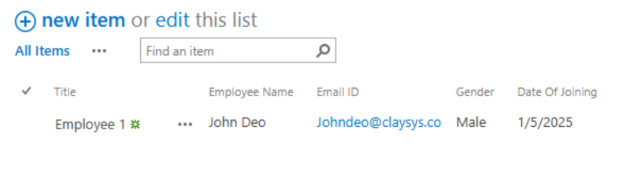
c) View Item
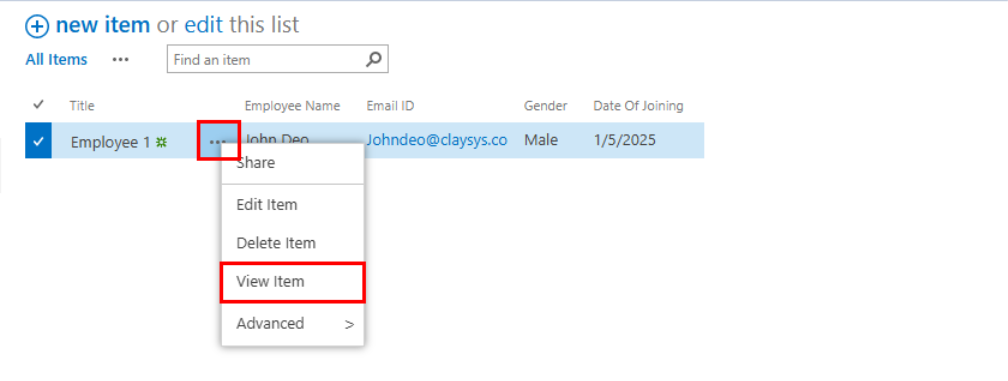
- Select the required item to be viewed and click three dots and select View Item option from the list as shown in the image below.
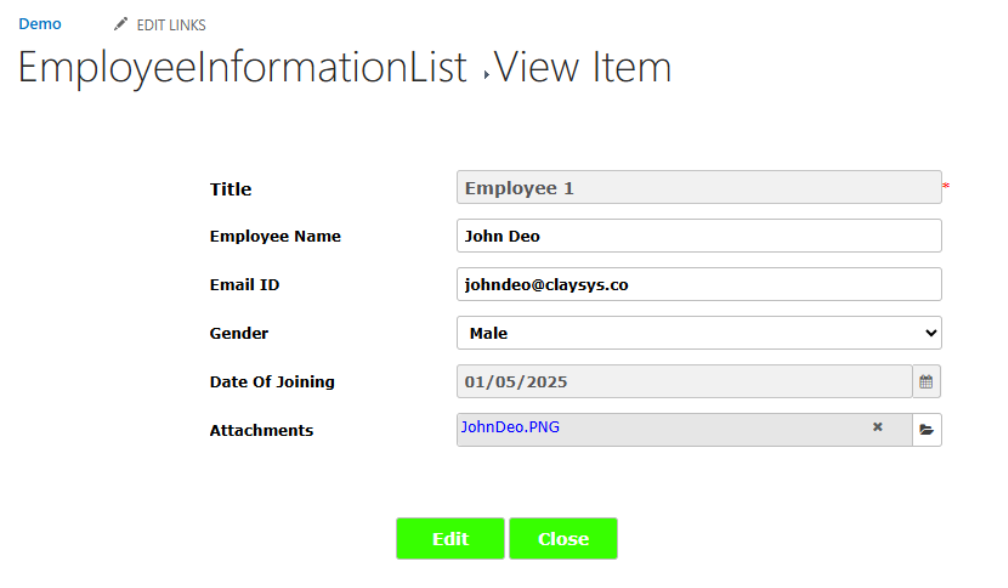
The item will be viewed as shown in the image below.
4. Configuration of form in New Item, Edit Item and View Item button
Let’s explore how to configure the New Item, Edit item and View Item buttons as shown in the image below.
a) Configure ‘New Item’ button with an ‘AppForms’ form
To configure a form for the ‘New Item’ button in the list, click the ‘Manage AppForm’ button, as shown in the image below.
- A ‘Form Selection’ window will appear.
- This window displays only the forms that have been published.
- Choose the desired published form from the available sub-sites, then click the ‘Select’ button.
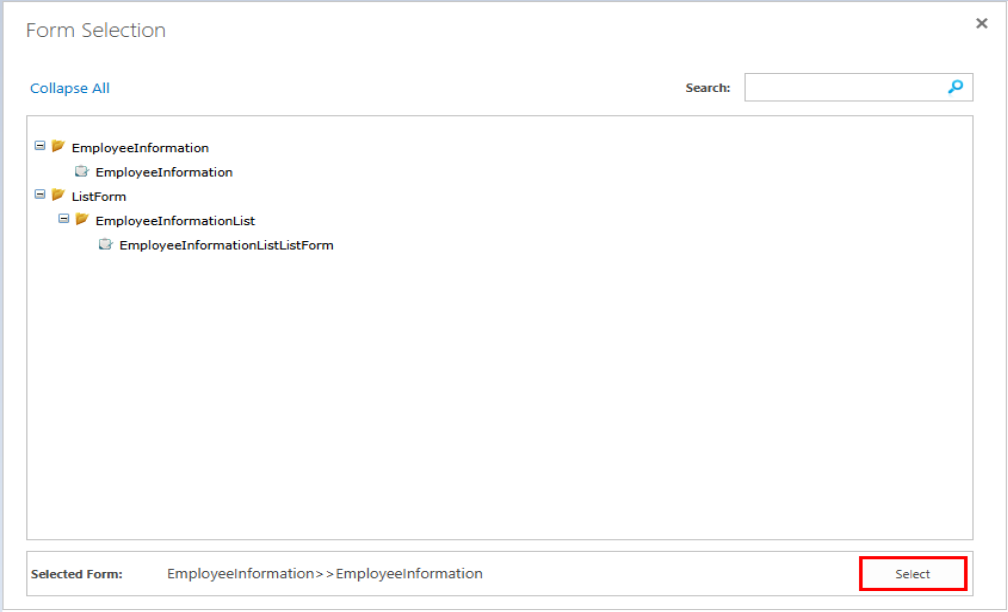
The Selected form will be updated in the new item form textbox as shown in the image below.
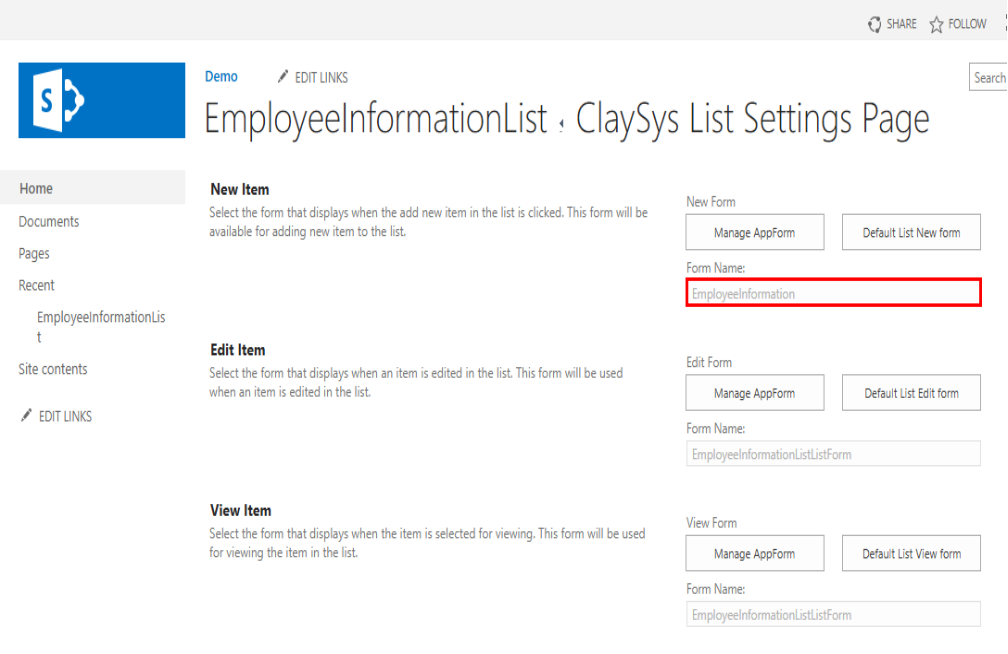
- Click on the ‘Save’ button.
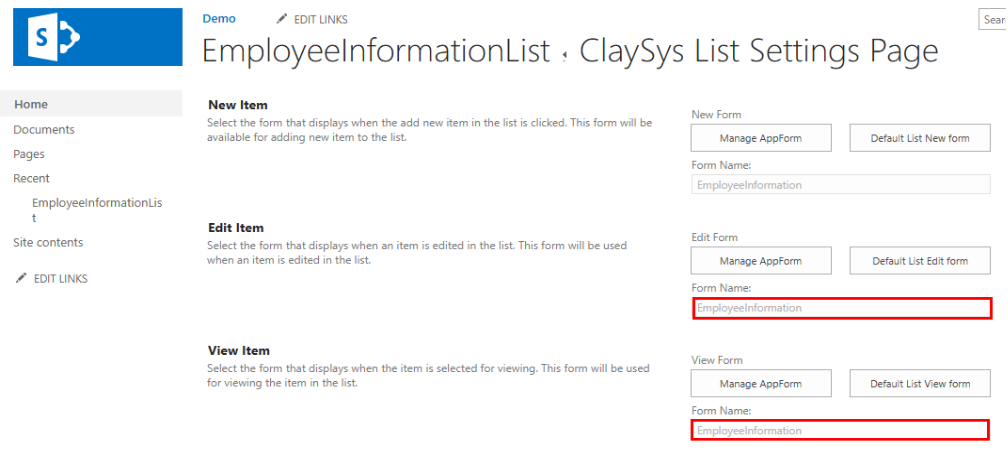
- Similarly, ClaySys AppForms can be configured for the ‘Edit Item’ and ‘View Item’ buttons as shown in the image below.
5. Configure ‘Edit Item’ button with Default SharePoint form
- To Configure a ‘Default SharePoint Form’ to the ‘Edit Item’ button of list, click on the button ‘Default List Edit form’ as shown in the image below.
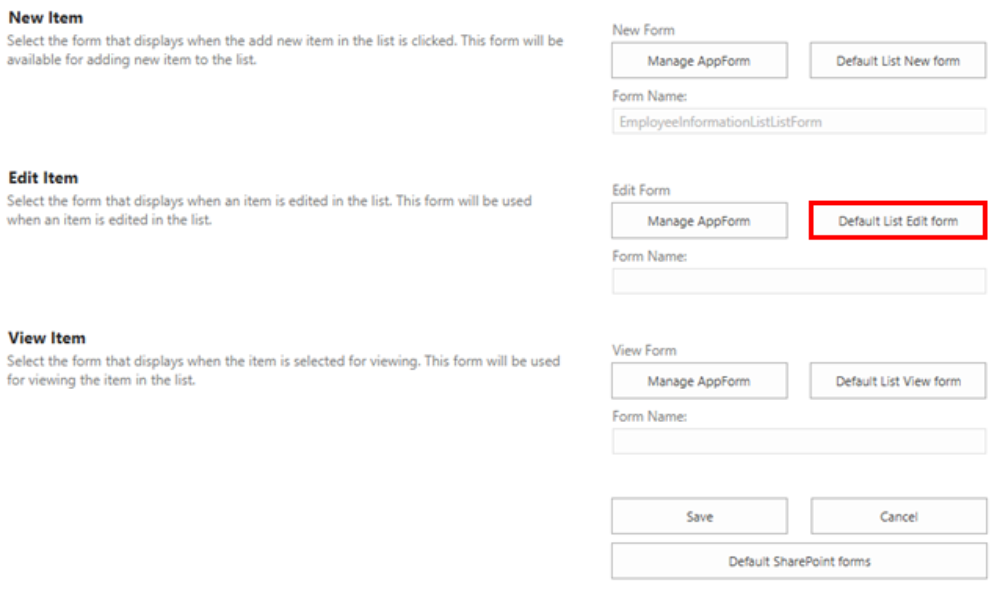
- Click on ‘Save ‘button to save the changes.
- Close the browser and open it again to view the changes done with ‘Edit Item’ button.
- Likewise Default SharePoint form can be configured with ‘New Item’ button and ‘View Item’ button individually.
6. Configure New Item, Edit Item and View Item buttons with Default Share Point form in a single click
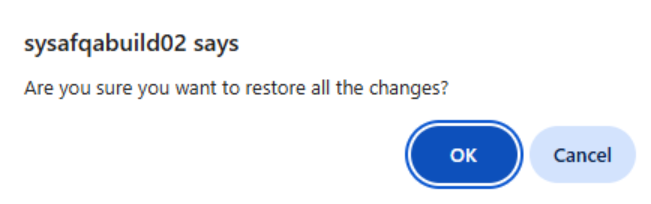
- Click on button ‘Default SharePoint forms’ button as shown in the image below.
- A dialog box will appear asking if you want to restore all changes. Click the ‘OK’ button to confirm.
The text boxes for ‘New Item’, ‘Edit Item’, and ‘View Item’ are now cleared. Click the ‘Save’ button to apply the changes. The user is then automatically redirected to the ‘List Settings’ page.
Click on New Item button, the default appforms will be shown as in the image below.
If you go back to the AppForms workspace, you will see that the list form is saved inside a folder named ‘List Form’. You can manage this form either from the AppForms workspace or from the list.
