Dynamic Grid configuration with SQL database
Step1

Step2
Now we need to configure the data source settings with the Db that we are going connect with this tenant.
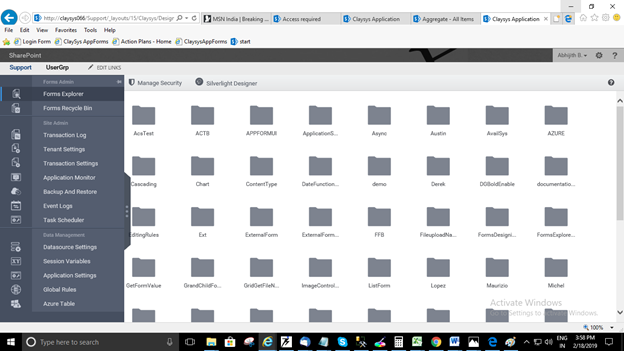
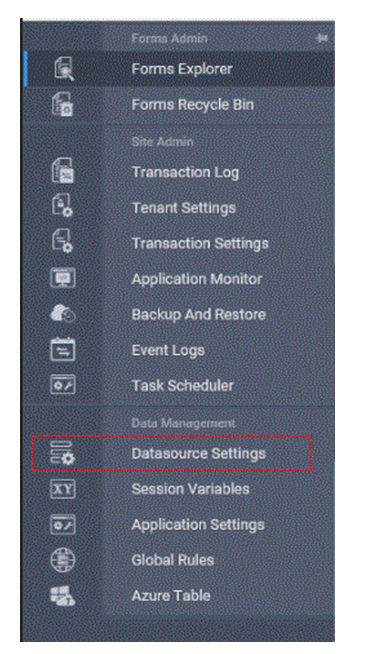
For that in the left pane of the ClaysysAppForms there you can see the links section. In that take Data Management tab and click Data-source Settings.
Step3
Step4
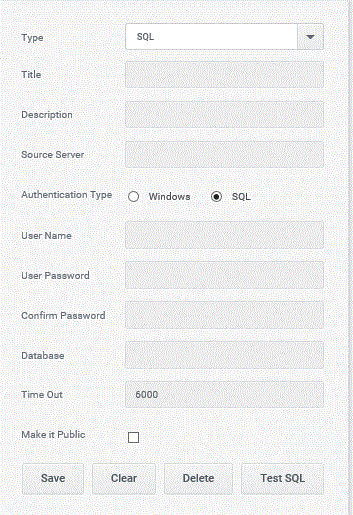
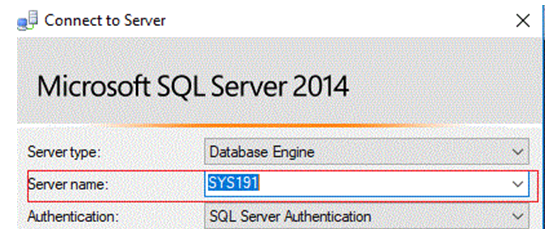
Open the SQL server management studio and copy the source server name.
Step5
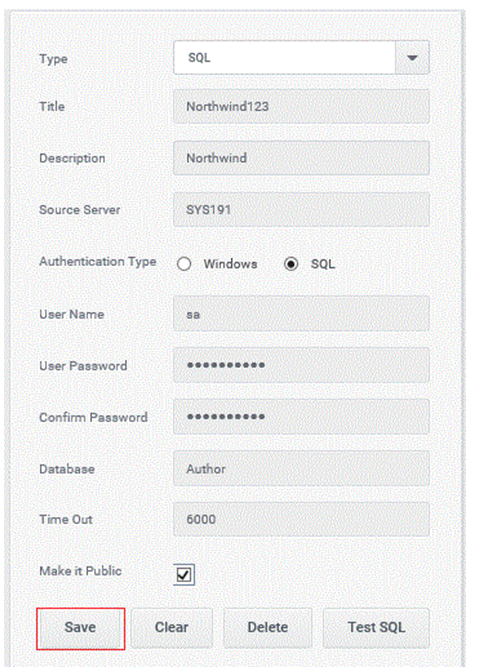
Now paste the source server name in the respective column, then set the credentials and type the name of the database in the server that we are going to use.
Step6
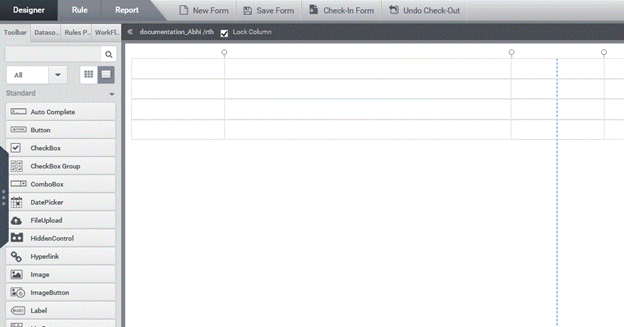
Then create a new form in the AppForm designer.
Step7
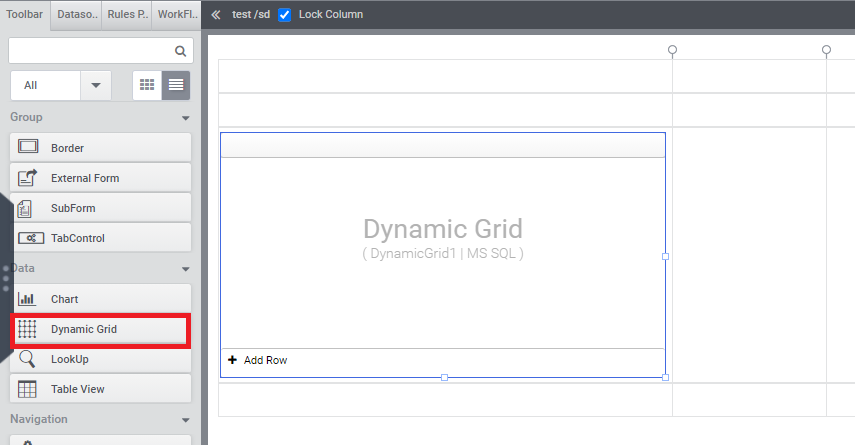
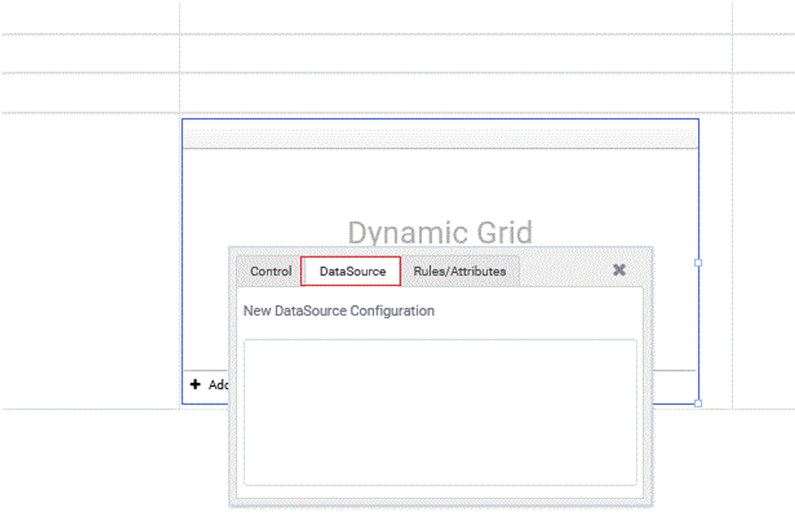
As shown in the below figure, in the ‘Data’ from the ‘Toolbox’, select the Control ‘Dynamic Grid’ then drag and drop it to the form and change the properties.
Step8
Click on the dynamic grid control and select DataSources in the pop-up and click New DataSource Configuration.
Step9
Step10
In the dynamic grid configuration window add columns as needed and click next button when completed.

Step11
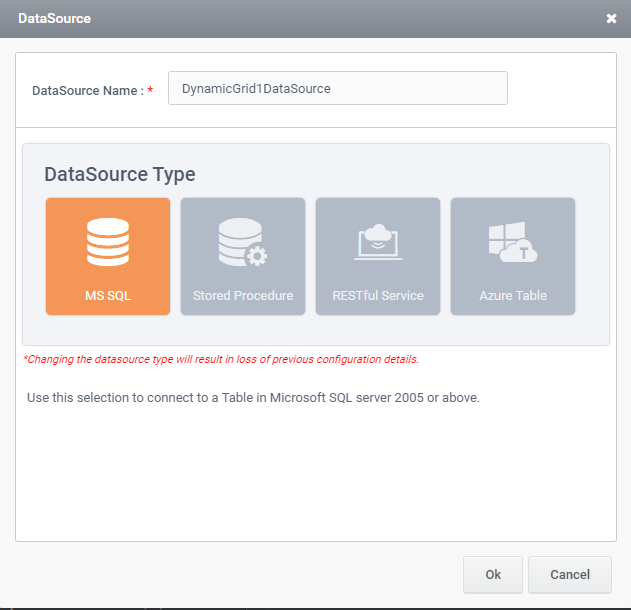
Select the data source and click next button.
Step12
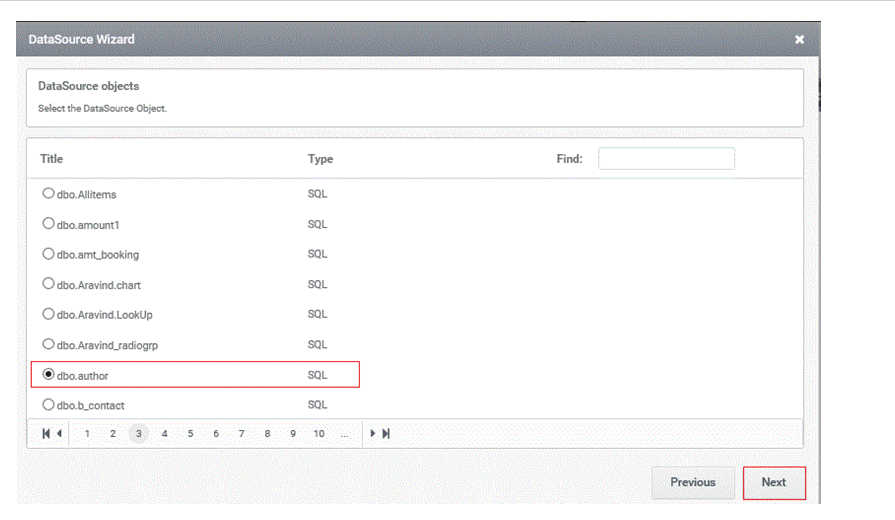
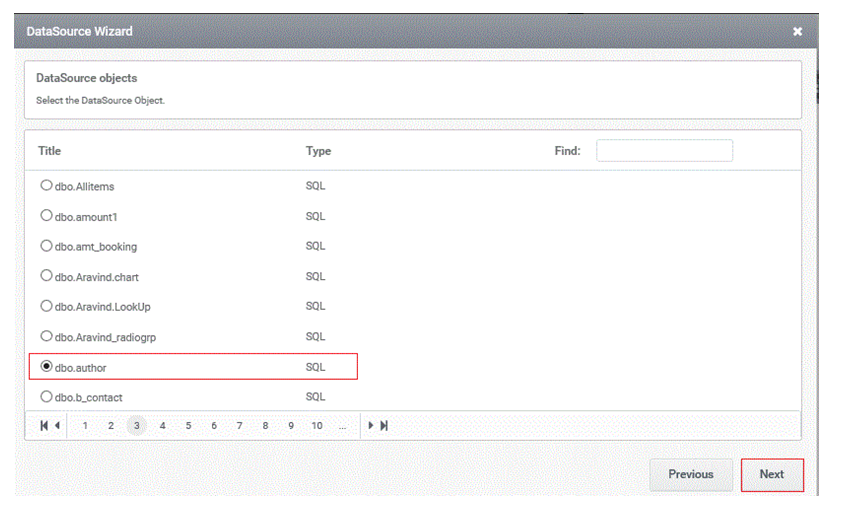
Then select the data source object (table name) and click next.
Step13
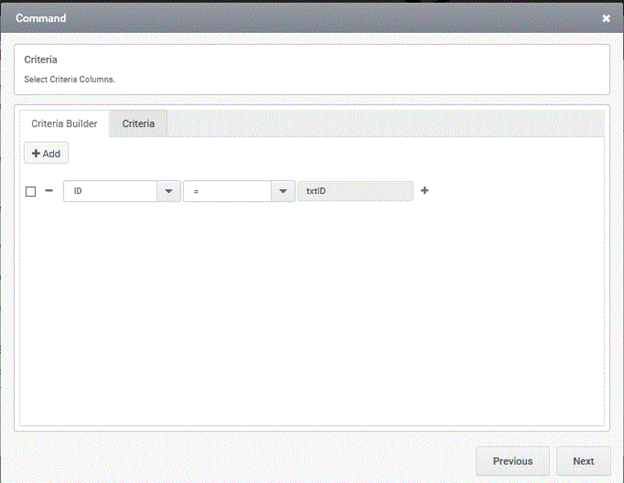
Select the columns required from the table.

Step14
All the selected columns will be listed in the next page and more columns can be added.
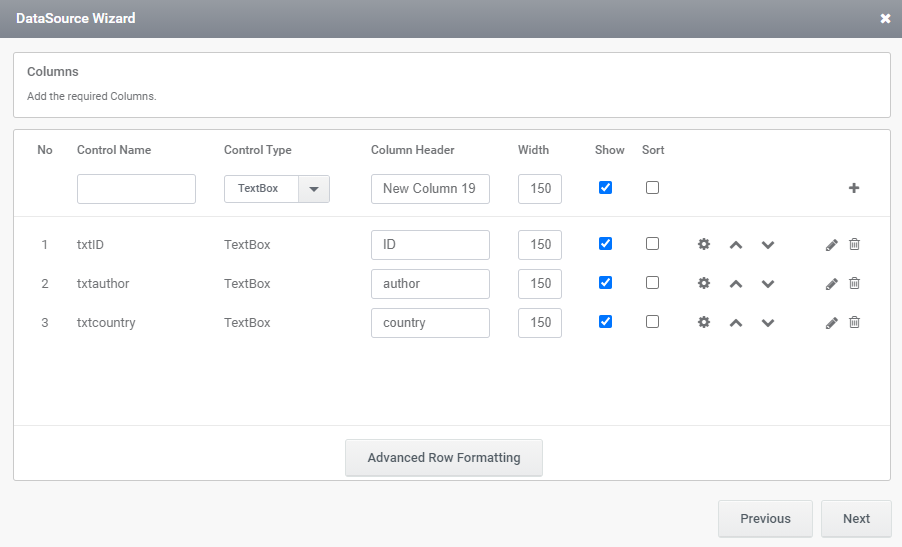
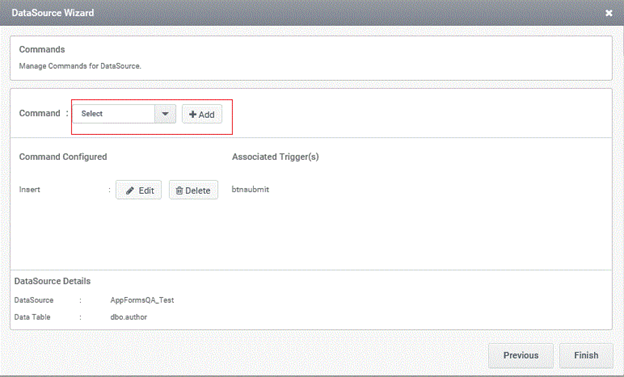
Step15
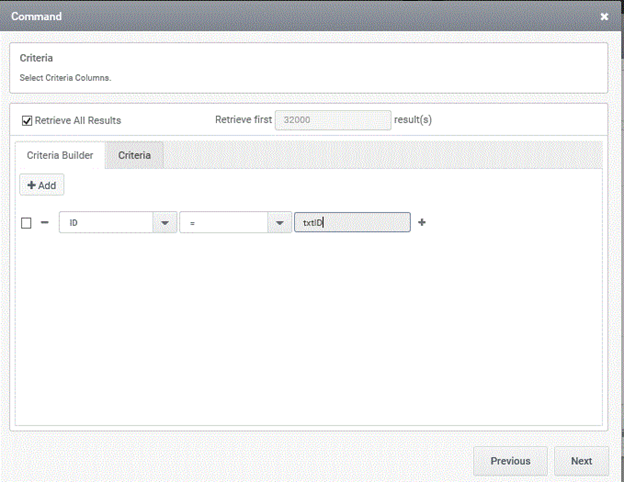
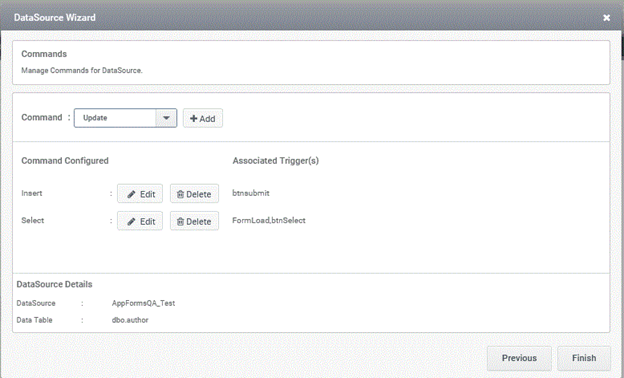
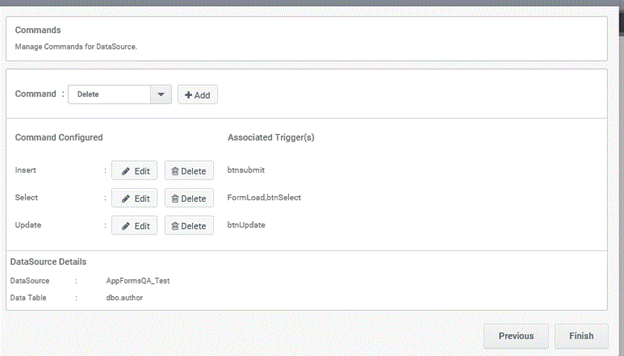
Select the command to configure and click on Add button.
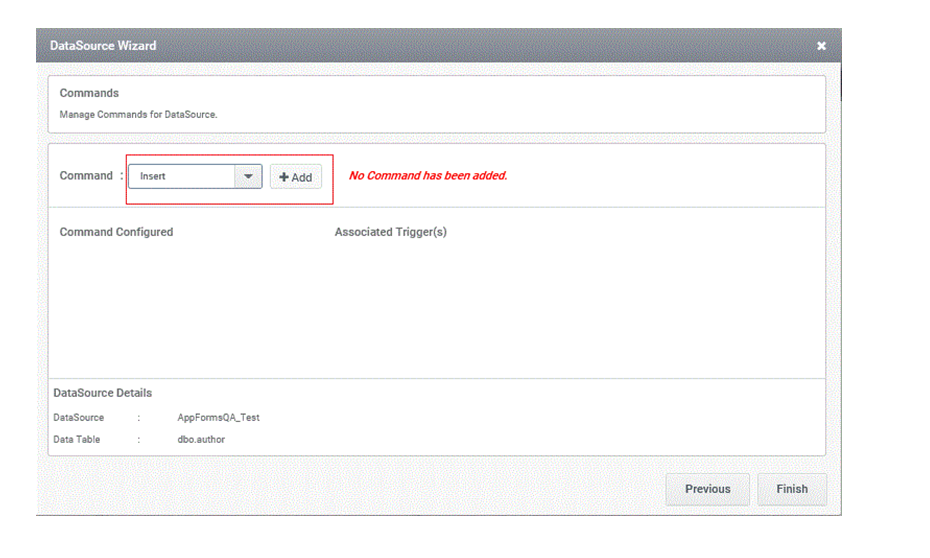
Step16
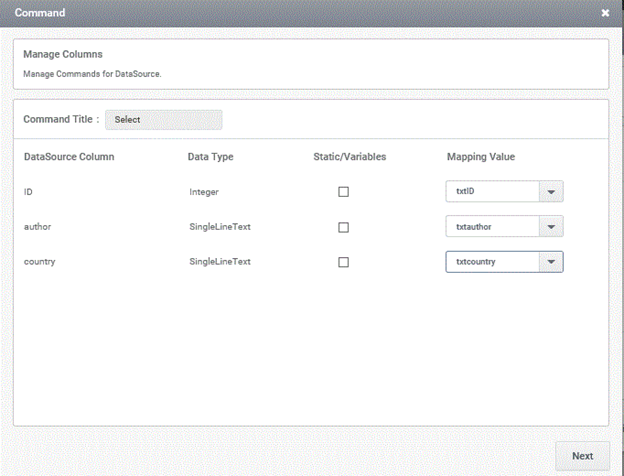
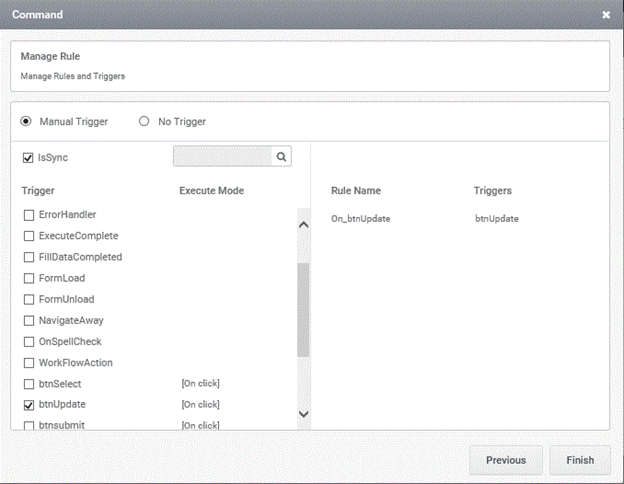
Map the controls to the Data source column and click Ok button.
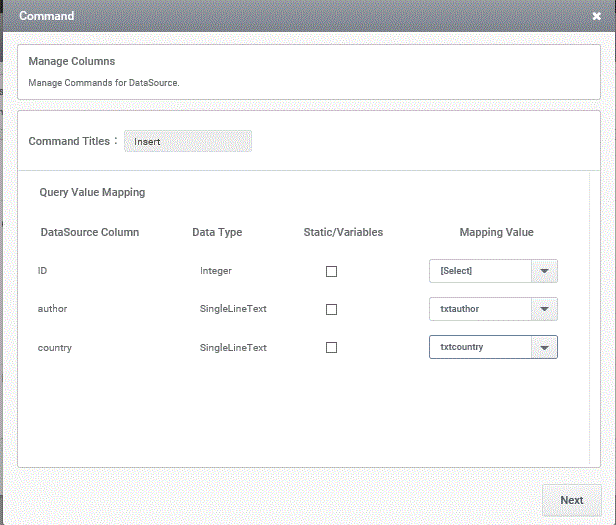
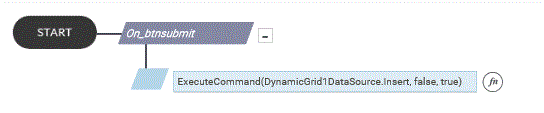
Step17
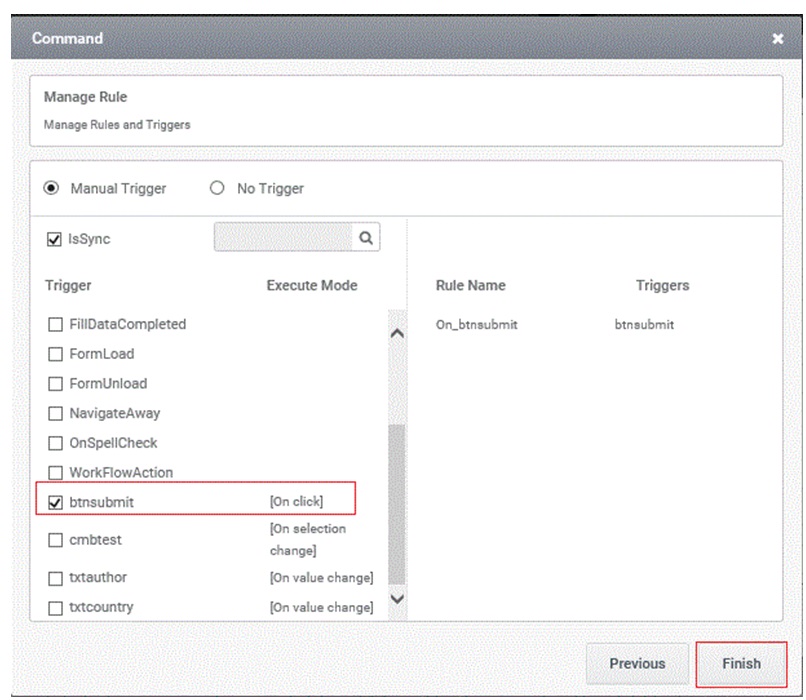
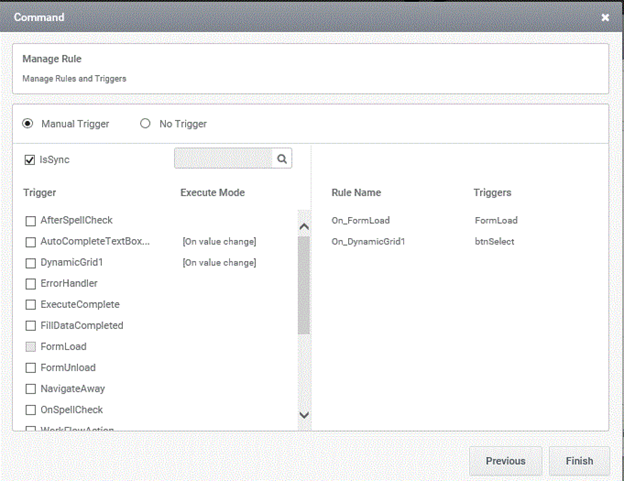
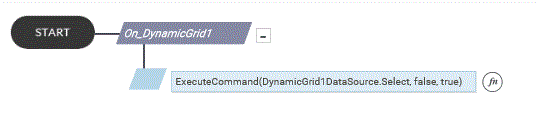
And the execute command rule is created.
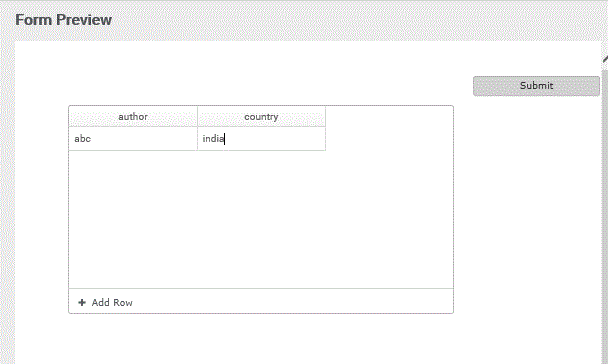
Step18
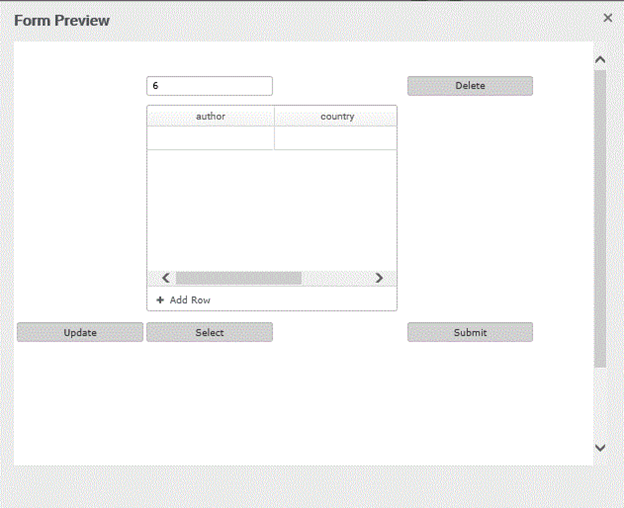
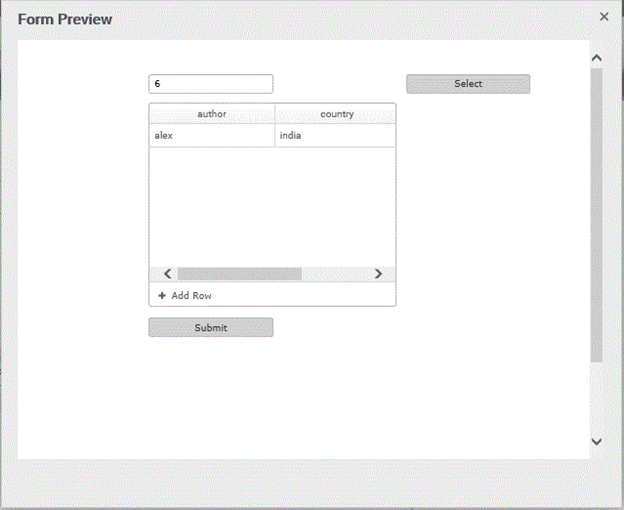
Take the form preview and enter the values and click submit button.
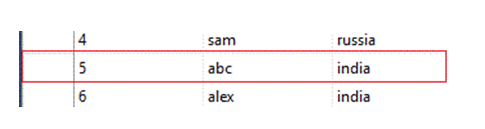
Step19
Go to the database then select the table and load the first 1000 values.
Step24
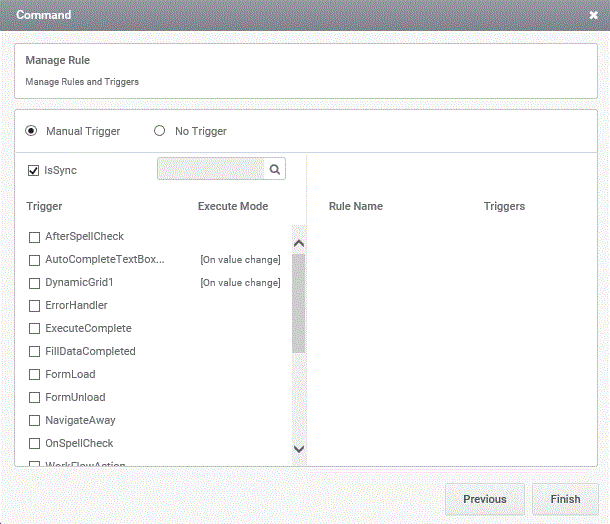
And the rule is created for the selection command.
Step25
Load the form and enter any ID value and click ‘Select’ button.

Step30
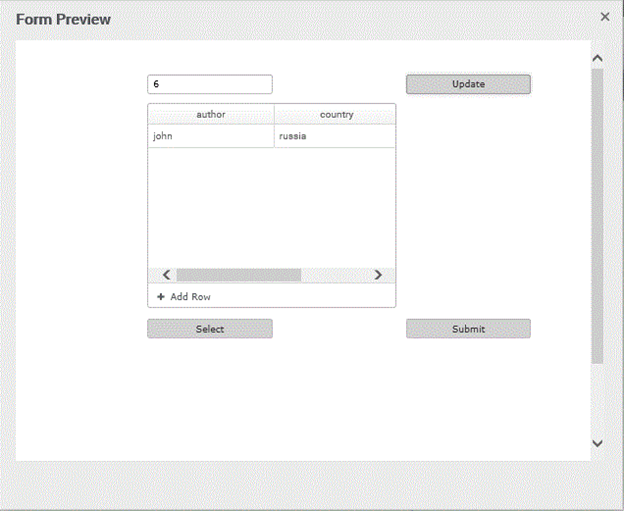
Load the form and then give any ID to load the values to the grid.

Then edit the values and then click Update button to update the values.
Step30
You can see that the new value is updated in the Data base as well as selected in the controls after the update.

Step31
Step32

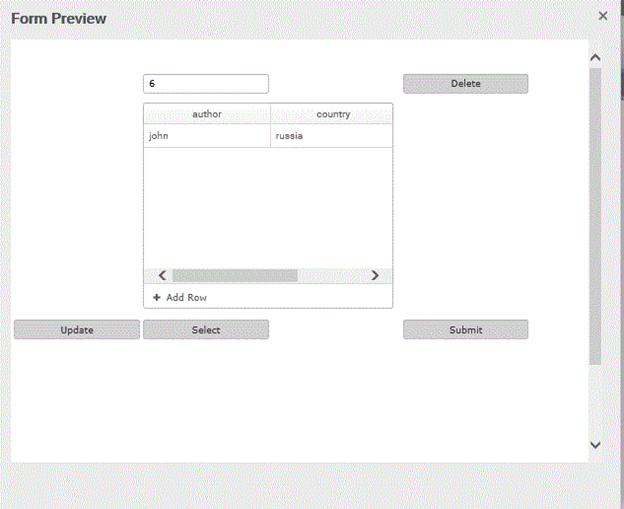
Step36
After deletion there will be no record for given ID