Expression Builder
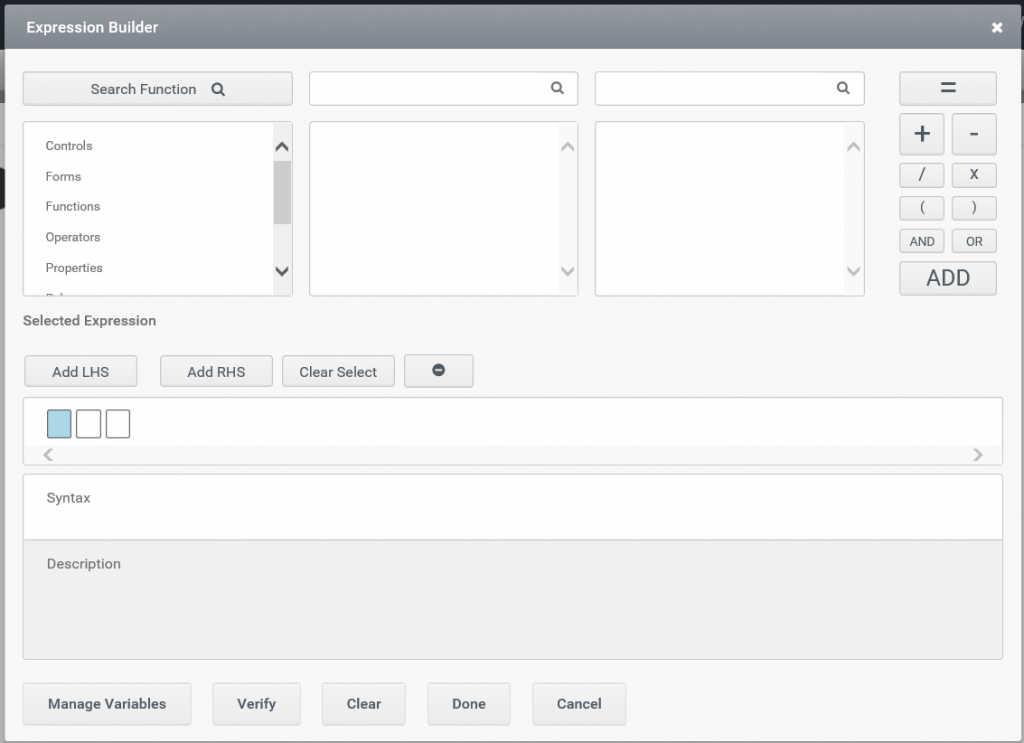
The Expression builder lets you build rules easily by providing easy access to the controls, functions, operators etc. It is like a lookup wizard, where you can browse a list of expressions, functions and can combine expressions into a larger and more complex expression. Expression builder is shown in Figure 1. This document provides a detail study about the expression builder.
Steps to access Expression builder
- Create a new rule by clicking on the “Create Rule” in the rule picker tab.
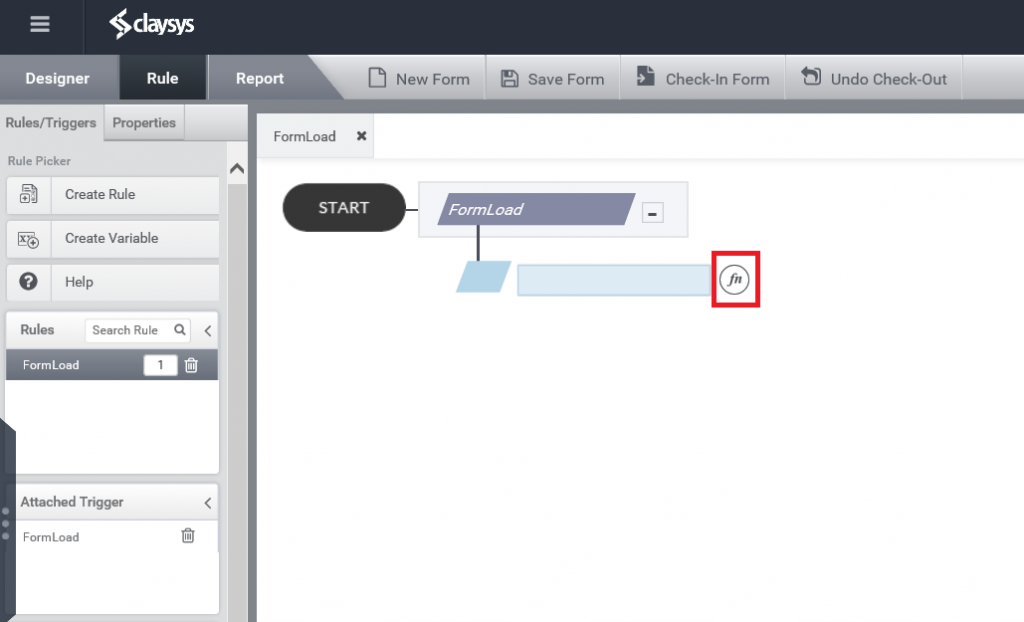
- Add an action to the rule. Expression builder tab can be taken by clicking on the function symbol as shown in Figure 2.
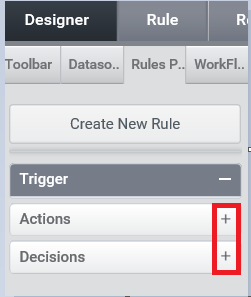
- Another method to access expression builder is from Rules Panel. You can access the tab by clicking on the add symbol on right of actions and decisions after selecting a rule as shown in Figure 3.
Working with Expression Builder
Expression builder consists of various sections:-
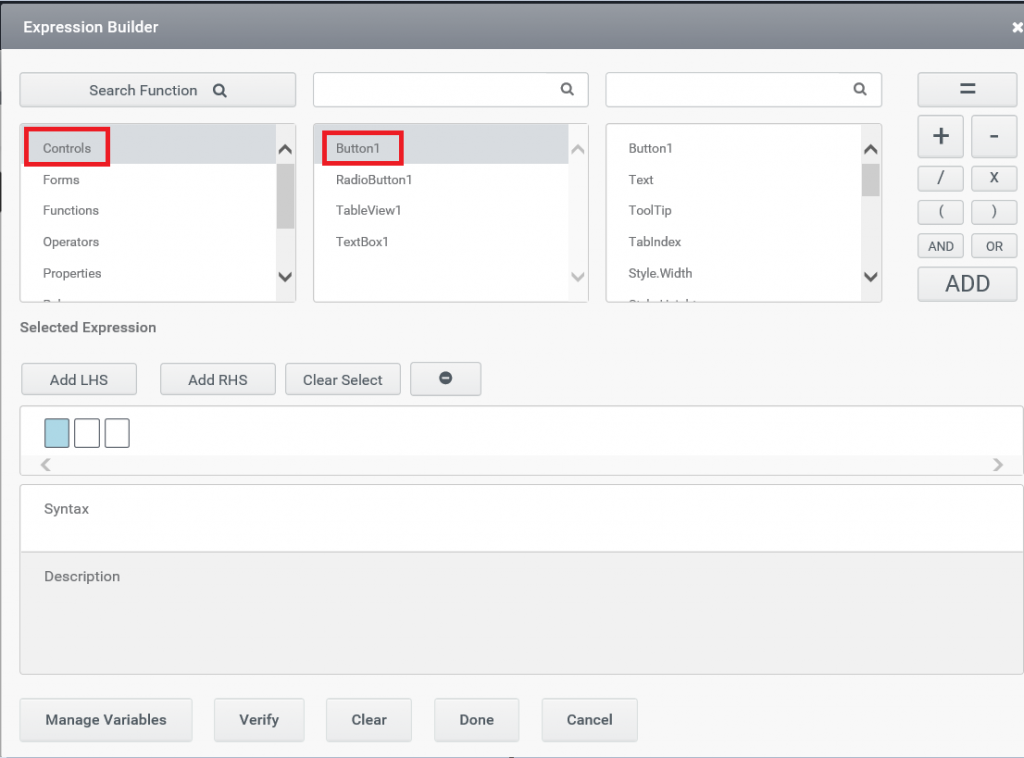
1) Controls :-
Controls tab is used to display the list of controls used in the form so that they can be accessed easily for generating expressions.
Step1:-Click on controls in the first list box of expression builder. This will display all the controls used in the current form in second list box.
Step 2:-Select the required control.
Step 3:-On selecting the control, third list box will displays the properties that can be used with the selected control.
Note:- In the below example, the user selected Button4, which is a button control.
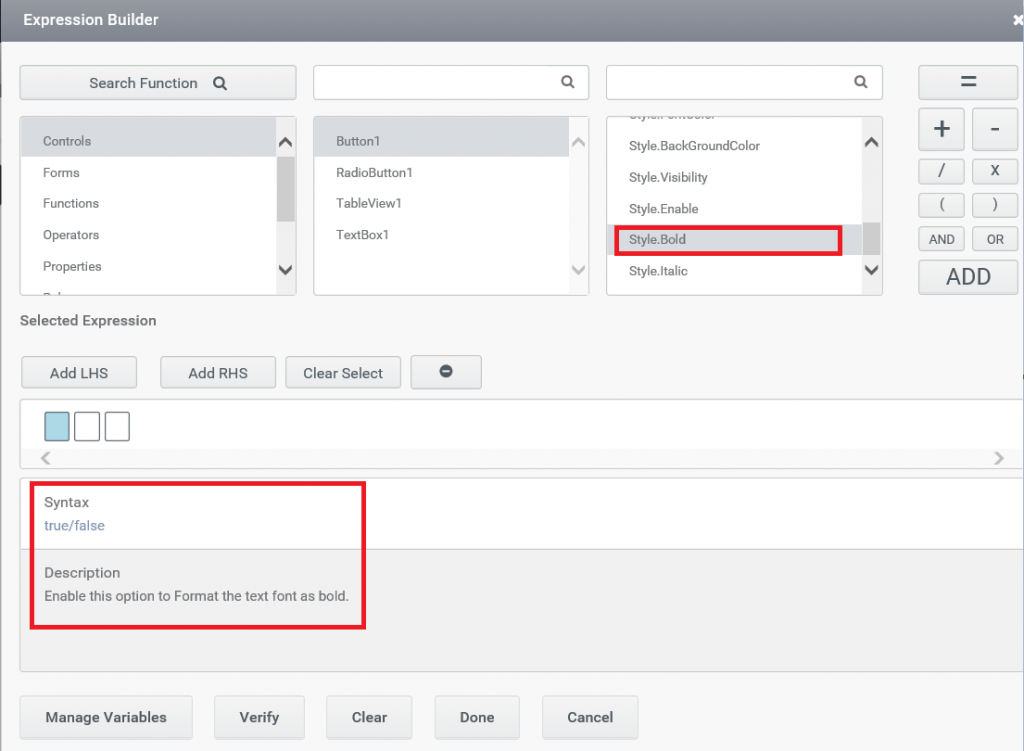
Step 4:- Select the property to be used with the control.
Step 5:- On selecting the property, expression builder displays the description of the property selected.
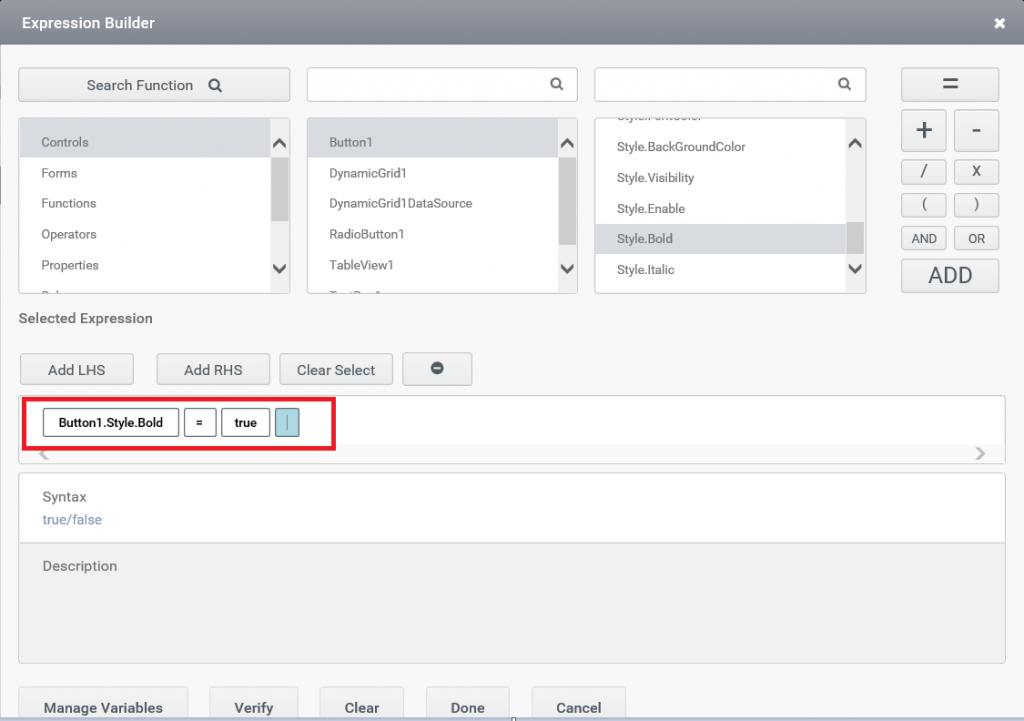
Note :- In the below example, the user selected the property “style.bold”, which is used to set text font style bold. The default value for this property can be True or False.
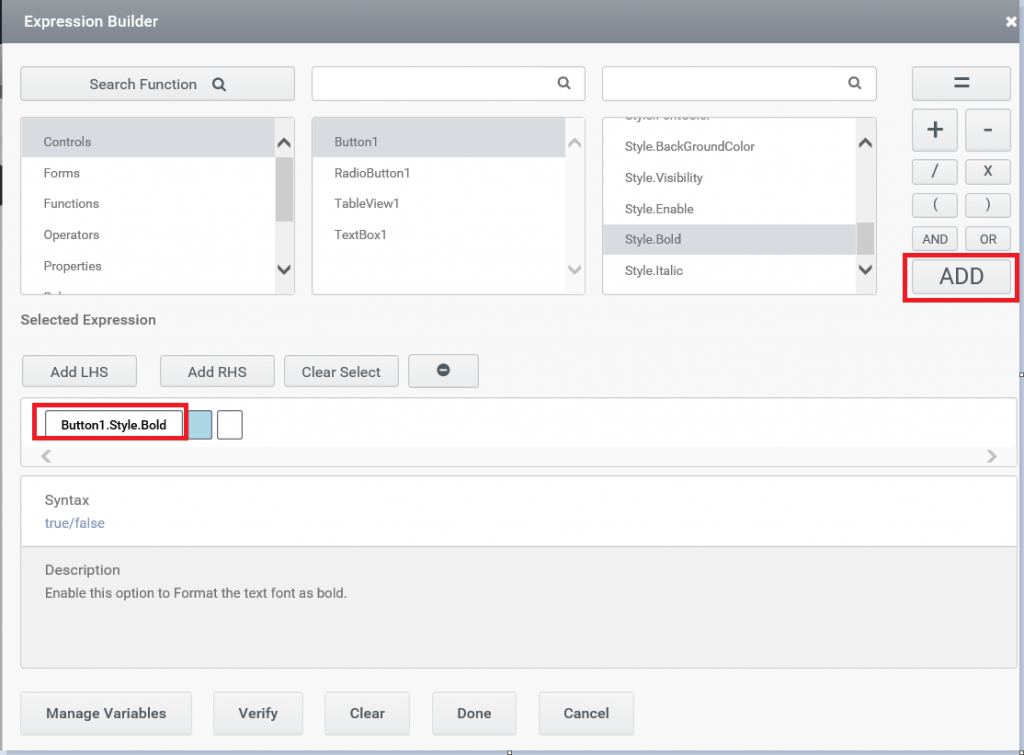
Step 6:-In order to add the selected function for the selected control click on the add symbol. This will add the expression as shown in Figure 6.
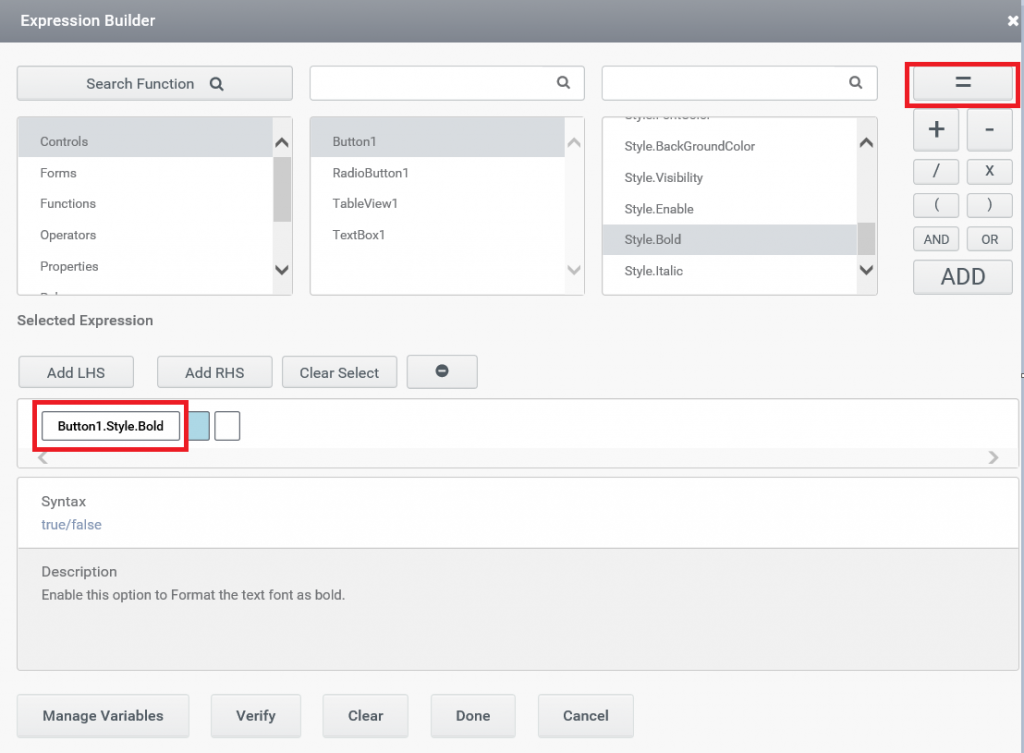
Step 7:- You can add any operators to the expression from the operators section which is on the right end of expression builder.
Note: – In Figure 7, the user added the operator “=” to the expression.
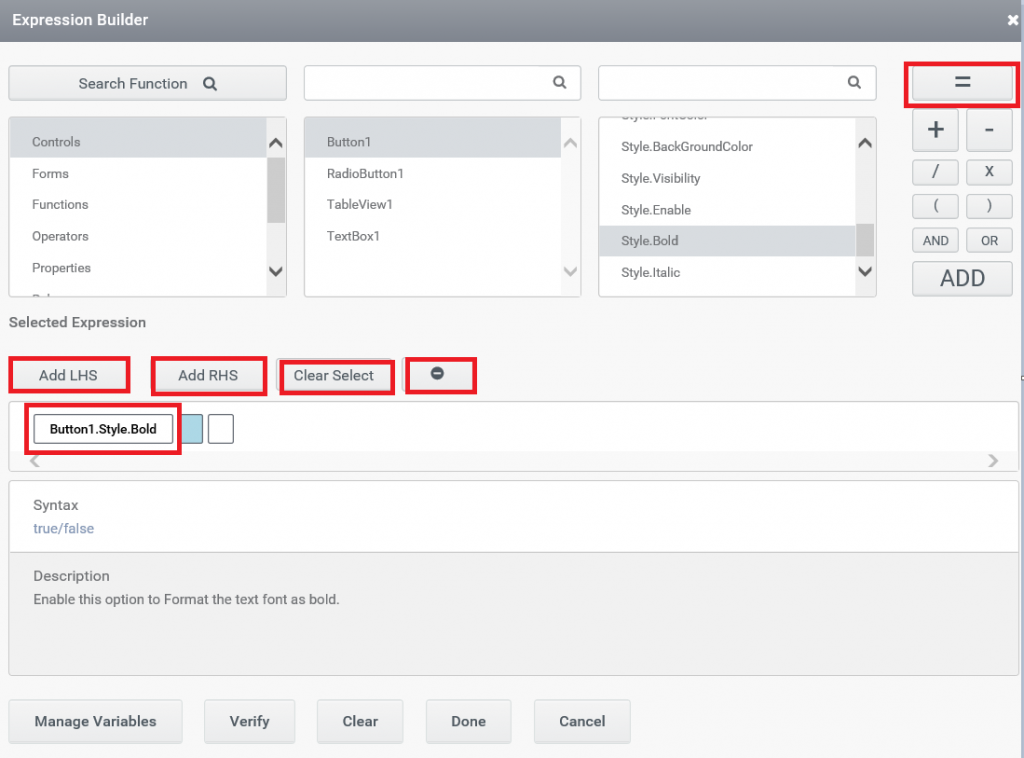
- Selected expression – It highlights the selected portion in the expression.
- Add LHS – On clicking the expression will display the Add LHS button, which is to insert a new textbox on the left side of the selected expression.
- Add RHS – On clicking the expression will display the Add RHS button, which is to insert a new textbox on the right side of the selected expression.
- Clear Select – Clear Select button is used to clear the selected expression.
- Delete – This is the symbol for delete, used to delete the selected expression.
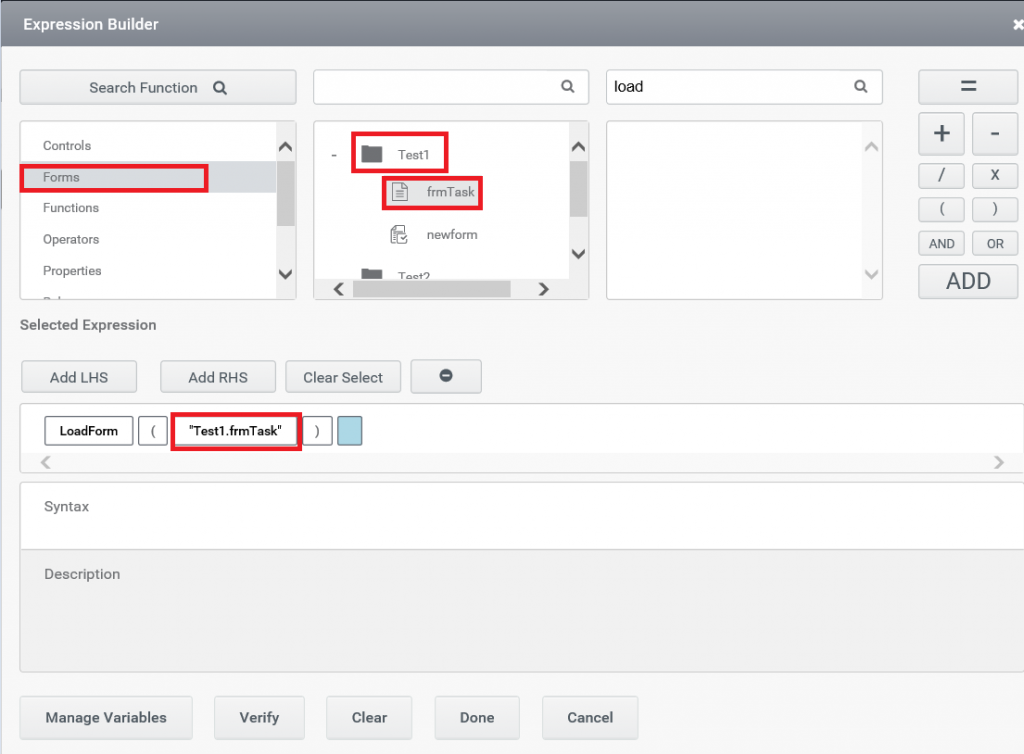
2) Forms :-
Forms tab displays the list of forms in the current tenant.
Step 1:- Click on the Forms tab in the first list box of expression builder. This will display all the folders in the current tenant in second list box.
Step 2:- Select the folder; this will display all the forms in the selected folder in third list box.
Step 3:- Select the desired form and click on add symbol to add the form to the expression as shown in Figure 9.
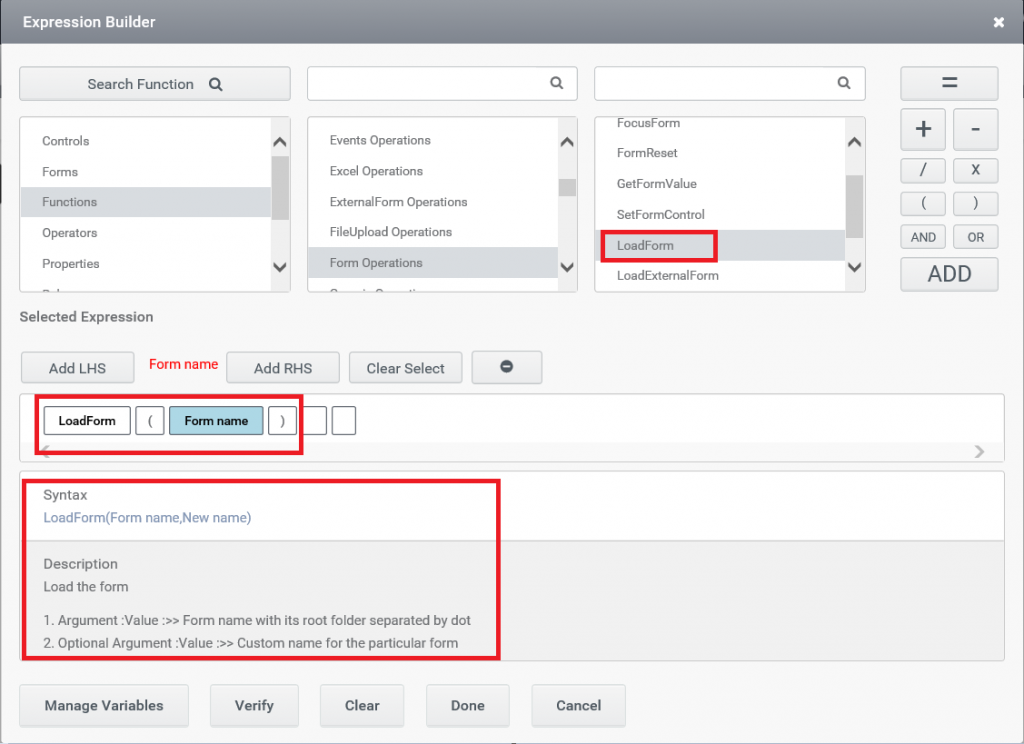
3) Functions :-
Functions tab is used to display the function that can be used in the expression.
Step 1:- Click on the Function tab in the first list box of Expression builder. This will display all the type of functions in the second list box.
Step 2:- Select the type of Function. On selecting, third list box will displays all the available functions under the type.
Step3:-On selecting the particular function, syntax of the function will be displayed on the bottom of expression builder. You can add the function to the expression by clicking on the add symbol as shown in Figure 10.
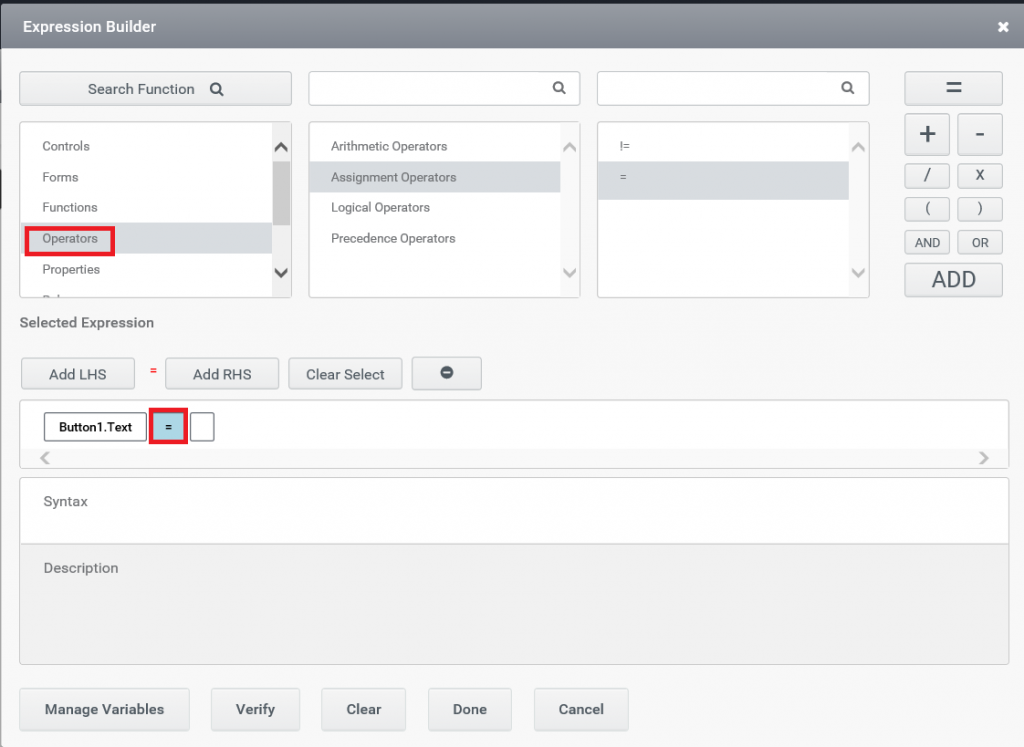
4) Operators :-
Operators tab is used to display the operators available for the expression.
Step 1:- Click on the operators tab in the first list box of Expression builder. This will display the types of operators in second list box.
Step 2:- Select the type of Operators from second list box. On selecting, third list box will display all the available operators under the selected operator.
Step 3:- Now select the operator you desire to add to the expression and click on add button (Figure 11).
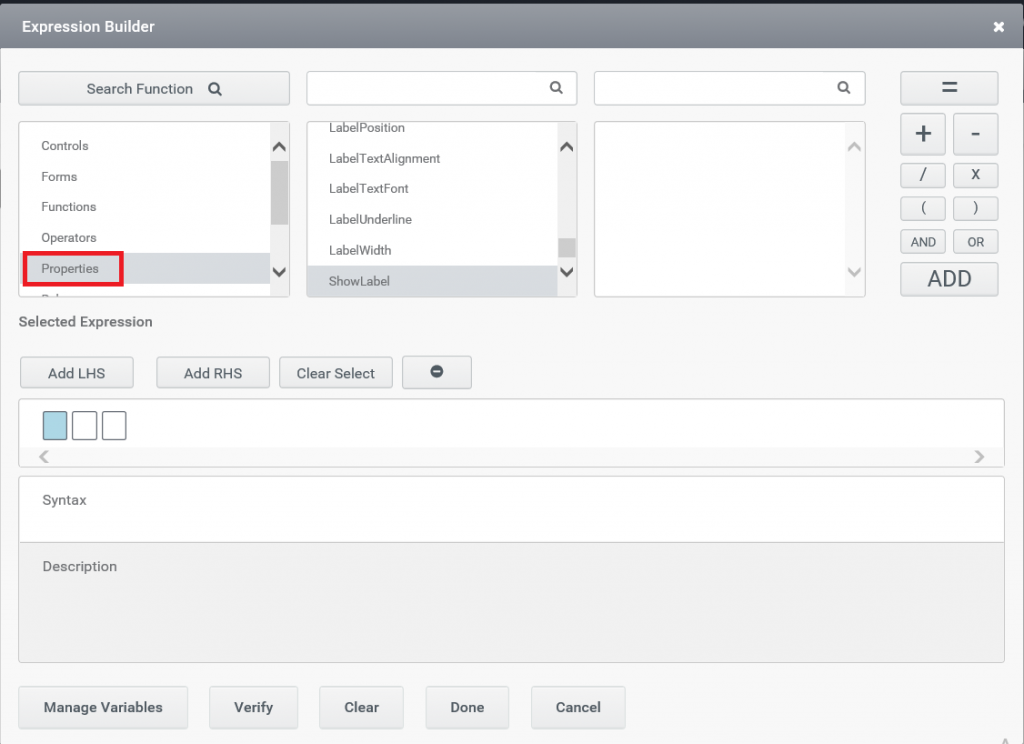
5) Properties:-
Properties tab displays all the available property names that can be added to the expression.
Step 1:- Click on the Properties tab on the first list box.
Step 2:- On clicking the properties, second list box displays all the available properties. You can select the property and click on add button to add the property to the expression (Figure 12).
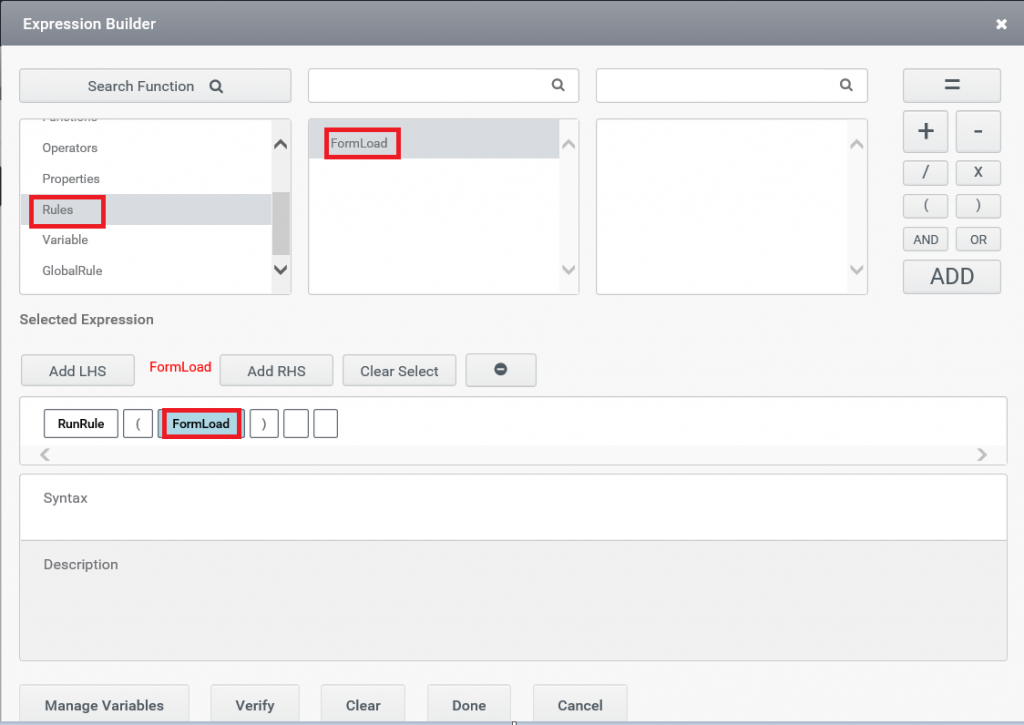
6) Rules:-
Rules tab displays all the rules used in the form.
Step 1:- Click on the Rules tab on the first list box. This will displays all the rules available in second list box.
Step 2:- Select the particular rule and click on add button (Figure 13).
7) Sites
Sites tab in Expression builder is used to display all the available sites and sub sites in the environment. If your expression needs a site name then you can select it from the list and click on add button.
8) Variables
Variables displays all the available variables like global variables, rules variables etc (Figure 14).
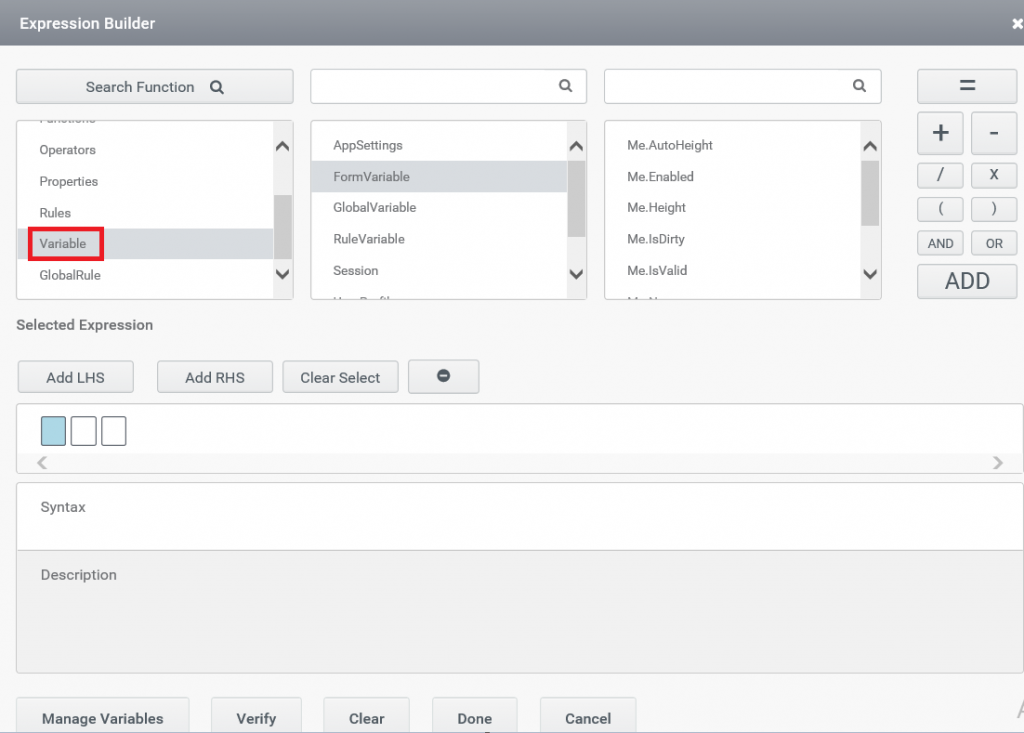
Different types of Variables available are:-
- AppSettings :- Variables used to return the application settings value.
- FormVariable :- Displays all the Variables available for Form functioning like Me.Name.
- GlobalVariable :- Displays all the global variables available.
- RuleVariable :- Displays all the temporary variables you have created in the form.
- Session: – Displays all the session variables in the current tenant.
- UserProfile:- Displays all the variables available for User profile.
9) GlobalRules
Global rules tab displays all the rules that you have set as global rule in the current tenant.
- Manage Variables
On clicking the Manage Variables button in the expression builder, will leads you to the page “Create variable” where you can create new variables (Figure 15).

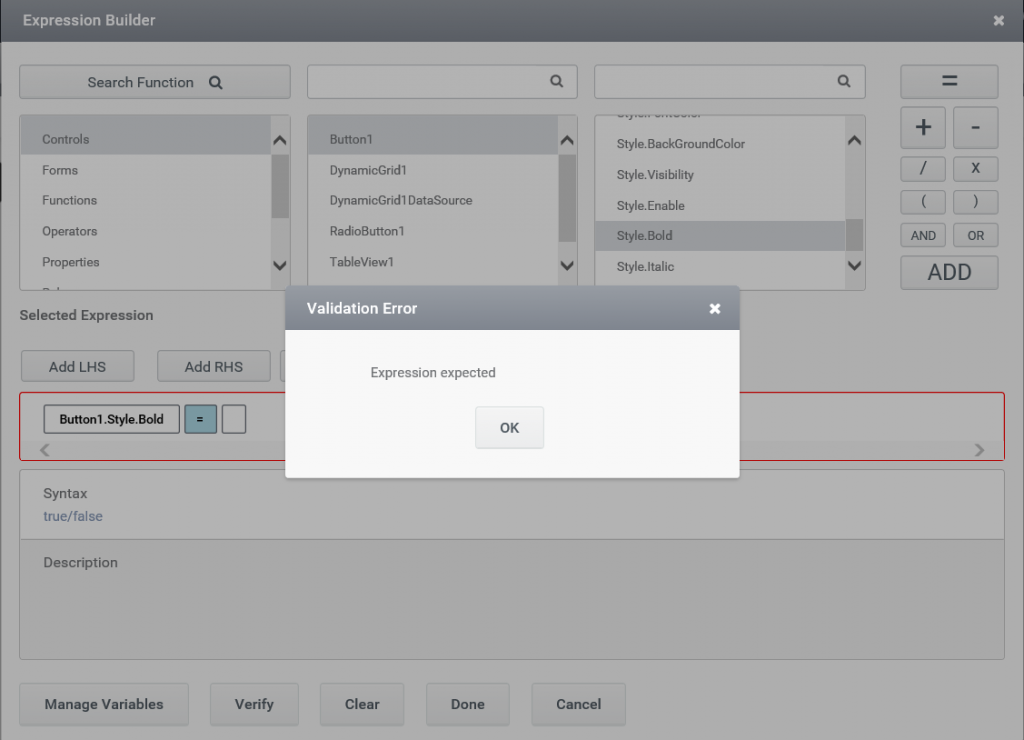
- Verify
Verify is a feature in Expression builder which helps you to verify the expression.
Step 1:- Write the expression in the expression builder.
Step 2:- Click on the Verify button. If the expression’s syntax is correct then a green rectangle covers the expression (Figure 16) or if the expression is wrong then a red rectangle covers the expression and a page pops out displaying the error in the expression (Figure 17).
- Clear
Clear button is used to clear the expression.
- Done
Done button is used to save the expression you have generated.
- Cancel
Cancel button is used to close the expression builder tab.