RPA Genie Health Monitoring Tool (HMT)
What is RPA Genie Health Monitoring Tool?
RPA Genie Health Monitoring Tool is a standalone service which is responsible for monitoring Genie Database and Genie Service connections to which the BOT Manager is connected. This is a new tool that helps in monitoring all the BOT machines connected to a particular BOT Manager which runs in the background and needs to be installed separately. It will notify the user through an Email if any of the connections are down.
Role of RPA Genie Health Monitoring Tool
It has been observed on various occasions where the BOT service and its database were not working as expected in the client machines. During these instances BOTs are throwing different errors and BOT will not be able to perform the automation. Our team has identified the root cause of the different scenarios where the BOTs can be down.
There are three main common cases where the BOT may stop working or throw errors. The first one is when the BOT machine is down, the second would be when someone may accidentally kill the particular service/process. In these two scenarios, the BOT manager will act effectively and push the notification to escalate the same. However, if the BOT Manager itself goes down, we wouldn’t get any notifications regarding the status of the services and the database. Here, the team took up this issue and introduced the RPA Genie Health Monitoring Tool.
How to configure RPA Genie Health Monitoring Tool?
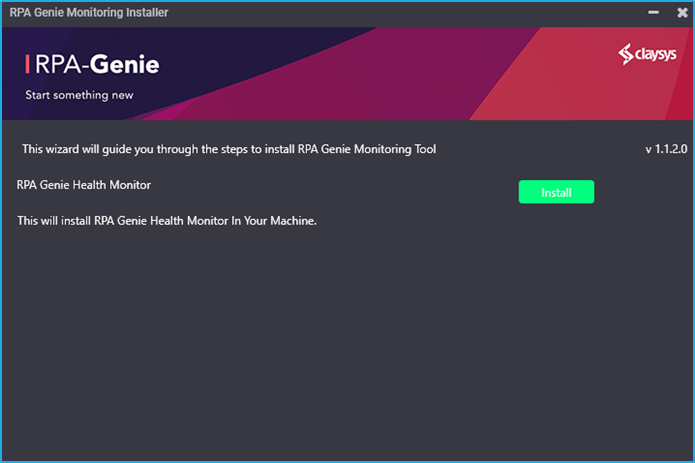
Step 1
RPA Genie Health Monitoring Tool has a separate installer file for configuring the service, which can be downloaded to a specific location in your system. After downloading the installer file, double-click and open it. A window named “RPA Genie Health Monitoring Installer” will appear as shown in the image below. Click on the “Install” button.
Step 2
Check the License Agreement checkbox and click on the “Next” button to continue.
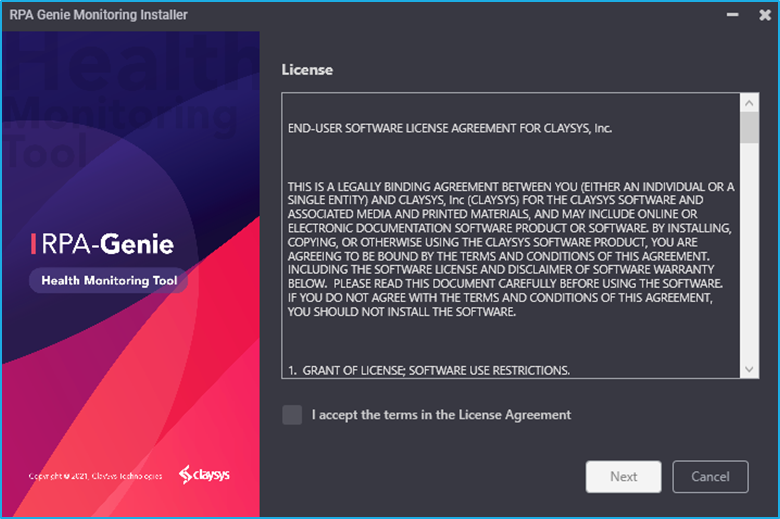
N.B: – License agreement is described in the box under License header.
Step 3
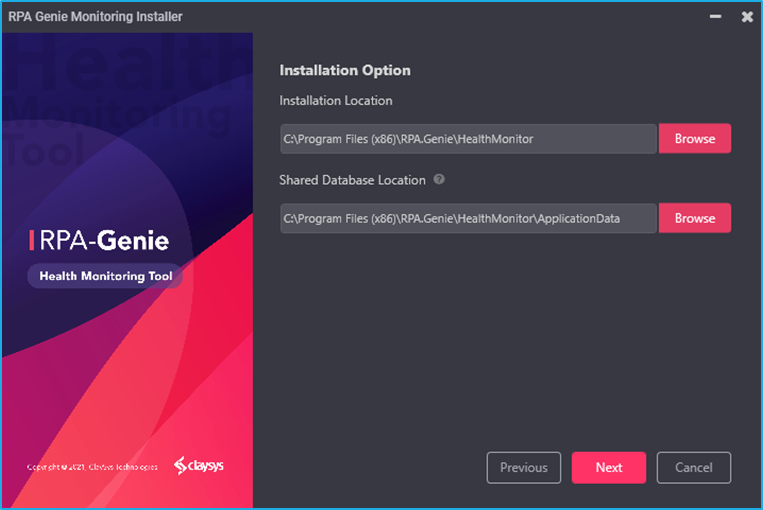
- Installation Location: Give the location to which the Health Monitor Tool needs to be Installed.
- Shared Database Location: In order to avoid duplicate notifications from each of the BOT machines while installing Health Monitoring Tool on multiple BOT machines, we will need to store the log file into a centrally shared Database location which is accessible to all the BOT machines.
Click on “Next” to continue.
Step 4
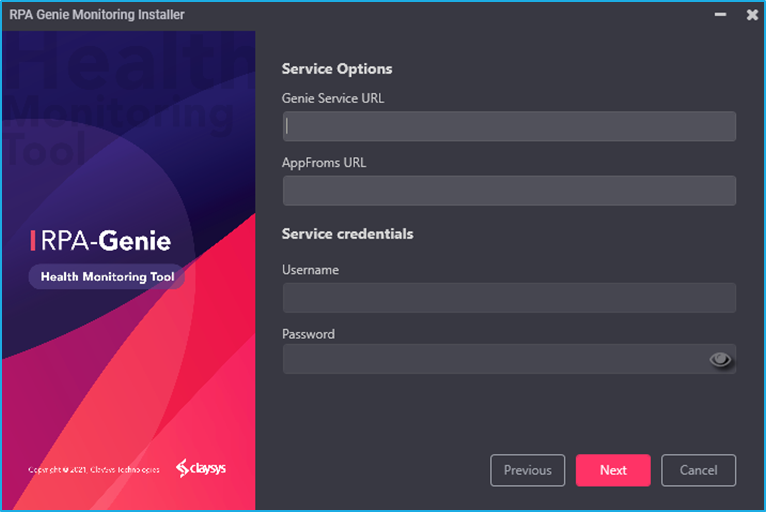
Under the “Service Options” page, you need to provide the following details:
- Genie Service URL: Provide the required Genie Service URL.
- AppForms URL: After providing the Genie Service URL, click on the “AppForms URL” field. Now, this field will be auto-populated with the corresponding AppForms URL. If not, manually provide the AppForms URL.
- Service Credentials: If the AppForms is configured with Forms Authentication, provide a user name and password through which the service can connect to AppForms.
Step 5
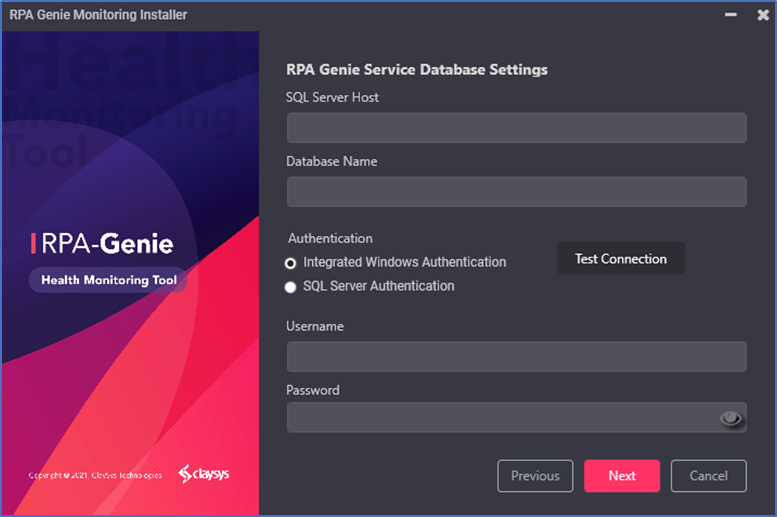
The Genie Database acts as a comprehensive storage system for storing all the metadata associated with a particular application or system. For effective data management, retrieval, and manipulation for various processes and functionalities, it preserves key information about data structures, configurations, and relationships within the application.
The following fields of the RPA Genie Service Database Settings page are editable by the users:
- SQL Server Host: The Genie Database SQL Server Host of the RPA Genie Service should be entered in the SQL Server Host field.
- Database Name: The Genie Database Name of the RPA Genie Service should be entered in the Database Name field.
- Authentication: In the Authentication field, the user is able to test the connection of Integrated Windows Authentication and SQL Server Authentication.
N.B: – If Windows authentication is selected provide the AD username and password. However, if it’s SQL authentication, provide the corresponding SQL username and password.
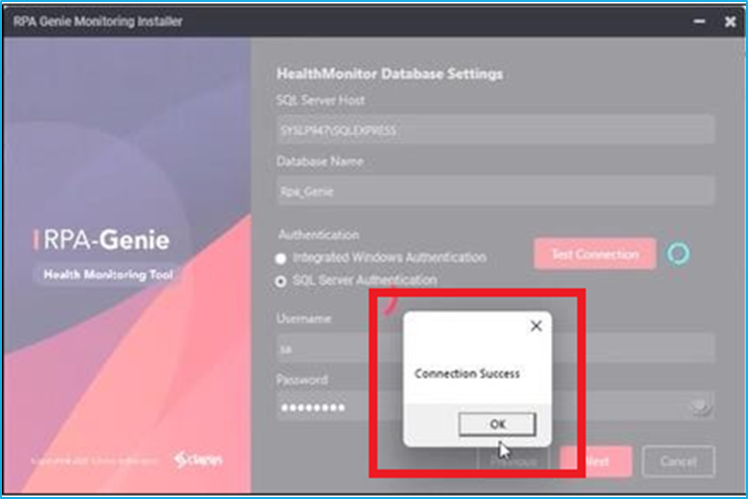
After providing all the required details, click on “Test Connection”. If the connection is successful, then a pop-up message, “Connection Success” will be displayed as shown in the image below and you can click on “OK” to proceed further. Click on the “Next” button to continue.
Step 6
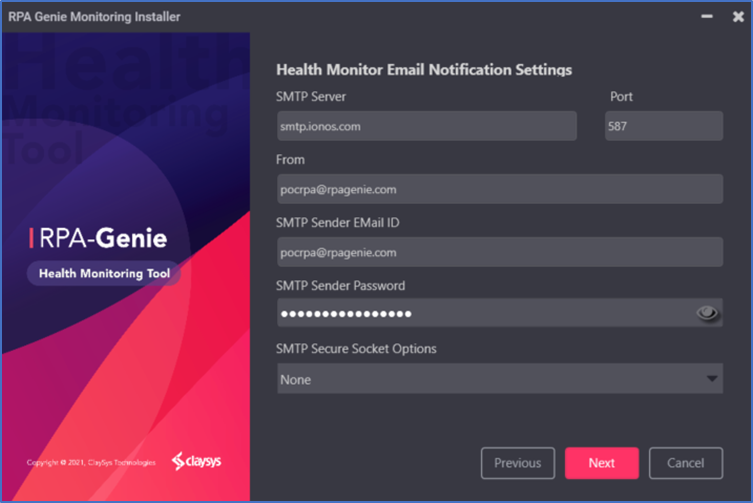
If the Notification settings are already added to the BOT Manager, then the fields in the Health Monitor Email Notification Settings page will be auto populated. If not, you can provide the respective SMTP details which the service will use to send out email notifications. Here, you can fill the SMTP Server details, SMTP port and From Address. Next, you will be able to configure SMTP Sender Email ID and Password. Finally, select the SMTP Secure Socket option from the available dropdown list.
Step 7
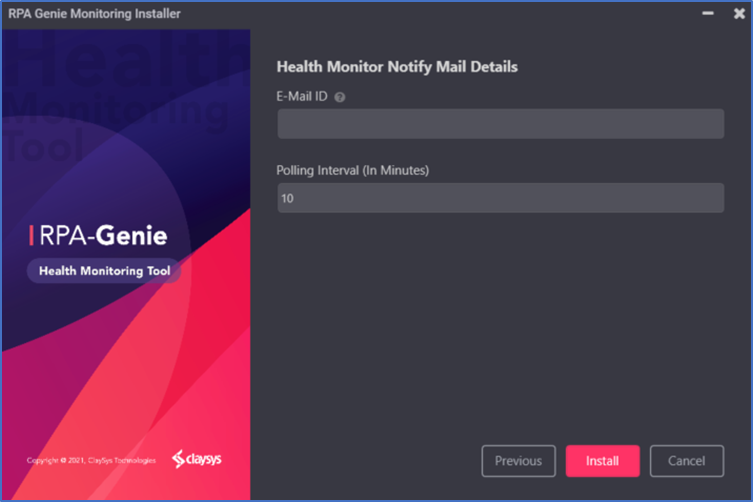
In the Health Monitor Notify Mail Details page, you can provide the Email ID to which the notification has to be sent. You can also give multiple Email IDs separated by comma. Polling Interval is the interval in which the application will be checking for the status of the Service and Database. Default polling interval would be 10 minutes. Click on the “Install” button to install the application.
N.B: – Polling Interval can be changed according to user preference.
Step 8
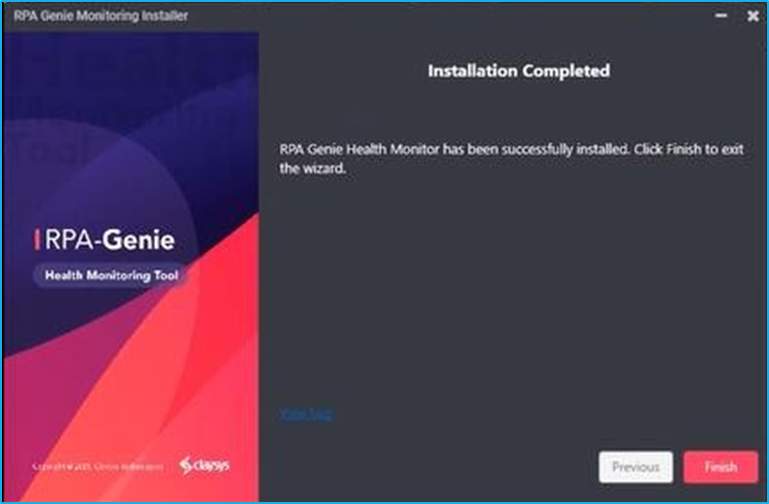
Finally, click on the “Finish” button to complete the installation.
Step 9
Go to “Services” window and right-click on “RPA Genie Health Monitor”, select “Properties” from the given options.

Step 10
Navigate to “Log On” section and choose “This account”. You can manually provide the Service account along with the domain. Also, fill the “Password” and “Confirm Password” field. Click on “OK”.
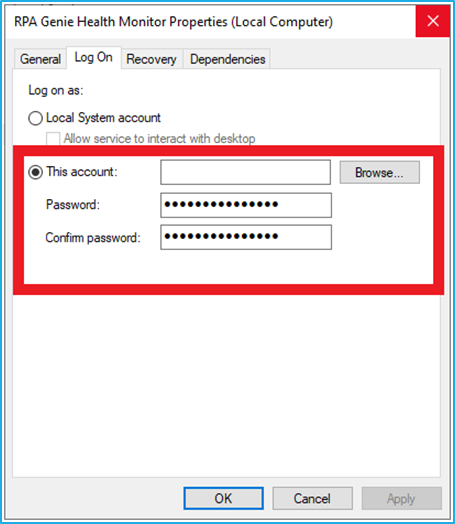
N.B: – A service account is a user account that’s created explicitly to provide a security context for services that are running on Windows operating systems. The security context determines the service’s ability to access local and network resources.
Step 11
Click on the service and select the restart option.
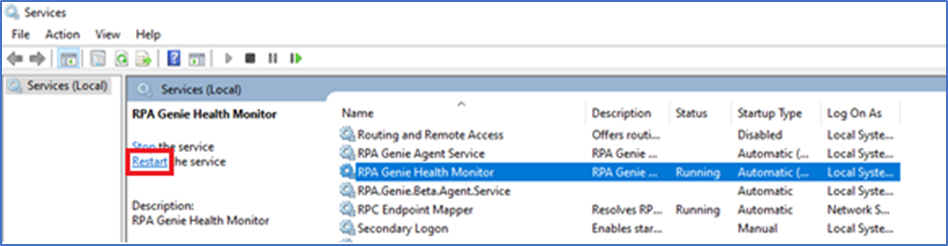
N.B: – Make sure the status of the service is “running”.
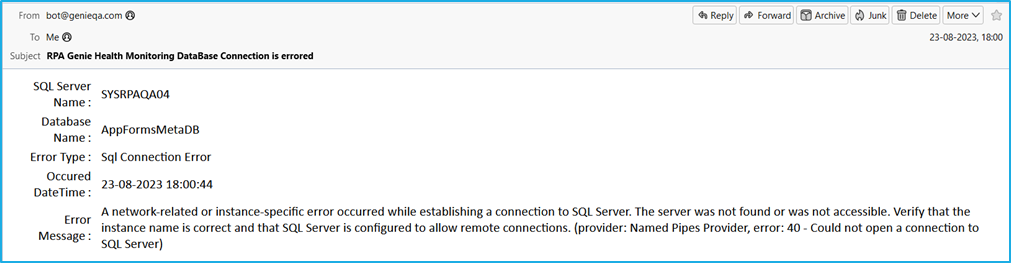
Output
Below is the sample error message sent via Email:
Genie Service Error Message

Database Connectivity Error Message