External Form Control
Introduction
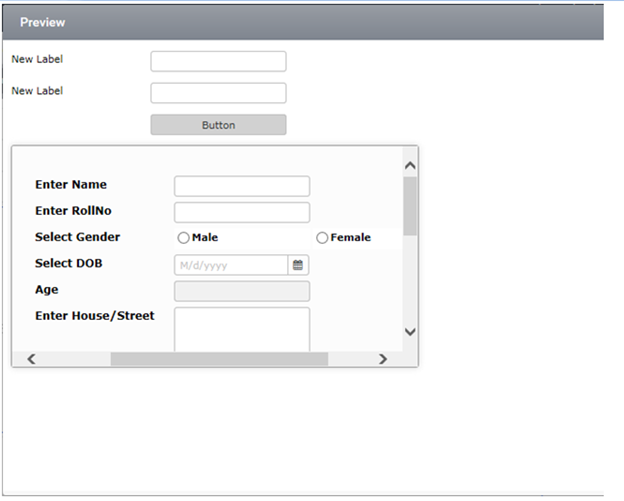
External form is one of the features in ClaySys AppForms, which helps to display an already existing AppForm into the current form. By using this feature multiple numbers of forms can be displayed as it is within the single form. Using External Form, we can perform the actions such as ‘repeat’, ‘remove’ and ‘view change’ of the form and there by the performance of the current form can be increased.
External Form Configuration
Login to AppForms using your credentials
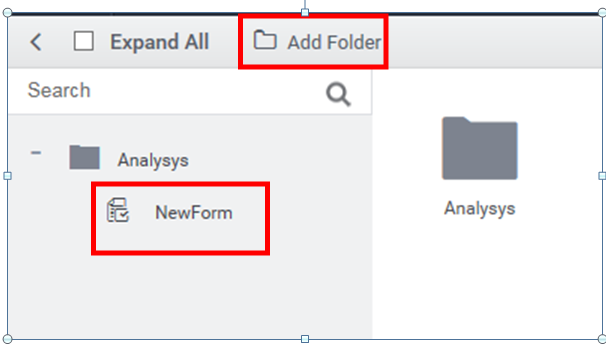
Then create a new folder and then create a new form inside the folder you have created (see figure 2).
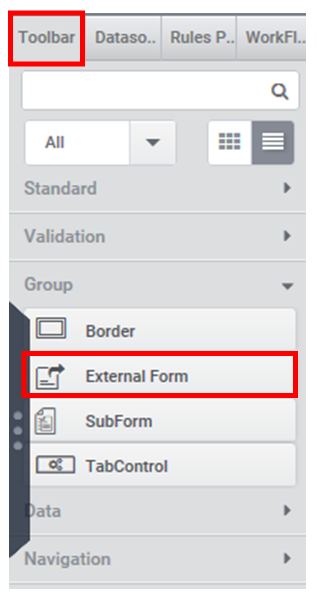
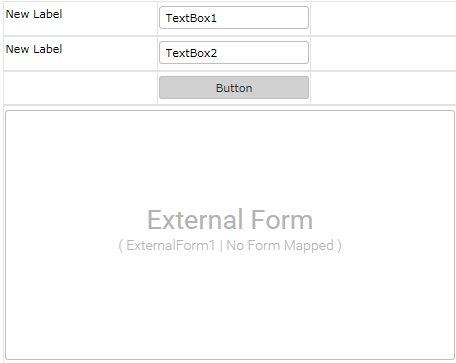
Then open the new form, drag and drop an External form control to the form (Figure 4). You can see the external form control in the ‘Group’ tab under the ‘Toolbox’ tab.
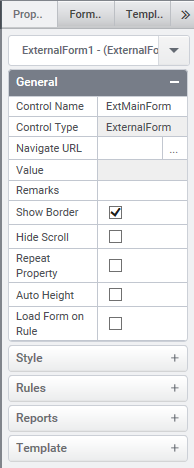
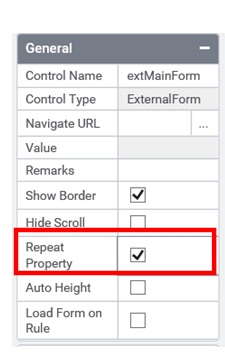
Then take the property window (Figure5) and rename the control with a unique name preceding with ‘ext’ this is to identify that this is an external form control.
You can also checkout the other properties of this external form in the property window which is in the right pane to the AppForm designer.
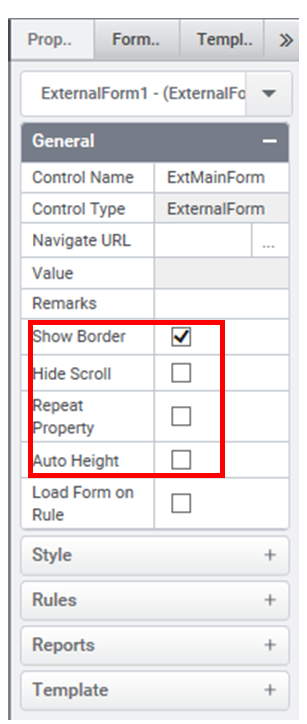
You can check the properties like Show border which will show the border to the external form control, Hide scroll to hide the horizontal and vertical scrolls which appear in the form. Repeat Property to enable the repeat property of external form. And checking Auto Height will enable the auto height property for the external form.
Calling a form to the External Form: To call a form to external form there are three methods. In the properties window you can see Navigate URL option (Figure 7).
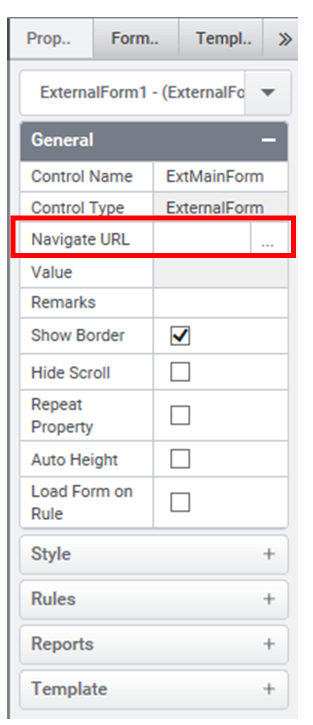
Click on that, Navigate form pop up window will appear to configure a form to external form.
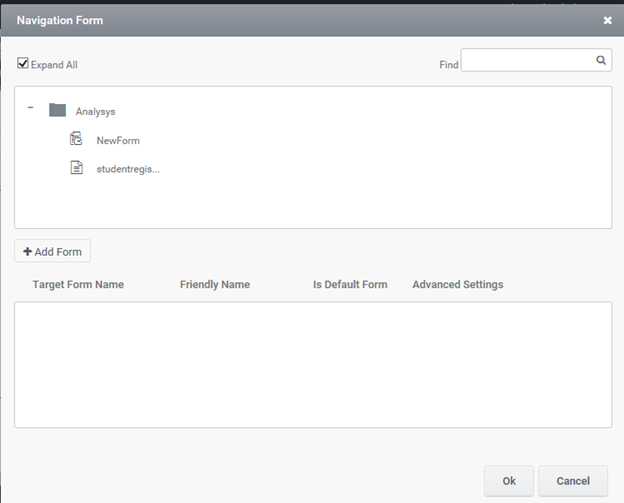
Select the form that you want to configure to the external form control. And click on Add button
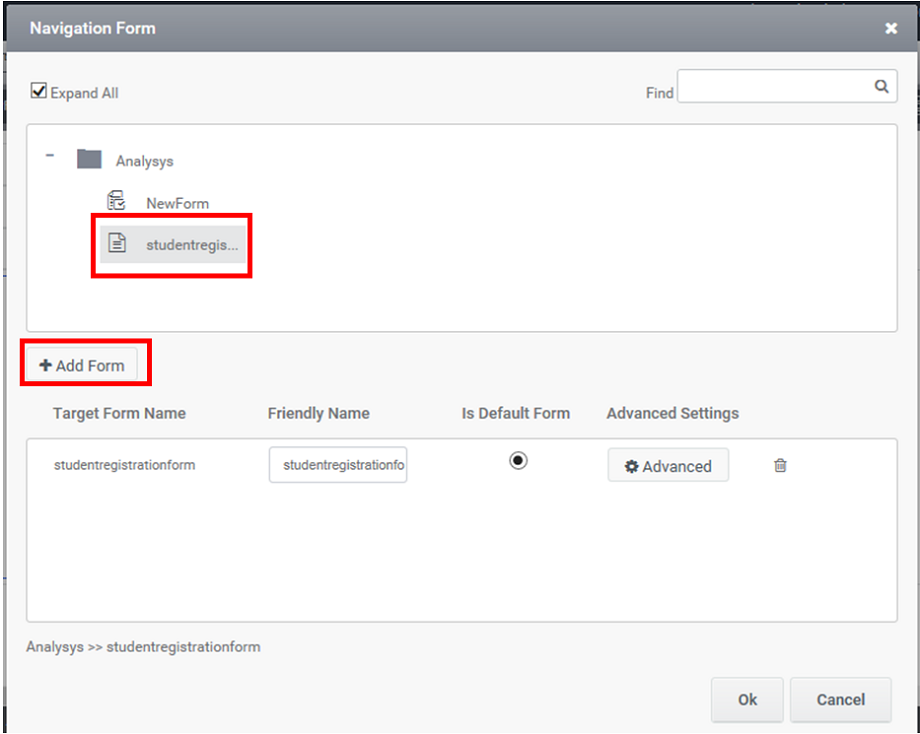
Clicking on Advanced button there is another popup will open and you can pass the parameters from the parent form to the external form using this window.
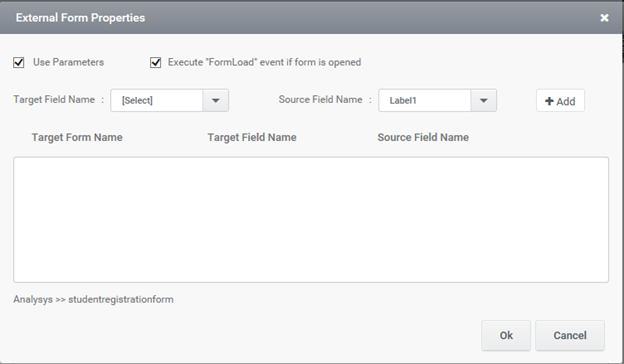
And click OK to continue it.
You can remove the forms that you have added to external form using the delete button in the Navigation Form popup window (Figure 11)
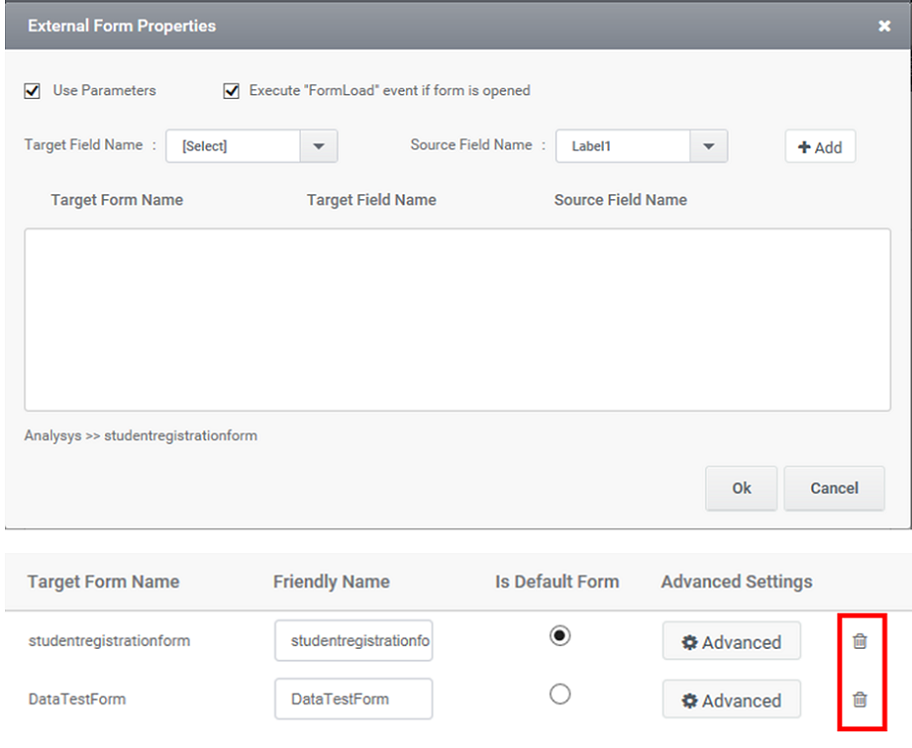
You can add multiple forms to form external form. And when selecting multiple forms you can set the default form by checking it. And click OK to complete the form mapping. Now the form is loaded in the external form control.
Another way you can do the same is by calling the form in the External form by rule.
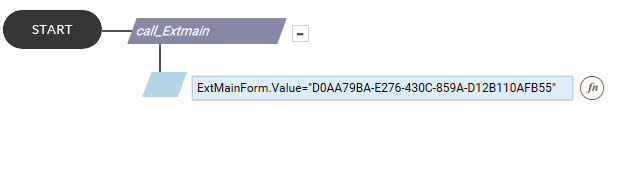
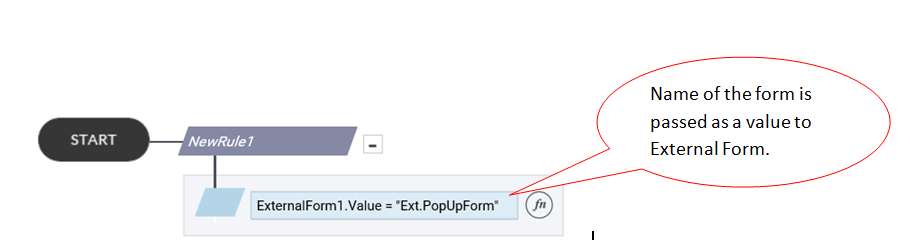
We are using the ‘ExternalForm.Value’ rule to call the form in the external form see (Figure 14). This rule can be triggered during form load or by button click or by change of value.
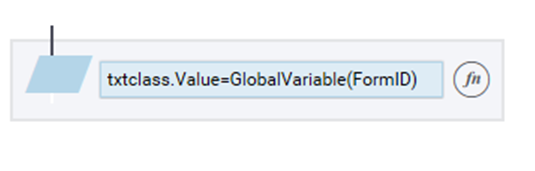
We are using the FormID to call the form in external form. To get the form id of one form you can use this rule GlobalVariable(FormID) see (Figure 13). You can set the form id to any of the control in the form and then copy it and paste it in the rule in the other form where the external form lies.


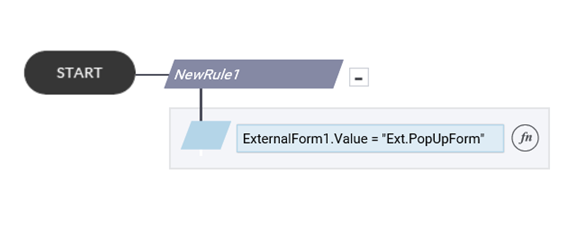
Another way is also by rule. We are using the ‘ExternalForm.Value’ rule to call the form in the external form .This rule can be triggered during form load or by button click or by change of value.
We are using the FormID to call the form in external form. To get the form id of one form you can use this rule GlobalVariable(FormID). You can set the form id to any of the control in the form and then copy it and paste it in the rule in the other form where the external form lies.
Similarly we can use the ‘ExternalForm.Value’ rule to select the form path and load the needed form by mentioning the path. It is illustrated below.
If you know the name of the form that you are synchronizing with the ExternalForm, you can directly write an action inside the rule as in the below figure
In the expression builder follow these steps, you first need to select the control (ExternalForm) and select the ‘Value’ option and add a RHS with ‘=” as the value in it.
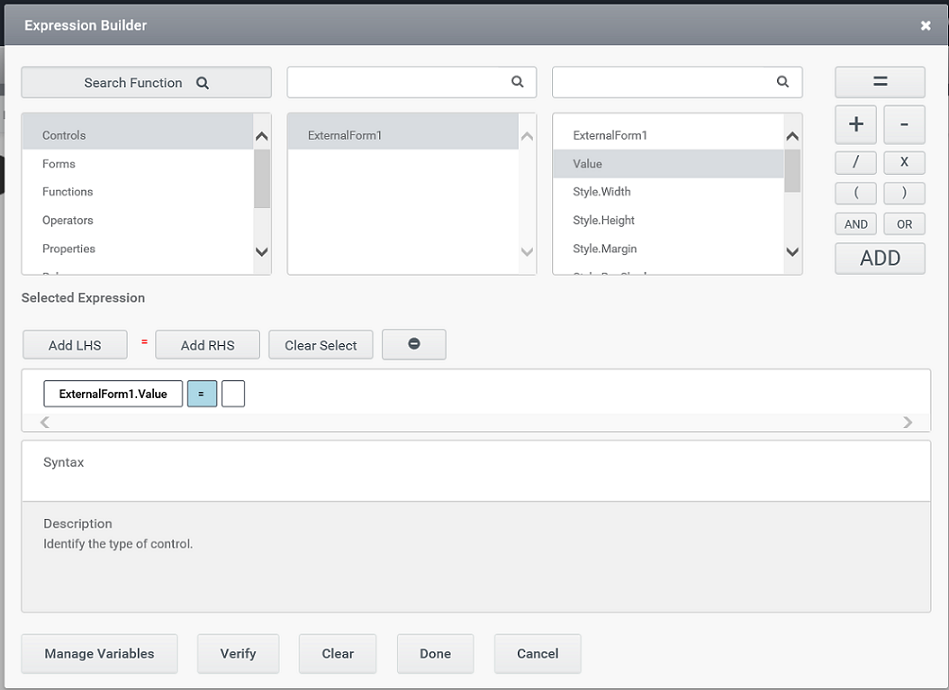
After that select the form you want to load inside the external form by selecting the ‘Forms’ option and select the form from the list showing.

The rule will have the following arguments,
Repeating property of External form: The major functionality of external form control is its repeating property.
You can set this by using rule or by enabling the property in the property window of external form control.
1) By Rule
Use the rule Repeater to repeat the external form. You can specify the count the form to be repeated.
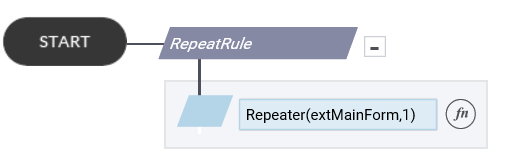
You can trigger this rule on true value of a condition or in a button click. When you are enabling this property you can see that on the click of the trigger the rule will work and form will repeat based on the count given.
2) By default property
In the property window you can see that the ‘Repeat Property’ option. Check that one to enable the repeat property of external form control.
After checking this property external form will load with the option to repeat and you can see that button in the right bottom corner of external form control.
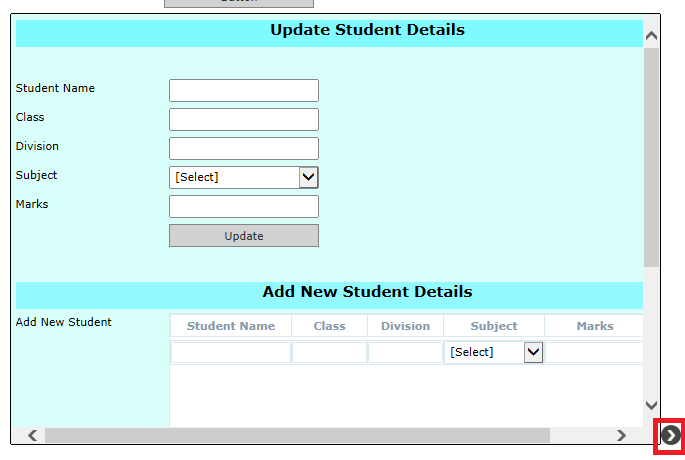
Clicking on that button there is options to repeat and remove the current external form.
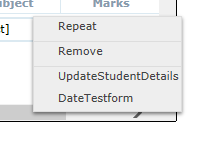
If you add multiple forms to the same external form control then you can see the names of the forms. To repeat, click on the form name which you want to repeat.
The remove option is to remove the repeated forms. But note that you can’t remove the parent form. It only allows to remove the child forms (Repeated forms).
When enabling the Repeat property you need to tick the Show Border property because then only you can see that operations button of the control. But when using the Repeater rule and once parent form gets repeated then in the child form you can see the repeater function button.
RepeaterGetFormName Rule: This rule given the form name appended with the form index. (See Figure26)
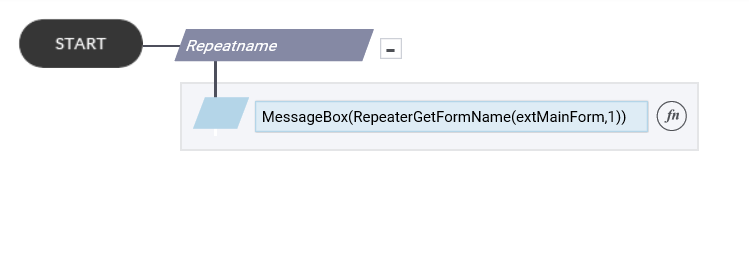
In this example when this rule is triggered it will show the form name with index 1 in a message box.
14. RepeaterQuickAction: We can enable or disable the repeating property of the external form by using this rule, instead of designer.
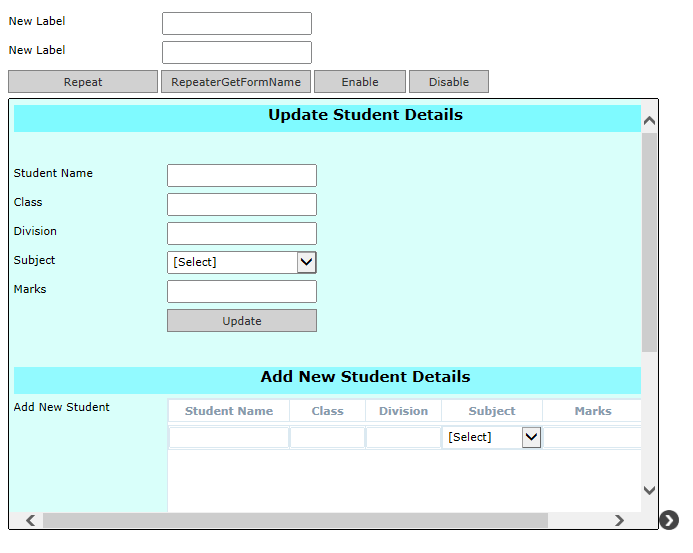
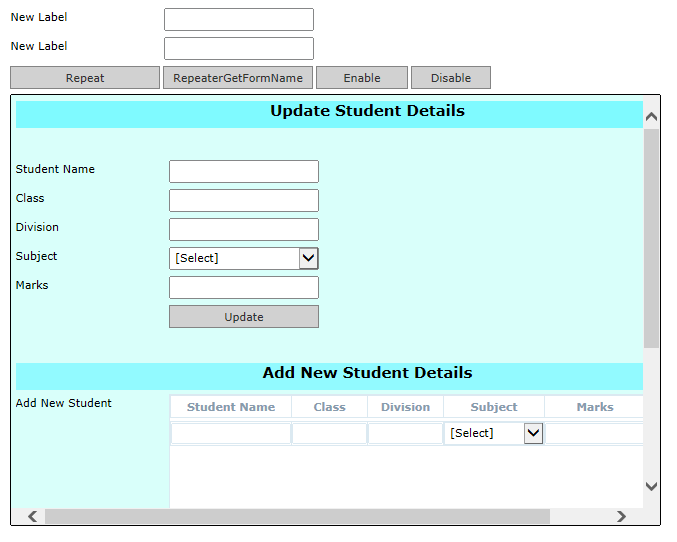
For this remove check from the Repeat property in property window of external form.

Then set two buttons in the designer to enable and disable this property. In the trigger of these buttons you can add the rules.

Then add the rule to enable and disable.
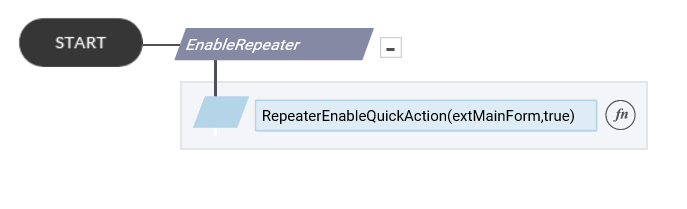
Setting to ‘true’ will enable the repeater property.
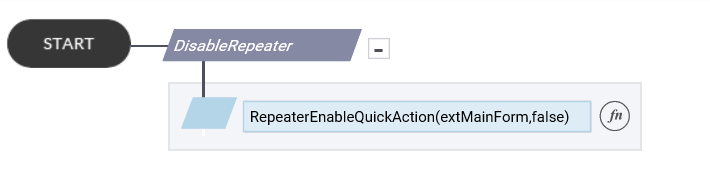
Setting to ‘false’ will disable the property on the click of the trigger button.
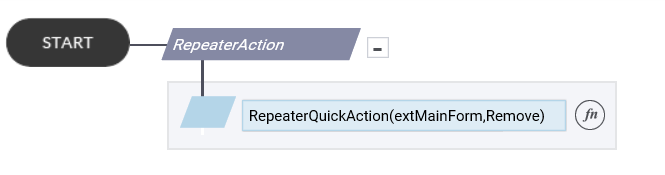
15. RepeaterQuickAction Rule: The rule is used to set the repeater actions by rule.
Syntax is: RepeaterQuickAction(ExternalFormName,ExternalFormAction,FormName[optional])
Where
ExternalFormName is the name of external form.
ExternalFormAction is Repeat/Remove/Change View.
FormName is applicable only if the second parameter is Change View
16. ExternalForm.Action Rule: This rule gives the current action performed on external form. You can add it in a message box and check what action has been done by triggering the rule in a button click.
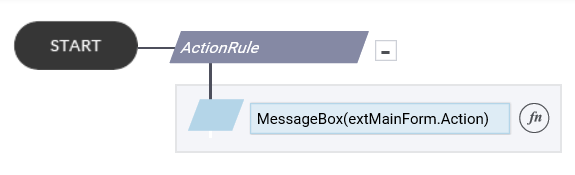
When clicking on button it will shows the action that happened before the rule triggered.

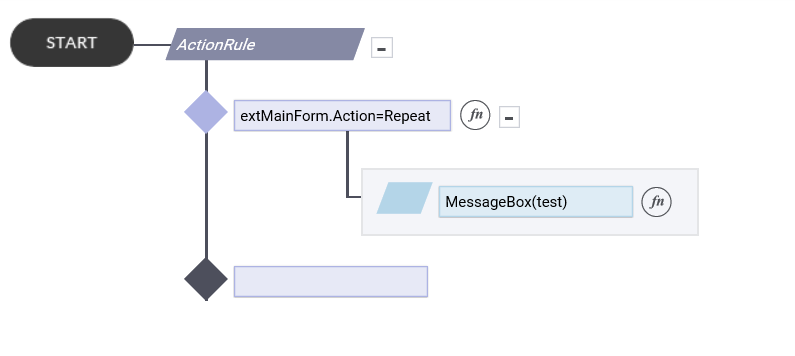
This rule can be used to make decisions based on the action in the external form by checking the ExternalForm.Action rule in a decision like in the below example. Here when a repeat action is occurred the message box will be triggered.
17. ExternalForm.ViewName Rule:
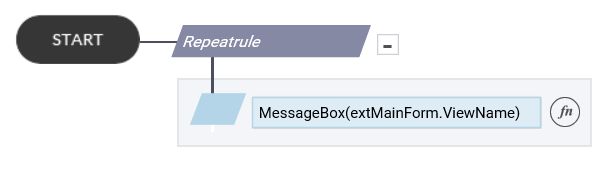
This rule will gives the form name of current form external form. In case of repeating it will give the name of last form which repeated.
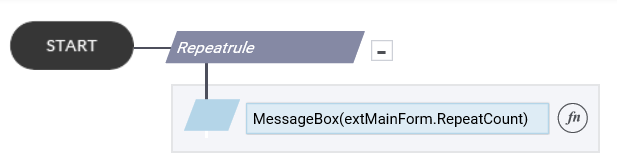
18. ExternalForm.RepeatCount Rule: This will returns the total count of repeats in external form.