Adding a Job Alert
Job represents the actual execution instance of an automation process. A job can be in various states such as scheduled, Running, Completed, Error, etc. indicating its current status and outcome.
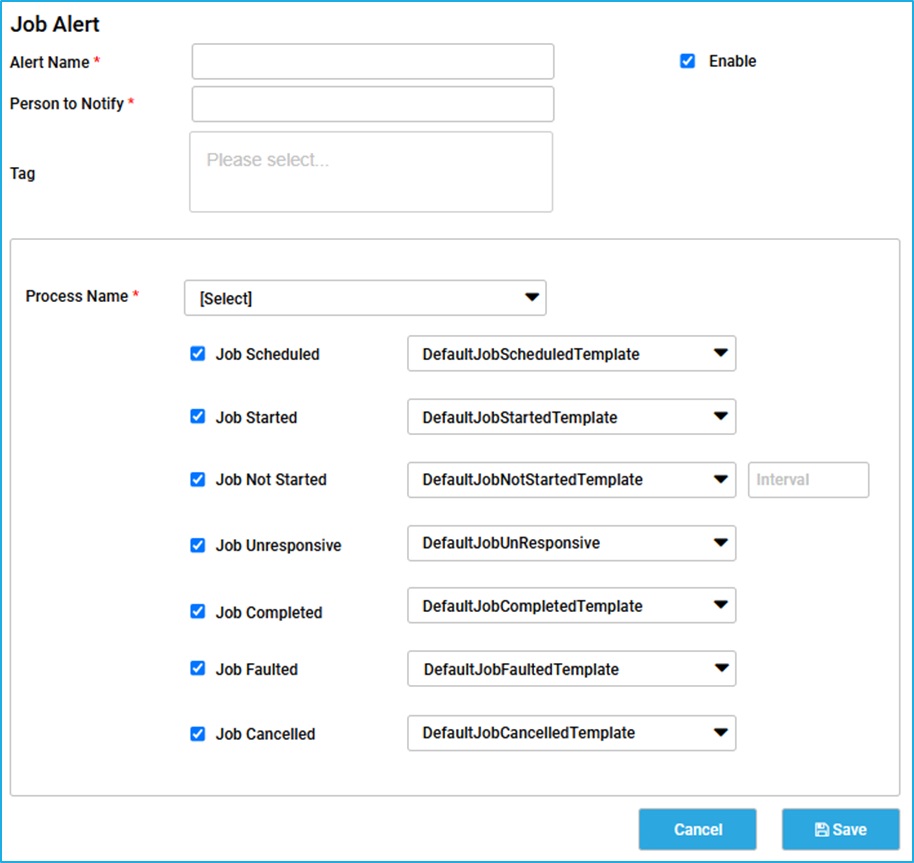
Steps to add a job alert:
- Configure the common fields such as the ‘Alert Name’, ‘Person to Notify’ and ‘Enabled’ checkbox and Tags.
- Select the Process name using the dropdown list for which the alert has to be assigned.
- After selecting the Process name, the user has seven options for job alerts. Notification can be sent for events such as Job Scheduled, Job Started, Job Not Started, Job Unresponsive, Job Completed, Job Faulted and Job Cancelled. Select the appropriate alert type and then select the template name using the dropdown next to it.
- Job Scheduled – This alert notification will be sent whenever the job is scheduled on a particular robot at the specified Date and Time.
- Job Started – This alert notification will be sent when the job has started to execute and the status of the job changes to running. It will provide the details about exactly when the job started to execute.
- Job Not Started – This alert notification will be sent only if the job has not started. This is based on the specified time interval to check whether the job has started or not.
- Job Unresponsive – This alert notification will be sent at any stage when a job becomes unresponsive to a particular robot.
- Job Completed – This alert notification will be sent on successful completion of the job. It will provide the details about the Start Time and End Time of the completed Job.
- Job Faulted – This alert notification will be sent whenever an error has occurred during the execution of a job and the status of the job changes to ‘faulted’.
- Job Cancelled – This alert notification will be sent whenever the scheduled job has been stopped, and the job status changes to ‘cancelled’.
- Click on the ‘Save’ button to add the Job Alert.