Project Snapshot
The Project Snapshot feature of RPA Genie serves as a virtual snapshot of the entire automation project and provides users with the capability to capture both the source code and the comprehensive history of their project during the publishing process. This feature facilitates users to maintain a detailed record of all the changes made in the project.
Project Snapshot Capabilities
The capabilities of the project snapshot are listed as follows:
- Source Code Capture: RPA Genie’s Source Code Capture goes beyond typical version control. It precisely captures the codebase during project publication, ensuring users can easily refer back to specific versions for a secure and controlled development environment. This mechanism preserves source code integrity, making it an integral part of Project Snapshot for confident analysis, recreation, or reverting to prior states.
- History Logging: RPA Genie’s Project Snapshot history logging feature provides a chronological record of changes made throughout the development lifecycle, offering users transparency into the evolution of the automation project. This functionality documents every change, update, or modification made to the automation project. This includes details such as user contributions, timestamped edits, and version comparisons. With this granular history, users gain insights into the project’s progression, facilitating efficient collaboration and troubleshooting.
Snapshot Creation and Utilization
Creating a snapshot captures a project’s state at a specific version, allowing easy reference and rollback to specific point when needed. Follow the steps provided below to create a Project Snapshot:
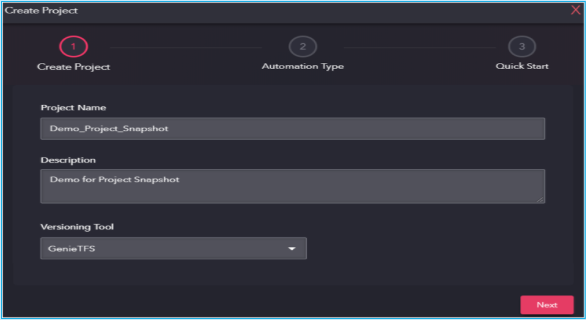
- Open a new blank project by providing a suitable project name and description. Select ‘GenieTFS’ as the versioning tool.
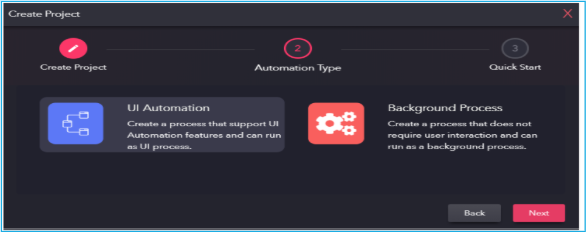
- Select Automation Type and click ‘Next’.
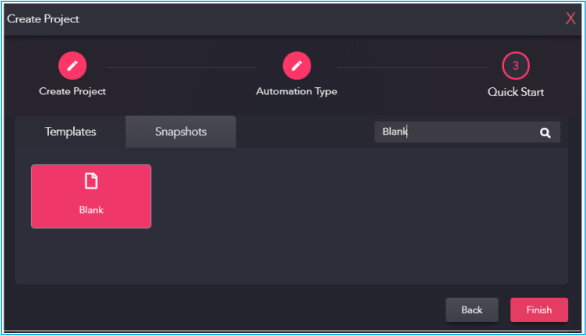
- In the Templates tab, select the blank template and click the ‘Finish’ button.
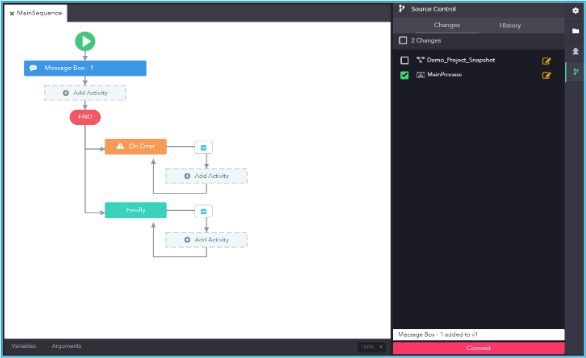
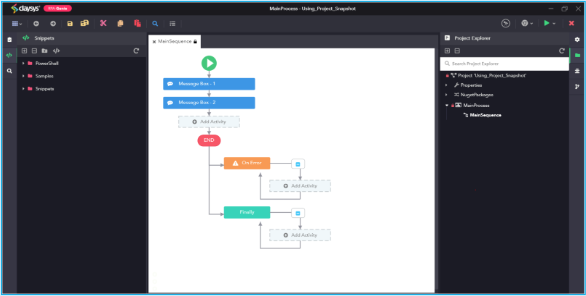
- In the designer pane, add a Message Box activity. Set ‘Message Box -1’ as the label and ‘Version 1’ as the message, then save the changes.

- Right-click on the project name in the Project Explorer. Select ‘Check-in All’ option to go to the source control panel.
- Add a comment (e.g., “version1”) and click ‘Commit’.
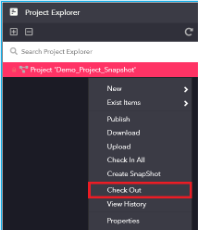
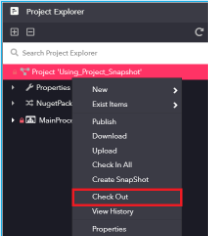
- Right-click the project name again in the project explorer and select ‘Check-out’ to make new changes.
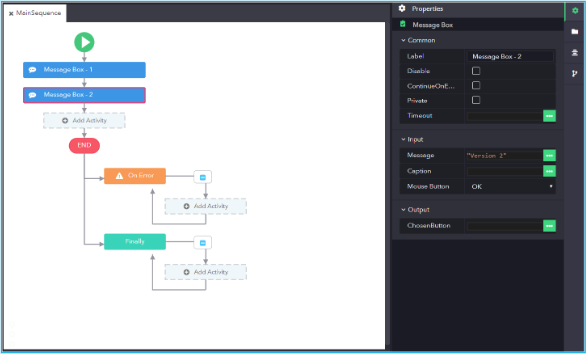
- Add another Message Box activity in the designer pane. Label it ‘Message Box -2’ and set the message to ‘Version 2.’ Save the changes.
- Repeat the check-in process by right-clicking the project name, selecting ‘Check-in All,’ adding a comment (e.g., “version2”), and clicking ‘Commit’.

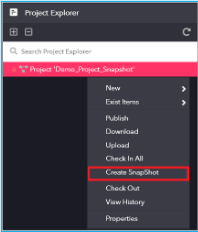
- Right-click the project name, select ‘Create Snapshot’ option to create the project snapshot.
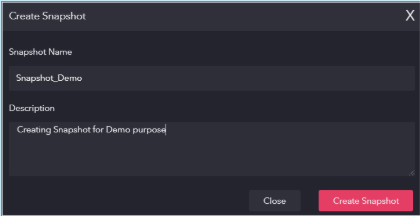
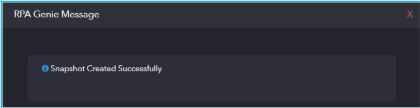
- In the ‘Create Snapshot’ window, enter a snapshot name and description. The message “Snapshot Created Successfully” will pop-up after clicking the ‘Create Snapshot’ option.
Utilizing the created Project Snapshot
Using a snapshot quickly restores a project to a prior version, making it easy to review, modify, or revert changes without recreating the work. Follow the steps provided below to use the Project Snapshot created in the previous project:
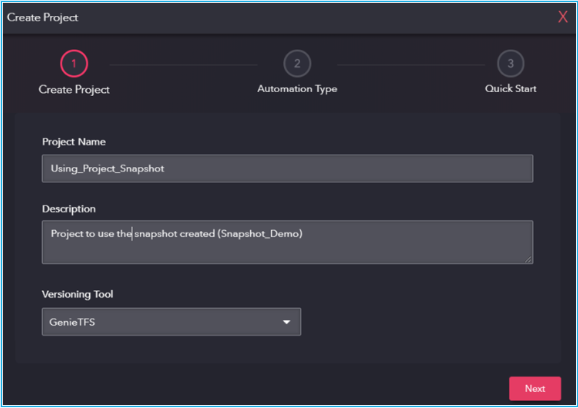
- Open a new blank project by providing a suitable project name and description. Select ‘GenieTFS’ as the versioning tool.
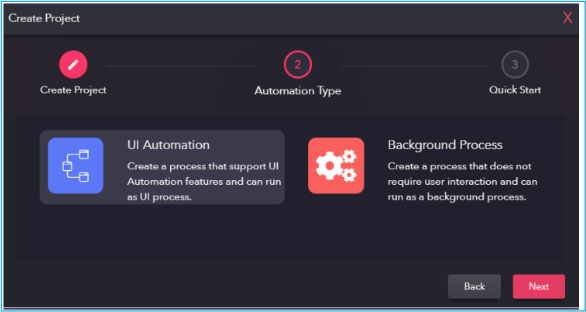
- Select Automation Type and click ‘Next’.
- In the Snapshots tab, select the previously created snapshot and then click ‘Finish’.

- Next, view the workflow of the snapshot that was created previously. The project will open with the latest version displaying the activities added (i.e. both Message Boxes) added in versions 1 and versions 2 respectively.
- Right-click the project name in the project explorer and select ‘Check-out.
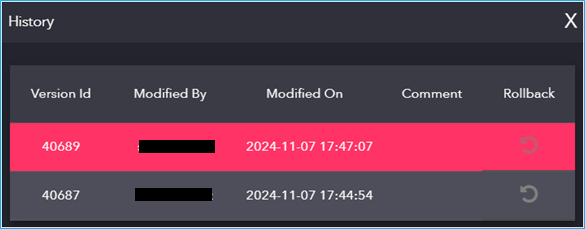
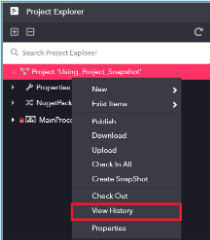
- To view the project version history, right-click the project name and select ‘View History’ option.
- In the History window, the details such as the Version ID, Modified By, Modified On, Comment, and Rollback options can be reviewed. It also allows users to revert to any previous version of the project snapshot.