Settings
User can access a list of options in the RPA Genie Admin Console by clicking on the “Settings” tab, as illustrated in the image below.
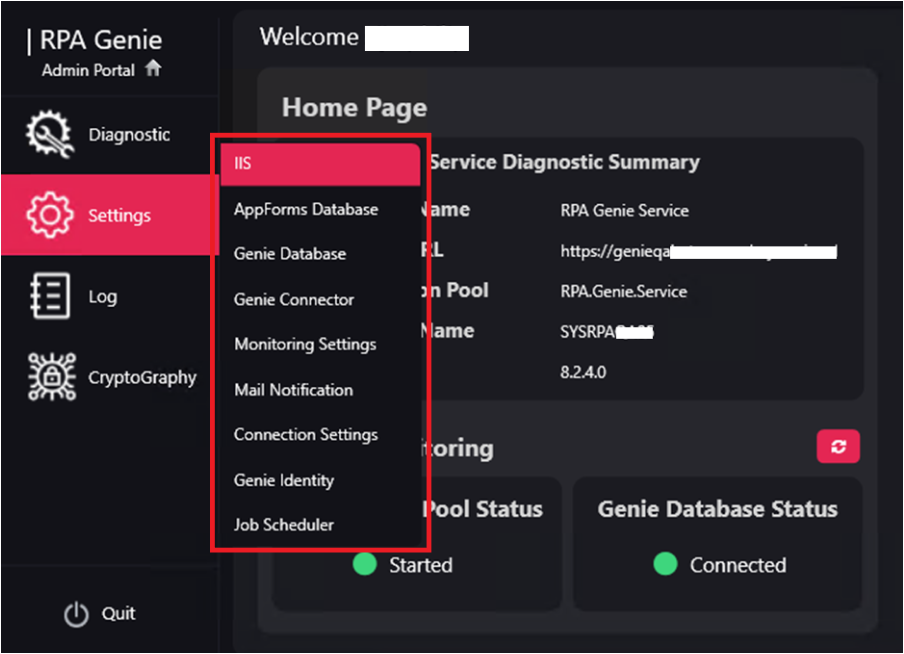
IIS
IIS, or Internet Information Services, is a web server software by Microsoft that is used for Windows servers. It is utilized to host and manage websites, web applications, and services.
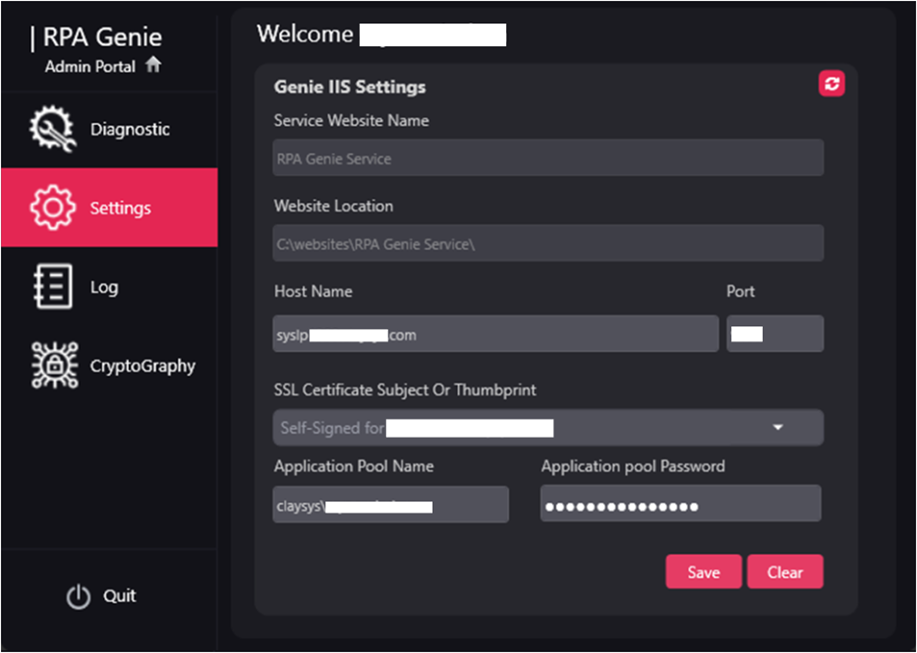
From the IIS window of RPA Genie Admin Console, users can configure the following fields:
- Service Website Name: The website name of the RPA Genie Service will be displayed in this field.
- Website Location: The location of the RPA Genie service that is installed on
youruser’s machine will be displayed in the Website Location field. - Host Name & Port: The hostname and port number of the RPA Genie Service can be visible in this field.
- SSL Certificate Subject or Thumbprint: In the SSL Certificate dropdown list, the user can see all the available certificates in the user Domain and also can bind any of the certificates with the IIS Settings of RPA Genie Service.
- Application Pool Name: This field is often set as ‘Server-name/Username’ to identify which user or service account is running the application on that server.
- Application pool password: It’s the password for the identity (user account) under which the application pool runs.
AppForms Database
Authentication methods are stored and managed centrally in the AppForms DataBase. It enables the users to securely store and access authentication information, such as usernames and passwords, which can be used to confirm the legitimacy of users accessing applications or systems while improving security and access control.
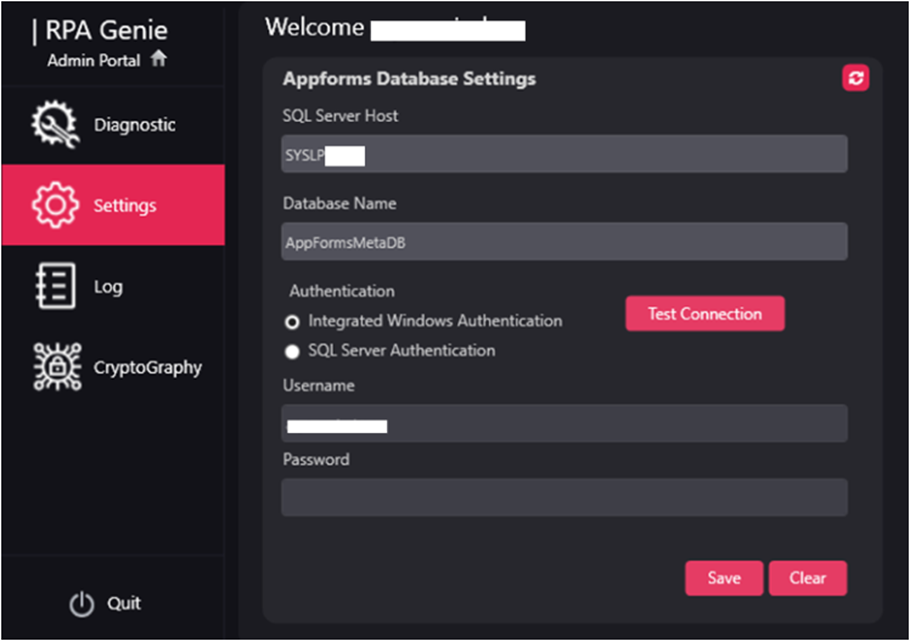
The following fields of the AppForms Database window are editable by the users:
- SQL Server Host: The AppForms Database SQL Server Host of the AppForms Service will be shown in the SQL Server Host field.
- Database Name: The AppForms Database Name of the AppForms Service will be shown in the Database Name field.
- Authentication: In this field, the user can select between Integrated Windows Authentication (which uses the Windows login credentials) and SQL Server Authentication (which requires a SQL username and password). A Test Connection button is available to verify the database connection when using Integrated Windows Authentication. Test Connection button is not applicable when using SQL Server Authentication.
- Username: The Username of the user connected to the AppForms Database can be seen in the Username field.
- Password: The user’s password connected to the Appforms Database will be shown in a masked format in this field.
Note: The Username and Password fields are disabled when Windows Authentication is selected and become editable only when SQL Server Authentication is chosen.
Genie Database
The Genie Database acts as a comprehensive storage system for storing all metadata associated with a particular application or system. For effective data management, retrieval, and manipulation for various processes and functionalities, it preserves key information about data structures, configurations, and relationships within the application.
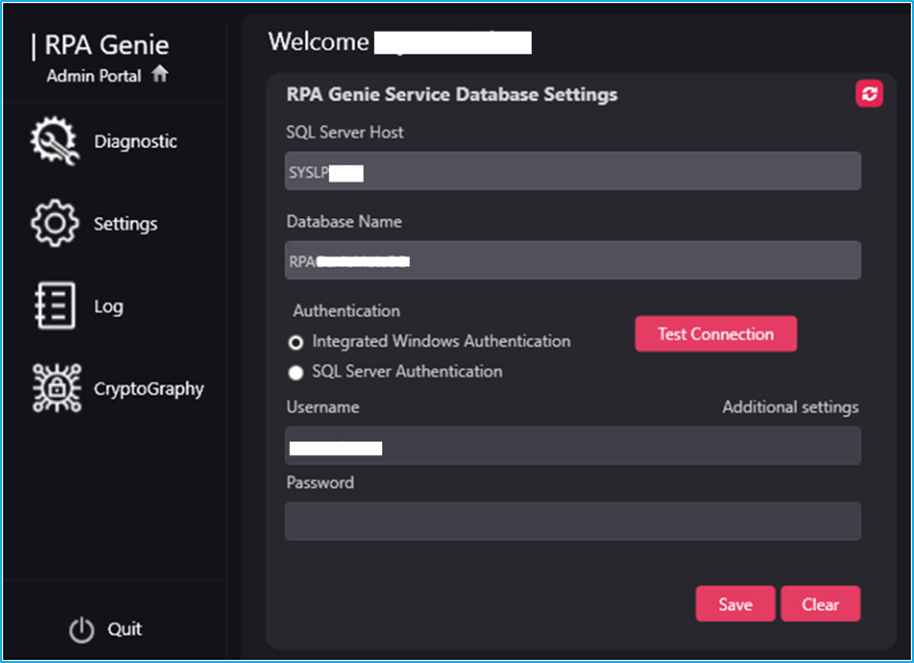
The following fields of the Genie Database window are editable by the users:
- SQL Server Host: The Genie Database SQL Server Host of the RPA Genie Service will be shown in the SQL Server Host field.
- Database Name: The Genie Database Name of the RPA Genie Service will be shown in the Database Name field.
- Authentication: In this field, the user can select between Integrated Windows Authentication (which uses the Windows login credentials) and SQL Server Authentication (which requires a SQL username and password). A Test Connection button is available to verify the database connection when using Integrated Windows Authentication. Test Connection button is not applicable when using SQL Server Authentication
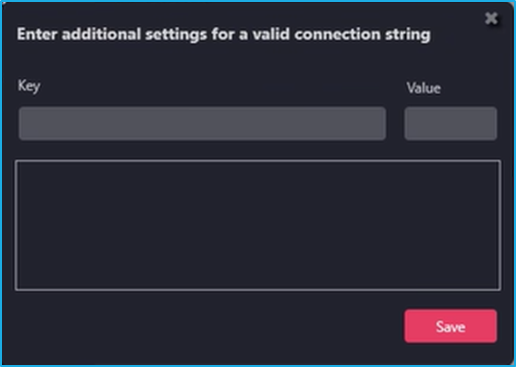
- Additional Settings: By clicking on the additional settings, the user will be able to add additional properties to the connection string in the form of a Key value pair.
- Username: The Username of the user connected to the Genie Database can be seen in the Username field.
- Password: The user’s password connected to the Genie Database will be shown in a masked format in this field.
Note: The Username and Password fields are disabled when Windows Authentication is selected and become editable only when SQL Server Authentication is chosen.
Additional Settings Wizard:
Genie Connector
The Genie Connector Settings provides a unified interface to configure how RPA bots connect and operate across machines. It allows users to define the bot’s connection scope, enable offline access through Disconnected Mode, and set up Machine Connection Settings. These settings include a unique Machine ID to identify each device and a Machine UserId that combines the machine address with the username, ensuring accurate mapping, secure communication, and efficient automation across both attended and unattended environments.
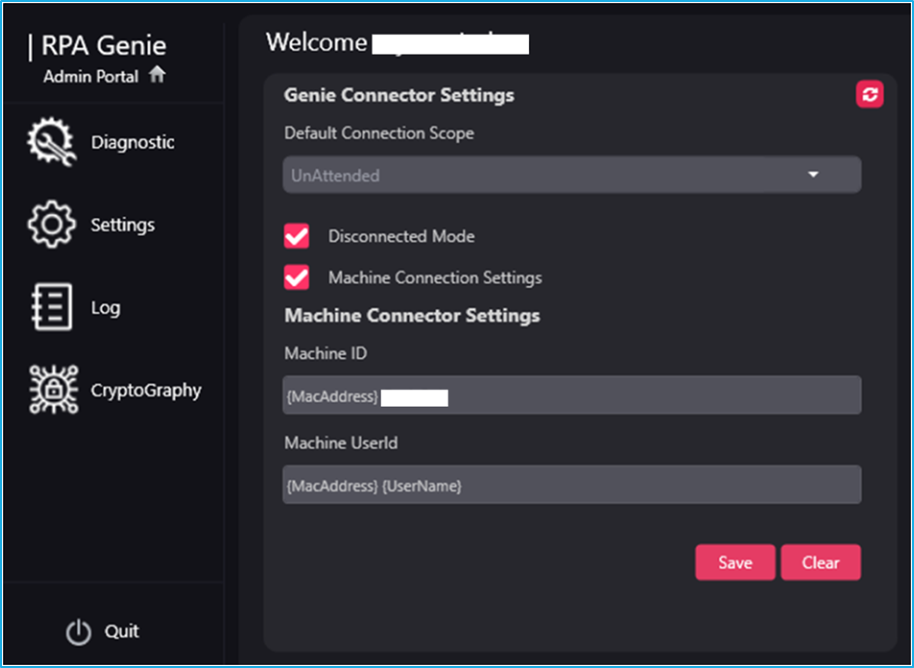
The following fields of the Genie Connector Settings window are editable by the users:
- Default Connection Scope: Bots are classified as Attended or Unattended based on whether they require user interaction (Attended) or can run automatically in the background (Unattended).
- Disconnect Mode: When this checkbox is selected, it enables offline access when the RPA service is stopped. This allows CoPilot to display the Offline button after a short delay.
- Machine connection settings: When this checkbox is enabled, it allows the user to input a unique Machine ID and Machine UserId for accurate bot-to-device mapping.
- Machine ID: A machine ID is a unique code or a number assigned to a computer or device, serving as a unique identifier for the system.
- Machine UserId: This field creates an individual identifier for a particular computer or device by combining the machine name and username, which are separated by a hyphen.
Monitoring Settings
Users will be able to configure Shared Location and Notify Email options in the Monitoring Settings window.
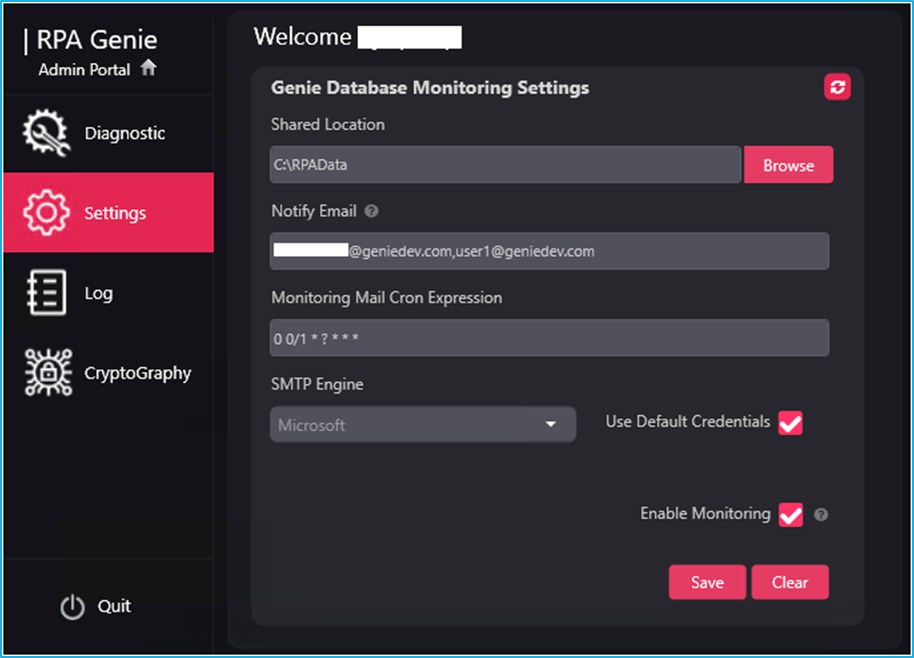
- Shared Location: This field indicates the same shared place from which the installation bundle, packages, and extensions can be accessed. Also, the user will be able to browse to change the shared location path and configure it to a different location, so that all the files will be accessible from that configured location.
- Notify Email: In the Notify Email field, users can provide the Email ID to which the notification has to be sent. Users can also give multiple Email IDs separated by a comma.
- SMTP Engine: This field allows users to select their mail notification engine, which can either be Microsoft or MailKit for accessing their emails using the dropdown menu.
- Use Default Credentials: Select thecheckbox to enable the use of system default credentials for mail access.
- Enable Monitoring: Select the checkbox for enabling genie Database Monitoring.
- Monitoring Job Cron Expression: A cron expression is a string representing a schedule in the form of fields, separated by spaces. Each field represents a unit of time, such as minutes, hours, days, and so on. Cron expressions are commonly used in job scheduling to define when a job should run. A monitoring job cron expression typically specifies the schedule for monitoring tasks or jobs.
A cron expression consists of five or six fields, representing the following:
- Minute (0 – 59): The minute at which the job should run.
- Hour (0 – 23): The hour at which the job should run.
- Day of the month (1 – 31): The day of the month on which the job should run.
- Month (1 – 12 or JAN-DEC): The month in which the job should run.
- Day of the week (0 – 6 or SUN-SAT): The day of the week on which the job should run.
- Year (optional): An optional field for specifying the year.
| Field Name | Mandatory | Allowed Values | Allowed Special Characters |
| Minutes | Yes | 0 – 59 | , – * / |
| Hours | Yes | 0 – 23 | , – * / |
| Day of month | Yes | 1 – 31 | , – * ? / L W |
| Month | Yes | 1 – 12 (representing Jan – Dec), JAN – DEC (case-insensitive) | , – * / |
| Day of week | Yes | 0 – 6, 7 (representing Sun-Sat and Sun again), SUN – SAT (case-insensitive) | , – * ? / L # |
| Year | No | empty or 1970-2099 | , – * / |
Mail Notification
The Genie Mail Notification Settings window is used to customize email-related settings. The email polling behavior and the preferred engine for handling mail notifications can be configured.
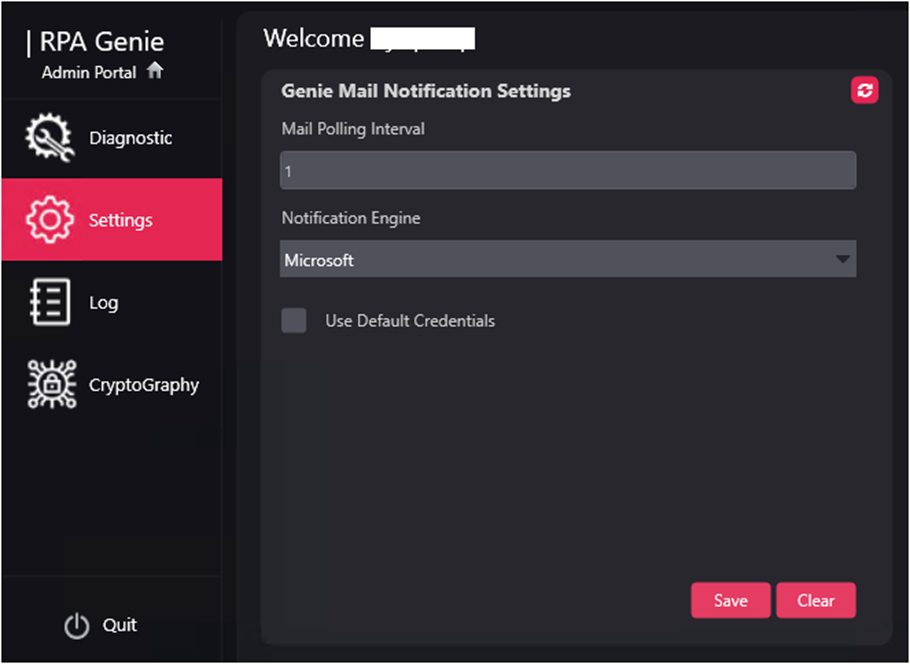
- Mail Polling Interval: This field allows users to specify the time interval (in minutes) to receive mails from BMT alert.
- Notification Engine: Users have the option to choose their mail notification engine, which can either be Microsoft or MailKit, from a dropdown menu for accessing their emails.
- Use Default Credentials: If this checkbox is checked, then the default credentials will be used to send the mail through the Microsoft server. If it is unchecked, then the mail is sent with the respective SMTP credentials provided in Bot Manager. This is only applicable to Microsoft SMTP Server.
Connection Settings
The Connection Settings window allows users to configure how frequently their robot or machine communicates with the RPA Genie Service. These settings help ensure consistent connectivity and timely status updates.
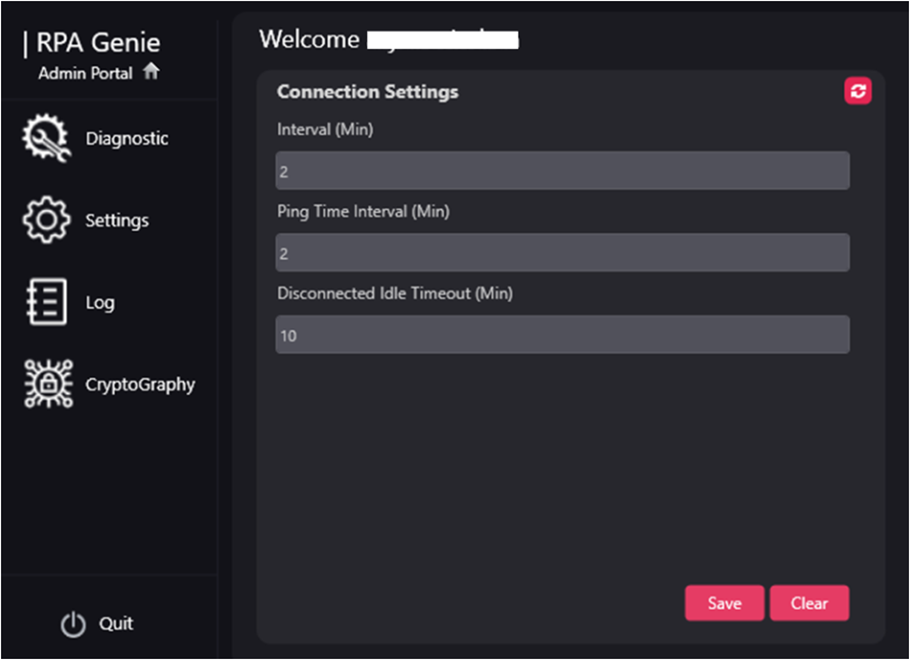
The Connection settings window enables the user to customize the following fields:
- Interval (Min): This field specifies the frequency or time interval (in minutes) at which a robot/machine establishes a connection with the Service URL.
- Ping Time Interval (Min): The frequency or time interval (in minutes) at which a service notifies the user whether or not a robot/machine is still connected to the service URL.
- Disconnected Idle Timeout (Min): The time limit/interval (in minutes) up to which the robot/machine tries to re-establish the connection with the RPA Genie Service. After the specified time limit the status of the robot/machine will change to disconnected.
Genie Identity
The Genie Identity section under Settings allows users to configure certificate details required for secure connection and authentication through the Genie Connector.
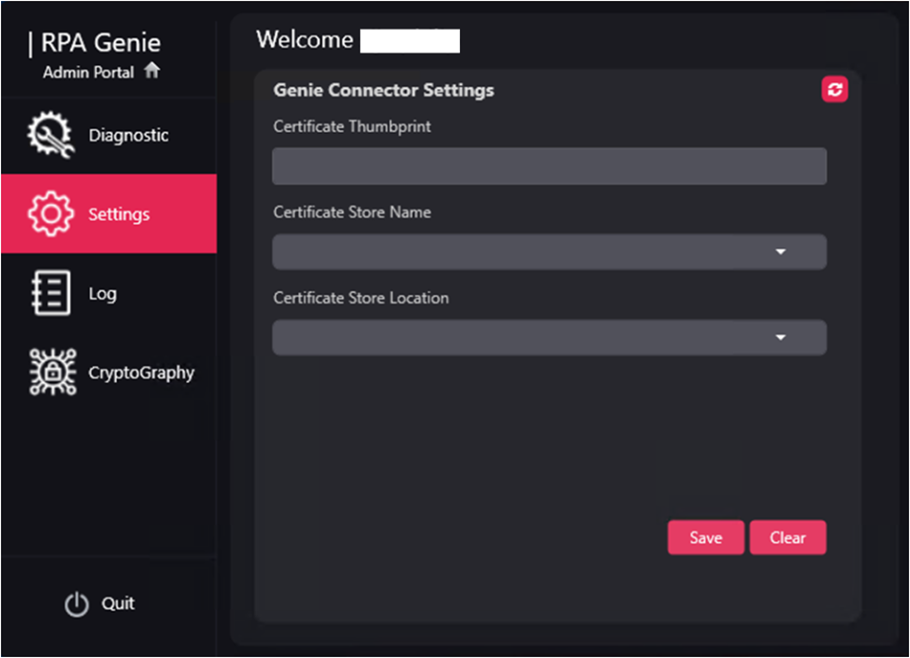
Following are the fields that the user can edit in the Genie Identity window:
- Certificate Thumbprint: This field allows the user to enter the unique identifier of the certificate to be used.
- Certificate Store Name: This field allows the user to select the store where the certificate is located using options such as AddressBook, AuthRoot, CertificateAuthority, Disallowed, My, Root, TrustedPeople, and TrustedPublisher from the dropdown.
- Certificate Store Location: This field allows the user to select the location scope for the certificate store using options such as CurrentUser or LocalMachine from the dropdown.
Job Scheduler
A job scheduler automates job execution by defining how often specific jobs will be running, their active execution intervals, and the maximum idle time before termination.
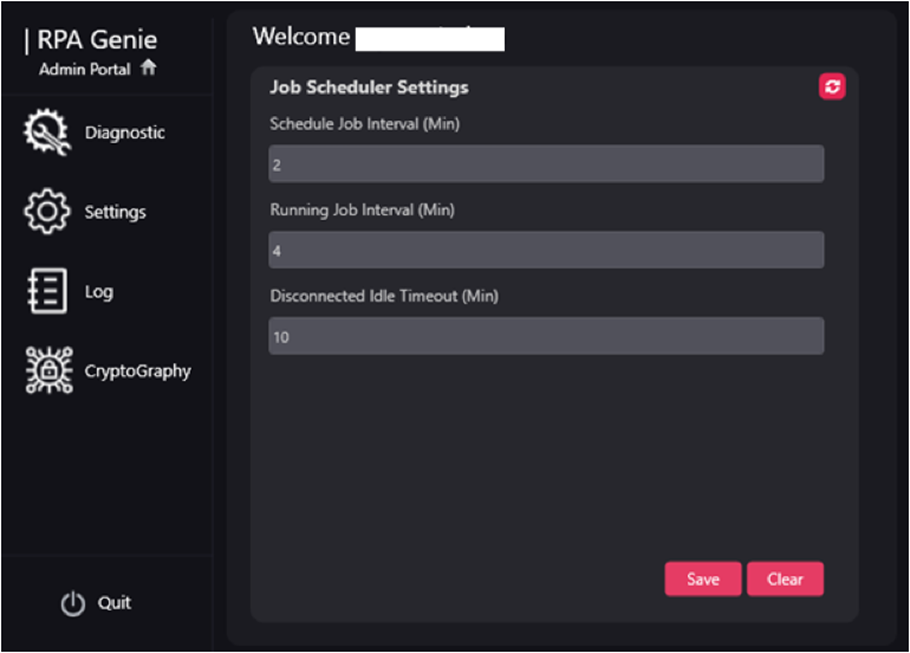
Following are the fields that the user can edit in the Job Scheduler window:
- Schedule Job Interval (Min): The time duration or frequency (in minutes) can be configured in this field to run a specific job or task automatically in a scheduled manner.
- Running Job Interval (Min): The Running Job Interval specifies the time interval or frequency (in minutes) at which a job or process is actively running or executing.
- Disconnected Idle Timeout (Min): In this field, user can specify the maximum period of inactivity allowed for a job to remain disconnected (not actively processing) before it is terminated or marked as inactive by the scheduler.