How to Pass Value from one form to another Form in ClaySys AppForms?

In ClaySys AppForms a user can pass values to a form to another form using the SetFormValue() Function. Here we are demonstrating how to implement this functionality in ClaySys AppForms.

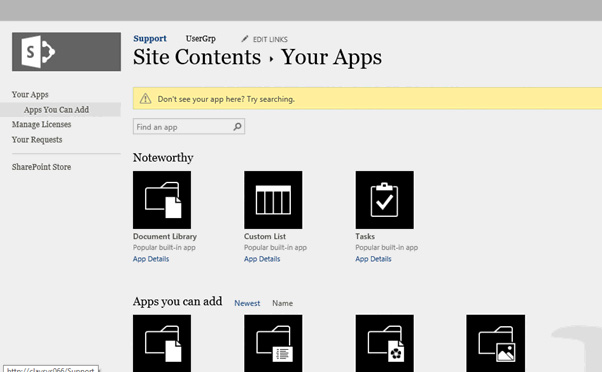
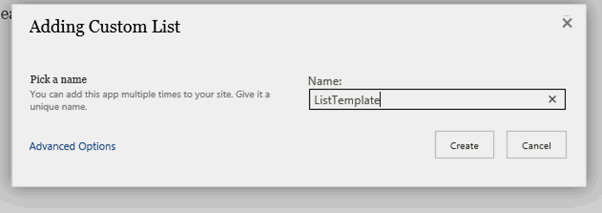
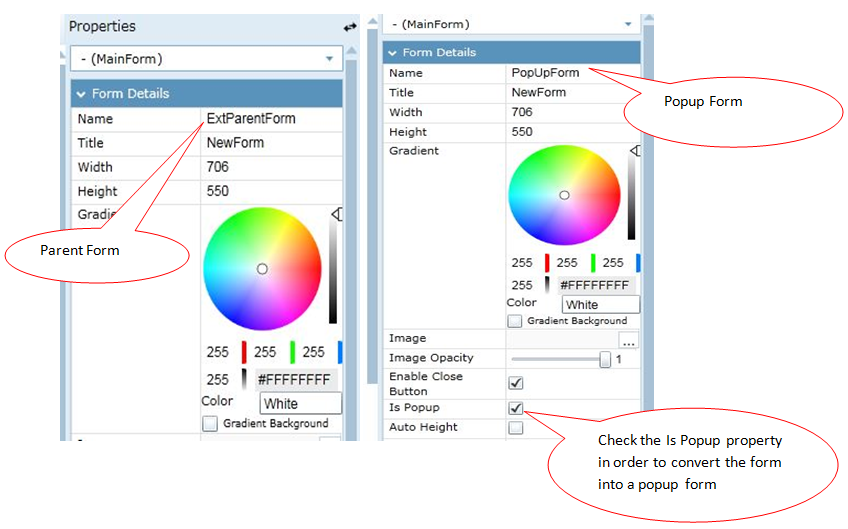
In order to pass values a user should have a minimum of two forms. So create a form and convert it into a pop up form and another form acting as the parent form where the actions to setvalue occur.

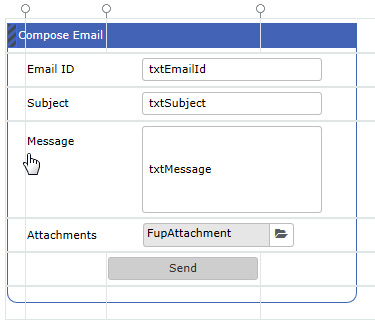
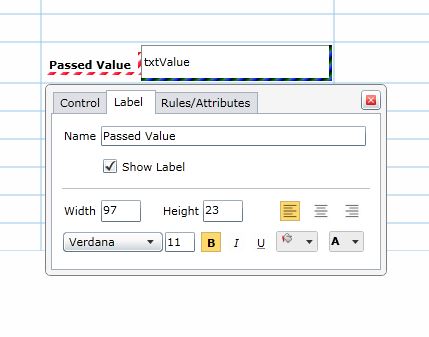
Drag and drop a textbox control into the popup form so that we can see the passed value from the parent form. Save and checkin the form.

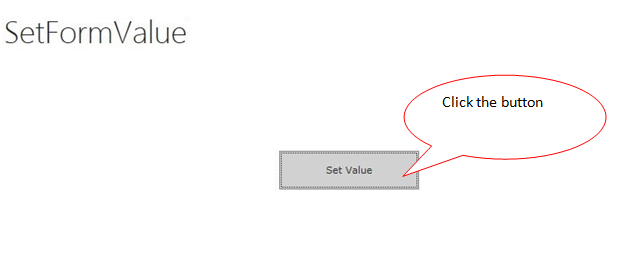
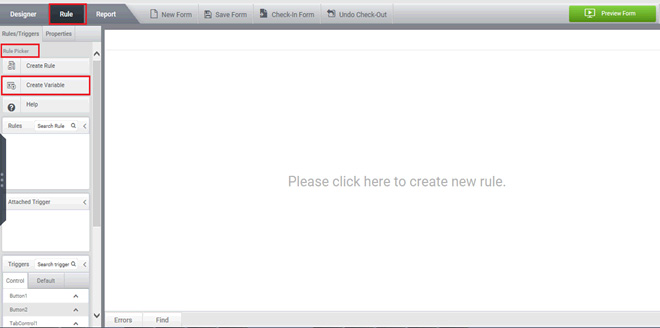
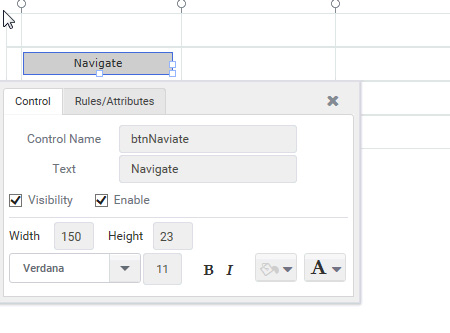
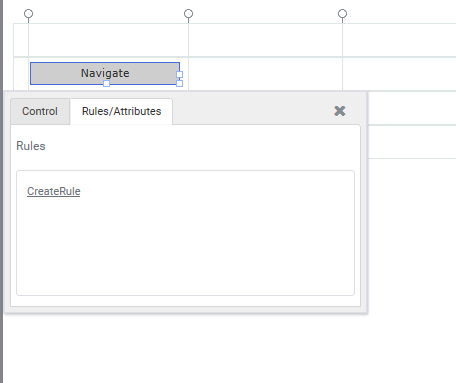
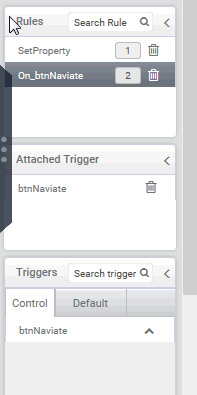
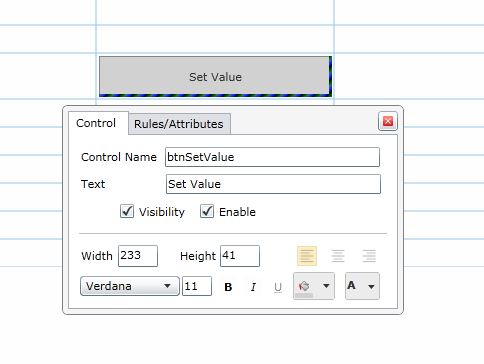
Now in the parent form drag and drop a button control and set a rule in the form, with the button control as the trigger.

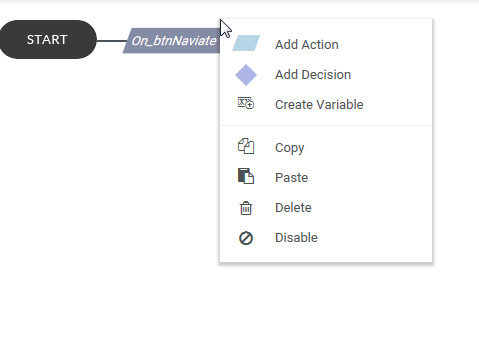
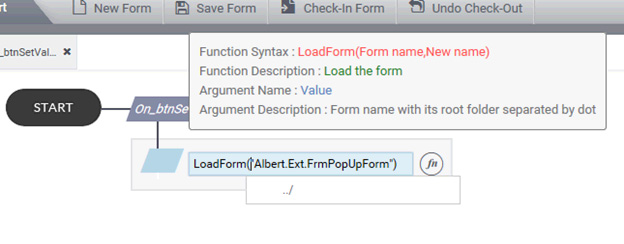
Add an action in the form so that in the button click we can load the popup form. For that we have a function LoadForm() to load a specified form.


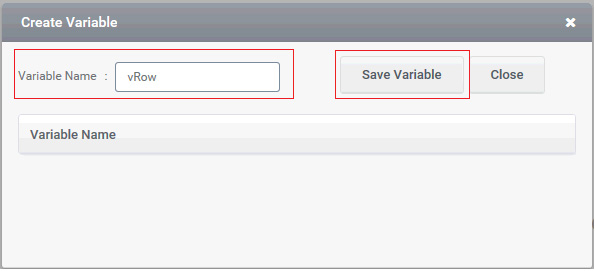
Now we have to pass a value to the popup form, for that in ClaySys AppForms we have the SetFormValue() function. So add another action below the LoadForm() function to set value as shown below,

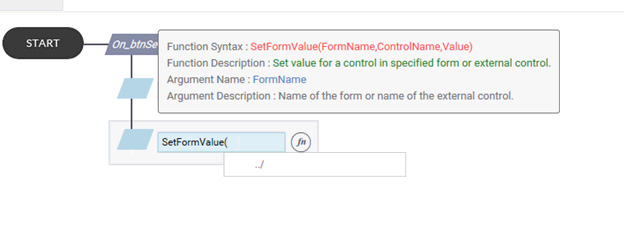
SetFormValue have 3 arguments.

  1. The name of the form to which the value is been passing.
  2. The Control name where the value is to be passed.
  3. Finally the value to be passed. Either it can be a string or a value from a control.

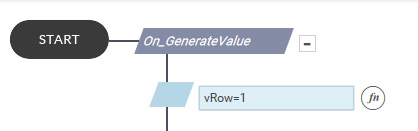
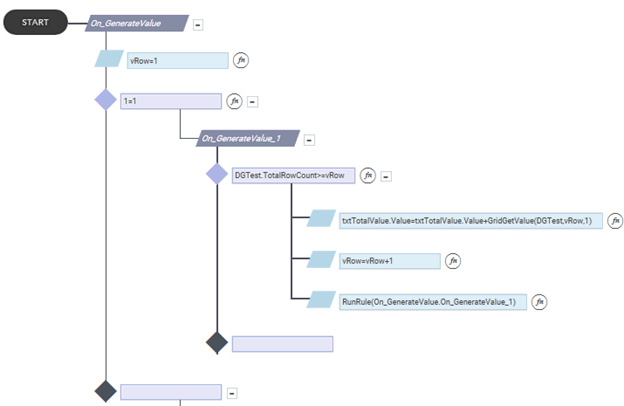
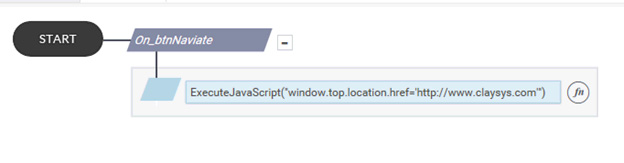
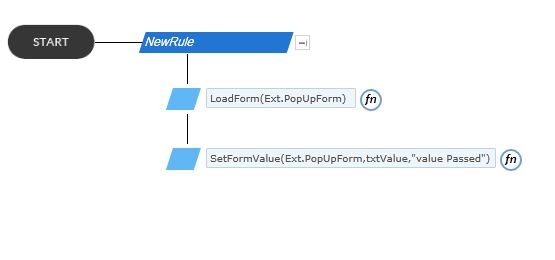
The complete rule will be like this,

Note: SetFormValue() can only be viewed in WebPart. So add the parent form to the web part.

How to use loop rules in the form

How to use loop rules in the form

Step 1 : Create a variable ‘Vrow’ which is used to count the loop. Click on ‘Create variable’ Option  under Rule Picker  From the left side of the Rule tab.

Figure 1

Step 2 : Enter the Variable Name and click on ‘Save Variable’ button and after saving click on ‘Close’ button.

Figure 2

Step 3 : Initialize variable ‘vRow’ by giving ‘1’ as its value. After each iteration the value of ‘vRow’ will be incremented by one .

Figure 3

Step  4 : Create a sub-rule ‘On_GenerateValue_1’ for  defining the loop , as the loop contain a set of action which is executed repeatedly and should be separated from the initialization of ‘vRow’.

Figure 4

Step  5 : Define the loop . A loop contains a condition, set of action to be repeated , increment operation .

  • Define a Condition  such that iteration occurs only when this condition is satisfied else exit from the loop. for example here we take the total row count of grid by ‘DGTest.TotalRowCount’ command  and will check if its value is greater than the value in vRow. After each iteration the vRow Value will increase by one . When vRow value become greater than TotalRowCount, the loop will exit.
Figure 5

Define the set of action to be repeated. For example here ‘GridGetValue(DGTest,vRow,1)’ will give the value in that particular row  ,which matches with the value in vRow. This value is summed up and stored into a text control named ‘txtTotalValue’.

Figure 6

Increment the value of variable ‘ vRow’  by one.

Figure 7

To continue the iteration call the loop rule by using RunRule function. For example we use ‘RunRule(On_GenerateValue.On_GenerateValue_1)’ . Here  ‘On_GenerateValue ‘ is the main rule name and ‘ On_GenerateValue_1’ is the sub-rule name.

Figure 8

Figure 9 shows the Loop rule.

Figure 9

How to Create an External SharePoint Data Source

How to Create an External SharePoint Data Source

How to Create an External SharePoint Data Source

Consider a scenario where you want to access the data stored in a List in another site. In ClaySys AppForms this can be achieved by creating an External SharePoint Data Source related to that SharePoint List.

To create an external SharePoint, click on Datasource Settings from the AppForms designer in the site where you want to access the list.

From the menu appearing select External SharePoint as the type of Data Source and enter the Title, Description and select the URL of the site where the List resides. While entering the URL of the site always append the URL with the following .asmx code “/_vti_bin/Lists.asmx” Provide the username with the domain who has permission in that particular site and save the details. Complete procedure is shown below.

For accessing the Lists from another site in the forms, open ClaySys AppForms designer. Create a Data Source, select External SharePoint as DataSource Type.

Clicking ok will take you to the menu where you want select the data source, select the data source and click next to see the available sites.

Click next, Here you can see that all the available lists is been populated in the menu. Now you can select any of the lists according to your workflow and continue with insert, select, update, delete operations.

So using External SharePoint a user can access the data available in another site.

How to save List Templates

How to save List Templates

Step 1 : on the right corner of the window  click on settings.

Figure 1

Step 2 : Click on ‘Site settings’ from the drop down menu , then we can see the following window appearing.

Figure 2

Step 3 : Click on ‘List template’ option as shown in the above image. And we can see ‘List Template Gallery’. Click on ‘Files’ at the leftmost corner as shown in the following image.

Figure 3

Step 4 :Click on ‘Upload Document’.

Step 5 : Following Pop up will appear where we can browse a list template stored in our computer and click ‘OK’ button.

Figure 5

Step 6 : Following Pop up will appear where we can change the name of the List Template and    enter the Description as required and click on ‘Save button’.

Figure 6

Step 7 : Now go to the Required sub site, click ‘Settings’ on the right corner (as done in step ‘a’). Then click on ‘Site Contents’. Following Screen appears in which click on ‘add an app’.

Figure 7

Step 8 : Following screen will appear where we can type the uploaded template name and click search.

 Figure 8

9 Step 9 : Then you can see the Uploaded template ,Click on it .

 Figure 9

Step 10 : On clicking it ,we will get following Pop up . Enter the name for the List template and click ‘Create’ button.

Figure 10

How can I send email from a form in ClaySys AppForms?

Send Email

  1. Send an Email

       This is a feature included in the AppForms to generate an email, so that the sender will receive that email as soon as the button is triggered and the entire form is also attached along with the mail in a pdf format.

         Step 1: Create a form as shown below in-order to show the ‘Send an Email’ property.

Figure 1: Designer

Figure 2: Preview

2, Send an Email using form as an attachment.

            Step 2: Enter the rule as per the below mentioned syntax and set a trigger in-order to activate the rule.

        Syntax:

        SendEmail (ToAddress, Subject, EmailBody, SuccessMessage, true/false, Fileupload)

        Example:

        SendEmail (txtemailid.Value,txtsubject.Value,rtbmessage.Value,”Email Sent successfully”,true,FileUpload4)

                                               OR

        SendEmail (abc@gmail.com, text, hello, “Email Sent successfully”, true, FileUpload4)

Figure 3: Rule for SendEmail

OR

Figure 4: Rule for SendEmail

   Step 3: Once the rule is set, check the preview and thereby clicking on the button, which is set as a trigger, the email is sent to the corresponding recipients.

Figure 5

1, On checking the recipients inbox, the email can be viewed.

Figure 6

3, Send an Email with files that are uploaded to the File upload control

In the ‘Send an Email’ property, the email can be send by attaching multiple files with the mail and send to the corresponding recipients.

  1. Create a form as mentioned above.
  2. In the properties of the ‘File Upload’ control, click the checkbox of ‘Allow Multiple File’.
  3. Check the ‘Preview’ and enter the values in the fields as shown below.
Figure 7

4, On checking the recipients inbox, the email can be viewed.

Figure 8: Attachment number is 3, as there are 2 file uploads and 3rd attachment is the ClaySys AppForm

How to Configure RESTful Web Service in ClaySys AppForms

Configuring RESTful Web Service in ClaySys AppForms

Click on the DataSource Settings tab under Data management, select the RESTful Web Service you want to configure into the form, here we are demonstarting this with a sample RESTful Web Service.

Select the RESTful Web Service to configure with the form or you can create a new one in the DataSource settings wizard.

Enter/Select the details and click on the save button to save the DataSource.

Create a form where you want to configure the RESTful Web Service. A sample form is shown below.

Create a Data Source and configure the Data Source as shown below.

  • Select the RESTful Web Service.

Select the RESTful Method

Enter the Mapping criteria; here we’re using the ID as the mapping criteria.

Enter the XML code in the Response wizard.

In the Soap response view, select the controls to display the details needed.

We are using a button as the trigger to get the values to the controls by using ID as the mapping criteria. It’s shown below.

How to Navigate in ClaySys AppForms using executeJavaScript function?

How to Navigate in ClaySys AppForms using executeJavaScript function

In ClaySys AppForms, We can navigate back to a particular site from an AppForm using executeJavaScript function. So a user can navigate away to a specified URL in a button click or value change or according to the trigger in the form.

Here we are demonstrating a similar scenario and how to achieve navigation in a button click.

Create a form and drop a button control.

In the trigger of this button, a user must be able to navigate to a specified URL. For that the user should create a rule on the trigger of the button. Click on the Rules/Attributes tab and select create rule. It will lead you to the rule page and you can see button is already selected as the trigger.

Right click on the new rule tab and select Add Action.


As mentioned, a user can easily navigate to a URL by embedding JavaScript in the form actions. JavaScript can be embedded into the form using the ExecuteJavaScript() Function. The syntax of ExecuteJavaScript() function is shown below.

So a user only needs to write the JavaScriptCode inside the parenthesis. It is illustratwed below,

Here when the user clicks the button, the page should navigate to ClaySys home page. Now save and checkin the form. Form preview on button click is illustrated below.

How to save a form as PDF?

ClaySys AppForms – Save as PDF

Step 1: Create a form as shown below.

Figure 1: Designer

Step 2:Set a rule as per the below mentioned syntax and append a trigger to it.

     Syntax: SaveAsPdf()

Figure 2
Figure 3

 Step 3: In the Form Preview, on clicking on the button, the pdf is opened in which the form is shown.

Figure 4