ClaySys AppForms 1.0
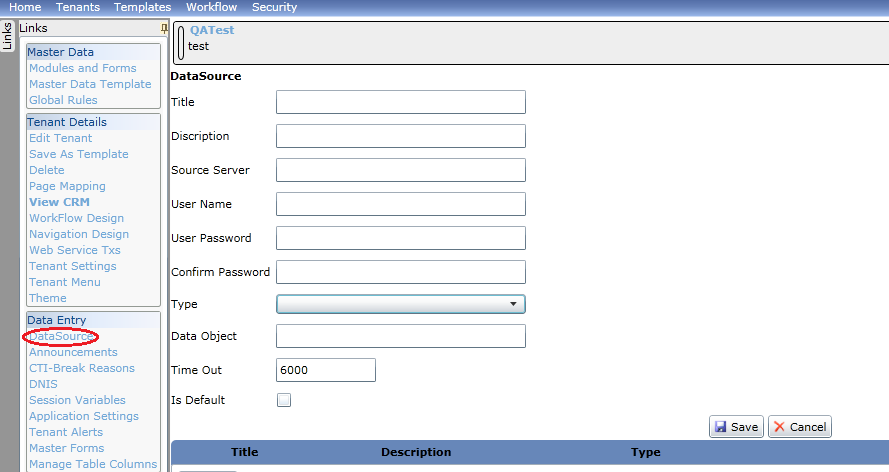
On clicking DataSource under the Data Entry section, the DataSource form is opened as in figure. This screen will help you setup all the required data connections for the current tenant.
Title: A name for the Data Source to be defined.
Description: Information about the DataSource to be created.
Source Server: The name of the server with which the tenant needs to connect.
User Name: The Login name for the Source Server.
User Password: The Password for the Source Server.
Confirm Password: Enter the same password as entered in User Password.
Type: On clicking the drop down box threee options are provided (SQL, WebService, Socket) as shown below.
SQL: On choosing SQL, the Data Source will be connected to SQL Server.
WebService: On choosing Web Service, A Web Service will be called.
Socket: On choosing Socket, a socket mentioned will be invoked.
Data Object: Enter the name of the database in the Source server to which the tenants can connect.
Time Out: The time duration for which the connectivity is maintained with the Source Server.
Is Default: On ticking this, the provided Source Server will be the default server for all tenants. By default 6000 is provided.
There are two buttons provided on the right corner after Is Default.
- Save: Click on the Save button to save the Data Source.
- Cancel: Click on Cancel to clear all the data entered in the textboxes.
A Data Source grid at the bottom of the page with Title, Description and Type which displays the created and existing DataSources. Data Sources in this grid have an Edit Button to their left to edit the data related to them.
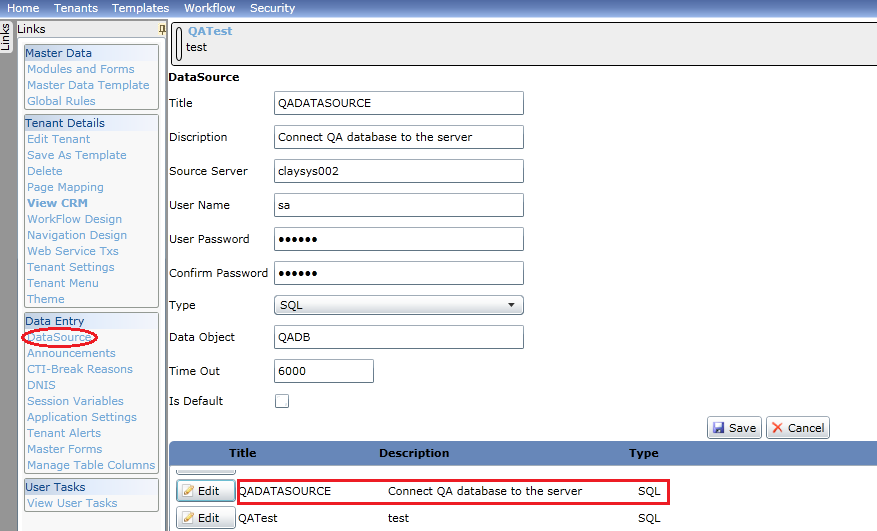
Example:
Figure shows the Datasource with title QADATASOURCE, which is added to the datasource grid of existing Datasources on clicking the Save button. On clicking the Edit button, an editable form with the data entered is displayed.


