Whenever a user finishes modifying a particular project or process, the changes can be Checked-in, making it available for other users to check out and continue working on the same. This approach assists in managing several concurrent development projects, keeping track of version history, and avoiding data loss or overwriting of changes made by different team members.
There are two ways to access the Source Control –
By clicking the source control icon on the right-hand side of the designer panel.
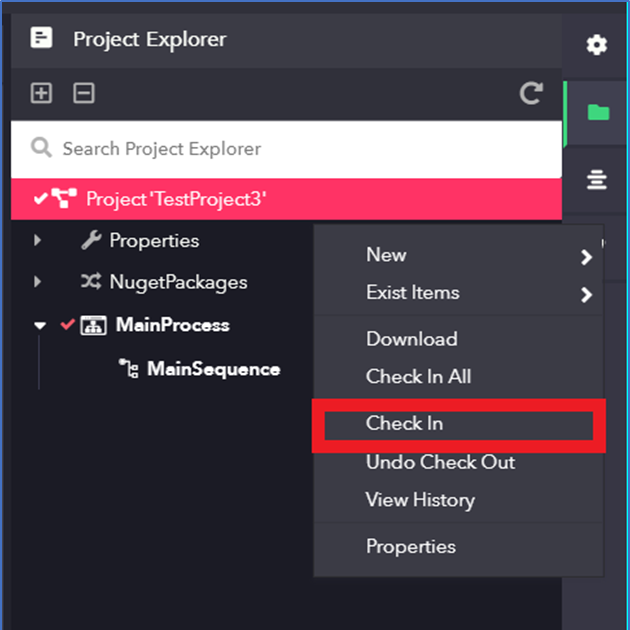
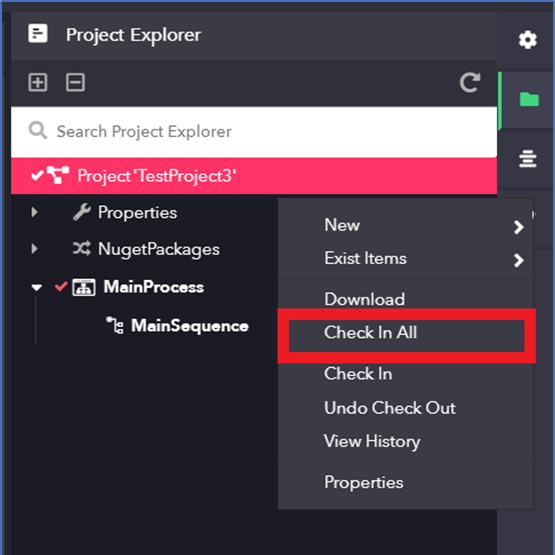
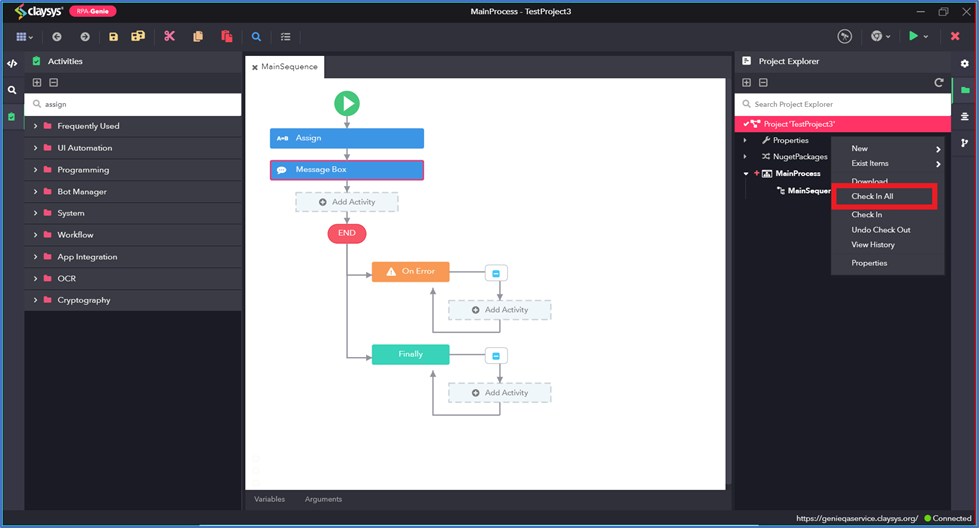
Right-click either on a particular Process and select the Check-In option Or Right-click on a Project and select the Check-In All option.
Note: The Check-In option is used for a particular Process while the Check-In All option is used to check-in all the processes that come under the project. It is not only applicable for the process but also for the UI window, Folder and File.
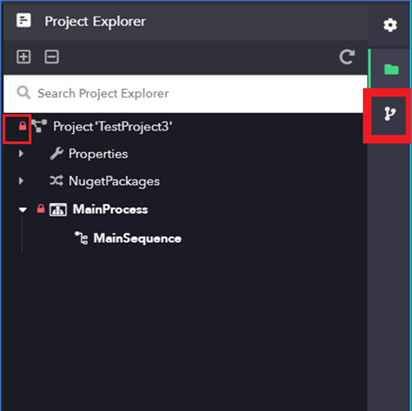
In the “Project Explorer”, a lock symbol will appear beside the process that had been checked-in as shown in the above image.
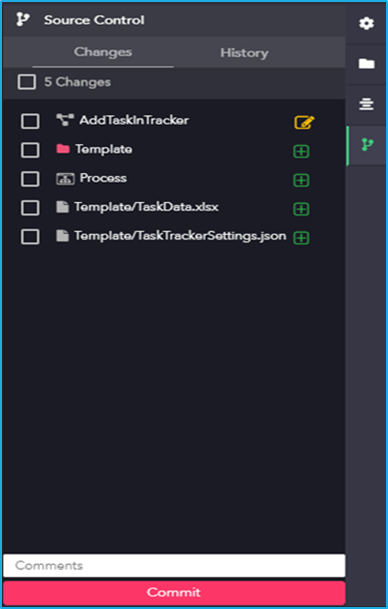
On accessing the Source Control panel, a list will be shown consisting of a project, processes, folders, files, UIWindows or a combination of all depending on what the user has created or modified.
Suppose the list has only processes within it, then either a single process or multiple processes can be selected depending on the requirement.
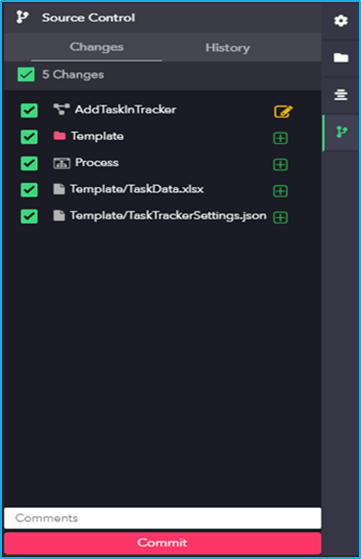
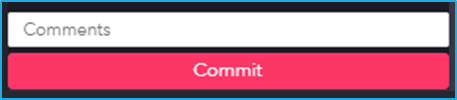
Add a comment in the comments field and then ‘Commit’ button can be clicked finally to Check-In the selected processes.
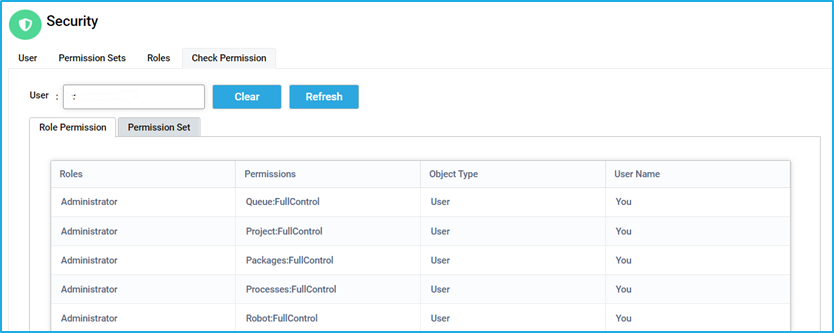
A user without any roles does not have access to any resource. Users can access resources or obtain the necessary authorization to perform specific tasks only when they are assigned with one or more roles.
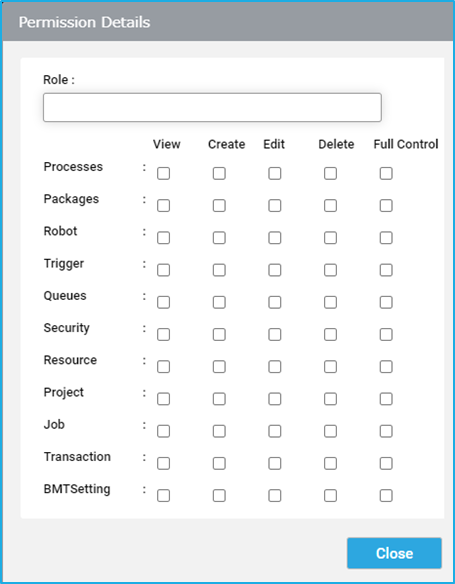
To add roles for a particular user, click on ‘Add Role’ button. A popup ‘Add Role’ will appear where the role name can be entered, and permissions (View/Create/Edit/Delete/Full Control) can be selected. Click ‘Save’ to store the changes.
The given permissions can be changed at any time by clicking the ‘Edit’ option. Also, the role can be deleted by clicking ‘Delete’ option.
Note: Project, Processes, Packages, Robot, trigger, queue, security, resource, job, transaction and BMT settings permissions can be restricted by administrators and authorized users by clicking on the edit button for each role.
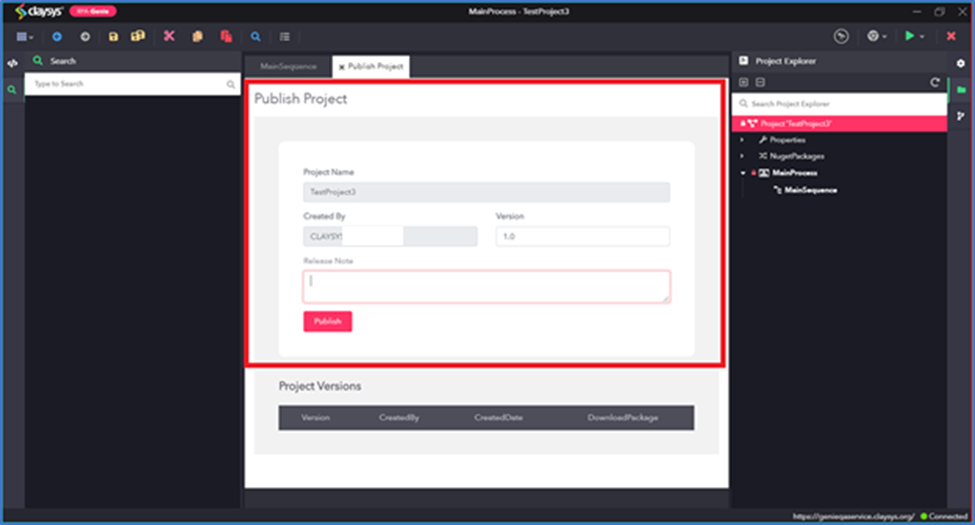
To publish a project, right-click on the Project Name in the Project Explorer and select the publish option. But before publishing the project, every process must be checked in. A package will be created upon publishing a project and users can view the previous versions of the package while publishing the project.
In the Publish Project wizard, users can see the details such as Project Name, Created By, Version and also can specify comments in the Release Note field. After providing all the details, click on “Publish” button.
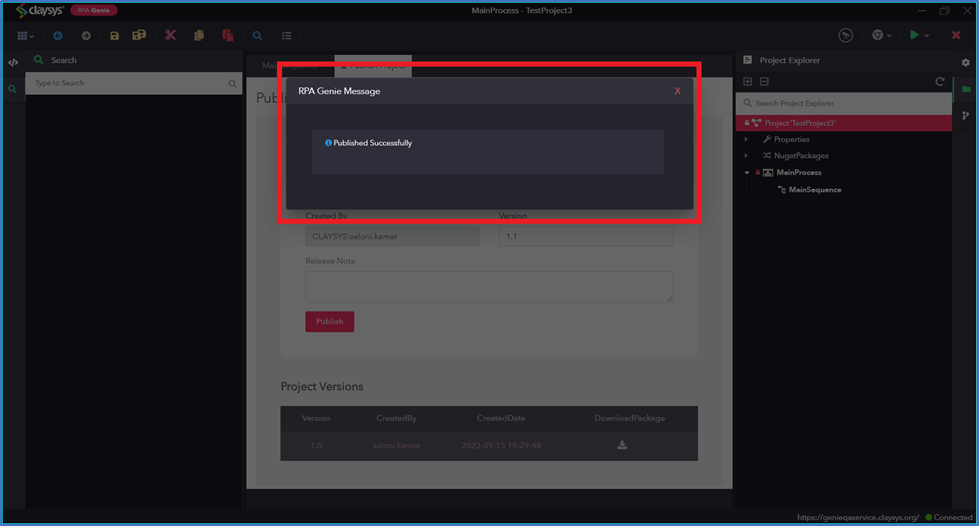
After publishing, user will see a pop-up named “RPA Genie Message” showing “Published Successfully”.
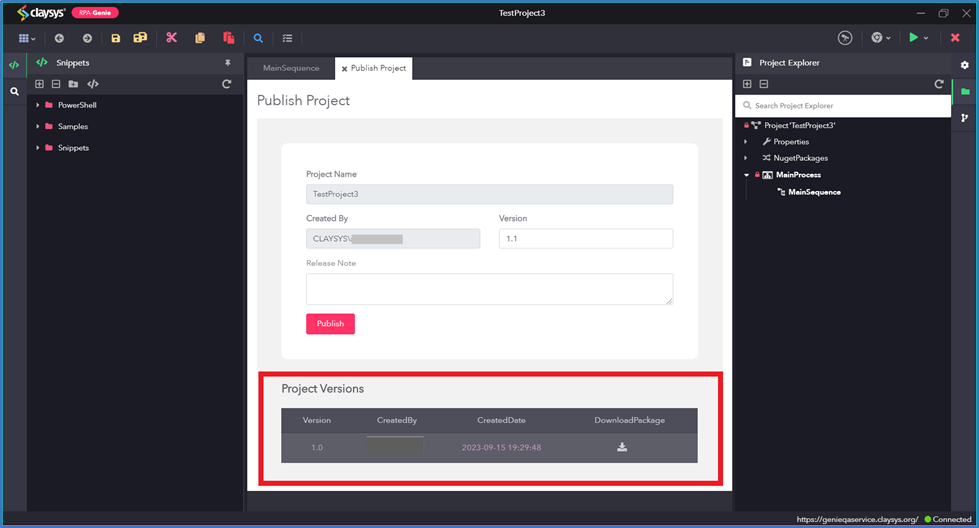
In the Project Versions section, user would be able to see all published version along with the username of the creator, created date and time. Further, there is option to download the package for specific version.
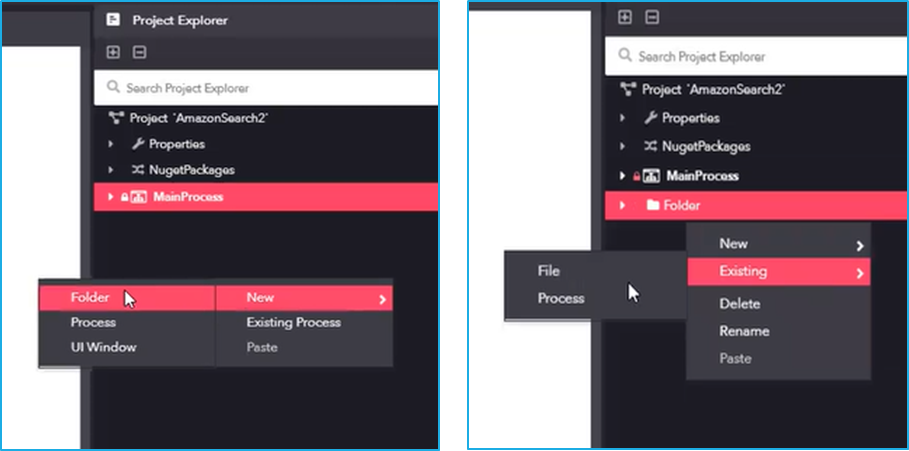
Users have an option to create a folder within a project as shown in the screenshot given below. The common processes, files, UI-windows and subfolders can be stored in a folder which will be useful while creating a project.
To create a folder, right-click on the project name in the Project Explorer panel, hover the mouse over the ‘New’ option, and then click on the ‘Folder’ option.
Right click on the created folder and hover the mouse over the ‘New’ option. Then select the appropriate option from the dropdown to create a process, file, UI window or folder.
Right click on the created folder and hover the mouse over the ‘Exist Items’ option. Then select the appropriate option from the dropdown to add a process or file stored in the local system.
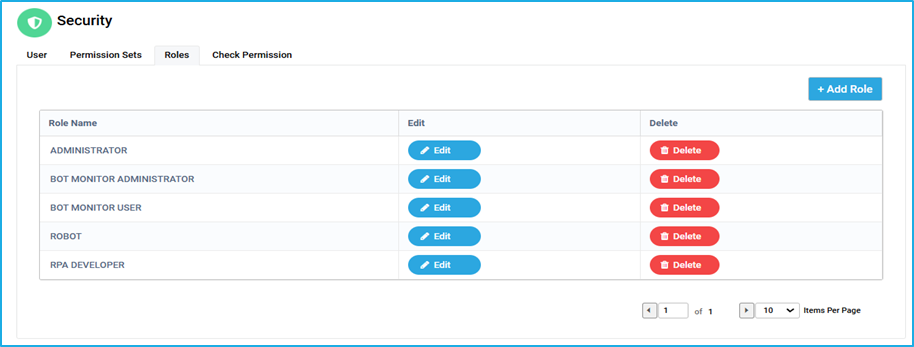
It is used to control the access for each role used in the BOT Manager and it’s also possible to restrict the permission for users. Roles are sets of permissions assigned to users to use certain resources.
Note: Authorized users or admins can only add roles and manage permissions for the users in Roles.
The ‘Roles’ tab displays the role name and allows edit/delete for a particular role.
Role Details
Default Roles
Permission
Administrator
Full access to Studio and BOT Manager.
BOT Monitor Administrator
Full Control for all Tabs Except the Jobs Tab and Projects.
RPA Developer
Full Control for Projects and All Tabs in BMT Except Security Tab.
BOT Monitor User
Full Control for all Tabs Except Security and BMT Settings and Projects.
Robot
Full Control for Robot and Transaction Tab and Only View Permission for Processes, Packages and Resources. View, Create and Edit Permissions for Jobs Tab.
Permissions of users may vary depending on the assigned role.
Note: Permissions cannot be edited for Default roles.
A NuGet package is a single ZIP file with the .nupkg extension that contains a single activity, or a group of activities created by the developers to reduce repetitive tasks.
“NuGetPackages” feature can be found inside the Project Explorer tab of the RPA Genie Studio.
First, the required NuGet Package should be added in the Bot Manager, which can then be installed in the RPA Genie Studio for further use.
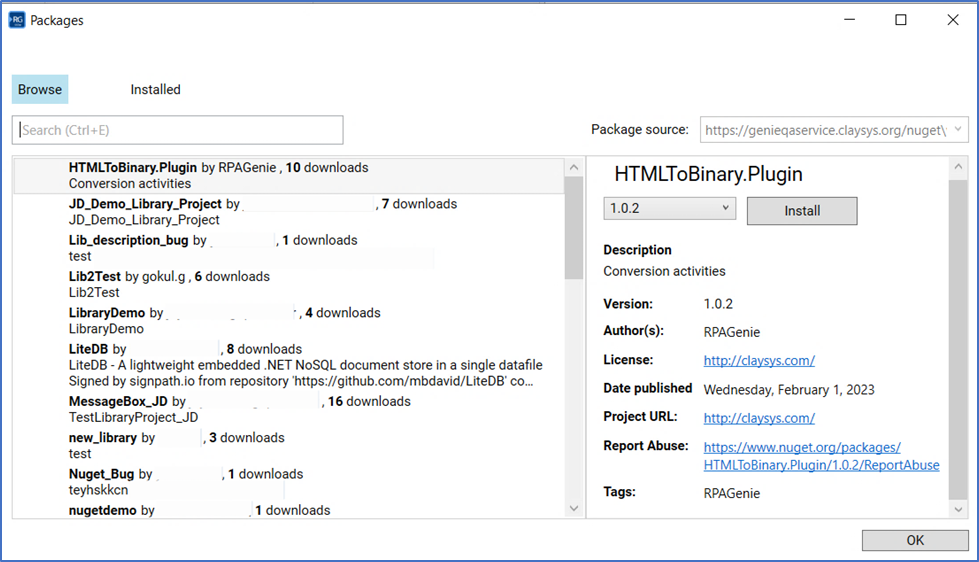
On clicking the “NuGetPackages” tab, a pop-up window called “Packages” will appear.
On clicking the “Browse” tab, it allows to either search for a particular package by giving the package name in the search field or select a particular package from the list of packages that are available.
On clicking the “Installed” tab, the user will be able to view all the installed NuGet Packages.
Under the “Browse” tab, on selecting a particular NuGet Package, all the details of that package can be viewed as shown in the above image. In addition to that, it allows users to choose the version of that package that needs to be installed.
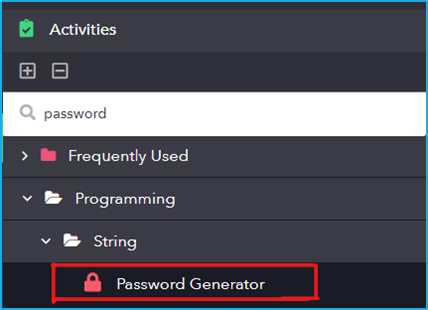
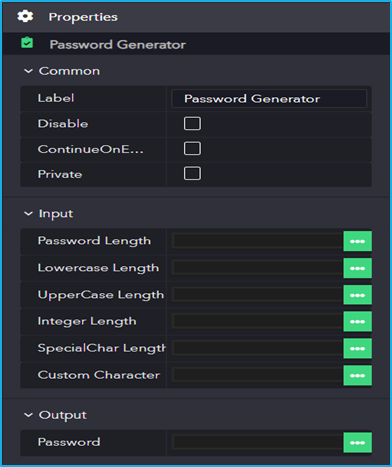
Once a NuGet Package is installed, it will get added in the Activities panel along with the other default activities. Depending upon the NuGet Package that have been installed, it could either be a single activity (Eg: Password Generator) or group of activities in the form of a folder (Eg: PDF).
For Example, if a user installs a NuGet Package named “RPA.Genie.Password.Generator”, a new activity called “Password Generator” will be added to the “Activities” panel and on expanding “NuGetPackages”, it displays the installed package under it. “Password Generator” is an activity that helps to generate random password of the required length.
Similar to the properties of other activities present inside the RPA Genie Studio, the above-mentioned “Password Generator” activity has fields like “Common, Input and Output” as shown below.
Please note that if a NuGet Package has not been installed in a particular project, it cannot be used by that project.
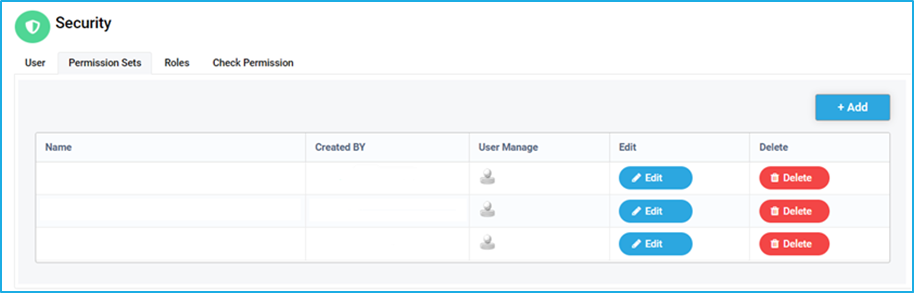
A permission set is a type of authorization that allows the user access. It is a group of settings /permissions that allows the users to access the BOT Manager and Studio. It is also possible to restrict authorization for the users by using permission sets. (For example: A certain requirement may need user to have access to a resource but only to specific fields within that resource in some instances.)
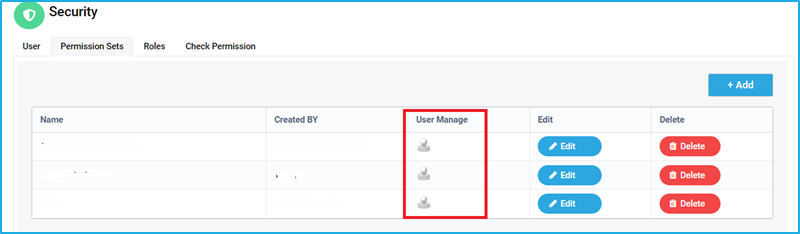
The Permission Set tab displays details such as Name, Created By, User Manage, Edit and Delete Columns.
Project, Process and Queue permissions can be restricted by administrators and authorized users by clicking on the edit button for each name.
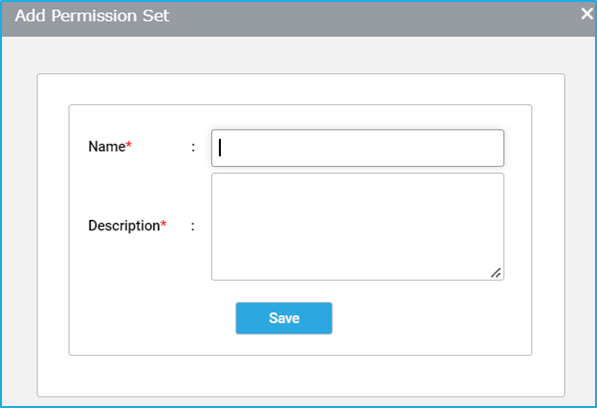
Add permission Set
Click on the ADD button on the top right. The ‘Add Permission Set’ Popup will appear.
Type the Permission name and Description
Click on the Save button.
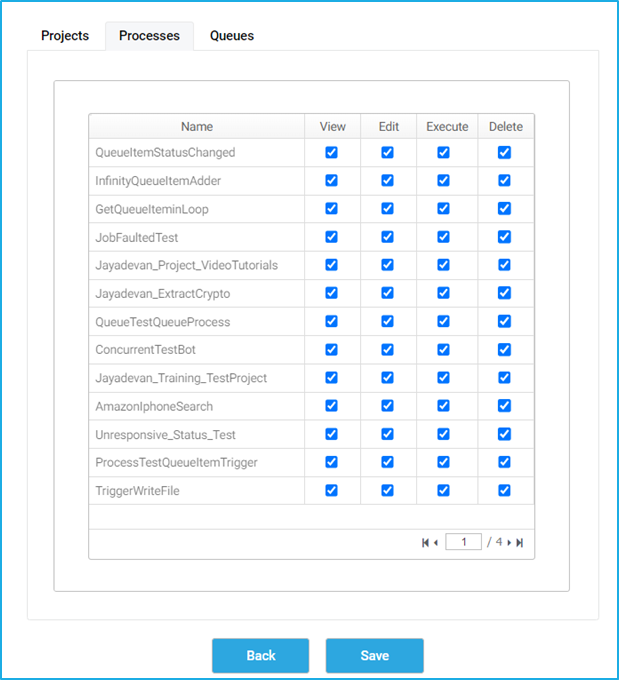
Check the boxes to grant permissions [View, Edit, Execute and Delete] as per the requirement and Click on Save.
Now Permission Set will be created and it will be displayed in the Permission Set tab.
Note: By clicking ‘Edit’ option in the permission set tab, a new window as above will open, where the Projects, Processes and Queues are listed and the permissions (view/edit/execute/delete) of any these can be changed by selecting the checkboxes.
After the permission set is Created, the required users can be added to it through User Manage.
User Manage
After creating a permission set group and adding permission sets to it, access can be provided to the created permission. It can be a Single User or Multiple Users. On adding the user to a group, the user will have the assigned privileges.
The below image illustrates how to manage users in permission set
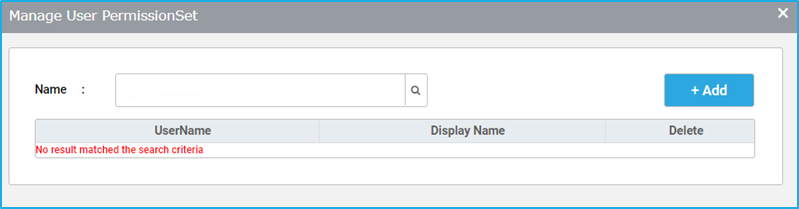
On clicking the ‘User Manage’ icon, the ‘Manage User PermissionSet’ Dialog will open where the user can be added by searching the Name.
The added UserName gets displayed in the Table. To remove a particular user, click on the ‘Delete’ icon in Delete column.
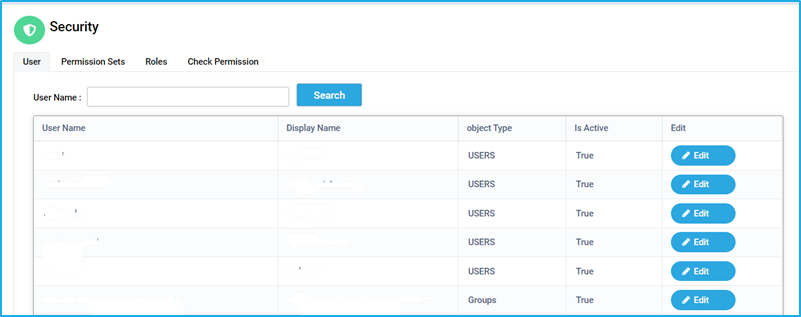
The User Tab displays a list of the available users with their User Name, Display Name, Object Type and Is Active. There is also an Edit option which helps to edit the permission for the users.
The ‘User Name’ displayed is the Login Username of the BMT and it should be different from the Existing Usernames in BMT. It should be Unique to avoid duplicates.
The ‘Object Type’ refers to whether the displayed User Name belongs to Users or Groups. Users Type given to Single User. Groups Type given to Multiple Users.
The ‘Is Active’ Column refers to whether the created user is Active or InActive. If the created user is Active, then only they can Access BMT.
Note: The users can be added by a person who has designer permission.
There is a search option through which a specific user can be searched using their usernames and roles can be assigned to them.
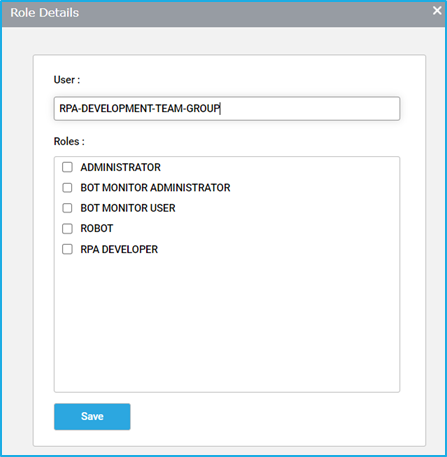
On clicking the ‘Edit’ button, the ‘Role Details’ window will appear allowing to add one or more role(s) to the user. User Field is not editable, only Roles can be edited in this window.
Note: A user without any roles does not have access to any resource.