Bot Management Tool (BMT) in RPA Genie is a centralized platform for managing and monitoring automation bots. It is built on AppForms which is another standalone product of ClaySys. It enables users to control multiple bots, schedule tasks, view job statuses, and track bot performance. With features like bot analytics, alerting, job execution, and resource management, BMT offers comprehensive oversight and control, making it easier to deploy, monitor, and manage automations across an organization.
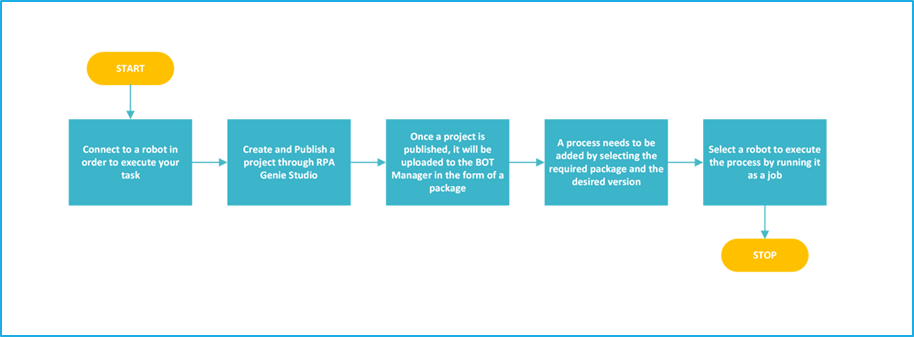
Fundamental workflow of Bot Manager
Connect to a robot to run an automation
Develop a project and publish it through the RPA Genie Studio.
Access this published project in the Bot Manager in the form of a package.
Select this package based on the required version to add it as a process in the Bot Manager.
Finally, execute an automation project as a job by selecting the robot.
Publish a Project to Bot Manager
To publish a project to the BMT in RPA Genie, follow the below provided steps:
Check-in All Processes: Ensure that all processes in the project are checked in within the Project Explorer. This locks the final version for publishing.
Initiate Publish: Right-click on the project name in the Project Explorer and select Publish. This action packages the project into a deployable form.
Configuring Publish Option: RPA Genie will create a package that includes the project’s name, version and release note. These configuration details can be customized.
Deploy to Bot Manager: Once published, the package is deployed to the BMT. Here, the package can be managed, scheduled, and executed by bots through the Bot Manager and Co-pilot.
This allows administrators to manage the project within BMT and monitor its performance during automation.
Run a Project as a Job in Bot Manager
To run a project as a job in the BMT, follow these steps:
Access Packages Tab: Ensure that the Published Project is listed as a Package under the “Packages Tab”.
Add Process: Add the required package as a process by selecting the appropriate package name and version.
Access Jobs Tab: Go to the “Jobs” tab in the BMT interface.
Click the Start Job button, which opens the “Select Process” window.
Choose the desired process from the dropdown list.
Set the job’s priority (High, Medium, or Low).
Select the specific bot(s) required to execute the process.
Confirm selections and click Start.
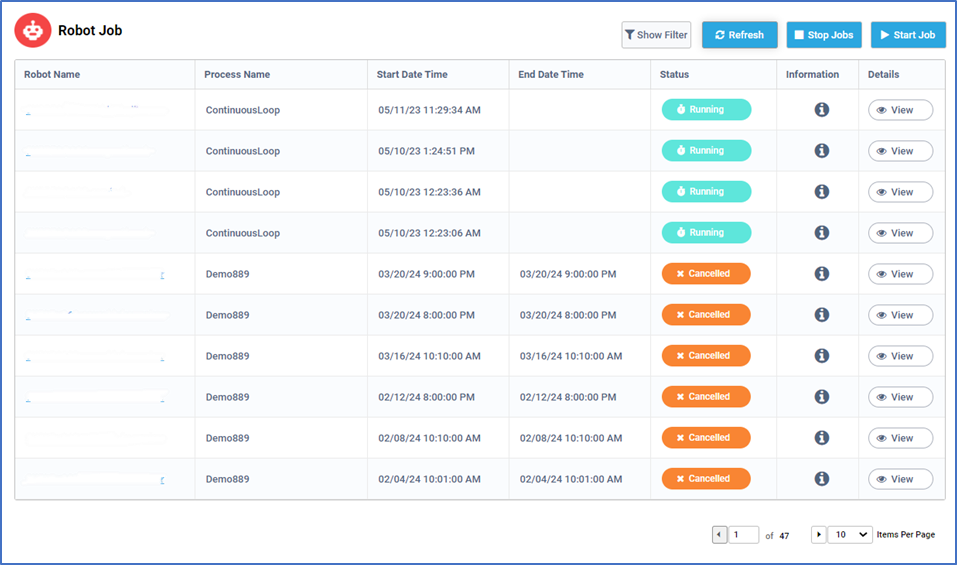
The job will begin running through the selected bot(s) with the status, including start and end times, displayed in the Robot Job List.
Note: The user can monitor job activities, transactions, and logs for the job under the “Jobs” tab.
Tabs in BOT Manager
The following tabs are available in the BOT Manager:
Dashboard: It offers a comprehensive overview of the following:
BOT overview section displaying connected, running, and inactive bots.
Total job overview section includes metrics for job requests, completions, errors, and running jobs.
Process job section displays a bar graph that shows the job status for each created process.
Bot Analytics: This option under the Dashboard tab provides insights into transactions and queue items, estimating dollars and hours saved, with sections for total transaction overview (detailing requested, not started, error, and completed transactions), total BOT transactions, and BOT efficiency, which shows machine utilization and calculates each bot’s efficiency.
Jobs: Jobs represent process executions. Using the Jobs Tab, users can manage and monitor jobs, check their statuses, and view activities, transactions, and logs.
Robots: Using the Robot Tab the user can manage and view the status of the robots that are connected to the BMT. They also have the option to check the event details of any particular robot.
Machine: Users can view, search by name/status, edit details, and see logs for machine events and robot statuses, including connected, disconnected, or maintenance modes.
Packages: The Packages tab stores all published RPA Genie projects for easy access, allowing users to download or upload packages from their local system. These packages must be added as a process to run through the Bot Manager/Co-Pilot.
Nuget Packages: The RPA Genie NuGet Package is a manager for creating and sharing reusable automation activities in Genie Studio. The users can expose necessary properties through the custom package interface in the property pane. The NuGet packages tab allows adding files for later access in Genie Studio.
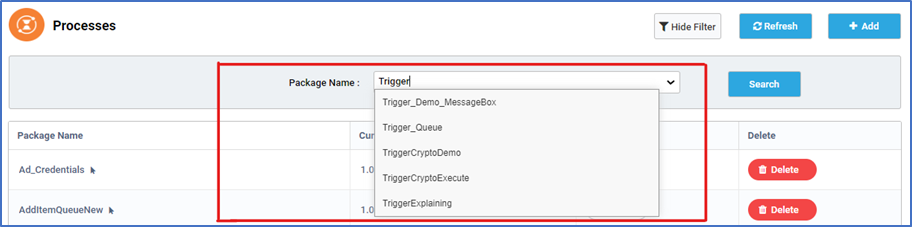
Processes: In this tab, users can create a process by selecting the required package name and its corresponding version. Once a package has been added as a process user can run it as a job through BMT. This tab displays the process name, current version, available versions, and a deletion option.
Triggers: Triggers execute Jobs at specified intervals using the Time Scheduler or when new queue items are added via the Queue Scheduler, allowing users to manage existing triggers. This tab displays trigger names, requested scheduling times, status (enabled/disabled), trigger type (Time Scheduler, Queue Scheduler, or Maintenance Mode), and a history with details like robot name, process name, and timestamps. Users can also edit or delete triggers as needed.
Queues: This tab allows users to manage the queue created in the BMT. This tab shows the names and descriptions of queues, with the “In-Progress” column indicating the count of queue items that are currently being processed. It also has the “Pending” column showing unprocessed items and the “Error” column indicating items that have failed to process. Users can edit or delete the queue as needed.
Security: Security provides centralized authentication and access control for the BOT Manager and Studio, authorizing users to access specific tabs such as Dashboard, Robot, Process, Packages, and Triggers, and includes four tabs: User, Permission Sets, Roles, and Check Permission.
Resources: A resource is an asset management tool in RPA Genie that enables the creation, storage, and maintenance of data for various projects, representing shared variables or credentials accessible through RPA Genie Studio. This tab displays the resource name and type, along with options to edit or delete resources.
BMT Settings: The BMT Settings enable users to customize the default configurations related to managing log retention, setting up SMTP server details, managing mail templates and holiday calendars. This section includes four tabs: SMTP Server, Mail Template, Holiday Calendar, and Data Retention.
Import Export: The Import Export feature allows users to back up specific data from a particular Bot Manager environment and restore it to another environment. The “Backup” option allows the user to export existing Processes, Queues, Resources, Triggers, NuGet Packages, and Holiday Calendars. Under “Restore,” the user can import these items by clicking the “Browse” button to select a file from the local machine.
Manage Alerts: The Manage Alerts feature helps to set up various types of alerts for monitoring purposes. Five alerts can be configured within the Bot Manager- Machine, Robot, Job, Queue, or Trigger. Each alert can be customized with a name, recipient email(s), and specific status triggers (e.g., Connected/Disconnected for Machine and Robot, Scheduled/Completed for Job, Item statuses for Queue, or Disabled for Trigger).
Maintenance Mode: This feature allows users to take the Machine and Server offline temporarily by halting all activities. In this tab, users can view maintenance statuses by Type (Robot or Server) or State (Completed, Initialized, In-Maintenance).
Audit Details: The Audit Details tab is essential for tracking and reviewing changes performed across all tabs of the Bot Manager. Here, details of any event occurring in BMT are displayed such as Type, Action, Description, Action By, Action Time, and View.
Below mentioned points apply to all the tabs in the BOT Manager:
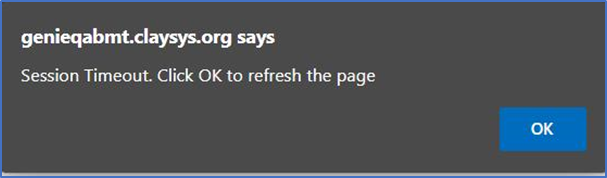
API Timeout Popup when the access token is expired.
Session timeout happens when a user’s session expires due to inactivity or the predefined time limit has been exceeded. It results in the user being prompted to authenticate again by clicking on the “OK” button before continuing to use the Bot Manager.
2. Advanced Pagination in all the table views.
Advanced Pagination allows users to enter the required page number and rapidly browse to that particular page rather than relying only on the next/previous navigation button.
For Example: To navigate to the 10th page out of the 47 pages, simply type 10 in the box, which will become “10 of 47” and then click on any part of the page. This will redirect to the 10th page without clicking on the next icon subsequently.
3. Auto-Complete Box in every input field.
The combo box’s drop-down functionality has been switched to an auto-complete feature that lets users search for and filter alternatives as they enter, making selection processes more flexible and effective.
By allowing users to rapidly identify and pick particular items from a bigger set of options without having to search through a long dropdown list, the auto-complete box expands the combo box’s functionality.
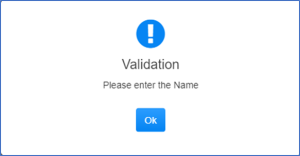
4. Form validation in all available forms in Bot Manager.
Form Validation is essential when a required field is not entered, a validation message will be displayed to inform the user about the missing information. This message serves as feedback to indicate that the field needs to be filled out before the form can be submitted.
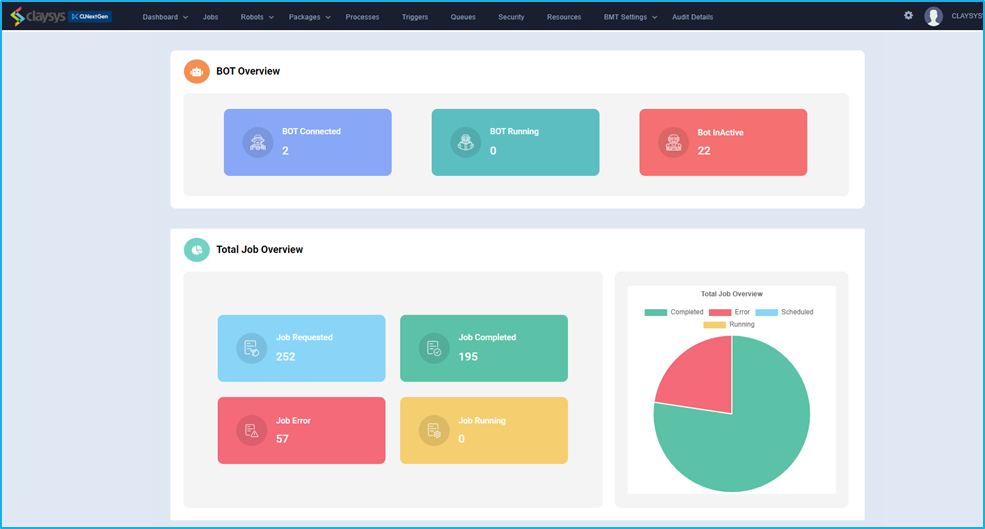
BOT Manager Dashboard
The BOT Manager’s landing page or dashboard, provides an overview of BOT activities and job statistics through various widgets, allowing users to monitor all activities at a glance.
The BOT Overview section is the topmost section and it consists of three widgets:
The ‘BOT connected’ widget displays the number of bots that are currently connected.
The ‘BOT Running’ widget shows the number of bots that are currently running.
The ‘BOT Active’ widget displays the number of bots that are active at present.
The Total Job Overview section follows right below the Bot Overview section and it consists of four widgets:
The ‘Job Requested’ widget shows the number of jobs requested
The ‘Job Completed’ widget shows the number of jobs completed
The ‘Job Running’ widget shows the total number of jobs that are running at the moment
The ‘Job Error’ widget shows the total number of jobs that have faults in runtime.
The “Process job” section is the last component where a bar graph displays the current job status of each created process.
The URL of the demo project is given below where users can learn about these activities in a better manner.
Steps:
Open “Google.com“.
Use the Set Text activity to search for “w3 HTML Table” in the search field.
Click on the first link from the search results.
On the W3Schools webpage, wait for the “HTML Tables” element to appear.
Check if the table element exists:
If the table exists:
Display a message saying, “Table exists.”
Use the Find Children activity to retrieve the child elements of the table.
Loop through the child elements of the table and extract the text from each using the Get Text activity.
Display each extracted text in a message box.
If the table does not exist:
Throw an error.
Activities Used
“Open Browser, Maximize, Set Text, Send Hotkey, Find Element, Click, Element Appear, Element Exists, Decision, Throw Error, For Each, Get Text, Message Box”
After the completion of each project in Studio, the same will be directly published from the studio to the BOT Manager. Packages cannot be directly executed through the agent. Under the packages tab in the BOT Manager, we will be able to view the name and the version number of each package. By default, the version number for each package would be 1.0. However, if we happen to update or make any changes to the existing project, then the version number of the package will change accordingly. From the BOT Manager, under the Processes tab, once we click on the Add Option, we need to select the name and the version number of the package in order to convert the package into a process. Once the package has been converted to a process, it can then be run through the Agent. To run a package version locally from an agent, first you will need to install it using the Agent by following the below steps.
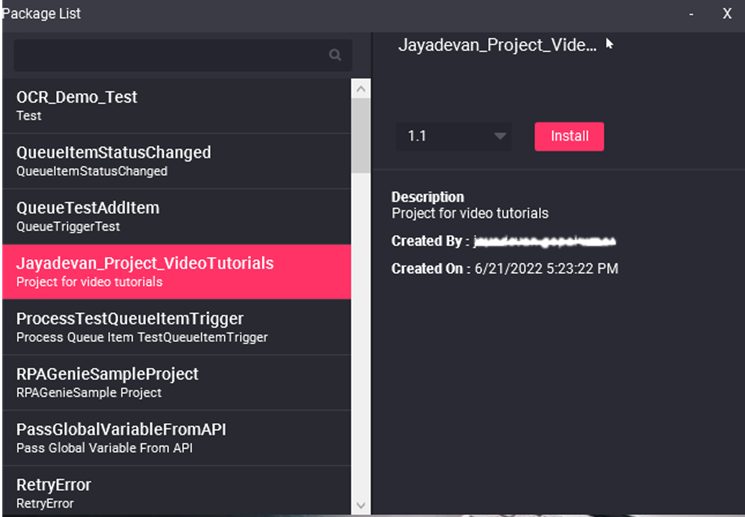
The mouse icon next to the package name indicates that this package needs UI Automation.
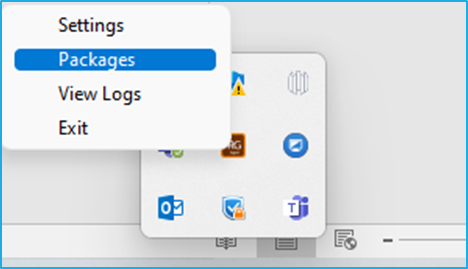
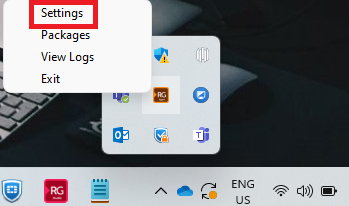
Right-click on the Agent icon available in the system tray and select packages.
Select the preferred package and the desired version that needs to be installed.
If the selected package had not been installed earlier in the robot, an Install button will appear. However, if that package had already been installed, an Update button will appear. Select the preferred choice as per your need.
You can uninstall a package by selecting that package and clicking on the Uninstall button displayed on right side.
To go to the Agent Settings, Right click on the Agent icon displayed in the system tray and select the settings option. You can connect/disconnect the agent from here. You need to go through the connection wizard for connecting the agent to the BOT Manager.
Connect to the BOT manager/ Register BOT
If your agent service supports the auto connect feature and the robot registration has been completed, the Agent will automatically connect to the BOT Manager once you open the Agent. After connecting to the BOT Manager, you can directly manage your Bot from the Bot Manager. You can also register a new robot from the connection wizard. After the registration, the Bot will be connected to the BOT Manager.
Follow the given steps to register or connect the bot :
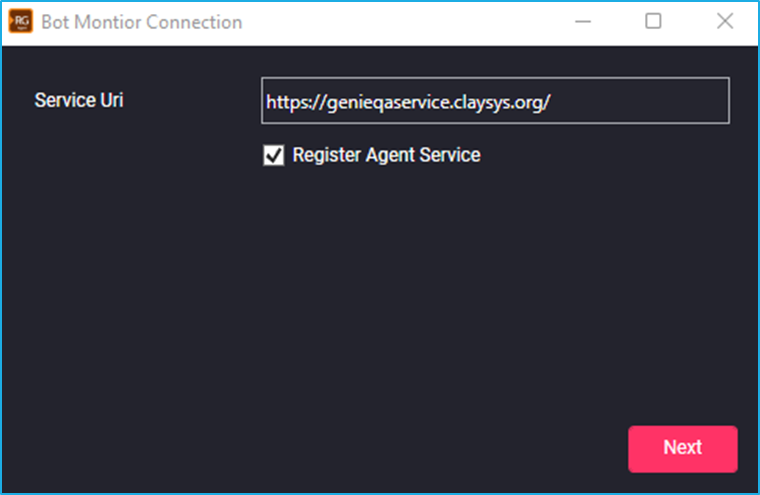
Enter the Service URL and check the Register Agent Service Checkbox and click on next
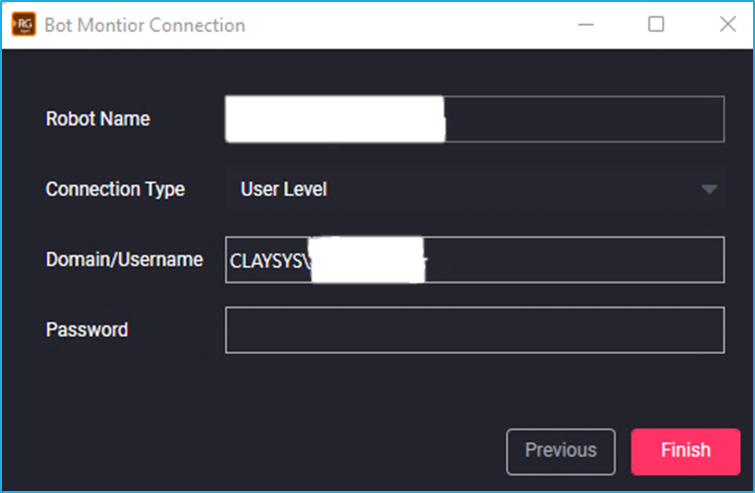
On this window, you will see a few fields such as Robot name, connection type, Domain/Username, Password
Robot name: This will be auto populated.
Connection type: You will see two options here, User level and Machine level
User Level – Creates individual bots for each user in a machine.
Machine Level – Connects all the users in a machine as a single bot.
It includes activities for automating web interactions, including opening, navigating, and interacting with web pages.
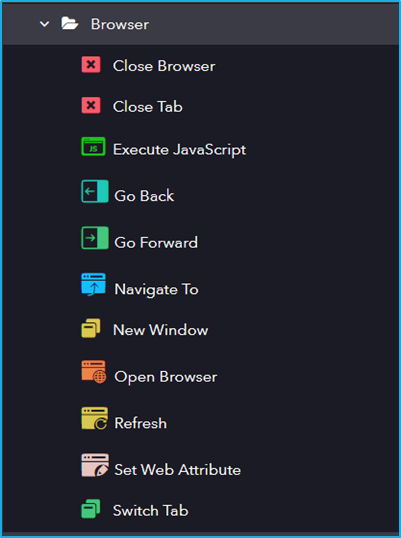
The Browser category has the following sub activities:
Close Browser: This activity is used to close the specified browser.
Windows Properties:
BrowserWindow: Browser window variable that holds the specified browser session that needs to be closed.
Close Tab: Closes the tab/webpage that is open in the browser.
Windows Properties:
BrowserWindow: Browser window variable that holds the browser tab that needs to be closed.
Execute Java Script: This activity can execute a Java script code in the context of a web page.
Element Properties:
Element: UI element variable or browser window variable which is returned by another UI activity.
Input Properties:
Script: The code to be executed as a string.
Arguments: Input parameters to be passed between the script and robot.
Output Properties:
Result: It will be the formatted output of the JavaScript execution, which can be a primitive value, a dictionary, a list, or a wrapped Selenium if a DOM element is returned.
Go Back: This activity is used to go back to the specified browser’s history list.
Windows Properties:
BrowserWindow: BrowserWindow variable which holds the browser to which it should go back.
Go Forward: This activity is used to go forward to the specified browser’s history list.
Windows Properties:
BrowserWindow: BrowserWindow variable which holds the browser to which it should go forward.
Navigate To: This activity is used to direct the browser to a specified URL.
Windows Properties:
BrowserWindow: BrowserWindow variable which holds the current browser Session.
Input Properties:
URL: Location of the web page to which it should navigate.
Open Browser: This activity is used to Open a browser from different browser types at a defined URL and perform multiple actions within it.
OptionsProperties:
Headless Mode: Headless browser is a tool used for automations where the visible UI shell is not required.
Auto Download Driver: Automatically downloads the required web driver for web automation.
Input Properties:
URL: Location of the web page that needs to be opened.
BrowserType: Select the browser type (Chrome/Edge IE Mode/ MS Edge/ Mozilla Firefox/Internet Explorer/) Default browser is Chrome.
Preferences: The preferences for the browser instance.
Capabilities: Browser configuration prior to open.
Arguments: Command line arguments to be used while starting the browser instance.
Output Properties:
BrowserWindow: BrowserWindow variable that stores all the information regarding the specified browser session.
New Window: This activity creates a new window or tab in a browser window.
Windows Properties:
BrowserWindow: Browser window variable that holds the specified browser session which needs to be openned as a new window.
Input Properties:
WindowType: The type of window in which the browser session needs to be opened.
Refresh: This activity reloads the webpage of the browser that is specified in the input of the browser properties.
Input Properties:
BrowserWindow: BrowserWindow variable which holds the current browser Session that needs to be reloaded.
Set Web Attribute: This activity sets the value of the attribute of an element in the webpage.
Input Properties:
AttributeName: Name of attribute that needs to be changed.
Value: The value assigned to an attribute.
Switch Tab: This activity allows user to switch active tabs in the browser.
Windows Properties:
BrowserWindow: BrowserWindow variable which holds the current browser Session.
Input Properties:
Title: Title of the tab to which It should be switched.
Index: Index of the tab to which it should be switched.