Product Development Cycle Explained

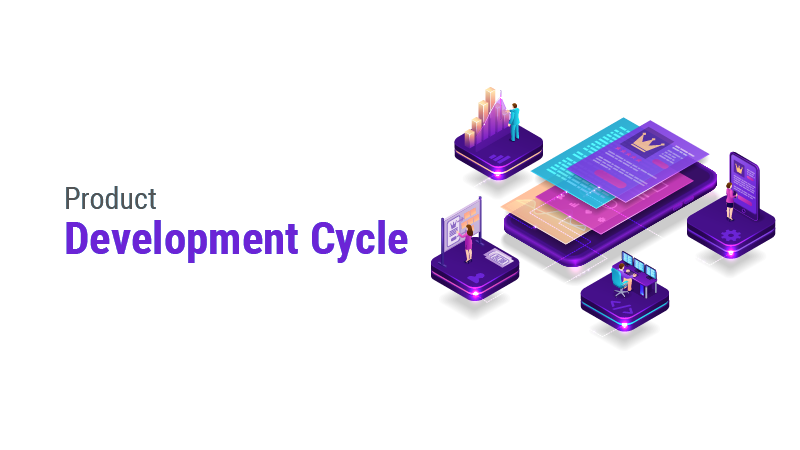
What is Product Development Life Cycle?

The product development cycle is the process by which a product moves from the very beginning of its idea to its launch in the market and beyond and this life cycle includes several departments within an organization: product managers, QA testers, developers, designers, and many more.

Usually, the launch of a product is considered to be the last stage in the product development process but it does not end with the launch of the product. There is a lot of work that needs to be done even after your new product or feature reaches the market. Markets mature and the choice of your customer changes, as a result, new products evolve and develop to meet the changing needs of the customer. For this reason, there should be a thorough knowledge of the product development life cycle.  

There is no guarantee that your product passes all stages one by one, meets all expectations, and follows the suggested changes in the indicators. But the product life cycle helps in creating a sense of control during the whole process. When you dream about the future of your product it will cost you nothing to apply it. Indeed, it serves as a guard from the unexpected. In short, the product development life cycle involves a series of continuous stages through which a product goes through. 

Stages in Product Development Life Cycle  

As said earlier, the product development life cycle consists of a series of complex steps that allow you to choose your idea and keep track of the activities needed to make it something really valuable for your customers. This is important because clarity is something that every team needs to go forward smoothly and productively with their work. Here we are talking about a seven-stage cycle, the best way to give clarity is it points out the key achievements of your team and links them back to broader business goals. 

Plan  

This is the stage where your team does research and talks to customers. The main aim of this stage is to prove the presence of an actual problem in the market and explain the ways in which your product or feature addresses the problem and solves it.  

Build  

The stage in which your product plan is implemented. The motive behind this stage is to work on the various types of tasks needed for the quick and efficient creation of your new product. 

Test  

During this stage, your team will be able to finish most of the work associated with the building of your new product or feature. Gathering customer feedback on operational efficiency and detecting bugs before full market release are the two major goals in this stage. 

Launch  

Releasing the product among your customers is one of the most significant stages in the product development life cycle. Here the focus is on making the release experience as smooth as possible to maximize the initial engagement of customers. 

Analyze  

After the launch of the product, it is time to assess the impact of the product on customers, their experience with the product, and your business goals. This is also the stage that gives you the opportunity to identify gaps or areas you need to improve in the future.  

Iterate  

Once you have done evaluating the impact of your product and figuring out the ways to improve your product or feature, it is time to work on bringing changes to any product on the basis of the findings during analysis. Increasing the customer value with each repetition is the main goal. 

Support  

This stage goes through post-release analysis and repetitive stages. Once your product holds a stable place in the market, your team can keep going forward actively with new projects. 

Stages in Product Life Cycle  

Product Development Life Cycle Looks at the different stages of work needed to introduce a product or feature to the market, meanwhile, the Product Life Cycle looks at the development of different products after the launch. It also gives insights into driving financial factors such as demand and supply that give you an idea about the product value in the business. Below given is the four-stage product life cycle: 

Development

This phase takes care of everything that passes through the software product development life cycle. 

Growth

At this point, you see the demand and adoption rate for your product rising. 

Maturity

In this stage, demand for your product starts decreasing as your product starts holding a position in the market. 

Decline

The impact of your product minimizes when there is a development in customer expectations or when market conditions change. 

Wrap Up 

The product life cycle is a supportive conceptual framework with all its stages, features, achievements, and challenges. It is comforting and helps to understand the unknown. As a developer or a manufacturer, you can program it and relax. Though it is impossible to predict accurately the end result of your product or feature, you will have an idea about the way things should go under the right circumstances. You can also have your own marketing strategies planned for the maturity and discretionary stages, think about the risk factors involved in the development cycle and have a complimentary plan. 

Software Development Best Practices

While engaging in custom software development, it is very crucial to monitor the best practices when you are dealing with the upgraded version of the prevailing application with thousands or millions of users. What you may not know is that obsolete techniques are used to write most projects, and once you switch to other projects or roles it can make your life harder when someone else has to maintain them. However, sometimes the way software is developed does not meet the specified standard in software development. For example, software development releases products with bugs that could have been avoided by following better development practices. This article covers some of the best software development practices that help you to look for common mistakes and bugs while developing your own software or working with a company that can contribute to the level of development. 

Best Software Development Practices 

Let us take a deep dive into the software development best practices: 

Keep it simple  

While developing a code you may be tempted to make it complex, unreadable, full of strings that you may require in the future, or a total mess in general. Writing complex and mysterious code was fashionable and the best way to show your sophisticated skill sets, years ago, but clarity and efficiency are the two most factors we need today. The following principle ensures the quality of your code: 

DRY (Don’t repeat yourself)

Duplication is a waste because your computer stores every data once you save it and it will remain there until you delete it. Repetition will result in wastage of time, money, and strain on code. Instead of repetition, focus on automation and implementation of code.

Start with well-defined requirements  

Having an SRSD (software requirement specification document) that consists of requirements for the software and design specifications, is one of the many best practices for software development. The resources of such development practices ensure that the prerequisites are being met and the procedures are followed. A decent SRSD will help you understand what needs to be done without asking questions and explaining the requirements of your project. 

Use an issue tracker for your software  

Any software bug or issue related to the software can be easily tracked using problem tracking software. A software issue tracker enables software developers to identify and report software issues in advance so that they will get enough time to troubleshoot before breaking the best practices of software development. The use of issue tracking software facilitates everyone involved in the software project to see what is working and the software problems that need to be solved.

However, software issue tracking tools are often overlooked by most software developers though it is one of the best practices of software development. The reason is that most of the issues that affect the efficient working of the project are not given much attention by many new software developers. They do not realize that some of those bugs will cause the project to fail at some point later, which is why it is so important to employ issue-tracking tools from the very first day. 

Write tests before writing software codes  

Writing software unit tests first before writing software code ensures that the developed software is free from bugs or other vulnerabilities. This allows you to make sure your code is working as expected and to detect any errors before releasing them to the public. It also facilitates documenting your code while you enter it. Whenever you test a function, you are actually recording the data types and parameters that it can accept, which allows other developers to understand the working of the code. The software code you write may contain bugs, which can result in numerous problems including security concerns. It is not quite easy to write software codes as the purpose of the application should be discussed and fixed by the software developers before starting to write the software code.  

Use an application framework

Using an application framework instead of manually developing software is one of the best software development methods that every programmer should be aware of. An application framework is a group of software parts that can be reused to facilitate the smooth development of software. These frameworks are not just reusable parts used to create software, they also consist of tools that avoid repetitive tasks like database management or changing file format involved in the development process.

Writing software manually is a time-consuming and tiring task. By using components and frameworks, you can save a lot of time and you can focus more on writing code rather than spending hours on tedious tasks. In short, an application framework reduces the number of errors you may run across later. Moreover, it acts as a chassis of your application, which you have to fill in with your own code. This will save you from writing basic functions from the beginning and ensure similarity across various platforms. 

Wrap Up 

Every business requires better practices to ensure the efficiency of resources, money, and effort and this is obvious when it comes to software development. You may have an experienced, well-equipped team and infrastructure, but without using the best practices of software development it may take a lot more time, effort, and money to develop upgraded versions of your code. Software development best practices can help you work more efficiently and it helps to make your projects more secure as there are fewer chances for bugs that could benefit hackers. 

As mentioned before, the primary goal of Software Development Best Practices is to assist you in developing your code to make it easier to function and make changes in the future. 

Top 10 FinTech Trends to Keep an Eye on This Year

Financial Technology (FinTech), today, has become a revolutionary field in the global industry, encountering rapidly positive changes each year! FinTech has transformed countless business sectors ranging from banking and retail to financial advisory services.

Though the COVID-19 pandemic disrupted most industries across the world, it has brought brilliant opportunities for FinTech. The implementation of FinTech in financial institutions increased rapidly when the pandemic called for contactless transactions and social distancing. This has resulted in great transformations in the financial sector, and the assimilation of innovation has probably never happened at a greater rate.

Here are the top 10 financial technology trends that everyone would definitely be talking about this year. 

Digital-only banking 

The financial sector moves quickly when banks virtually provide global payments, Peer-to-Peer transfers, contactless MasterCard along with no transaction fees, and opportunities to exchange and purchase Bitcoin, Ethereum, and various other cryptocurrencies. Banking processes that offer these services to customers through online channels are increasingly revolutionized by digital-only banking. These are incredibly beneficial since, with the help of digital processes, no customer has to spend time visiting the banks physically, wait in a long line for banking services, and do a lot of paperwork. Due to the rise of digital-only banks, visits to banks have dropped by 36% between 2017 and 2022. Non-requirement of physical visits has been a boon during the time of the pandemic, and that has consequently resulted in the practice being accepted at an increasing number of banks. Other benefits of digital-only banking include fast bill payments, feasible cost management, real-time analytics, reset pins from home, and quick balance review.

Biometric security systems

Various digital financial services like mobile banking have become so popular due to increased internet usage and smartphones. Though this is a good practice, the increases in digital services raise a lot of security-related questions. Cybercrime is also another problem that keeps increasing in number every day. This is why every FinTech company should consider taking necessary security measures, and one way to do that is to add a biometric system to the list! 

Biometric security systems provide customers confidence that all their personal and financial information is safeguarded, and since the introduction of various biometrics technologies like facial recognition and fingerprint identification is also a part of smartphones today, biometric security systems can be implemented to become a part of people’s everyday lives. However, in the years to come, contactless biometric solutions are believed to take over touch-based solutions. 

RPA

RPA (Robotic Process Automation) is a technology that uses digital robots or programs (bots) to automate specific and rote tasks that humans normally do. Many organizations have already implemented similar systems to free up resources and increase accuracy. Many have also adopted the technology to automate back-end office processes like customer onboarding, security checks, reconciliation of payments, account maintenance, and more. 

The most important advantage of RPA is that robots can complete each of these tasks quicker and more efficiently, allowing human employees to focus on much more complex and creative processes. 

Blockchain

Though originally designed to focus on cryptocurrencies, blockchain technology has entirely changed the working of the FinTech industry today. With this technology, each transaction is ensured to be done in a secure and safe manner; blockchain decentralizes the verification process of a transaction, and the consequent increase in security of a transaction has meant that many banks and financial institutions have already adopted it and are currently leveraging its benefits!

Blockchain makes sure that all the information stores are secured end-to-end while there is minimum risk. It can also be implemented to ensure safe cross-border payments. These are a few reasons why blockchain is trending today.

Artificial Intelligence (AI)

Banks worldwide are planning to use Artificial Intelligence for many of their internal operations. According to Autonomous Research, AI is believed to reduce 22% of the operational expenses in a bank by 2030, meaning that banks will be able to save around $1 trillion simply by implementing AI for their operations. 

Financial institutions can use AI to manage the increasing cyber-attacks by identifying financial threats and frauds. AI can also be made to work in a customer-centric manner by implementing algorithms that can record all interactions with utmost preciseness and accuracy. Through client service solutions like Chatbots, Artificial Intelligence has already shown its usefulness in financial intelligence – it is only a matter of time that financial institutions and banks adopt AI for other purposes. 

Voice-enabled payments

The popularity of Siri and Alexa has shown how important voice technology is in our daily lives. However, these technologies can not only be used for helping people switch off their lights and reading their news but can also help them make easy payments. Reports have shown that there are over 3.25 billion voice assistants being used around the world. So, when more and more users start depending on their Smartphones for payments, voice technology might take over traditional payment methods and become the new payment solution. 

Open banking

Open banking brings banks and Fintech together, enabling data networking across several financial institutions. It also ensures that the data released by financial service providers are standardized and secure, making information sharing easier among different authorized organizations online. It can also allow users to manage their financial accounts in a secure and accessible manner by offering them a consolidated view of their banking accounts. By making bank account management transparent and easy, open banking has the potential to improve the financial judgment for customers and has the potential to aid long-term wealth creation. 

Virtual cards instead of plastic 

The idea of using virtual cards instead of plastic is not new but is definitely getting popular this year. One of the major reasons why it is gaining popularity is high security; information cannot be stolen or copied easily unless a physical medium is present. Customers will also not have to worry about disposing of the cards once they expire. 

Financial institutions can arm their staff with virtual cards to help them better manage expenses, and many organizations have already implemented similar systems in place. 

Autonomous finance

Autonomous finance uses ML, AI, and automation to offer users a hassle-free experience on mobile portals. In this technology, the user is not required to give inputs directly. Instead, the customer can use the virtual banker created specifically for him on the portal. These unique virtual bankers will be able to manage and analyze the customer’s risks, portfolio, and investments. The AI algorithm will then generate the best savings and investment options for the customers, reducing the chances of any wrong judgment calls or human errors. 

Cybersecurity

With the increasing FinTech solutions being implemented, financial institutions must not leave out efficient cybersecurity strategies. Cyber threats increase every day with increased online transactions, and digital processes and cyberattacks can create shared risks across systems. This is why financial institutions must make themselves cyber secure and implement effective cybersecurity strategies to protect themselves and their clients. 

The FinTech revolution is only becoming stronger with newer and improved technologies. Therefore, avoid being left behind and explore these FinTech trends today!

Best Practices in ClaySys Appforms Configuration

Before going through this documentation, I am assuming that the user knows the basic ClaySys AppForms Configuration including rules and data sources.

A comprehensive configuration encompasses all the aspect of assembling the Forms, Controls, Rules and Data sources in the smart way. This will improve the performance and readability of the AppForm configuration.

This blog post will help you understand the best practises for ClaySys Appforms are not proposed to form an inflexible methods to follow, they are meant to serve as a guide for creating the application for a specific project.

The AppForm configuration can be divided as follows:

  • Deciding the goal
  • Finalizing the UI design
  • Data Source design (The back end data where you save and process data)
  • Deciding the number of form
  • Deciding the controls in the form
  • Structuring the rules
  • Calling the right rule at right time

b1

Designing the form

In AppForms the form is presented to the end user as the HTML, so basically the form is rendered as HTML in the client browser.

If you are not replicating the UI design of another form, keep the number of controls minimal to improve the rendering.

It is very important to decide navigation and number of form even before you start designing, so once you decided the navigation then you can take decision on the number of form you are going to use.

Hidden control

This is a kind of tricky stuff because mostly these hidden controls are used to keep the temporary values. Most of the time the designer will set the visibility of the control as hidden permanently and that control is used as “HIDDEN CONTROL”.

As the project move in agile mode the designer will keep adding the hidden controls just to maintain the temporary value or to control the form logically. When a new designer continue to work on this kind of form, they will be really worried to touch those controls so he will add new controls to it, the end result of this method will be a junk form.

Also if you use a hidden control whenever a value is changed in that control, the AppForms will search for rule for that particular control, this can be avoided.

As mentioned earlier, since this form is rendering as HTML, it will take time to render. But according to the end user there may be only few visible controls and the end user is really worried on the performance in that form .

b1 So how can we avoid this? 


There are few methods we can use :

  • Managing through variable
  • Managing through Session variables
  • Reusing the controls
  • Keeping only minimal data

“ Even if you wanted to use the hidden controls for managing the form logic then it is better to group the controls using SubForm control, So you can show and hide the controls by just disabling the sub form rather than hiding each controls “

Managing through variables

This is the smartest way to keep the temporary value and traffic the rules. The normal variables can be created from the rules. You have to note that the variables can be accessed only from rules, it cannot be accessed neither from the designer nor from data source.

If it is essential to pass the variable value to the data source then use only one hidden control and pass the variable value to the control. You can use the same hidden control to pass value to the different data source.

Please see the example below:

b1

There are two data sources to save to two different lists, and based on the date of birth they need to save Age to the first data source and based on the Gender they need to save Mr/Miss to the second data source. In this case you have to use the rule to populate the Age from Date of birth and Salutation from Gender. Once you populated you can assign the Age to lblTemp and invoke the save action. Once that is completed you can use the rule to generate the Salutation and assign that to lblTemp and use the same save to the second DB.

Managing through Session variables

Those who have a small glimpse to the programming world they must know the session variable. It can store any data and scope of the session variable is through out the Tenant in the ClaySys, and the life time is till the  browser gets closed.

Who need session variables?

Let’s take an example, If I want to maintain a common value called ‘company name’ through out the forms, I can either pass the value between the forms using the controls or use session variable.

Next, if the user want to load form_2 from form_1, but also he want to pass a value from form_1 to form_2, the user can use the session variable to keep that variable.

*Please note the session variables can be used in Data sources.

Reusing the controls

Reusing the control is just what it mean by the title. For example, based on different value you need to perform some operation in the rule. So let try the same by using only two controls, One for the command(txtCommand) and the another one for the value (lblValue). And when you create the rule add the txtCommand as the trigger .

b1

Standard naming practice

In any domain, naming conversion have a great benefit to reduce the effort to read and understand the configuration. It provides a better understanding to the third person who is reading this configuration even after a long time.

The best recommended practices are :

Control
The default name of a control name will be control type + number, leaving this as it is not a recommended process.
The recommenced naming standard is Control Type Short Name + Name +functionality

For example,
Text Box which managed with Name for the Employee info will be, txtEmpInfo.
ComboBox which load the state for Student info will be, cmbStateStudent.

Variable
The variable can be given with a prefix of Var
For Example,
The variable to keep the count will be varCount.

Also you have to note that whenever a variable name is created it should not conflict with the control name or the default rule function name.

Rule
The recommended process for the rule is, it should not conflict with the control name or the default rule function name. Whenever you are giving a sub rule it can be managed in a little more smart way, like

The Child name should be like Parent Rulename_1 and the second level child should be Parent Rule name_2 , like the example below:

b1

Using the right control

While configuring it is advised to use the right control for the right purpose, for example it is not advised to use the Dynamic grid control for the purpose of Search control. The main purpose of dynamic grid is not just to display data but perform the data manipulation operations, also it has composite column feature and lot more, so when you use the dynamic grid instead of search it has to do lot of process before pulling the data to the view .

Sync and Asynchronous operations

Basically the sync and Async operation plays while the time of data Source related command like Execute command and FillData command.

b1

Async / Sync

What is Synchronous operation ?

When the user choose the synchronous operation for the execution then it will block the next operation till the synchronous execution is complete, It is advised when you use the execute command as the last action.
OR if there is only one or two execution. Basically synchronous operation is advised to the basic forms.

What is Asynchronous operation ?

Asynchronous operation take the advantage of parallel processing, like the Async execution will not block the next operation.

Then how do I know that my Asynchronous execution is completed?

The user can use two methods to manage this, use the Execute completed and Fill Data completed trigger. Please refer the Execute Complete trigger and Fill Data complete trigger from the ClaySys AppForms documentation.
The second option is set the execution result to a control while configuring the data source and add that control as trigger to a rule, so when the execution is completed the result will set in to the control and the control will trigger its rule.

Rules optimization

Rules in the AppForms are the brain when the user wants to control the flow of his execution. So please note the better practice as below:

Enclose the non-control value with double quotes when you are using it,

For example
txtName.value=”anto.Rubin” (good practice)
lblName.Value=anto.Rubin (This will still work but not advised)

According to the architecture of rule engine, when you give a value the rule engine will check is that a control name/Variable/operation, only if that is not a control or variable it will rerun the name. But if we enclose double quotes then it will not check for the same and it will directly return as value .

Avoid giving the same control in multiple rules

It is advised to not give same control for different rules, but you can call the required rule using RunRule() function.

Avoid leaving the rule with syntax error

There is an option in the designer to check is there any syntax issue in the rules. If you leave as it is, the remaining rule will still work but that error part will be executed as rejected by the rules engine each time.

Avoid recursion

This is a big no no in the rules. This is like adding the control as trigger and setting value to the same control from the same rule. Also there are lot of recursions where the user use for the purpose of looping, and in that case the user must proof the looping logic with and entering condition. see the example below:

b1
In the above example the varIcount will control the execution of the LoopRule.

Working with a Dynamic Grid In AppForms

Introduction

Dynamic Grid is an advanced grid which allows the user to Display/Create/Update data from database.
Another creative future of the dynamic grid is that the user can configure a control for a cell and it can be created dynamically based on certain user defined rules.
This Dynamic grid can be bind to SQL Tables and the SQL stored procedures as well.

Dynamic Grid Configuration

Dynamic Grid’s wizard can be configured from Columns property of Dynamic grid.

g1

  • First Step of the wizard is used to select SQL Table or Stored Procedure
  • In the next steps Columns can be defined, Columns can be of type:
  1.  Label
  2.  Textbox
  3.  DateTimePicker
  4.  Combo box
  5. Checkbox
  6.  Hyperlink
  7.  Radio Button
  8. Composite Column.

g1
The Controls property of column can be configured in the property window by clicking the button at right side.
For e.g. If the control selected is Combo Box then we can set the properties for Combo Box there itself.

g1
If selected column is Composite Column, then the display rules can be created by clicking the Property button at the right side. So a popup will appear as like follows:

g1

  • From the first dropdown we have to select the source Column from where the data should be compared .
  •  Condition is the drop down from where we can set the logical comparison operator.
  •  And in the value column we can set the target value to be compared .
  • The control type is the last column where the user can set the target control type if is pass the defined criteria. And here itself we can define the properties of that particular control like the text /color/Data Source etc.
  •  Then Click the + Button to add this rule to the rules collection.

In the given example,

  • If the country is Norway then the city Column has to be Textbox control.
  • If the country is India then the city column has to be ComboBox control and here for this combobox we defined some Sql data source properties with values of Delhi, Mumbai, Cochin from database.
  • If the country is USA then the city column has to be ComboBox control with values of New York, Washington, Florida which is set from the properties of the combo box.

2.1- Configuring with SQL Tables

After creating the columns,

  • On first step, select the datasource
  • On Second step, Select the Table
  • On the third steps Command are defined.

Map the columns of the grid to corresponding table fields.

Select

g1Insert

g1
Update

g1
On the Next Click Map the Primary Column and Click Finish to complete the Configuration wizard.

SQL Commands Execution

Database Commands and called by rules.
Eg: ExecuteCommand(DynamicGridDataSource27.Select)
ExecuteCommand(DynamicGridDataSource27.Insert)
ExecuteCommand(DynamicGridDataSource27.Update)

g1
For adding new row press TAB at the last cell, then a new blank row will be generated at the bottom and internally that row’s mode will new.
When Insert command is called, all rows newly inserted will be saved to database and internally that entire new rows mode will be changed to update.
When Update command is called, then all existing data will updated based on the condition given.

Composite Column Rendering in CRM

When India Selected as country

g1
When USA is selected

g1If Country Is Norway
g1

  •  To hide default column heading uncheck ShowHeader Property of the Grid.

g1
2-2 Stored Procedure Configuration

In this only one stored procedure can be bind to grid so the user have to manage the logic of select ,Insert, Update from the store procedure .

After creating the Columns,

  • First select the Data Source
  • Select Stored Procedure
  • Set the parameters

g1
The left side is the input parameters for the stored procedure and right side denotes the return values from the stored procedure.
Then click finish to complete the configuration wizard.

Stored Procedure can be executed using rule ExecuteCommand(DynamicGridDataSource.SP)


  • Unique Properties of Dynamic Grid

3.1 Allow Paging:

By default this field is “unchecked” and as a result dynamic grid will be appeared without paging. Page numbers will be added if this field is in true condition. A sample Dynamic Grid with paging is shown below:

g1     Figure 21

3.2 Page Size:
This is the number of results per page. 10 is the default value and it can be modified.

3.3 Show Header:
This field value determines whether the columns headers in a grid need to be displayed or not. If this property is in unchecked condition, column headers won’t be showed in the grid as shown below. Please compare Figure 21 and Figure 22.
In figure 2-2 grid appears without column headers.

g1   Figure 23

3.4 Export to Excel:
By make this property as true, we can export the data in the dynamic grid into an excel sheet. If this field is true an excel icon will be available at the bottom of the grid.

3.5 Fill Data Trigger:

g1Fill Data Trigger helps to call the dynamic grid in three different ways. Following are the options:

On each row: If this is the Fill Data Trigger; then the corresponding rule will be executed, on fill each row of the dynamic grid. This trigger is useful to get the corresponding row index of the grid.

On each cell: If this is the Fill Data Trigger; then the corresponding rule will be executed, on fill each cell of the dynamic grid. This trigger is useful to get the corresponding column index of the grid.

On complete: The rule will be triggered, once the grid is completely filled in.

Rules for Dynamic Grid

  • To get the value of a cell.(function)

GridGetValue(Grid Name, Row Index, Col Index)

  • To Set the value to a cell(function)

GridSetValue(Grid Name, Row Index, Col Index, Value)

  • Current Row Index: (property)

GridName.RowIndex

Grid can be added as trigger for a rule, so that it will execute for every row change. You will get the corresponding row index from property GridName.RowIndex

Sample Grid Rule


g1Second and Third Columns are saved to variable VarName and VarCountry . It is appended to another variable VarRuleCol. This value is set to Column with index 6.

OutPut


g1
Column Grouping Property of Radiobutton in Dynamic Grid Control

This property helps to select the Radiobutton value either column or row wise without using rules.

5.1 Radiobutton grouping in a row

  • Drag a dynamic grid control into the workspace.
  • Add columns to the Dynamic Grid using “Columns” property.

g1

  • While configuring the columns, make sure that you are adding Radiobutton columns.

g1

  • Click on the icon, g1 in the “Properties” column of the control RadioButton1.
  • Property window opens.

g1

  • Two new fields “Radio Group” and “Column Grouping” are being added.
  • Enter a group name in the “Radio Group” field. I entered “DGGrid1”.
  • Close the property window.

-Open the Property window of the control RadioButton2.

  • In the “Radio Group “property field give the same group name. (Here it is “DGGrid1”).
  • Complete the dynamic grid configuration.
  • Now check the dynamic grid either in “Preview” or “CRM” page. In each row of the grid, only one of the Radio buttons can be selected at a time.

CRM View

g1
Radio button grouping in a grid

  • To select only one of the radio button options in a grid, “Column Grouping” property is being used.
  • To implement this feature, make the “Column Grouping” check box value as “true” in both the Radio button property window.
  • As we have done before, the value in “Radio Group” field should be same for both the Radiobutton controls. Only then the application considers the controls as items in a single group.

CRM View


g1

ClaySys AppForms In Multi Tier

ClaySys AppForms Enterprise 1.5


In the modern world most of the large scale deployment requires multi tier deployment to ensure high availability of applications. ClaySys AppForms Enterprise can be installed on a multi tier environment. Lets consider that the the deployment requirement is as following:

  • The applications need to be developed following a Multitier architecture
  • Each tier should be physically separated for security.
  • The business logic tier is the only one that can connect to the data tier.
  • The presentation tier only connects to the business logic tier.
  • The presentation tier may not directly connect to the data tier.
  • The presentation tier is located in a DMZ, other tiers are heavily secured.

The communication between different tires of the application should work like the example provided below:

NewItem35

Proposed Design

The service proxy requirement can be done using the feature in IIS7 called Application Request Routing. The details of this feature are explained below.

Application Request Routing

IIS Application Request Routing (ARR) 2.0 or above enables Web server administrators, hosting providers, and Content Delivery Networks (CDNs) to increase Web application scalability and reliability through rule-based routing, client and host name affinity, load balancing of HTTP server requests, and distributed disk caching. With ARR, administrators can optimize resource utilization for application servers to reduce management costs for Web server farms and shared hosting environments.

http://www.iis.net/download/ApplicationRequestRouting

The following steps can be used to install and configure IIS Application Request Routing:

Preparing the server(s)

  1. Make sure you have IIS 7 or above installed
  2. Download the Application Request Routing extension from :
    1. X86 :- http://download.microsoft.com/download/4/D/F/4DFDA851-515F-474E-BA7A-5802B3C95101/ARRv2_setup_x86.EXE
    2. X64 :- http://download.microsoft.com/download/3/4/1/3415F3F9-5698-44FE-A072-D4AF09728390/ARRv2_setup_x64.EXE
  3. Install the extension
  4. Finally we’ll configure the Application Request Routing.

In IIS Manager, click your server and go to Application Request Routing Cache:

NewItem36

Important note: If you work with multiple servers (and that’s what you’ll do in a real environment), you need to do this on your presentation tier (the ASP.NET website containing the Silverlight application).

5. On the right select Server Proxy Settings and check the box Enable proxy.

Creating the site for the presentation tier (and reverse proxy)

In the presentation website, i.e. the website hosting the asp.net application, open the application pool go to Advanced Settings and change the Idle-Time out to 0 minutes.
And finally go to Recycle, and clear the Regular time intervals (in minutes) checkbox.

Configuring IIS Application Request Routing and IIS Rewrite

  1. Open the web.config of the PresentationSite (running on the presentation tier).
  2. Now add the following to the configuration file:

<system.serviceModel>
<serviceHostingEnvironment aspNetCompatibilityEnabled=true
multipleSiteBindingsEnabled=true />
</system.serviceModel>
<system.webServer>
<validation validateIntegratedModeConfiguration=false />
<rewrite>
<rules>
<rule name=Reverse Proxy to Business Logic Tier stopProcessing=true>
<match url=^services/(.*) />
<action type=Rewrite url=
http://logictier/{R:1} />
</rule>
</rules>
</rewrite>
</system.webServer>

This will make sure all requests to the path services are forwarded to our logictier server (containing the business logic tier).

  1. Now, visit the page: http://presentationtier/services/Manage.svc

And there you have it. Even though we’re visiting a page on the server presentationtier it’s showing us content from the logictier server.
This means our Silverlight application no longer needs to talk to the logictier server. And thus, we don’t need to expose our logictier server to the internet or put it in a DMZ.

Note 1: The clientaccesspolicy.xml file we placed in the LogicSite is no longer required.
Note 2: The system.serviceModel part in the config is very important. If it’s missing you’ll get the following error:

In your browser:

Server Error in ‘/’ Application.
The resource cannot be found.

In EventViewer:

WebHost failed to process a request.
Sender Information: System.ServiceModel.Activation.HostedHttpRequestAsyncResult/27111447
Exception: System.Web.HttpException (0x80004005): The service ‘/services/Manage.svc’ does not exist. —> System.ServiceModel.EndpointNotFoundException: The service ‘/services/Manage.svc’ does not exist.

The final result in our ClaySys AppForms Application

  1. Check the web.config if it still contains the URL Rewrite configuration.
  2. Change the appsetting for the service url to the presentation layer (http://presentationtier/services)

And we’re done…

If you want you can start Fiddler and you’ll see that our ClaySys AppForms application is only accessing our presentationtier server:

NewItem35