Working with a Dynamic Grid In AppForms

Introduction
Dynamic Grid is an advanced grid which allows the user to Display/Create/Update data from database.
Another creative future of the dynamic grid is that the user can configure a control for a cell and it can be created dynamically based on certain user defined rules.
This Dynamic grid can be bind to SQL Tables and the SQL stored procedures as well.
Dynamic Grid Configuration
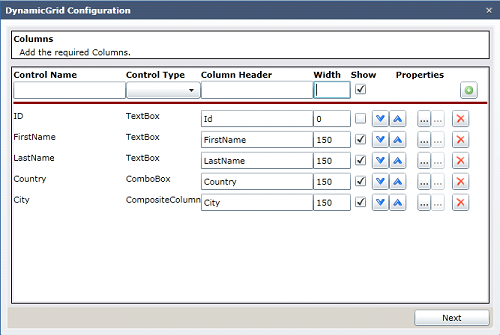
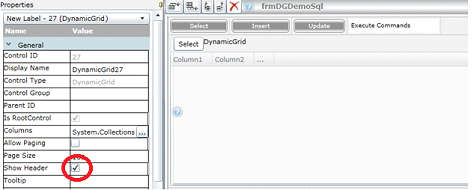
Dynamic Grid’s wizard can be configured from Columns property of Dynamic grid.

- First Step of the wizard is used to select SQL Table or Stored Procedure
- In the next steps Columns can be defined, Columns can be of type:
- Label
- Textbox
- DateTimePicker
- Combo box
- Checkbox
- Hyperlink
- Radio Button
- Composite Column.
The Controls property of column can be configured in the property window by clicking the button at right side.
For e.g. If the control selected is Combo Box then we can set the properties for Combo Box there itself.
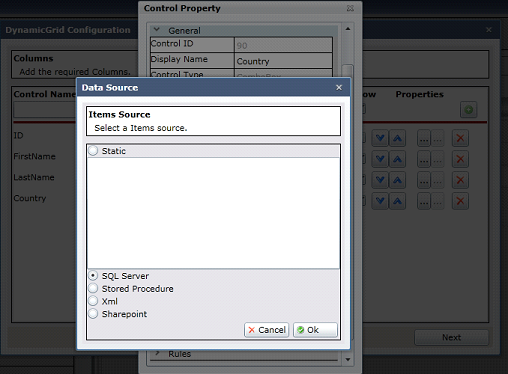
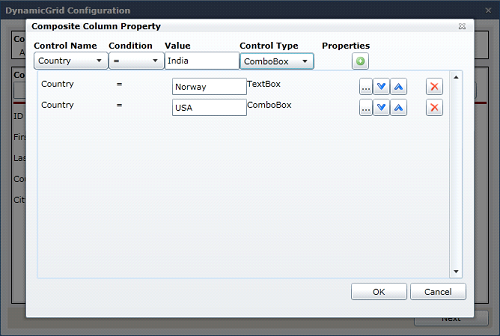
If selected column is Composite Column, then the display rules can be created by clicking the Property button at the right side. So a popup will appear as like follows:
- From the first dropdown we have to select the source Column from where the data should be compared .
- Condition is the drop down from where we can set the logical comparison operator.
- And in the value column we can set the target value to be compared .
- The control type is the last column where the user can set the target control type if is pass the defined criteria. And here itself we can define the properties of that particular control like the text /color/Data Source etc.
- Then Click the + Button to add this rule to the rules collection.
In the given example,
- If the country is Norway then the city Column has to be Textbox control.
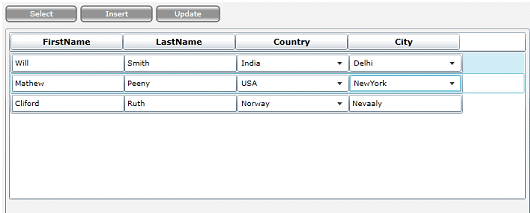
- If the country is India then the city column has to be ComboBox control and here for this combobox we defined some Sql data source properties with values of Delhi, Mumbai, Cochin from database.
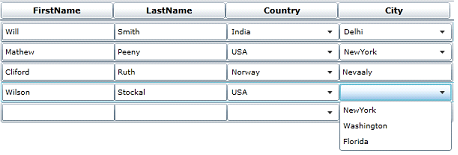
- If the country is USA then the city column has to be ComboBox control with values of New York, Washington, Florida which is set from the properties of the combo box.
2.1- Configuring with SQL Tables
After creating the columns,
- On first step, select the datasource
- On Second step, Select the Table
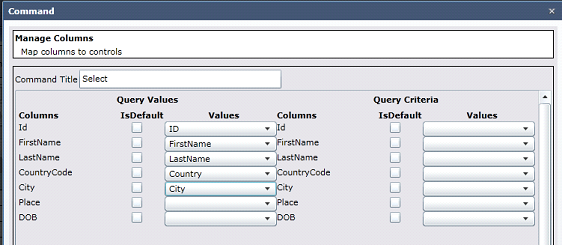
- On the third steps Command are defined.
Map the columns of the grid to corresponding table fields.
Select
 Insert

Update
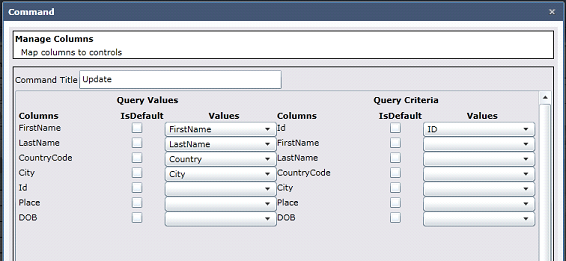
On the Next Click Map the Primary Column and Click Finish to complete the Configuration wizard.
SQL Commands Execution
Database Commands and called by rules.
Eg: ExecuteCommand(DynamicGridDataSource27.Select)
ExecuteCommand(DynamicGridDataSource27.Insert)
ExecuteCommand(DynamicGridDataSource27.Update)
For adding new row press TAB at the last cell, then a new blank row will be generated at the bottom and internally that row’s mode will new.
When Insert command is called, all rows newly inserted will be saved to database and internally that entire new rows mode will be changed to update.
When Update command is called, then all existing data will updated based on the condition given.
Composite Column Rendering in CRM
When India Selected as country

When USA is selected
 If Country Is Norway
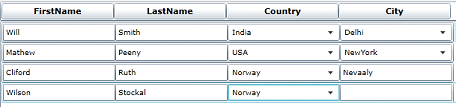
- To hide default column heading uncheck ShowHeader Property of the Grid.
2-2 Stored Procedure Configuration
In this only one stored procedure can be bind to grid so the user have to manage the logic of select ,Insert, Update from the store procedure .
After creating the Columns,
- First select the Data Source
- Select Stored Procedure
- Set the parameters
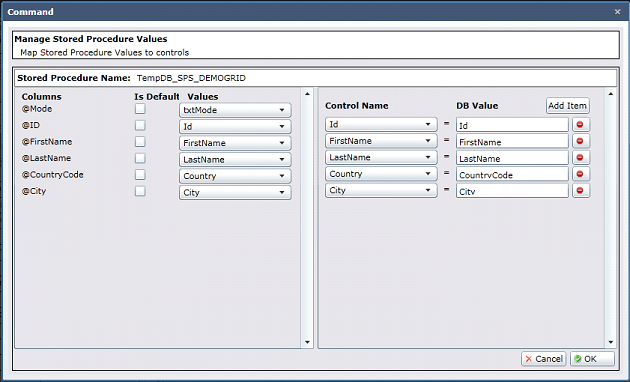
The left side is the input parameters for the stored procedure and right side denotes the return values from the stored procedure.
Then click finish to complete the configuration wizard.
Stored Procedure can be executed using rule ExecuteCommand(DynamicGridDataSource.SP)
- Unique Properties of Dynamic Grid
3.1 Allow Paging:
By default this field is “unchecked” and as a result dynamic grid will be appeared without paging. Page numbers will be added if this field is in true condition. A sample Dynamic Grid with paging is shown below:
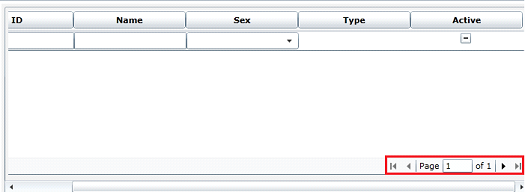 Figure 21
3.2 Page Size:
This is the number of results per page. 10 is the default value and it can be modified.
3.3 Show Header:
This field value determines whether the columns headers in a grid need to be displayed or not. If this property is in unchecked condition, column headers won’t be showed in the grid as shown below. Please compare Figure 21 and Figure 22.
In figure 2-2 grid appears without column headers.
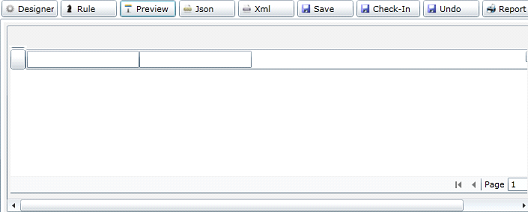 Figure 23
3.4 Export to Excel:
By make this property as true, we can export the data in the dynamic grid into an excel sheet. If this field is true an excel icon will be available at the bottom of the grid.
3.5 Fill Data Trigger:
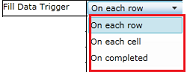 Fill Data Trigger helps to call the dynamic grid in three different ways. Following are the options:
On each row: If this is the Fill Data Trigger; then the corresponding rule will be executed, on fill each row of the dynamic grid. This trigger is useful to get the corresponding row index of the grid.
On each cell: If this is the Fill Data Trigger; then the corresponding rule will be executed, on fill each cell of the dynamic grid. This trigger is useful to get the corresponding column index of the grid.
On complete: The rule will be triggered, once the grid is completely filled in.
Rules for Dynamic Grid
- To get the value of a cell.(function)
GridGetValue(Grid Name, Row Index, Col Index)
- To Set the value to a cell(function)
GridSetValue(Grid Name, Row Index, Col Index, Value)
- Current Row Index: (property)
GridName.RowIndex
Grid can be added as trigger for a rule, so that it will execute for every row change. You will get the corresponding row index from property GridName.RowIndex
Sample Grid Rule
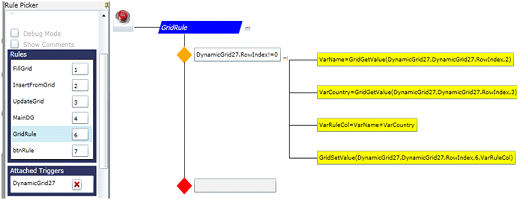 Second and Third Columns are saved to variable VarName and VarCountry . It is appended to another variable VarRuleCol. This value is set to Column with index 6.
OutPut

Column Grouping Property of Radiobutton in Dynamic Grid Control
This property helps to select the Radiobutton value either column or row wise without using rules.
5.1 Radiobutton grouping in a row
- Drag a dynamic grid control into the workspace.
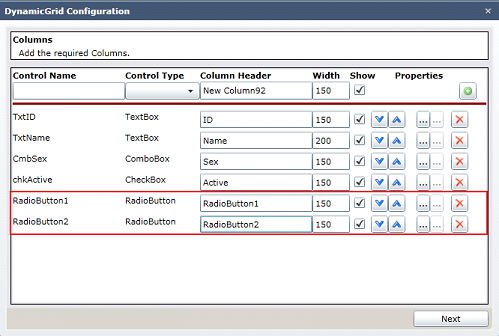
- Add columns to the Dynamic Grid using “Columns” property.
![]()
- While configuring the columns, make sure that you are adding Radiobutton columns.
- Click on the icon,
 in the “Properties” column of the control RadioButton1.
- Property window opens.

- Two new fields “Radio Group” and “Column Grouping” are being added.
- Enter a group name in the “Radio Group” field. I entered “DGGrid1”.
- Close the property window.
-Open the Property window of the control RadioButton2.
- In the “Radio Group “property field give the same group name. (Here it is “DGGrid1”).
- Complete the dynamic grid configuration.
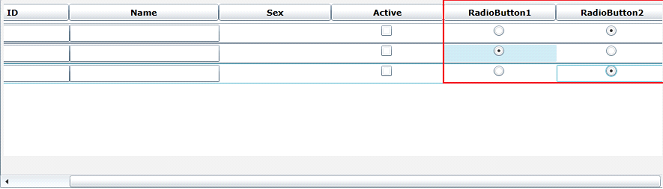
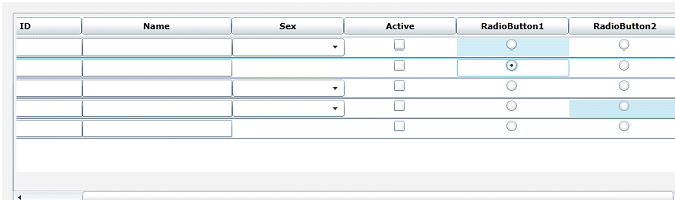
- Now check the dynamic grid either in “Preview” or “CRM” page. In each row of the grid, only one of the Radio buttons can be selected at a time.
CRM View
Radio button grouping in a grid
- To select only one of the radio button options in a grid, “Column Grouping” property is being used.
- To implement this feature, make the “Column Grouping” check box value as “true” in both the Radio button property window.
- As we have done before, the value in “Radio Group” field should be same for both the Radiobutton controls. Only then the application considers the controls as items in a single group.
CRM View
Blogs by Category
AppForms Artificial Intelligence Blockchain Call Centers Chatbots Cloud Computing Data Management Design Digital Marketing Digital Transformation Enterprise Applications FinTech Insights LowCode Development Microsoft Mobile Apps News Office 365 Robotic Process Automation Security SharePoint Software Development Web ApplicationBanking Automation with RPA: Benefits, Challenges & Best Practices

2026-06-01 14:26:05