The URL of the demo project is given below where users can learn about these activities in a better manner.
Steps:
Open “Google.com“.
Use the Set Text activity to search for “w3 HTML Table” in the search field.
Click on the first link from the search results.
On the W3Schools webpage, wait for the “HTML Tables” element to appear.
Check if the table element exists:
If the table exists:
Display a message saying, “Table exists.”
Use the Find Children activity to retrieve the child elements of the table.
Loop through the child elements of the table and extract the text from each using the Get Text activity.
Display each extracted text in a message box.
If the table does not exist:
Throw an error.
Activities Used
“Open Browser, Maximize, Set Text, Send Hotkey, Find Element, Click, Element Appear, Element Exists, Decision, Throw Error, For Each, Get Text, Message Box”
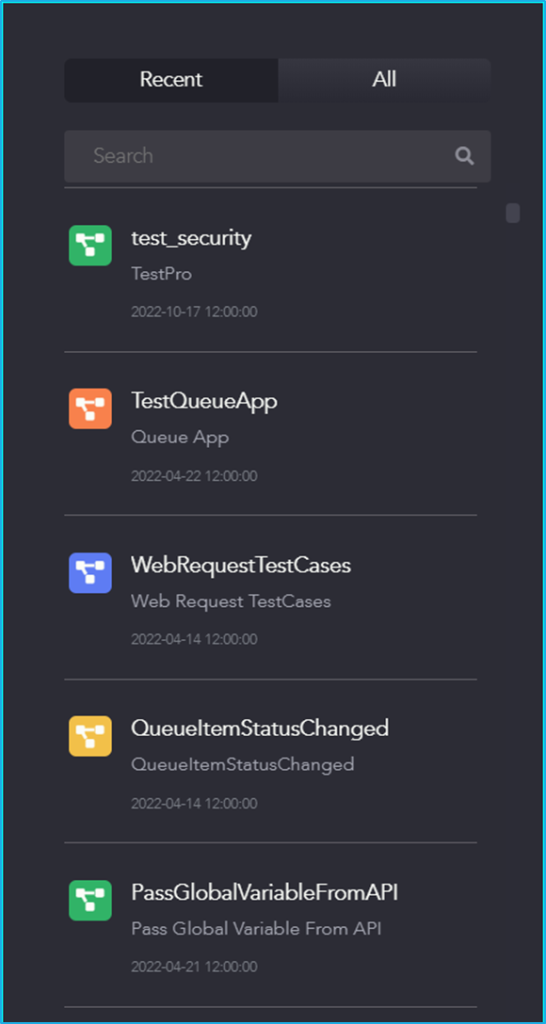
The Right panel of the Genie Studio consists of the ‘Recent’ and ‘All’ tabs. The ‘search’ icon is also available where the users can search for a specific project by providing the project’s name in the Search box.
If the user clicks on ‘Recent’, then they can find all the projects which they and other users have created recently. By selecting ‘All’, the user can find all of the user’s projects which are connected to that particular service URL based on the alphabetical order.
The steps below will provide a clear understanding of how to add a new user to the BOT Manager. To access the features of the BOT Manager, a user must first be added by the admin.
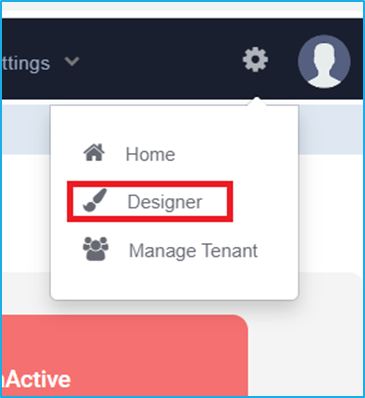
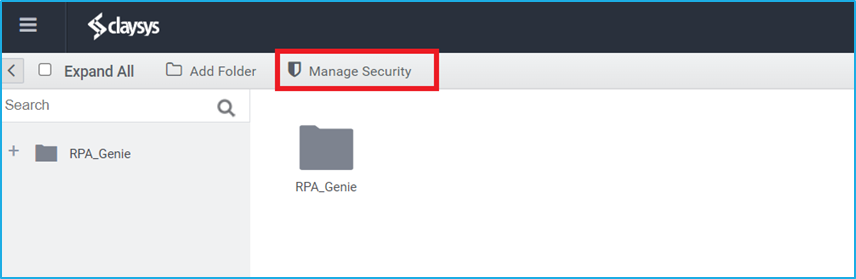
Open BOT Manager and click on the Settings icon and then select the ‘Designer’ option.
Once the Designer option is clicked, it will redirect to the AppForm designer window.
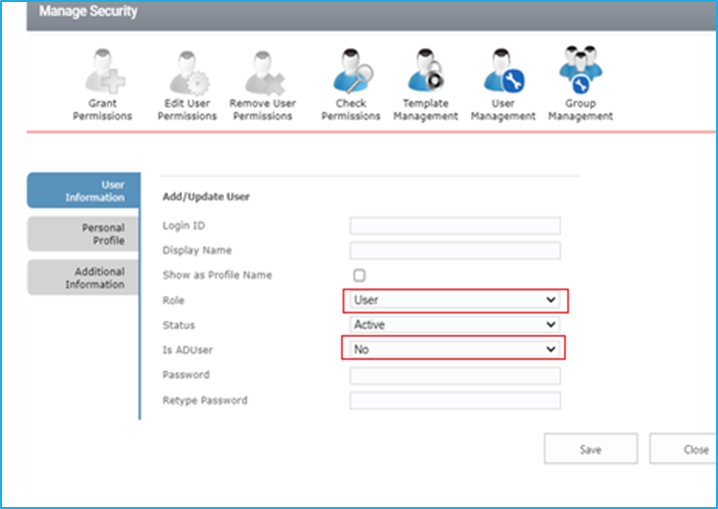
Click on the ‘Manage Security’ tab located at the top left of the window.
The ‘Manage Security’ Wizard will be displayed after clicking on the ‘Manage Security’ tab.
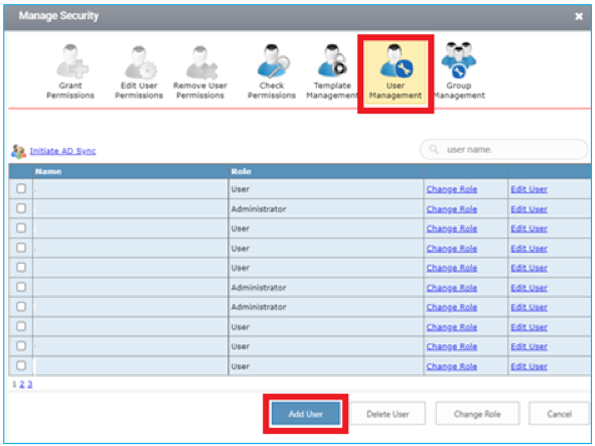
From the Available options, click on the ‘User Management’ icon and then click on the ‘Add User’ at the bottom of the ‘Manage Security’ window.
Provide the required user details, select an appropriate role, create a password, and finally click the ‘Save’ button.
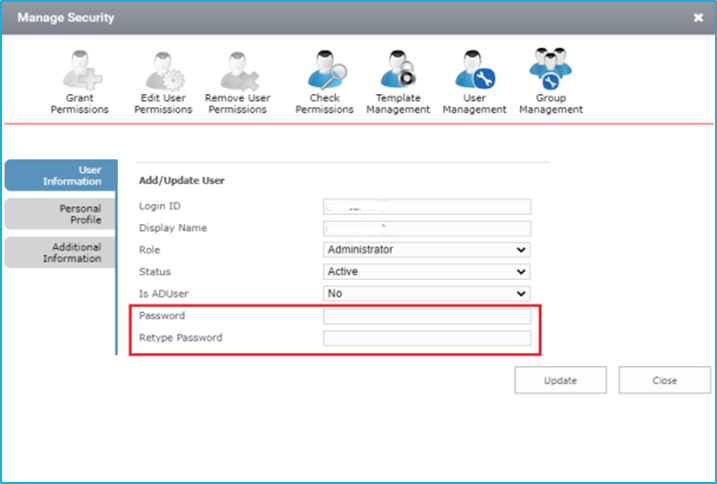
When adding a new user, the ‘Is ADUser’ field will display a dropdown with options to select. Selecting ‘Yes’ allows the user to log in via Windows authentication, eliminating the need for a separate password. Selecting ‘No’ means the user will log in via Forms authentication, requiring the creation of a password.
Select the appropriate role among the list that will be displayed when adding a new user.
Default Roles
Permission
User
This role has limited permissions in the BOT Manager. It can only access the home page and the workflow dashboard, where the forms are hosted.
Administrator
This role has full permissions in the BOT Manager.
Designer
This role can view the designer and the home page, but has no access to ‘Security,’ ‘Navigation Settings,’ and ‘Manage Tenant’.
Limited Access
The user will have Designer privileges but will not have access to the workflow feature.
After completing the steps, a new user will be added, and the details will be displayed in the list of users in the Bot Manager.
Provide the user Permission
The steps below will provide a clear understanding of how to provide permission to the new user in the BOT Manager.
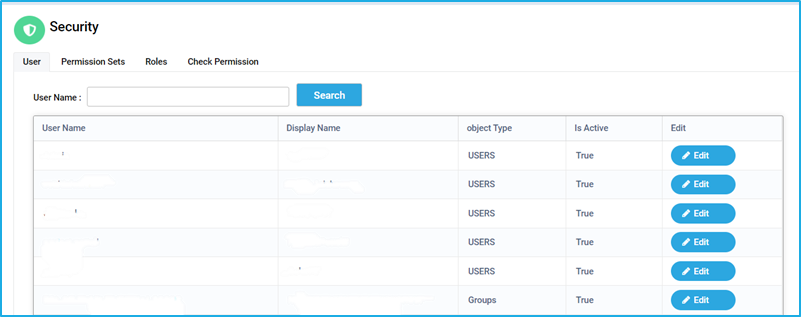
To set the permissions, navigate to the Security tab in BOT Manager
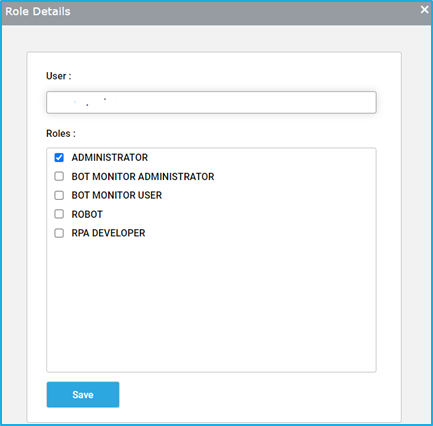
Click on the ‘Edit’ button next to the user under the ‘User’ tab.
Note: A user without any roles does not have access to any resource.
Select the appropriate role(s) to be assigned to the user. Next, click on the ‘Save’ button to grant permissions to the user.
Note: Only authorized users or admins can add roles and manage permissions for users.
To know more about the default roles, refer to the ‘Roles’ section under Security.
Change a user password
The admin is authorized to change the passwords of all users who are logging in through Forms authentication. Whereas, the password will be automatically updated for the Windows authenticated users when it is changed in the active directory.
The steps provided below will help to change passwords only for the Forms Authentication users:
Open BOT Manager and click on the Settings icon and then select the ‘Designer’ option.
Once the Designer option is clicked, it will redirect to the AppForm designer window.
Click on the ‘Manage Security’ tab located at the top left of the window.
The ‘Manage Security’ Wizard will be displayed after clicking on the ‘Manage Security’ tab.
From the Available options, click on the ‘User Management’ icon to view the list of active users.
Find the user for whom the password needs to be changed, and click ‘Edit User’ next to the username.
On the user information form that will appear, enter the new password in the ‘Password’ and ‘Retype Password’ fields. Then, click on the ‘Update’ button.