Sub Activity – Browser

It includes activities for automating web interactions, including opening, navigating, and interacting with web pages.

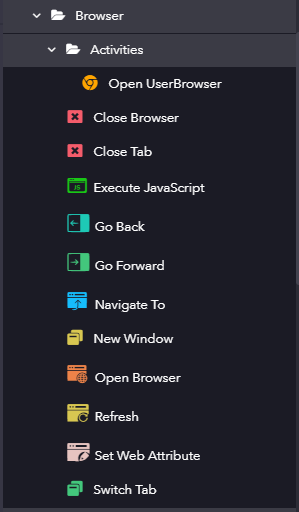
The Browser category has the following sub activities:

Open UserBrowser: This activity is used to directly open Chrome and retrieve the browser window with selectors.

Input Properties:

  • URL: Location of the web page that needs to be opened.
  • BrowserType: Select the browser type as Chrome.
  • Attach Existing Window: Enable the check box to attach an existing browser window.
  • Arguments: Command line arguments to be used while starting the browser instance.

Output Properties:

  • UserBrowserWindow: BrowserWindow variable that stores all the information regarding the specified browser session.

Close Browser: This activity is used to close the specified browser.

Windows Properties:

  • BrowserWindow: Browser window variable that holds the specified browser session that needs to be closed.

Close Tab: Closes the tab/webpage that is open in the browser.

Windows Properties:

  • BrowserWindow: Browser window variable that holds the browser tab that needs to be closed.

Execute Java Script: This activity can execute a Java script code in the context of a web page.

Element Properties:

  • Element: UI element variable or browser window variable which is returned by another UI activity.

Input Properties:

  • Script: The code to be executed as a string.
  • Arguments: Input parameters to be passed between the script and robot.

Output Properties:

  • Result: It will be the formatted output of the JavaScript execution, which can be a primitive value, a dictionary, a list, or a wrapped Selenium if a DOM element is returned.

Go Back: This activity is used to go back to the specified browser’s history list.

Windows Properties:

  • BrowserWindow: BrowserWindow variable which holds the browser to which it should go back.

Go Forward: This activity is used to go forward to the specified browser’s history list.

Windows Properties:

  • BrowserWindow: BrowserWindow variable which holds the browser to which it should go forward.

Navigate To: This activity is used to direct the browser to a specified URL.

Windows Properties:

  • BrowserWindow: BrowserWindow variable which holds the current browser Session.

Input Properties:

  • URL: Location of the web page to which it should navigate.

Open Browser: This activity is used to Open a browser from different browser types at a defined URL and perform multiple actions within it.

Options Properties:

  • Headless Mode: Headless browser is a tool used for automations where the visible UI shell is not required.
  • Auto Download Driver: Automatically downloads the required web driver for web automation.

Input Properties:

  • URL: Location of the web page that needs to be opened.
  • BrowserType: Select the browser type (Chrome/Edge IE Mode/ MS Edge/ Mozilla Firefox/Internet Explorer/) Default browser is Chrome.
  • Preferences: The preferences for the browser instance.
  • Capabilities: Browser configuration prior to open.
  • Arguments: Command line arguments to be used while starting the browser instance.

Output Properties:

  • BrowserWindow: BrowserWindow variable that stores all the information regarding the specified browser session.

New Window: This activity creates a new window or tab in a browser window.

Windows Properties:

  • BrowserWindow: Browser window variable that holds the specified browser session which needs to be openned as a new window.

Input Properties:

  • WindowType: The type of window in which the browser session needs to be opened.

Refresh: This activity reloads the webpage of the browser that is specified in the input of the browser properties.

Input Properties:

  • BrowserWindow: BrowserWindow variable which holds the current browser Session that needs to be reloaded.

Set Web Attribute: This activity sets the value of the attribute of an element in the webpage.

Input Properties:

  • AttributeName: Name of attribute that needs to be changed.
  • Value: The value assigned to an attribute.

Switch Tab: This activity allows user to switch active tabs in the browser.

Windows Properties:

  • BrowserWindow: BrowserWindow variable which holds the current browser Session.

Input Properties:

  • Title: Title of the tab to which It should be switched.

Sub Activity – Application

This includes activities for opening and managing applications, allowing automation of application-related tasks.

The Application category has the following sub-activities:

Open Application: This activity allows the user to open the specified application and create an application object.

Input Properties:

  • FileName: The full path or name of the Application to be opened.
  • Arguments: Arguments to be passed to the process.
  • ApplicationWindow: Window variable that returns active window.

Start Process: This activity helps to start a new Process.

Input Properties:

  • FileName: The name of the application to start, or the name of a document associated with an application that has a default open action.
  • Arguments: Command-line arguments to use when starting the application.
  • WorkingDirectory: Working directory for the process to be started.

Studio Settings

Studio settings have options that can be tweaked in a project. Select the ‘Studio Settings’ by clicking on options in the Options menu at the top left to access it.

Studio settings window will appears on the designer panel where the user can change the settings for IntelliSense, Debugger and Optimization.

IntelliSense Settings

IntelliSense Settings consists of fundamental features that are recommended to perform particular actions during the design stage of an automation project at the activity level. It includes:

  • Auto Create Output Property Variable – If this checkbox is selected, it indicates that the output variable needs to be generated automatically. 
  • Auto-Mapping Input Property – If this checkbox is selected, it indicates that the output needs to be auto-populated from the previous activity.

Debugger Settings

Debugger Settings contains global settings that are applicable to all projects opened in this version of studio. It includes:

  • Output console size – The output console is a panel that displays as soon as the process execution begins which will log each activity that is being performed. The output panel can display a maximum of 9,999 lines. The default value is 1000 lines. 
  • Highlight elements – If this check box is selected, it will highlight those UI elements that were indicated during the configuration of UI activities while the process is being executed. 
  • Minimize on run – If this check box is selected, the studio will be minimized while executing a project. After the execution of the project, the studio will be maximized. 
  • Show Activities Tray – If the checkbox is selected, the Activity Tray becomes accessible when the user executes a process in studio. This wizard provides real-time visibility of the activities being executed at a specific moment. Additionally, the user has the option to pause or stop the process from the activities tray.

Optimization Settings

In this version of Studio, the image display size for UI activities can be set globally by specifying the height and width, which determines how the images are displayed in a compressed format

Publishing a Project

To publish a project, right-click on the Project Name in the Project Explorer and select the publish option. But before publishing the project, every process must be checked in. A package will be created upon publishing a project and users can view the previous versions of the package while publishing the project.

In the Publish Project wizard, users can publish a project either using a new name for the package or as a new version of an existing package available in the bot manager. Additionally, the release note and version details can be updated if required. After providing all the details, click on the “Publish” button.

After publishing, user will see a pop-up named “RPA Genie Message” showing “Published Successfully”.

In the Project Versions section, user would be able to see all published version along with the username of the creator, created date and time. Further, there is option to download the package for specific version.

Open Project

Users will be able to import a project file in Genie studio with the .gsproj extension saved locally in a folder containing other dependent files such as .gprocess and .gsettings.

New – Library Project

A library project can be created where the same set of activities need to be used repeatedly in various projects. Once the library project is created, it can be reused in any other preferred projects.

The library project is a ‘.nupkg’ file package with multiple reusable components that can be used in a workflow.

Once that library project is present in the bot manager, it can be reused in any other new/existing projects simply by installing it using the NuGet package option in the Project Explorer and finally invoking the library project using the invoke process activity.

Note: The steps to create a Library Project and a New-Blank Project in RPA Genie Studio are the same.

New – Blank Project

Steps to create a project in RPA Genie Studio

  • Open RPA Studio and click on “New-Blank Project”.
  • Provide a suitable project name and description.
  • Choose the versioning tool from the drop-down, which is either Genie TFS or File-System. The folder path needs to be selected in case the File-System versioning tool is being chosen.

Selecting Genie TFS:

Selecting System File:

  • Choose the Automation Type:
    • UI Automation: UI Automation Project is used to create and run web UI automation processes. It includes activities that let users build automations and even interact with them during execution. Note: Only one UI process can run at a time.
    • Background Process: A process can be created where user interaction is not required. n this type of project, multiple background processes can be run simultaneously.These processes will run in the background where no user interaction is required. Since it is a background process, user will not find any UI related activities in this type of project.
      • Example 1: if there is a need to convert a word file in the folder to a pdf format every day then, a background process can be created for this, and the user need not go to the folder and manually convert it all day.
      • Example 2: Outlook mail automation, where an automatic reply can be sent each time a mail with a particular subject has been received.
  • Finally, choose a Template/Snapshot as per the requirement.

Template View:

Snapshot View: