Working with ClaySys AppForms form

This feature is to design a simple form in AppForms.
1. Creating a new form.
1.1. Right click on the tenant screen
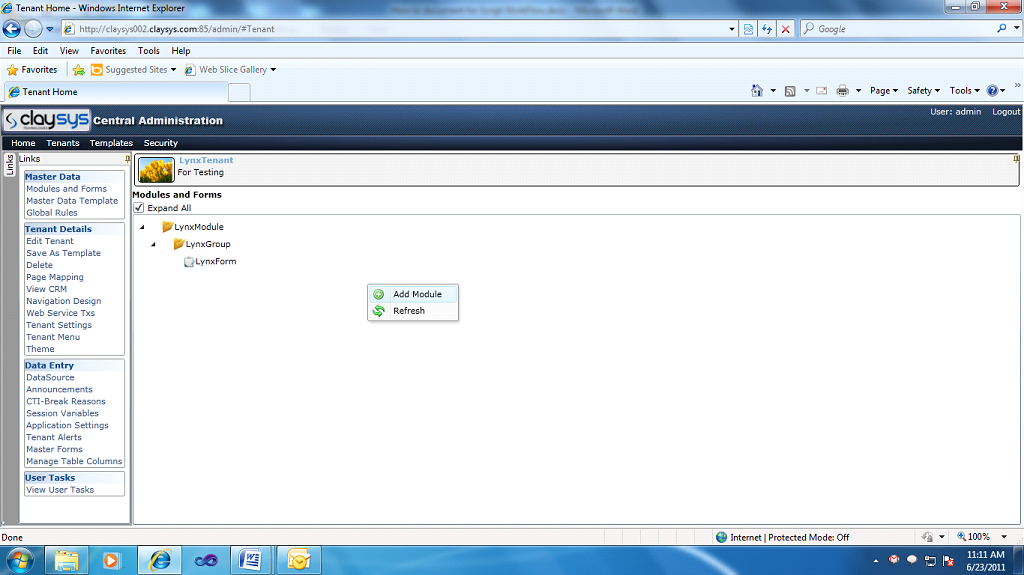
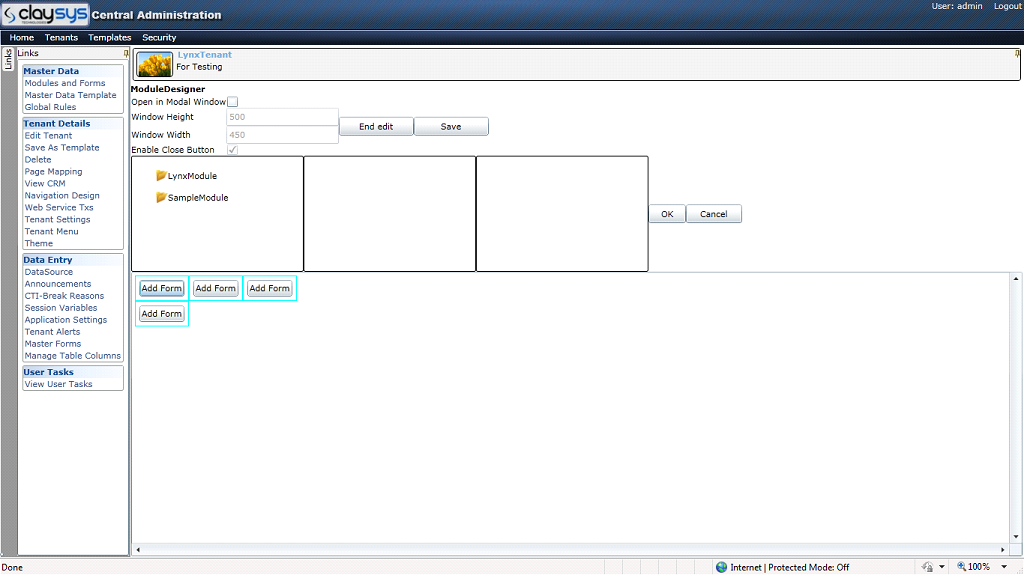
1.2. Click “Add Module” (This action will create a new module as shown below):

Change the default module name to “SampleModule”
1.3. Select the module “Samplemodule” and right click. This will show a context menu as shown below:
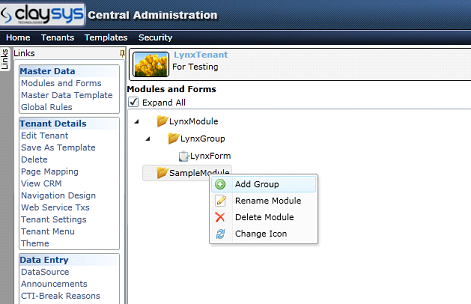
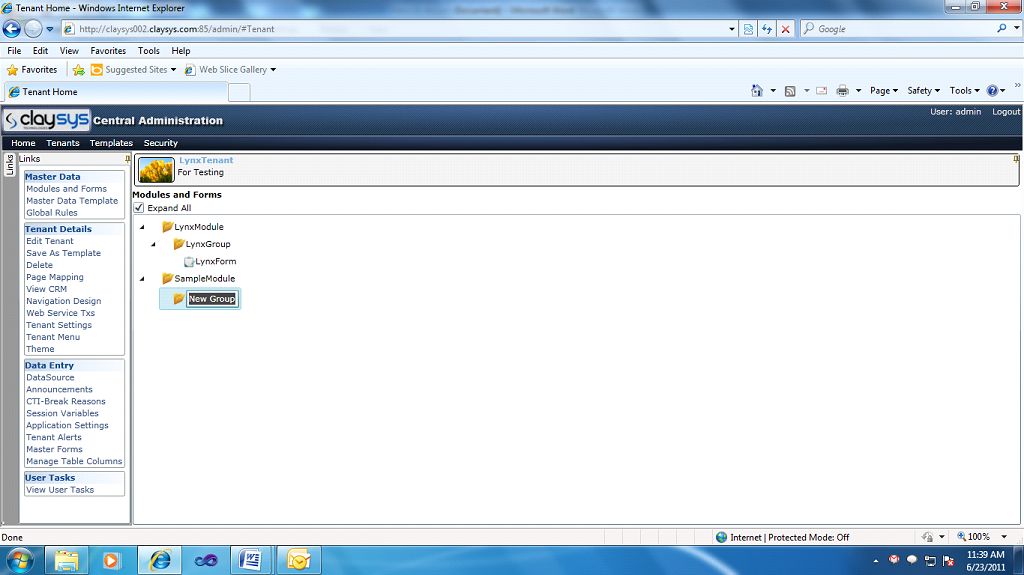
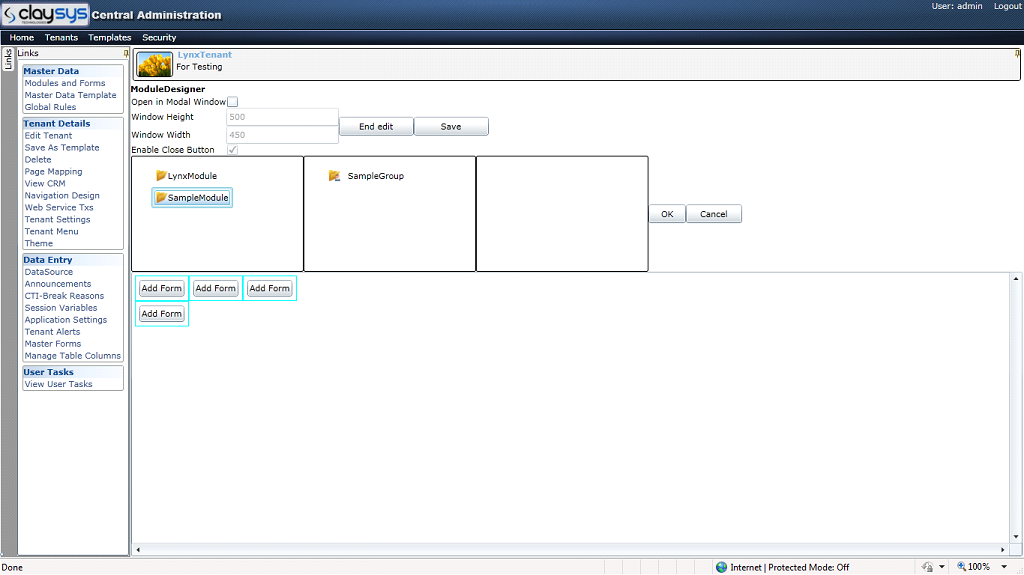
1.4. Click “Add Group”. (This action will create a new group as shown below):
Change the default group name to “SampleGroup”.
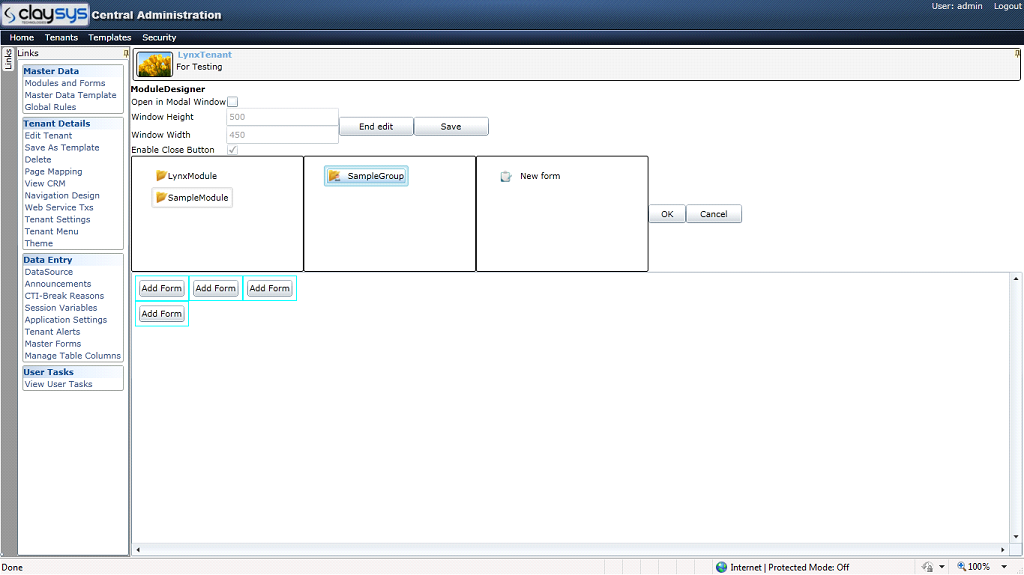
1.5. Select the Group “SampleGroup” and right click. This will show a context menu as shown below:
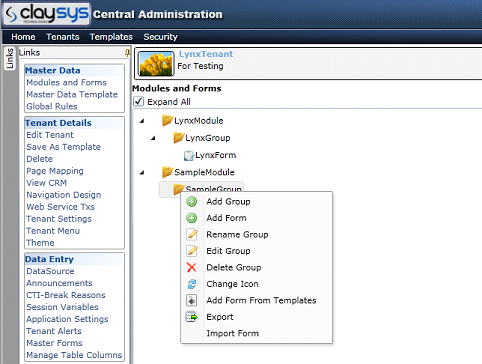
1.6. Click “Add Form”. (This action create a new form named “New form” as shown below):
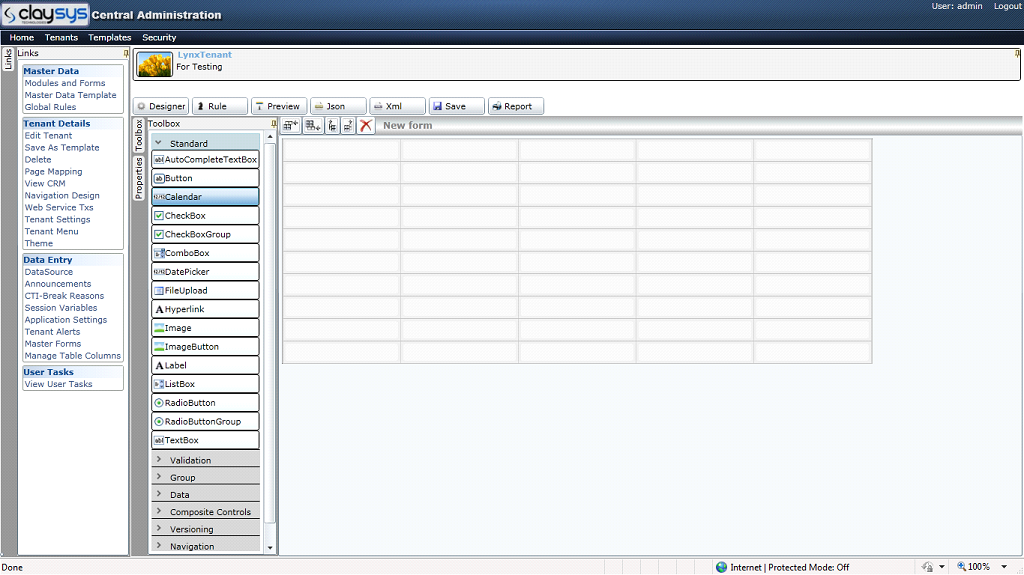
Tool Box
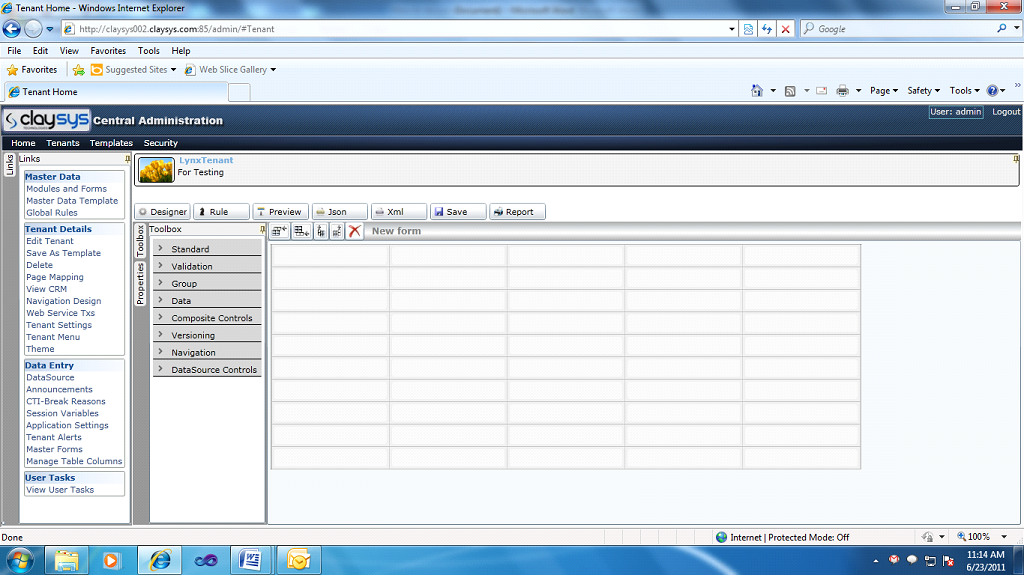
1.7. Tool Box is available in the left side of the form designer. The tool box is categorized into 8 groups. User can drag and drop controls from the toolbox.
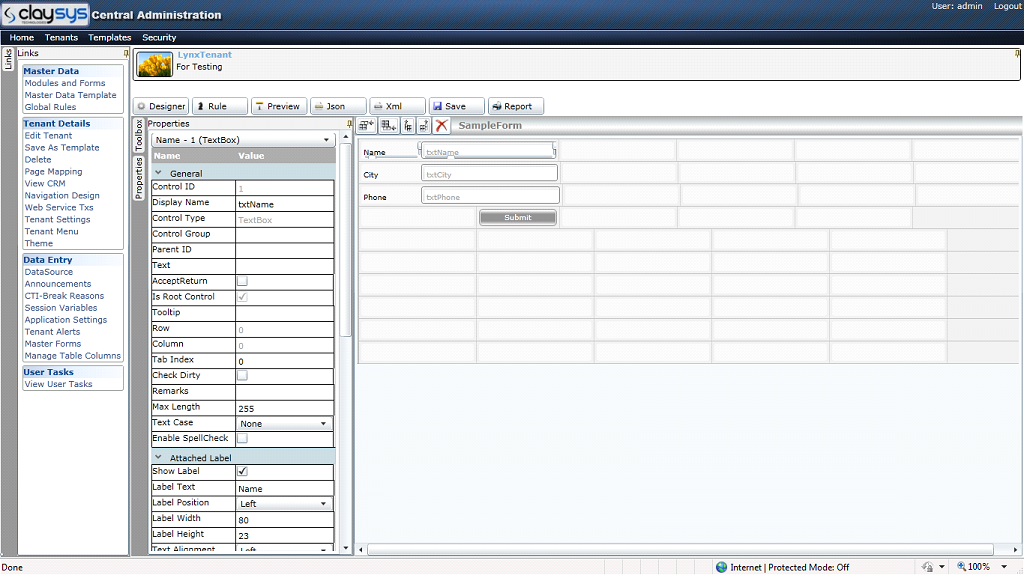
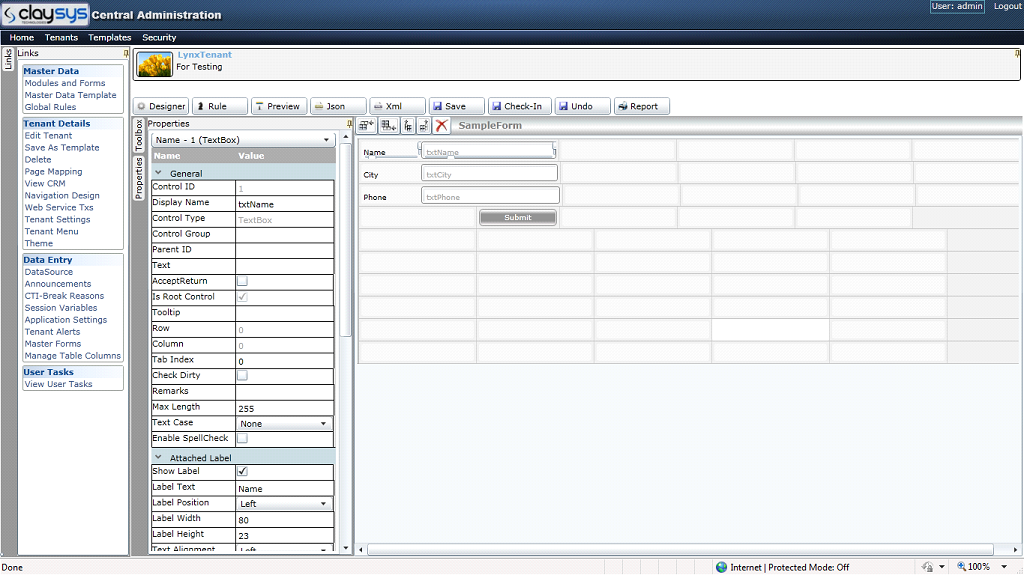
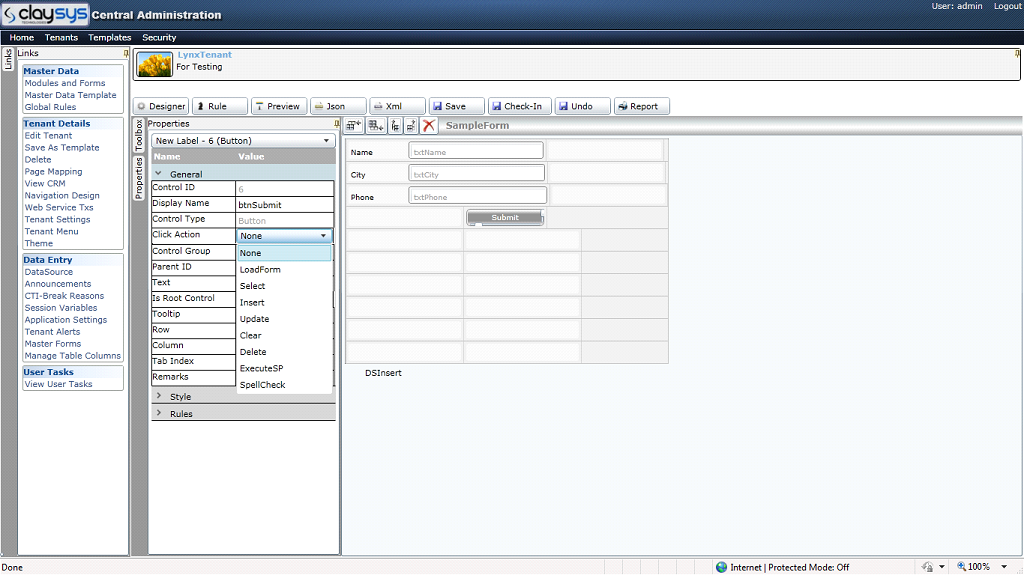
1.8. A sample form is created with 3 textboxes and 1 button. User can change the control’s properties using the properties window.
Properties window
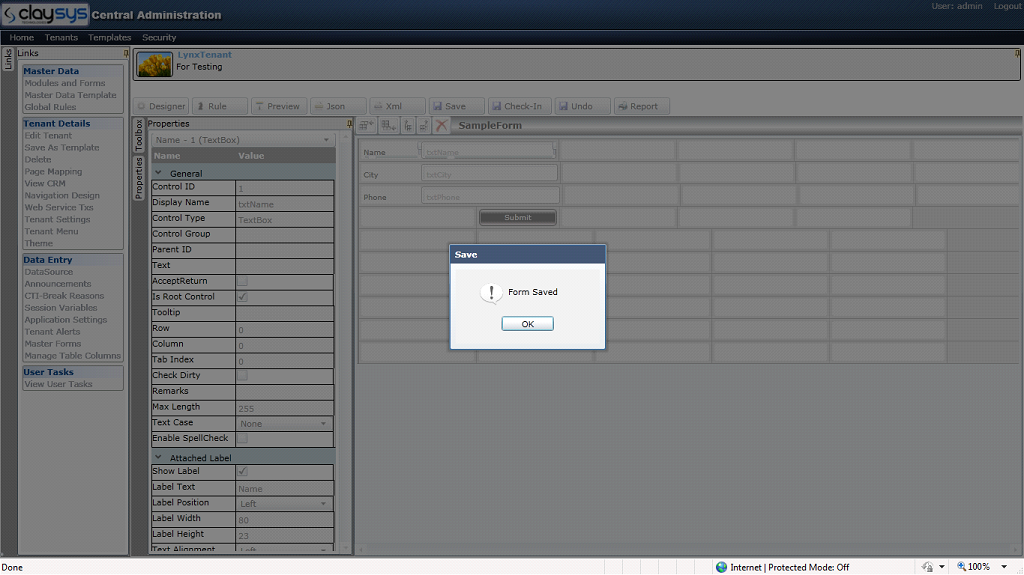
1.9. Click “Save”(This action will save the form).
Save button

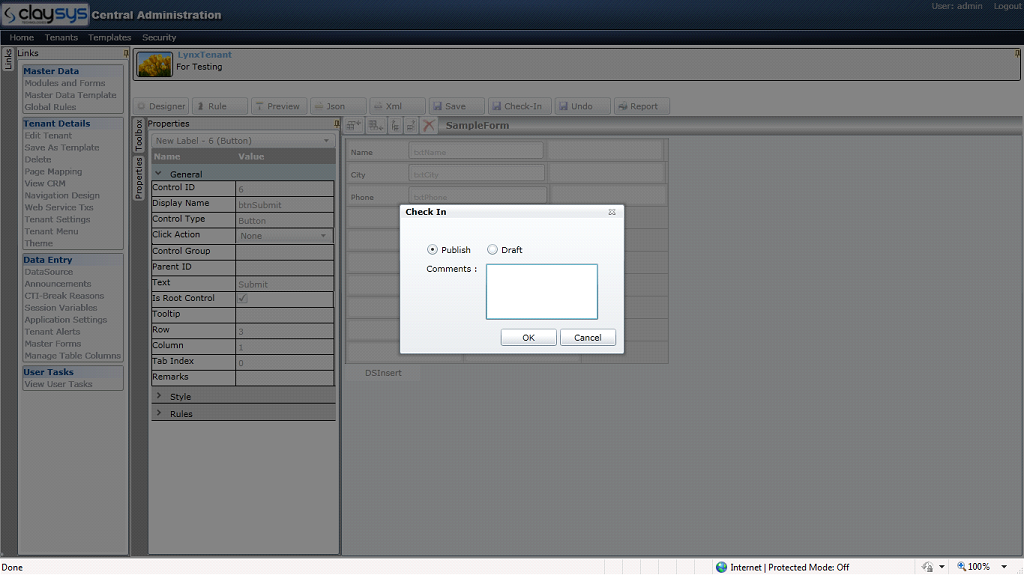
1.10. Click “Check-In” (This action will Check-in the form).
Check-in button
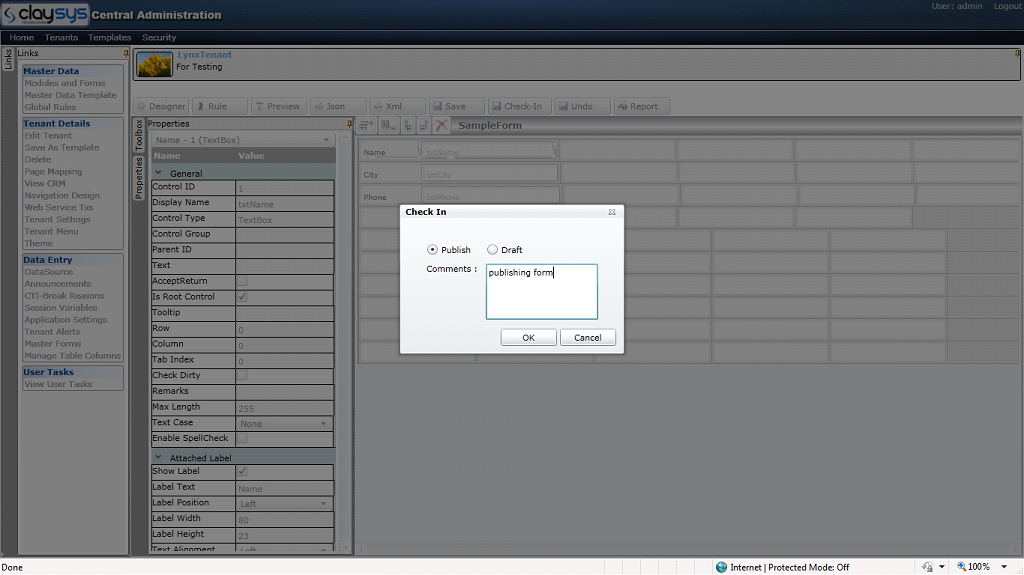
1.11. On clicking the “check-in” button, a popup window will be displayed as shown below.
Select”publish” and click “OK”
2. Edit a group and add the form
2.1. Right click the group, to which the form is to be added.
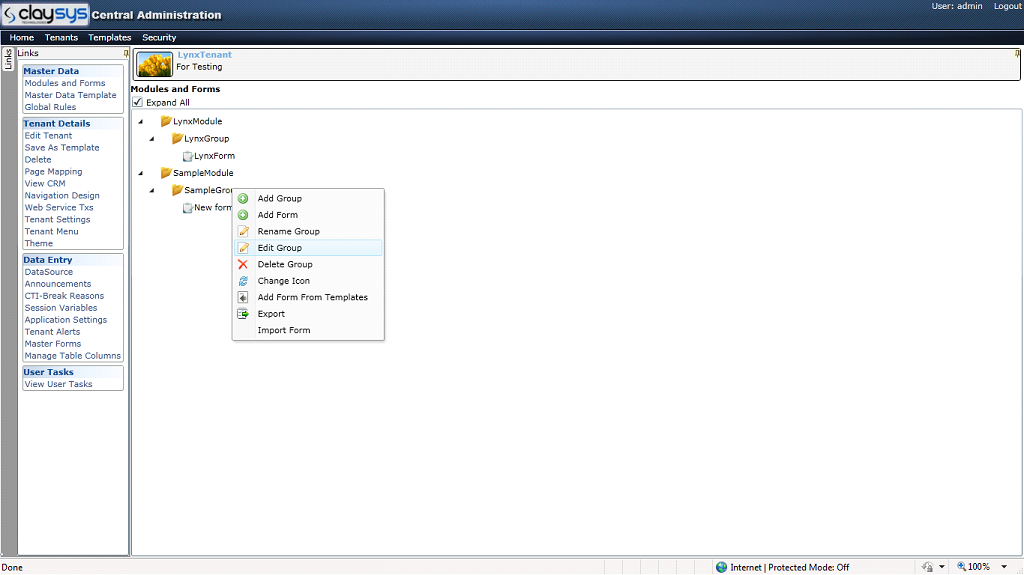
2.2. Click “Edit Group” from the context menu. This will result in the following screen:
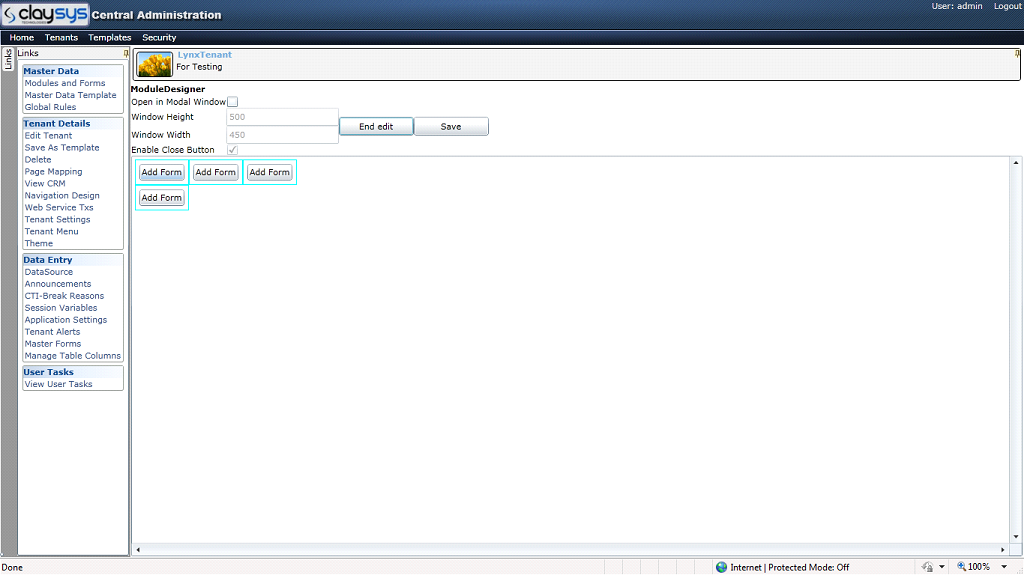
2.3. Click “Add form”. Now the page is displayed with all available modules in the tenant.
Available Modules
2.4. Click “SampleModule”. Now the page is displayed with all available groups in the selected module.
Available Groups
2.5. Click “SampleGroup”. Now the page is displayed with all forms in the selected group.
Available Form

2.6. Click the form named “New form”. Now the page is displayed with the form.
Save Button
2.7. Click “Save” button to save the form.
3.Configuring a ComboBox
3.1. Configure ComboBox using Static datasource
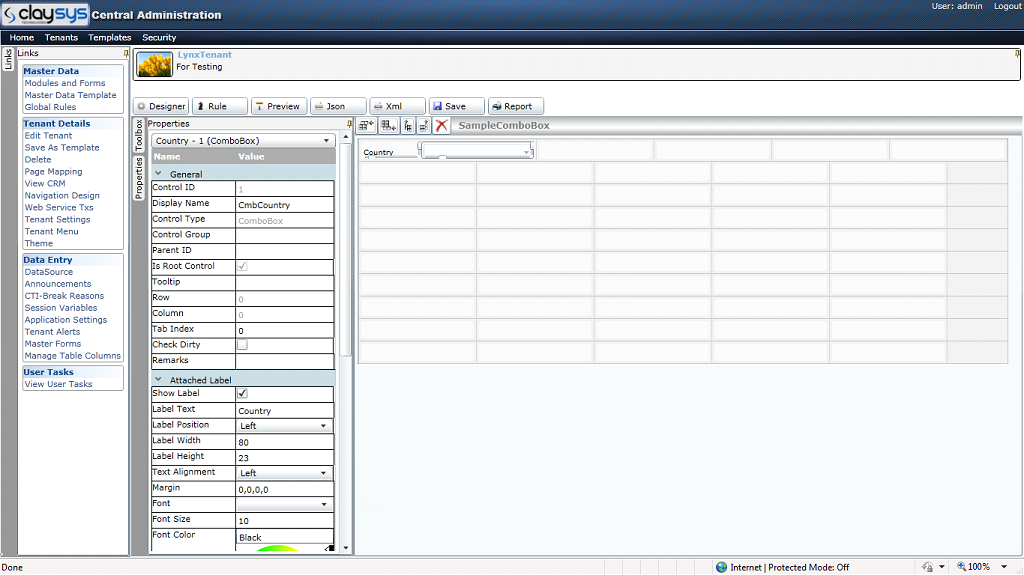
3.1.1. Drag and drop a combobox from the toolbox. Change the properties “Display Name” and “Label Text”.

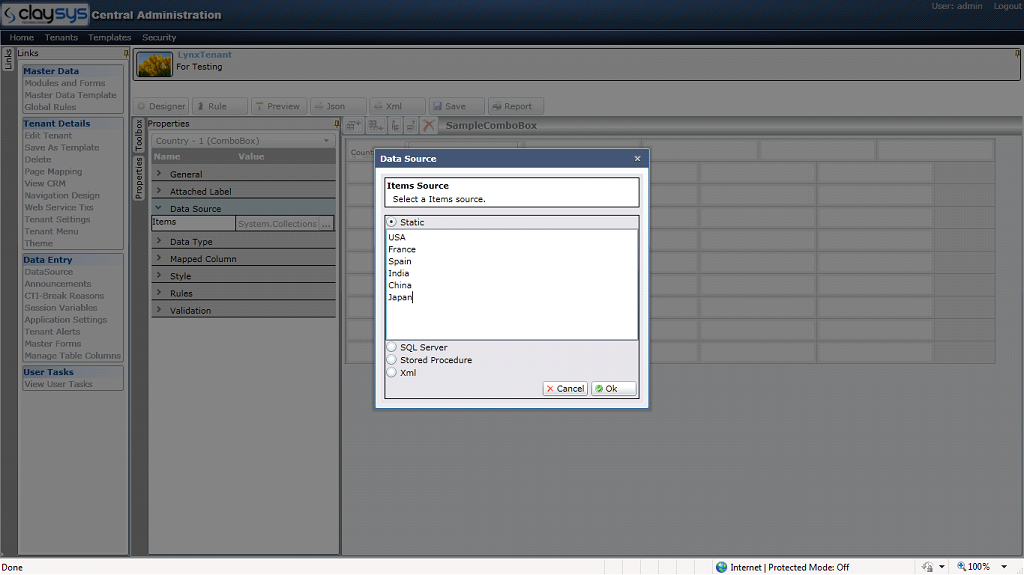
3.1.2. Select “Data Source” from the properties window. After clicking “datasource”, a popup window is displayed as shown below:
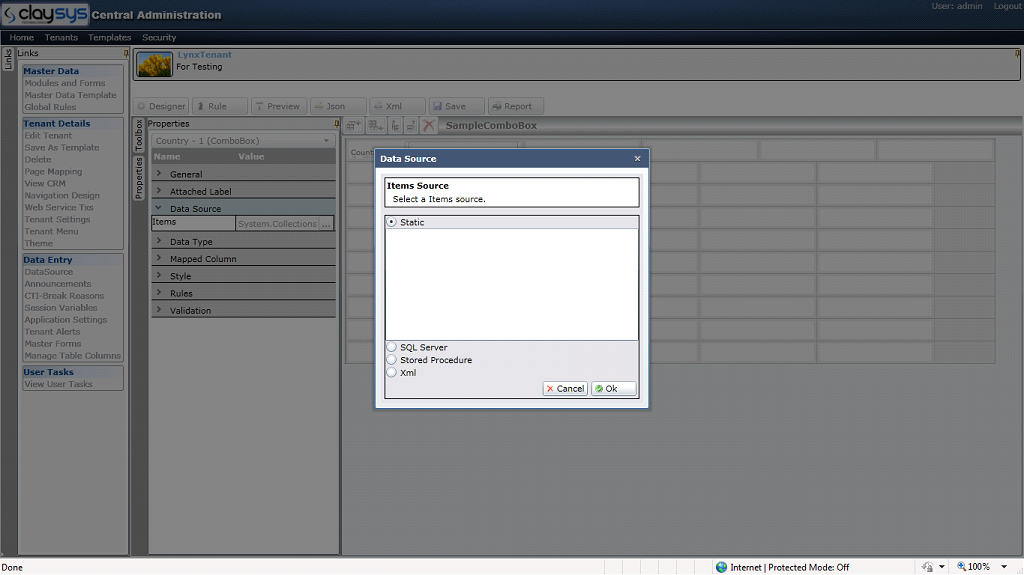
3.1.3. Select the radio button named “Static” and add the values as shown below, then click “OK”.
3.2. Configure ComboBox using SQL datasource
3.2.1 Drag and drop a combobox from the toolbox. Change the properties “Display Name” and “Label Text”.
3.2.2 Select “Data Source” from the properties window. After clicking “datasource”, a popup window is displayed as shown below:
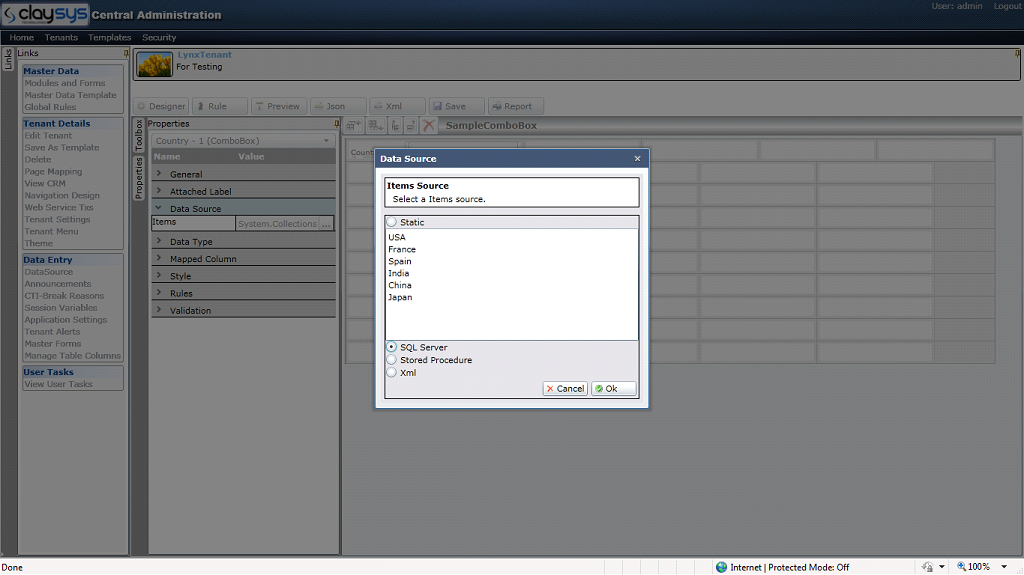
This window shows available SQL Server datasources
3.2.3 Select the radio button named “SQL Server”, then click “OK”. After clicking “OK” a popup window is displayed as shown below:

3.2.4 Select a datasource and click “Next”, all the available tables will be displayed as shown below:
This window shows available Tables
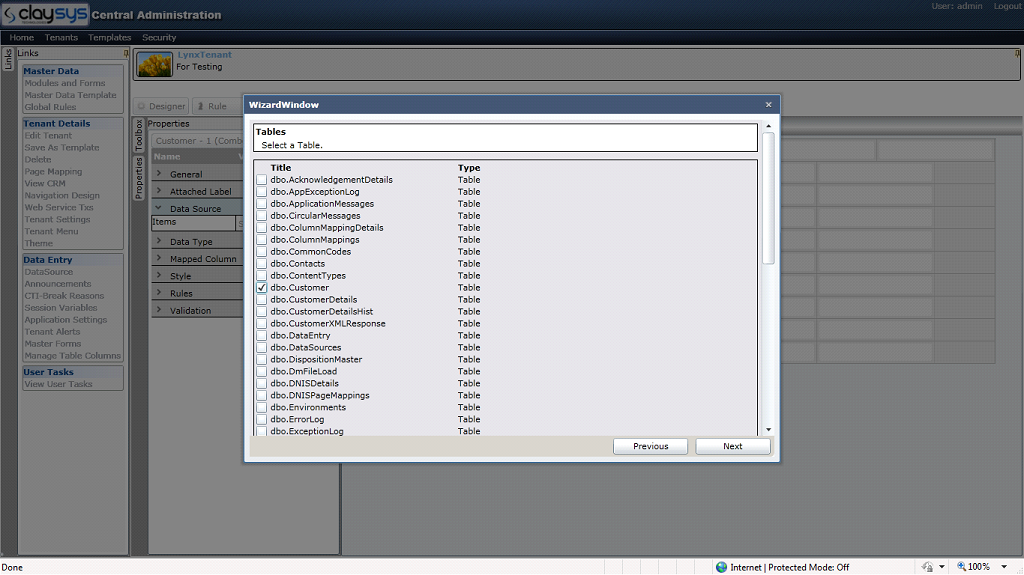
3.2.5 Select a table by tick the checkbox and click “Next”. This will lead to a screen where we can set the criteria for the select query as shown below:
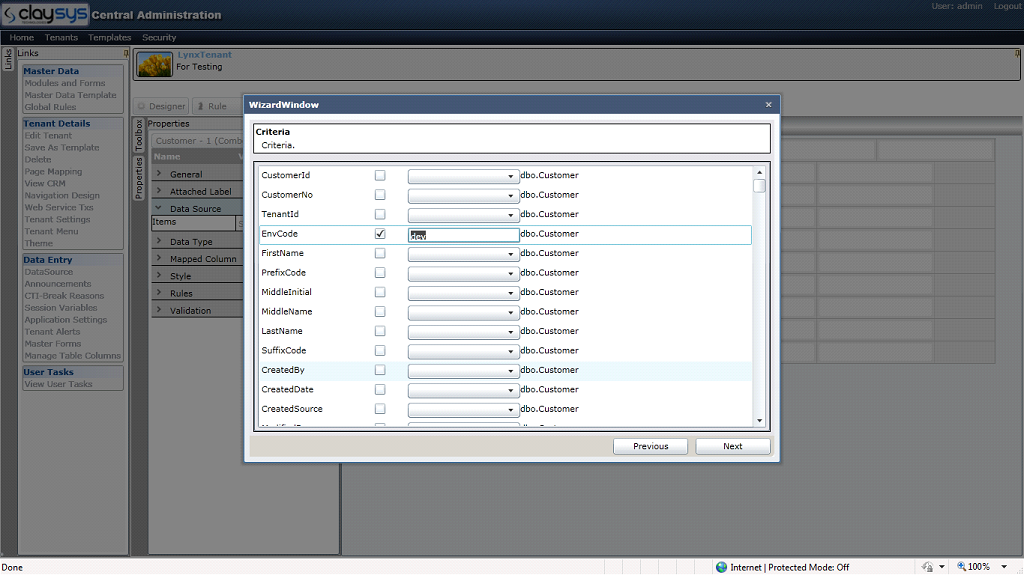
3.2.6 After setting the criteria click “Next”. This will lead to a screen where available fields in the table are displayed as shown below.
Here user can set one field as value member and another field as Display member
Display member
Value member
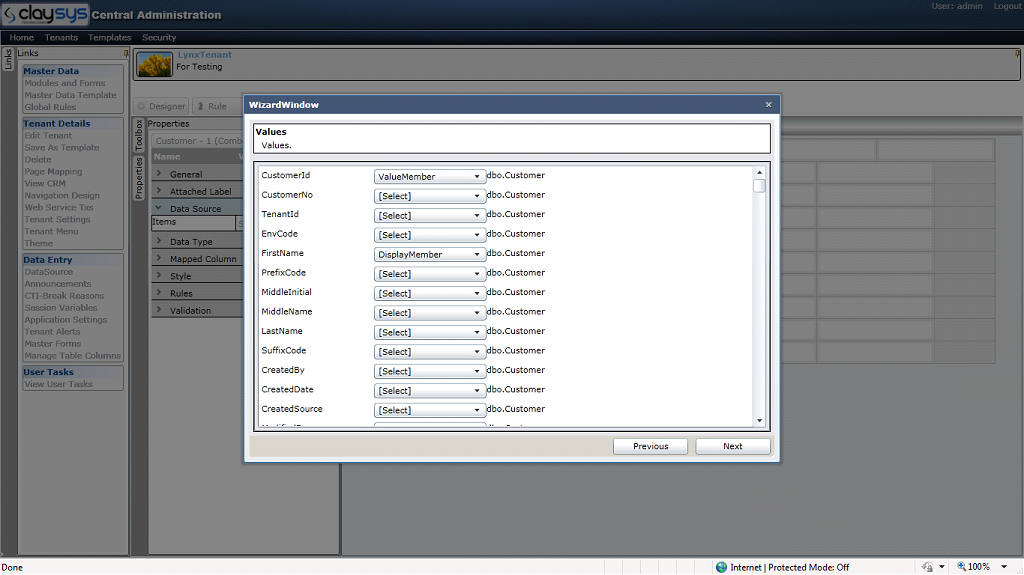
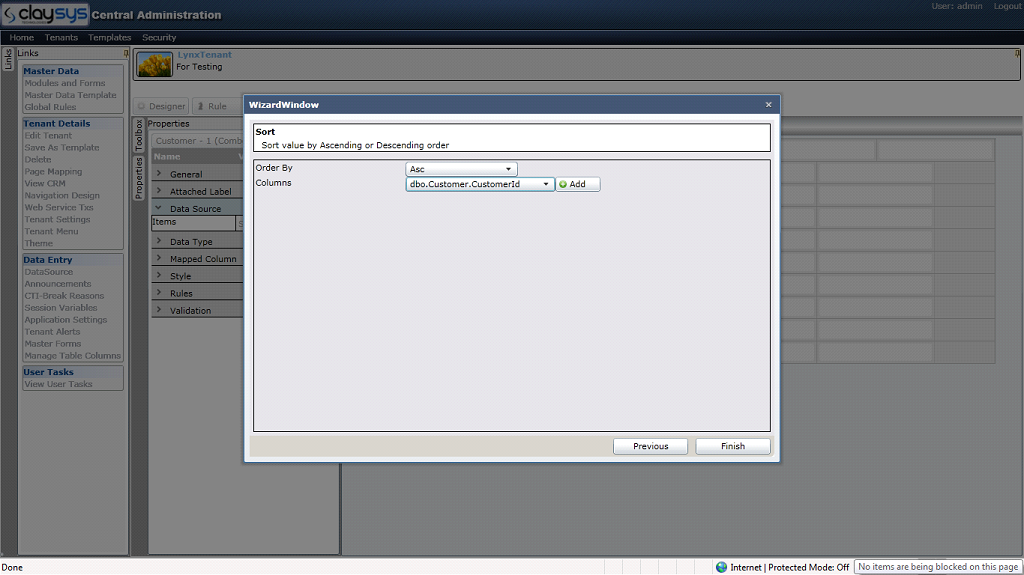
3.2.7 After setting Value member and Display member click “Next”. This will lead to a screen as shown below:
Here user can set the relationship between tables if more than 1 table is selected from the datasource.

Here user can set the sort order.
3.2.8 After setting the relationship click “Next” (In this case no relationship is required as we are selecting only one table). This will lead to a screen as shown below:
3.2.9 After setting the sort order click “Finish”.
Now the combobox is configured with SQL Server datasource. A Rule is required to bind the SQL Server datasource to the combobox.
3.2.10 Rule for combobox binding
3.2.10.1 Click “Rule” button. This will lead a screen as shown below:
Change the Rule name

3.2.10.2 Select the Rule and right click. A context menu will be open.Click Action
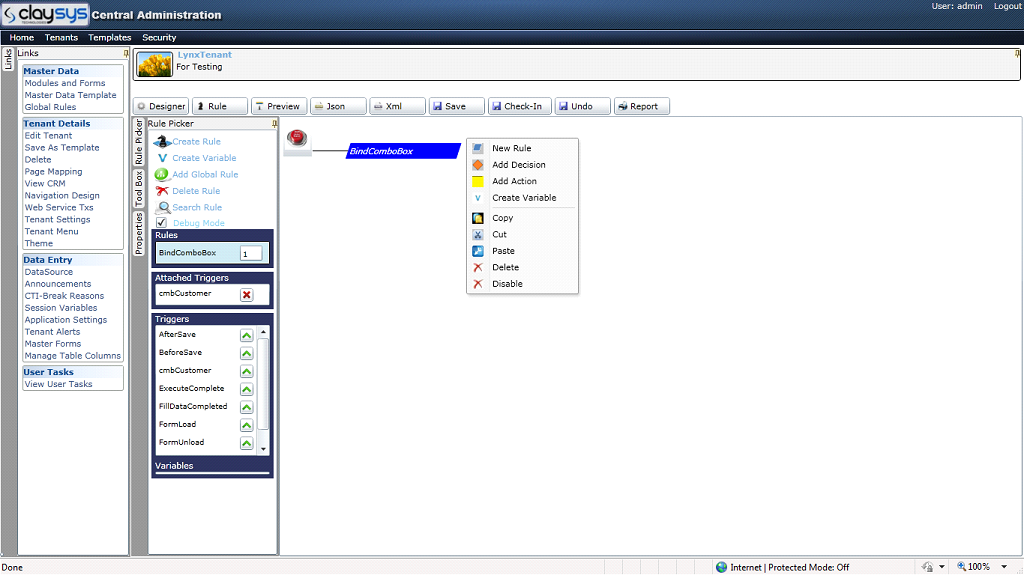
3.2.10.4 Select “Add Action” from the context menu and write the rule “ExecuteCommand(cmbCustomer)” as action. Set “FormLoad” as Attached Trigger.
Triggers
Attached Trigger

3.3. Configure ComboBox using Stored Procedure
3.3.1 Drag and drop a combobox from the toolbox. Change the properties “Display Name” and “Label Text”.

3.3.2 Select “Data Source” from the properties window. After clicking “datasource” a popup window is displayed as shown below:
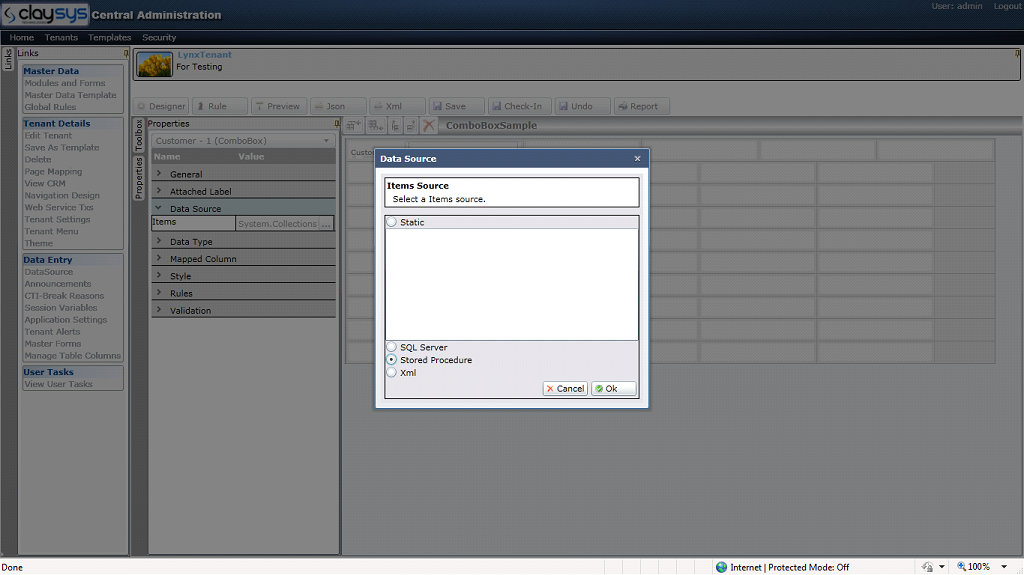
3.3.3 Select the radio button named “Stored Procedure”, then click “OK”. All the available datasources are displayed as shown below:
This window shows available SQL Server data sources
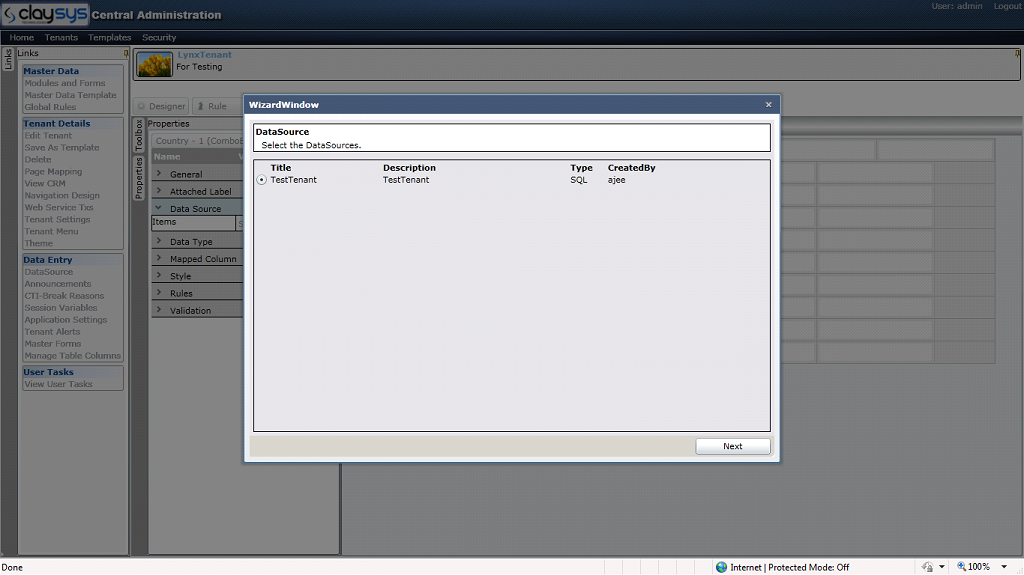
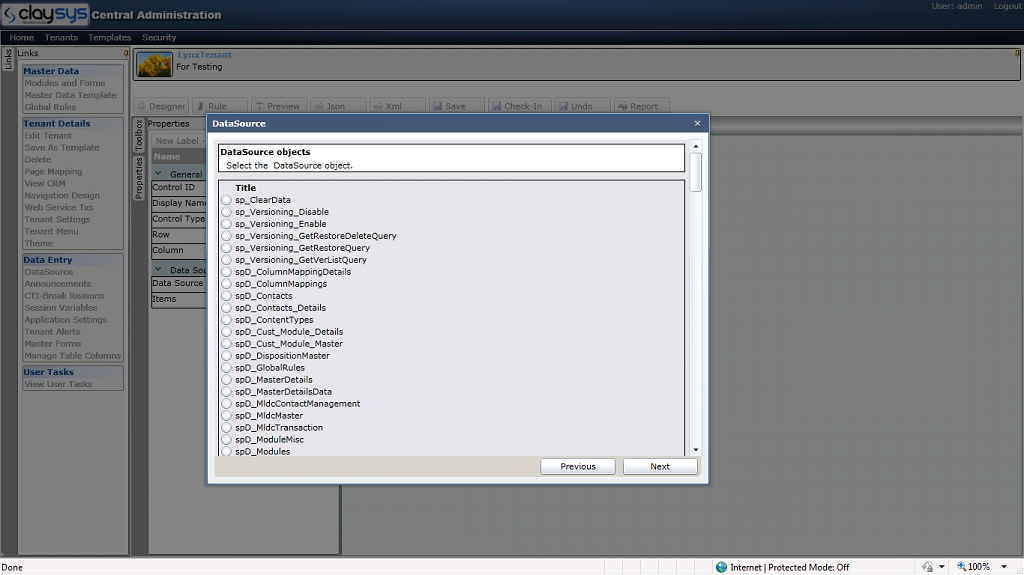
3.3.4 Select a datasource and click “Next”. A list of stored procedures will be displayed as shown below:
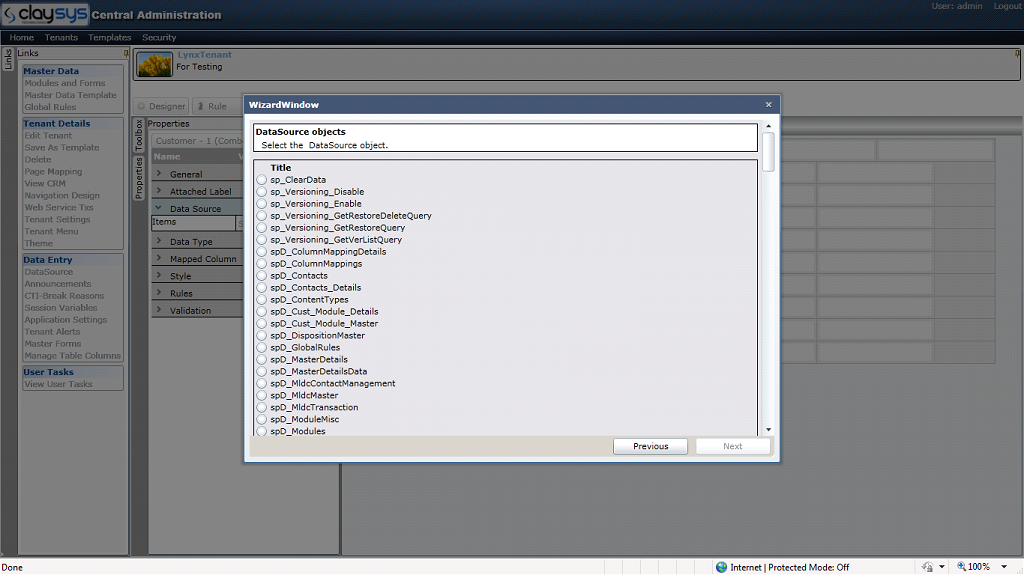
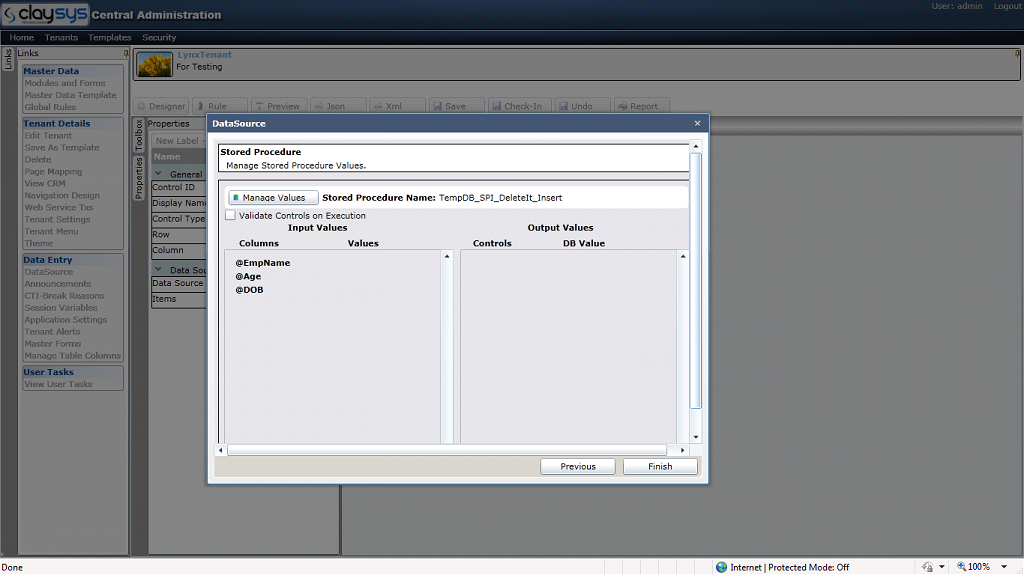
3.3.5 Select a Stored procedure and click “Next”. This will lead to the next screen as shown below:
Here user can set the output Parameter
Here user can set the Input Parameter
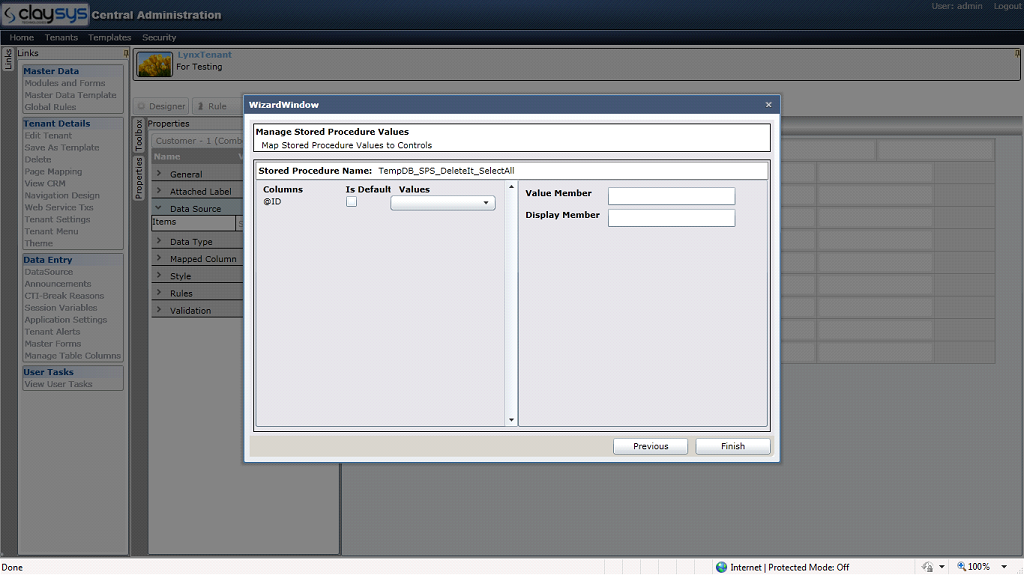
3.3.6 After setting the input and output parameters the screen will be as shown below:
3.3.7 Click “Finish”.
3.3.8 Writing Rule for combobox binding.
Refer index 3.2.10.
4 Insert/Update/Select connect to table using SQL Server as datasource
4.1 Insert to a table using SQL datasource
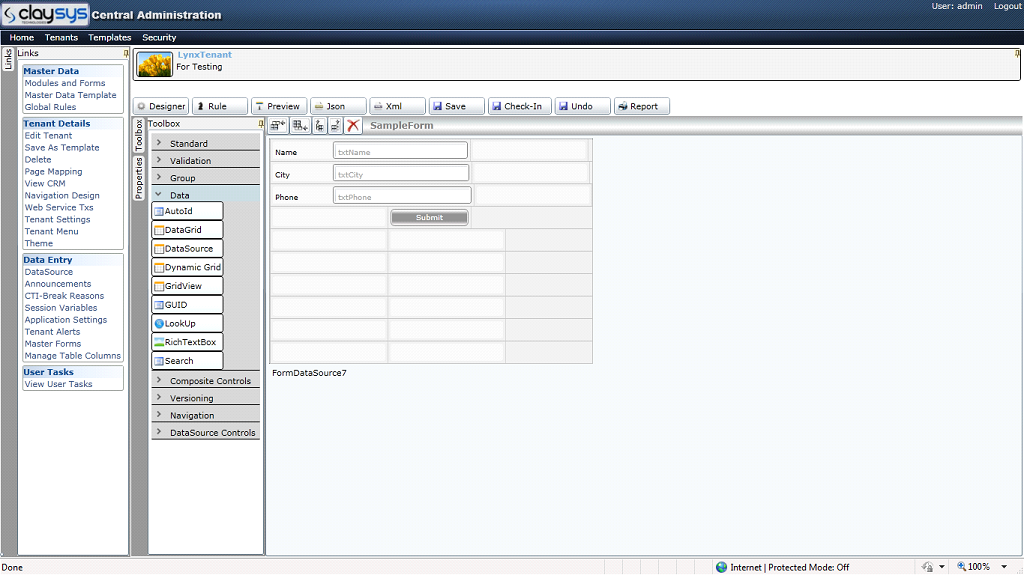
4.1.1 Create a form with three TextBoxes and one Button. Change the properties as shown below:
Dragged Datasource
Datasource

Drag and drop a datasource from toolbox(Toolbox/Data) and change its name as “DSInsert”.
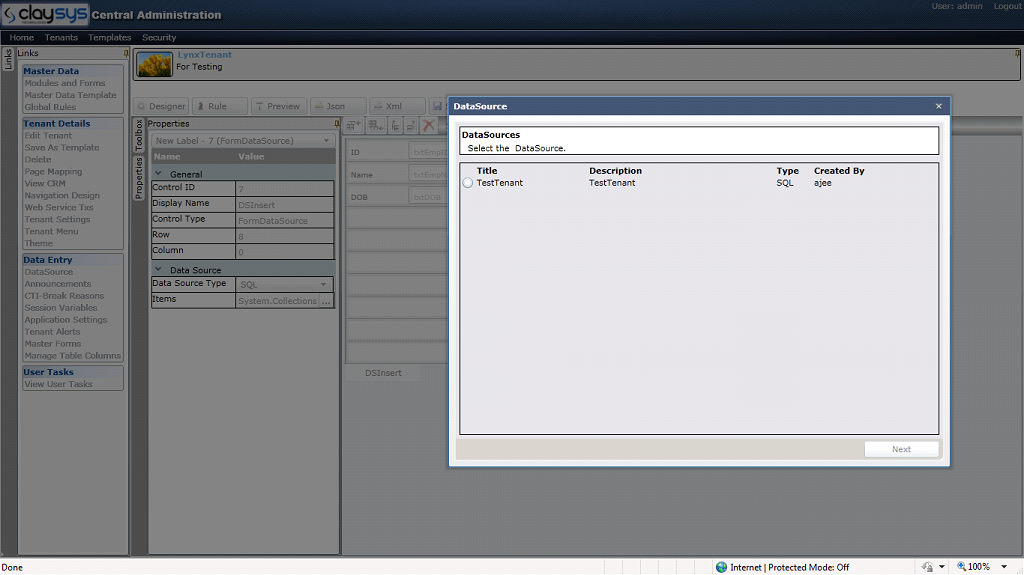
4.1.2 Select the datasource and select the properties. Set SQL as datasource and click Items. This will lead to a popup window as show below:
Available Datasource
Items
Datasource Type as SQL

4.1.3 Select a datasource and click Next.
Change the command to Insert
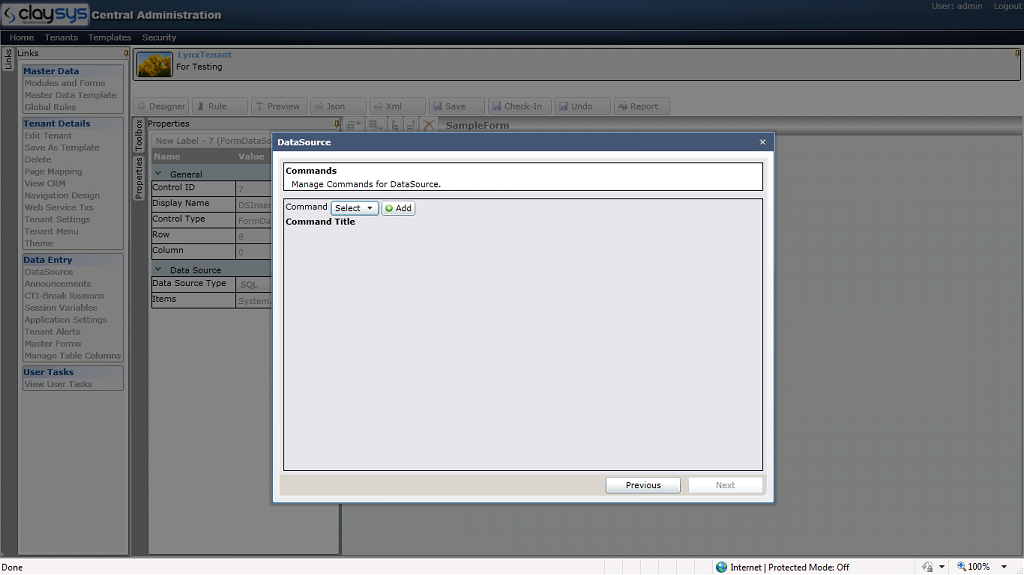
Change the command from “Select” to “Insert”.
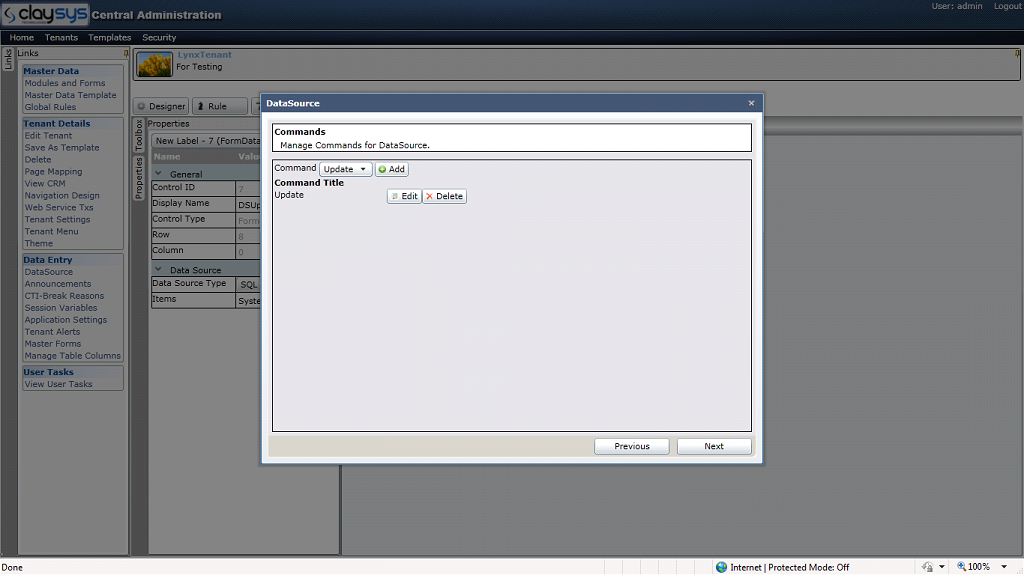
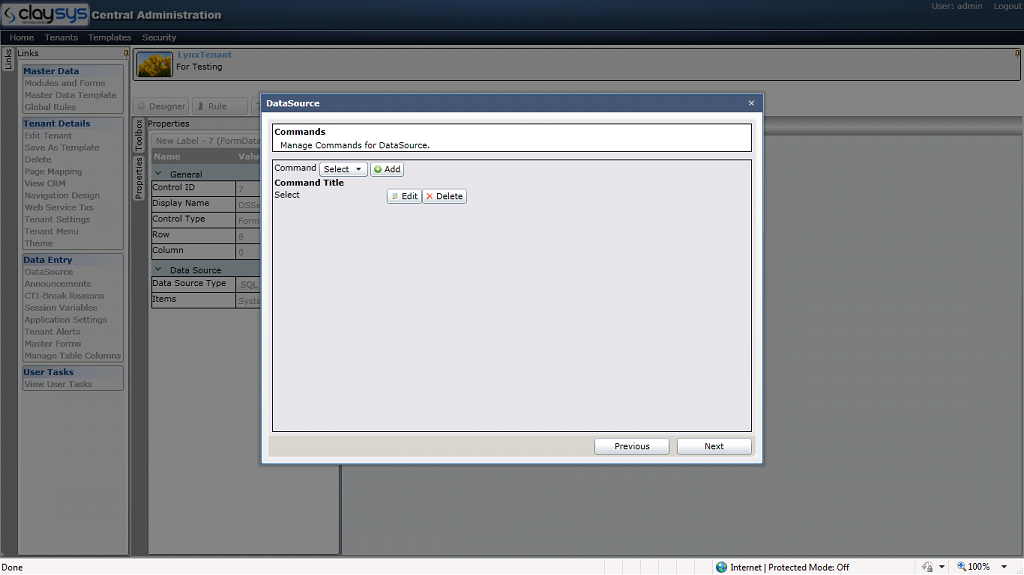
4.1.4 Click “Add”. A new pop up window named Command will be open.
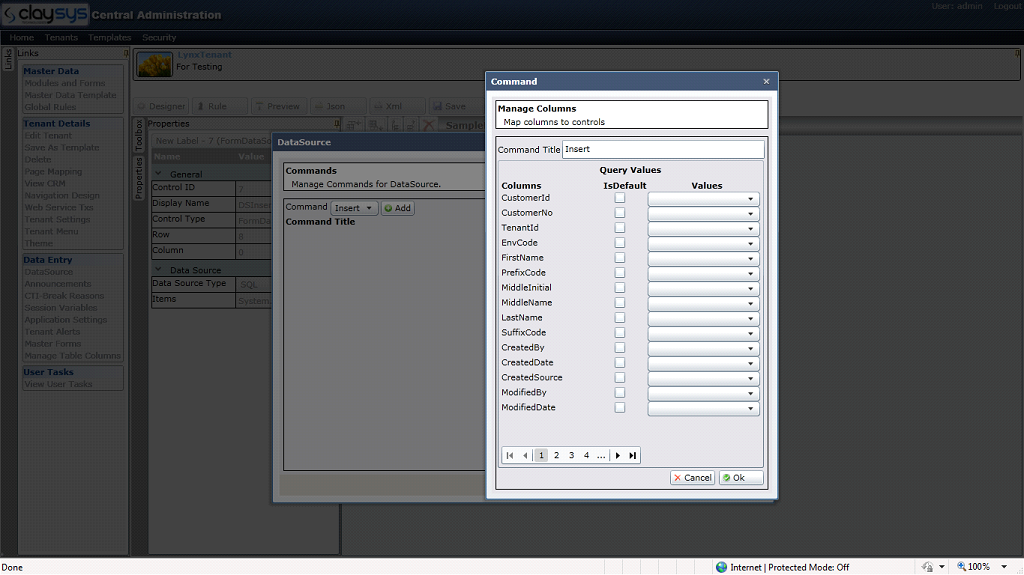
4.1.5 Configure the fields with corresponding controls.
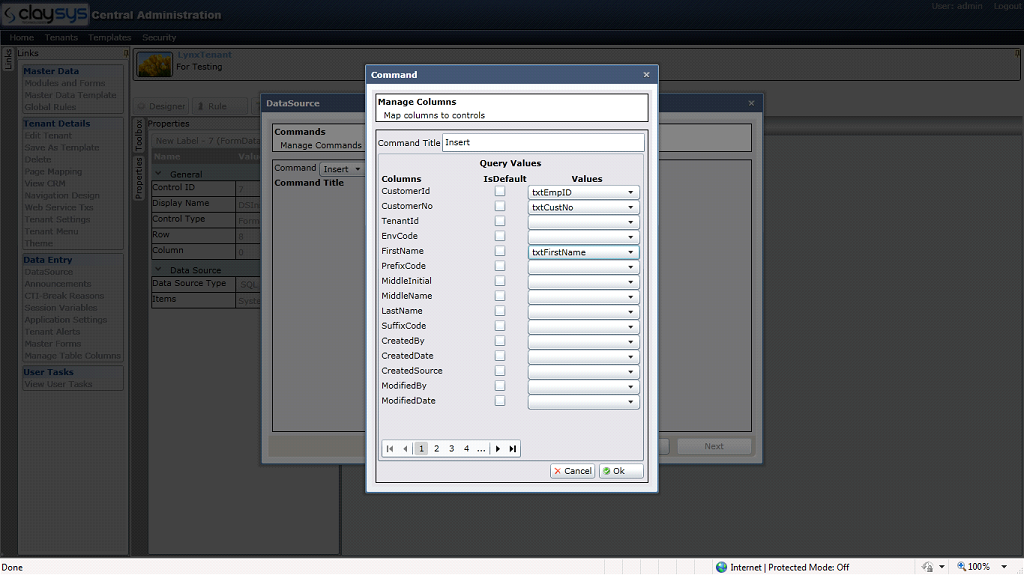
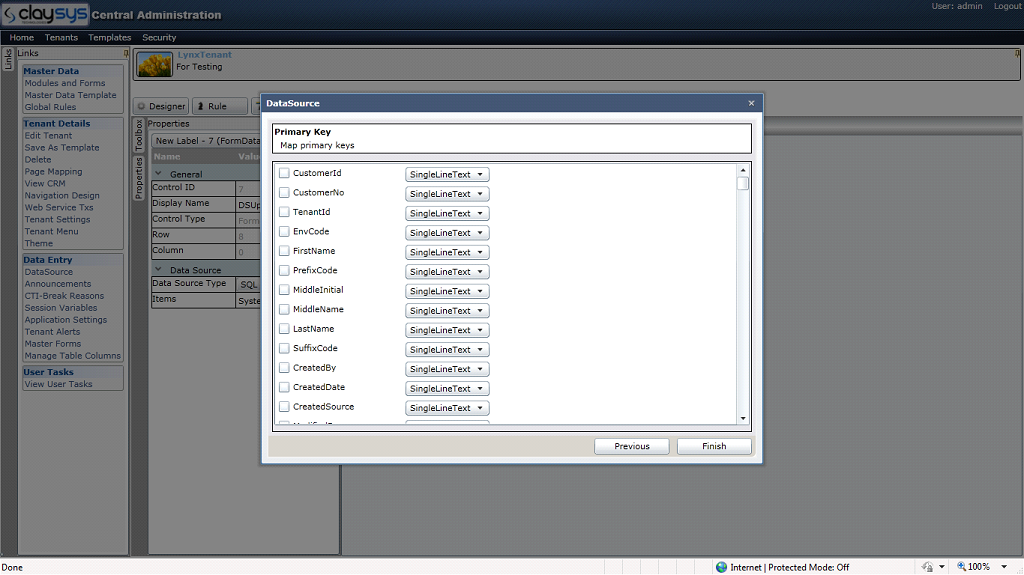
4.1.6 Click on “OK” after the configuration .This will lead to the following screen where user can set the primary keys, if exist.
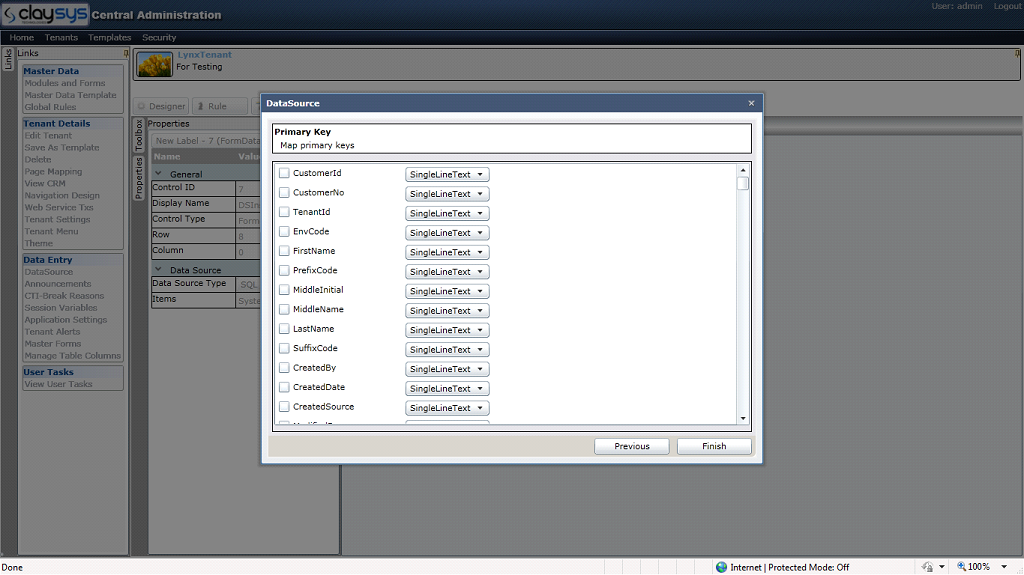
4.1.7 After setting the primary keys click “Finish”.
4.1.8 To execute the insert action the user can follow two steps, either by setting the “Clickaction” of submit button as “Insert” or by Rule. For more details please refer 6.
4.2 Update table using SQL datasource
4.2.1 Create a form with three TextBoxes and one Button and change the properties as shown below:
Dragged Datasource
Datasource

Drag and drop a datasource from toolbox(Toolbox/Data) and change its name as “DSUpdate”.
4.2.2 Select the datasource and select the properties. Set SQL as datasource and click Items. This will lead to a popup window as show below:
Available Datasource
Items
Datasource Type as SQL
4.2.3 Select a datasource and click Next.
Change the command to Update

Change the command from “Select” to “Update”.
4.2.4 Click “Add”.
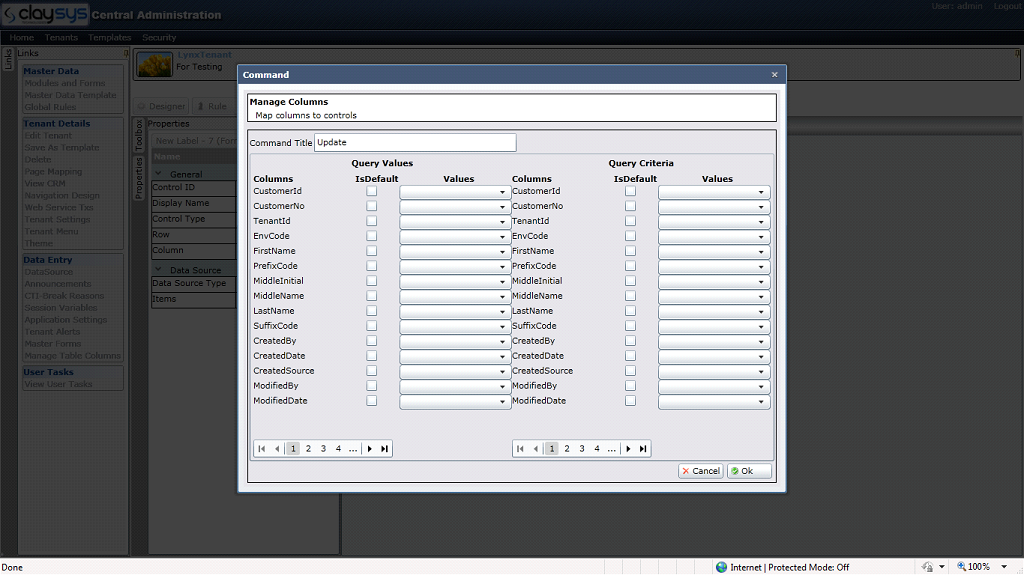
4.2.5 Configure the popup window as shown below:

4.2.6 Click on “OK” after the configuration.
4.2.7 Click “Next” this will lead to a screen as shown below. User can set primary key if exists.
4.2.8 After setting the primary keys, click “Finish”.
4.2.9 To execute the update action the user can follow two steps, either by setting the “clickaction” of submit button as “Update” or by Rule. For more details please refer 6.
4.3 Select table data using SQL datasource
4.3.1 Create a form with three TextBoxes and one Button and change the properties as shown below:
Dragged Datasource
Datasource

Drag and drop a datasource from toolbox (Toolbox/Data) and change its name as “DSSelect”.
4.3.2 Select the datasource and select the properties. Set SQL as datasource and click Items. This will lead to the popup window as show below:
Available Datasource
Items
Datasource Type as SQL

4.3.3 Select a datasource and click Next.
Change the command to Select

4.3.4 Click “Add”.

4.3.5 Configure the popup window as below:

4.3.6 Click on “OK” after the configuration.
4.3.7 Click “Next”.

If there is any primary key, configure it and click “Finish”.
4.3.8 To execute the Select action the user can follow two steps, either by setting the “Clickaction” of submit button as “Select” or by Rule. For more details please refer 6.
5 Insert/Update/Select connect to table using Stored Procedure as datasource
5.1 Insert/Update/Select/Delete to table using Stored Procedure
5.1.1 Create a form with three TextBoxes and one Button and change the properties as shown below.
Dragged Datasource
Datasource
Drag and drop a datasource from toolbox(Toolbox/Data) and change its name as “DSInsert”.
5.1.2 Select the datasource and select the properties. Set Stored Procedure as datasource and click Items. This will lead to the popup window as show below:
Datasource Type
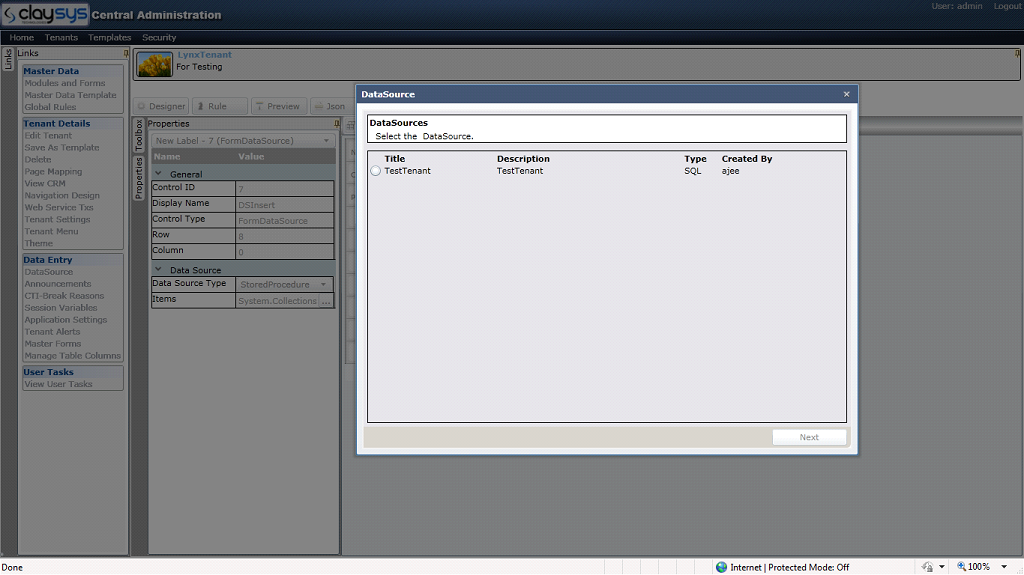
5.1.2 Select a datasource and click “Next”. This will show a list of stored procedures.
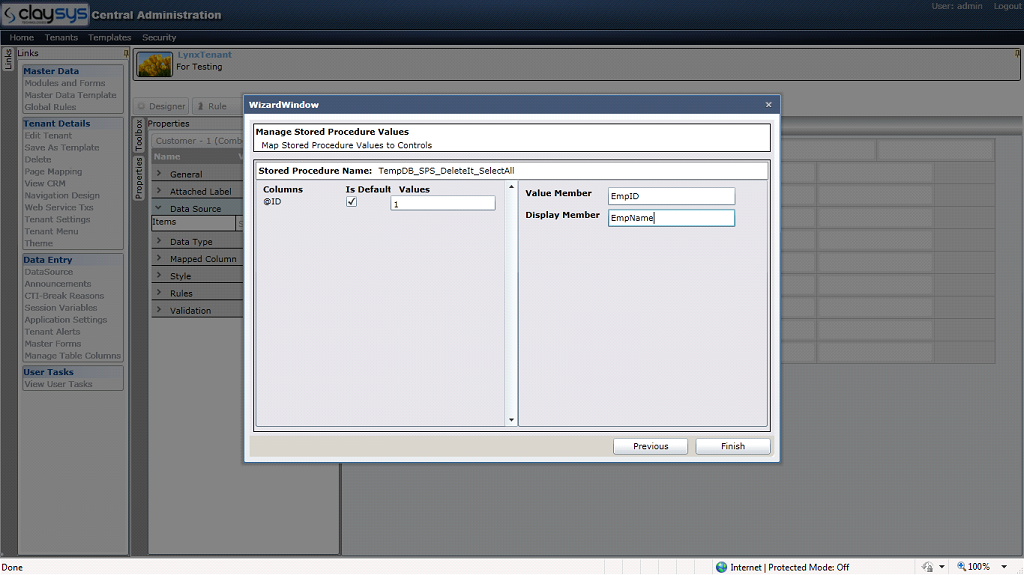
5.1.3 Select a Stored Procedure and click “Next”.
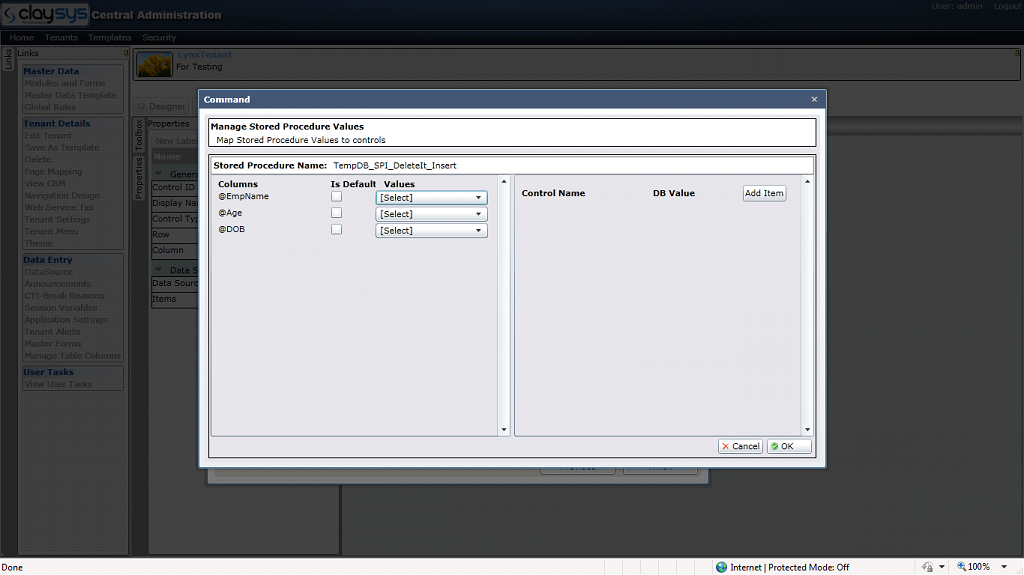
Manage Values
5.1.4 Click “Manage Values”.
Configure Output values
Configure input values
5.1.5 After configuring input values, click “OK”.
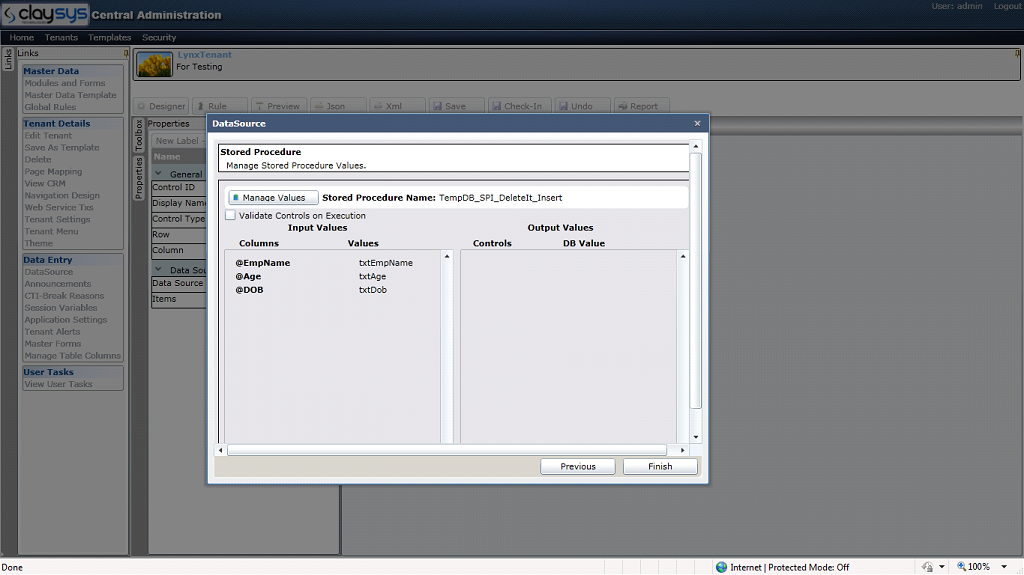
5.1.6 Click “Finish”.
5.1.7 To execute the selected action the user can follow two steps, either by setting the “Clickaction” of submit button as “ExecuteSP” or by Rule. For more details please refer 6.
6. Executing DataSource Methods
6.1 Setting button’s ClickAction for datasource operation
6.1.1 Select the Submit button and set the Clickaction property as shown below:
Click Action

Based on the datasource operation associated with a button user can set the button’s ClickAction property .Available ClickActions for datasource are,
1. Insert
2. Update
3. Select
4. Delete
6.1.2 After setting the ClickAction save the form.
6.2 Setting Rule for datasource operation
6.2.1 Select the Rule tab and set the rule as shown below:
Attached Trigger
Rule Action
Rule Name

6.2.2 If the datasource is SQL Server then the user can write the rule action as “ExecuteCommand(DatasourceName.dbOperation)”.
Here DatasourceName is the name of the datasource which is configured in the form and dbOperation is the name of operation which is to be executed, for example Insert,Delete,Update,Select.
In the case of an insert operation the rule should be,
“ExecuteCommand(DSInsert.Insert)”.
6.2.3 If the datasource is Stored Procedure then the user can write rule action as,
“ExecuteCommand(DatasourceName.SP)”.
Here DatasourceName is the name of the datasource which is configured in the form.
SP is a common name which executes all stored procedure operations.
In the case of an insert operation the rule should be,
“ExecuteCommand(DSInsert.SP)”.
7. Check-In & Check-Out
7.1 Check-In
7.1.1 The check-in button is visible in a form after the form is created and saved.
Check-In
7.1.2 Click “Check-in”.
Here user can set the form status as “publish” or “Draft” and click “OK”.
7.2 Check-Out
7.2.1
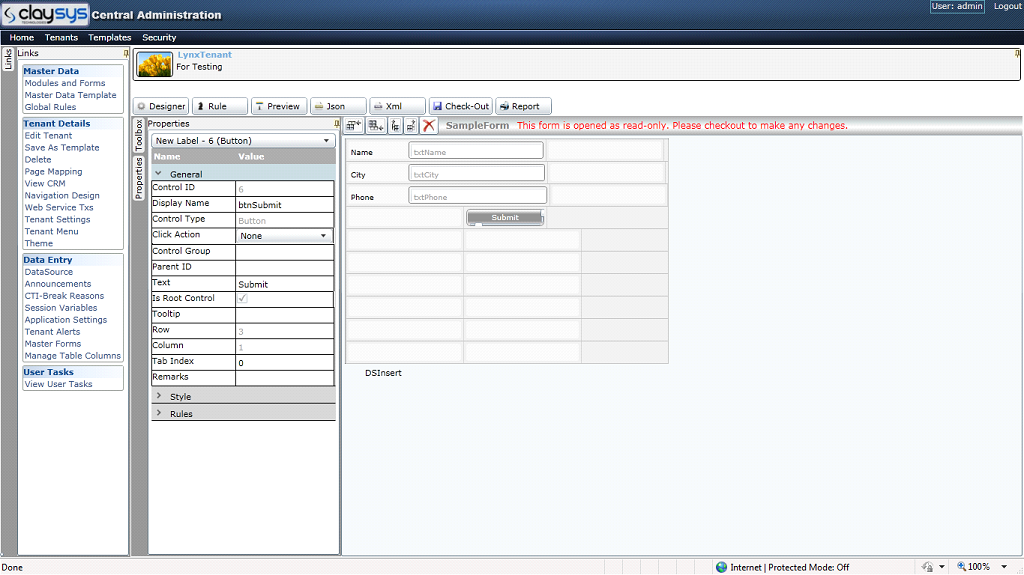
7.2.2 Click Check-Out.

Blogs by Category
AppForms Artificial Intelligence Blockchain Call Centers Chatbots Cloud Computing Data Management Design Digital Marketing Digital Transformation Enterprise Applications FinTech Insights LowCode Development Microsoft Mobile Apps News Office 365 Robotic Process Automation Security SharePoint Software Development Web ApplicationBanking Automation with RPA: Benefits, Challenges & Best Practices

2026-06-01 14:26:05