Creating Web Mail Using AppForms

Design Document for WebMail
Introduction
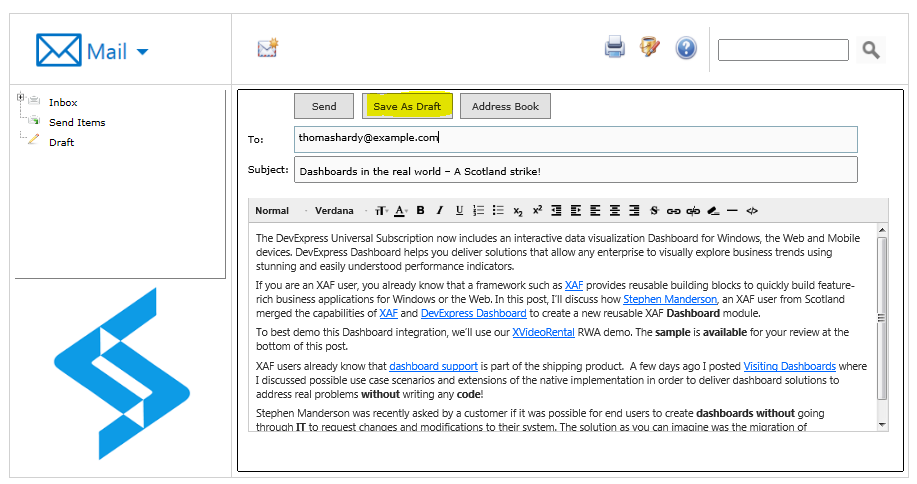
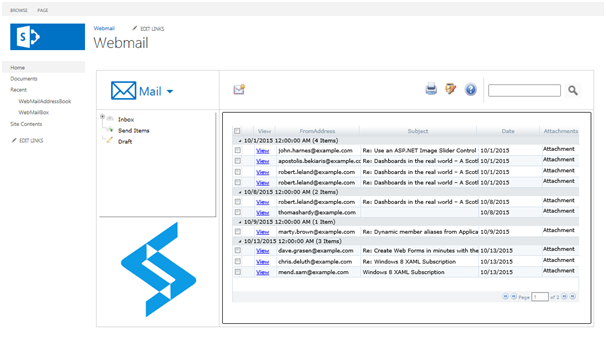
Webmail is web-based email accounts. These are usually free email accounts that are operated from a website. Webmail allows the users to access their emails as long as they have access to an Internet connection and a web browser. The purpose of this document is to be a reference for any person wishing to implement the Webmail Template using the ClaySys AppForms or any person interested in how to configure the AppForms to create a web mail Template. Here is an image what the webmail template dashboard we are going to be designing looks like.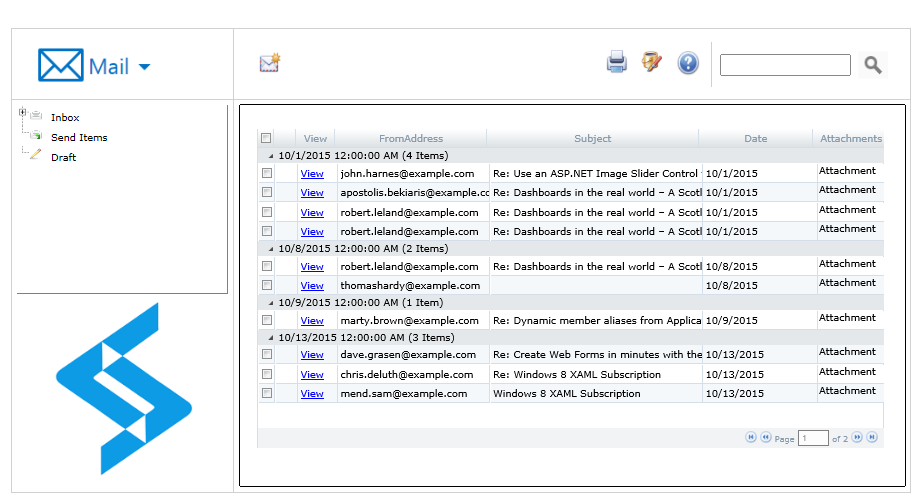
On the webmail Dashboard following functionalities are being added:
- Inbox: Allows you to view the received mails in inbox.
- Send Items: Allows you to view the mails you have sent.
- Drafts: Allows you to view the mails you have saved as draft.
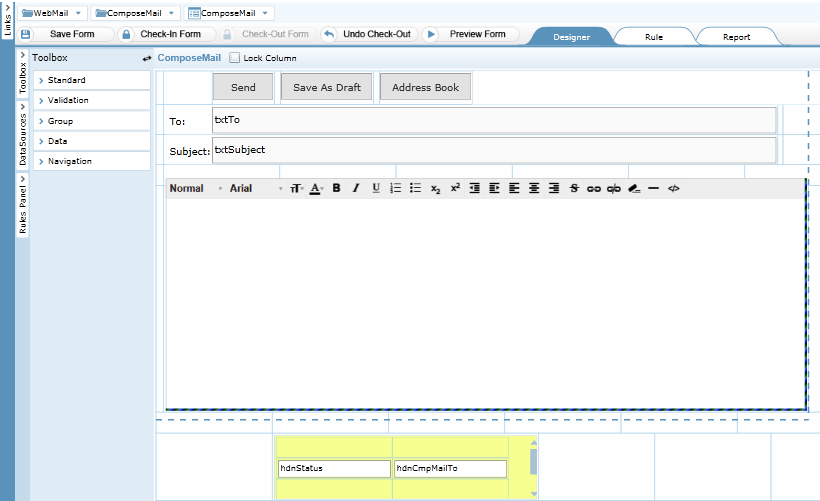
- Compose Mail: Allows you to write a mail. On clicking the following icon we can compose a mail: Here is the image of what the compose mail screen looks like:
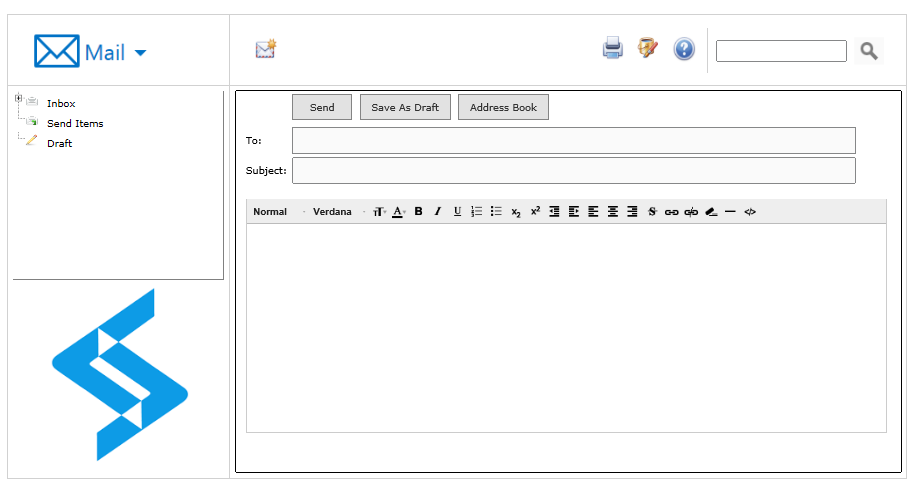
On compose mail screen following functionality is added:
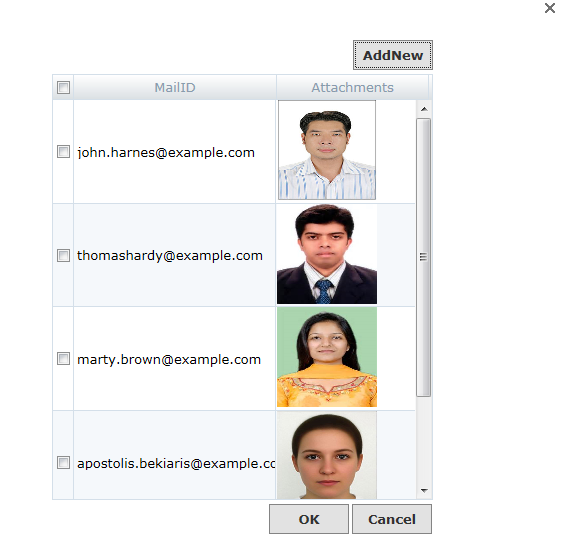
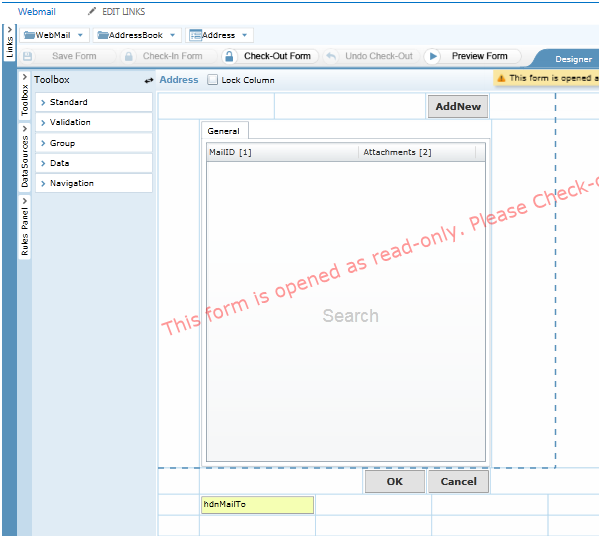
- Address Book: On clicking ‘AddressBook’ button following popup will appear in which you can select the recipient address and click ‘OK ‘ button .The selected recipient address will be added to the ‘To’ address textbox in the compose mail screen.
- Send Button: It is used for sending mails.
After filling the mail body, subject and ‘To’ Address you can click on the Send Button for sending mail.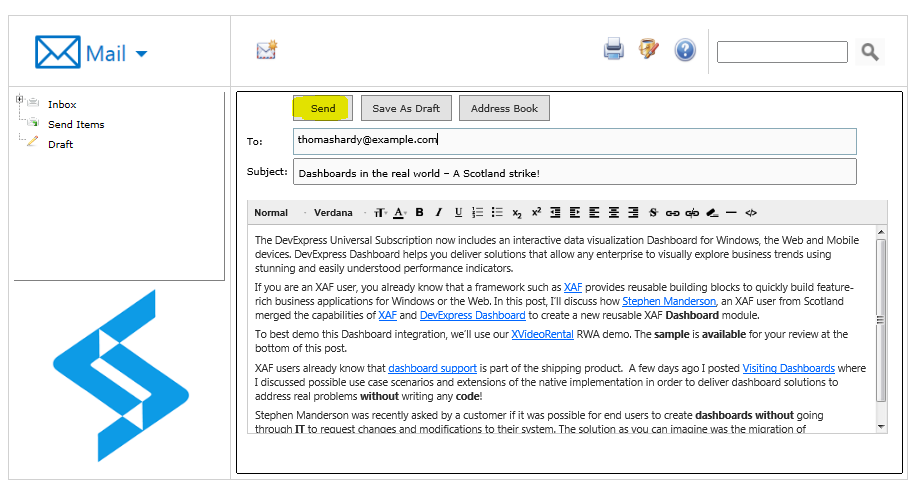
- Pre-Requisite: SMTP should be configured with the particular SharePoint version for sending the mail.
- SaveAsDraft: This button allows you to save a mail as draft.
On ‘AddressBook’ pop-up following functionality is added:
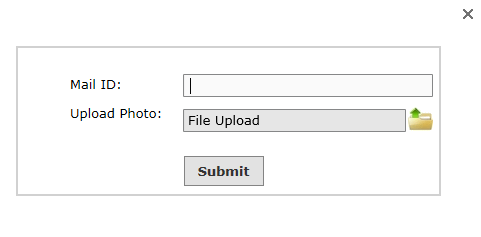
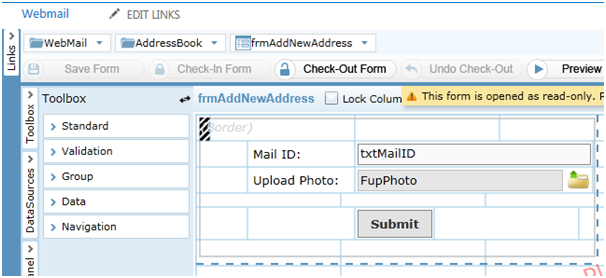
- AddNew: On clicking ‘AddNew’ button following popup will appear in which you can Add a new mail ID to your AddressBook.
Creating the Form
Steps to create a new form
Folders are used to store and organize forms that have a logical association or relationship. To create a new form click ‘New Folder’ button on the toolbar of the designer.
- On clicking the New Folder option, it will create a new folder and the name will be in the edit mode. You can type in the new name for the folder.
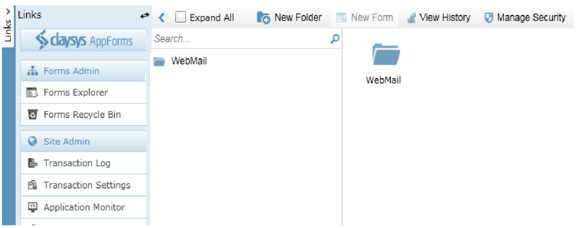
- Then click on the ‘New Form’ link on the toolbar. Give an appropriate name for the form. Click ‘Save Form’ to save the form.
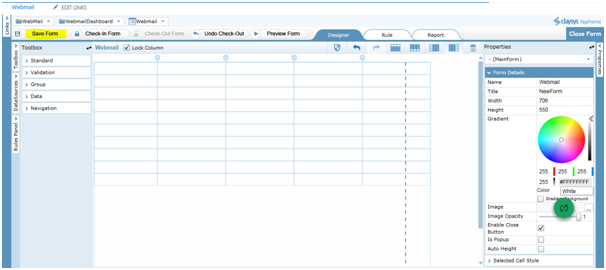
- You can drag and drop controls format the styles easily. ‘Check-In Form’ to save the changes and publish to get the completed form for the end user to use. A form must be checked-out to make modifications while all aspects of the form can be examined while checked-in.
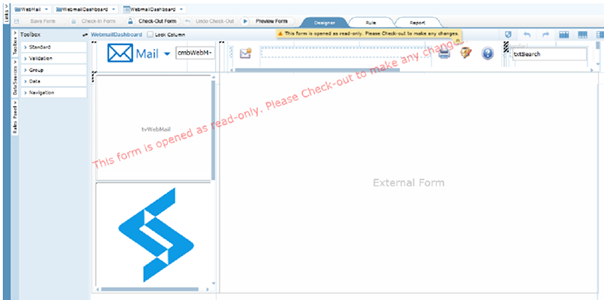
Following are the controls we used here in designing the above Webmail dashboard form:
- External Form Control
- TreeView
- Combo Box
- Image Buttons
Similarly we can create all other forms required for the webmail template. Following are the forms required:
- Webmail dashboard (as the image shown above).
- Compose mail (Screen where user can write a mail).
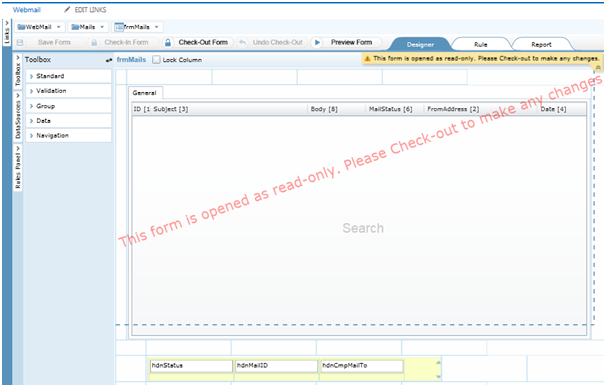
- frmMails (This form contains a search which shows all the mail items as a list).
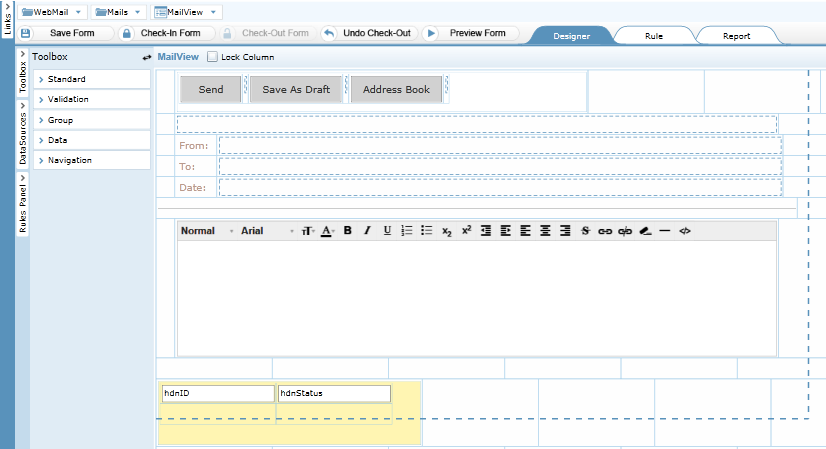
- MailView (This form is designed to show each mail details using label controls).
- Address ( This form is the pop up shown when we click on the Address button in webmail dashboard).
- frmAddNewAdresses (This form is to add new mail ID to the Address book).
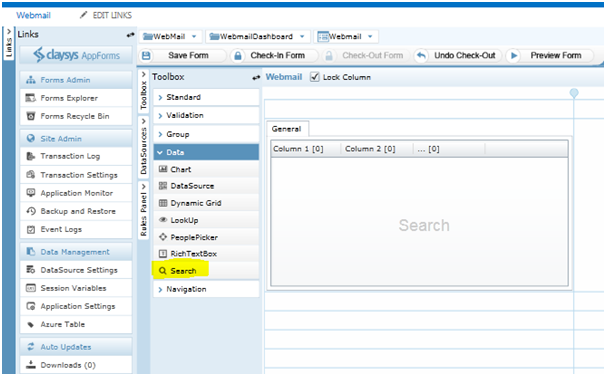
Steps for Configuring search Control
Here are the steps for configuring Search control referring to the form ‘frmMails’.
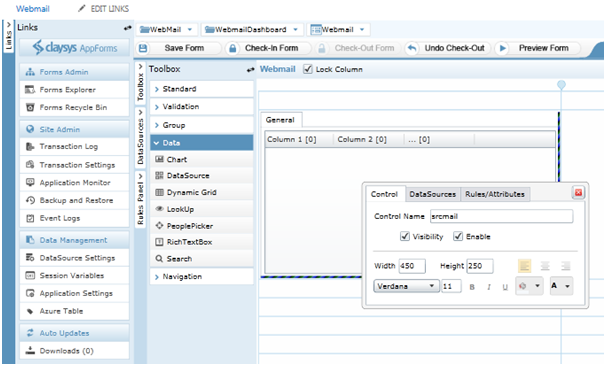
- From the ‘Toolbox’ at right side of the window , drag and drop the search control, which comes under the ‘Data’. Enter the name for Search control .
- On Clicking the search control , a pop up appears click on ‘DataSource’.
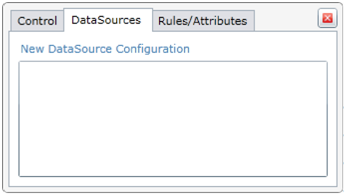
- Click on ‘New DataSource Configuration’.
- Select the List from the available list and click ‘Next’ button as shown in the image.

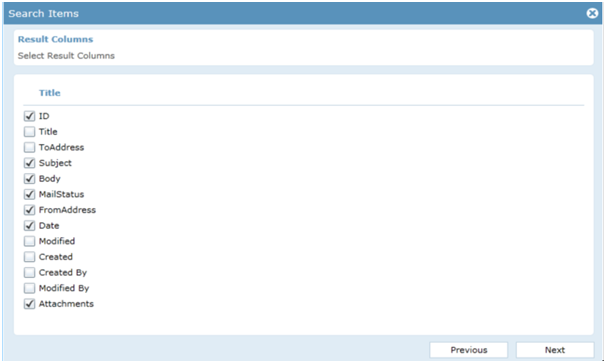
- Select the Result columns Which you want to show in the search and click ‘Next’ button.
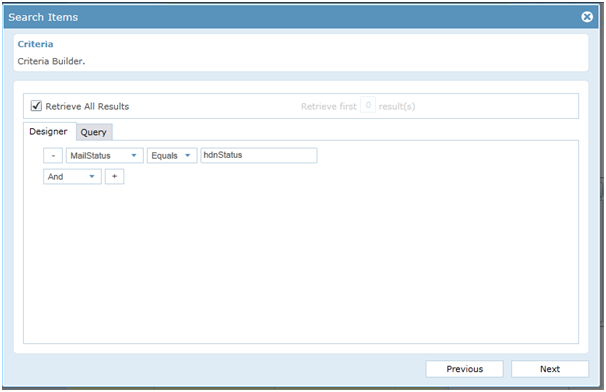
- Give the condition for the Selection of values in the search as shown in the image. And click ‘Next’ button.
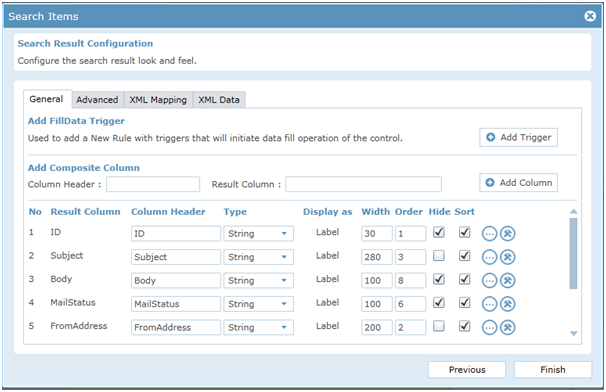
- Here you can specify the column header, width of each column , the order in which each column should appear in search and other similar settings of columns. And click ‘Finish’ button.
Steps for External Data sources Configuration
Here are the steps for configuring External Data source referring to the form ‘frmAddNewAdresses’.
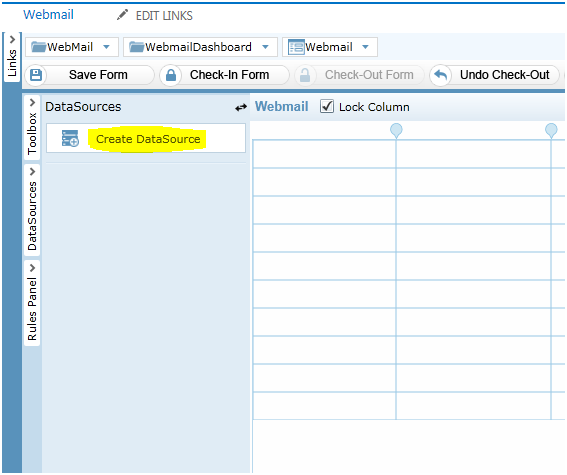
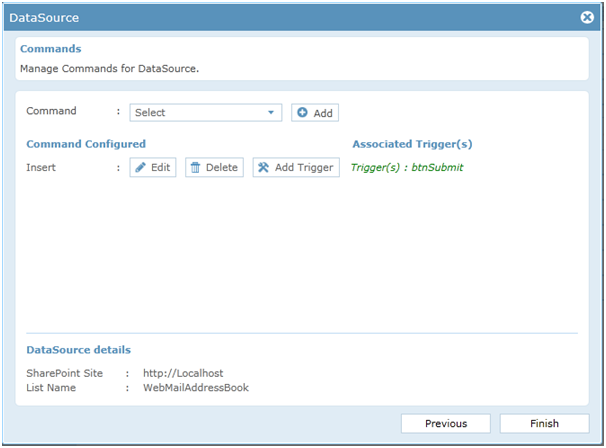
- Click on ‘DataSource’ and then click on ‘Create DataSource’ as shown in the image.
- Enter the name for the DataSource ,Select the ‘DataSource Type’ and click ‘OK’ button. As shown in the image.

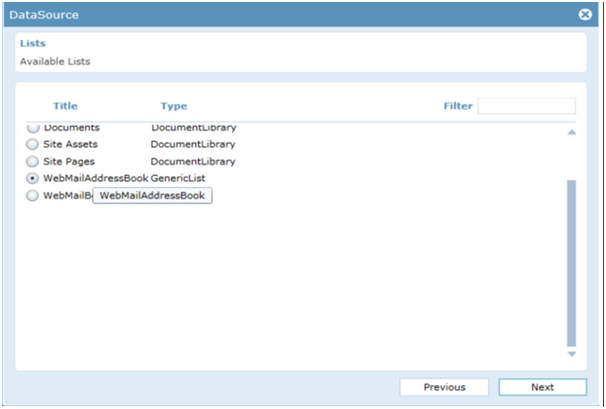
- Select the List from the available list and click ‘Next’ button.
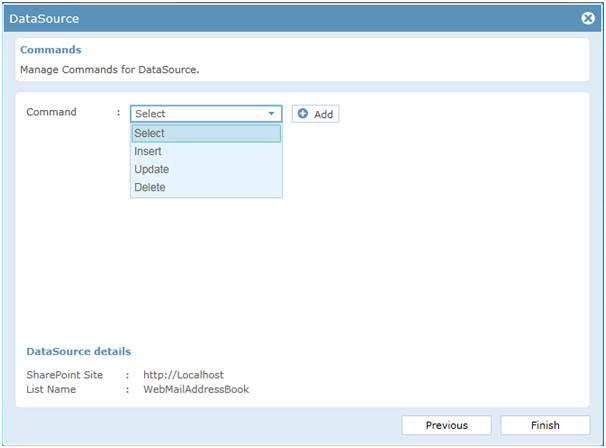
- Select the command as ‘Insert’ or ‘select’ as your requirement and click ‘Add’ button.
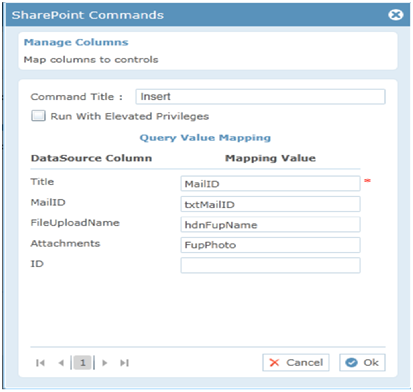
- Enter the Command Title and enter the mapping values as shown in the image and click ‘OK’ button.
- Click ‘Finish’ button . Thus a new external data source has been created.
Rules Configuration
Rules in each form are being explained below. Initially to create a rule you need to click on ‘Create Rule’ and enter a name for the new rule.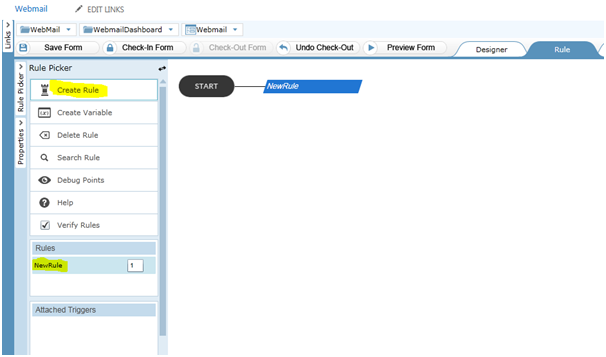
Also you can add trigger to the rule by selecting the triggers as shown in the image below.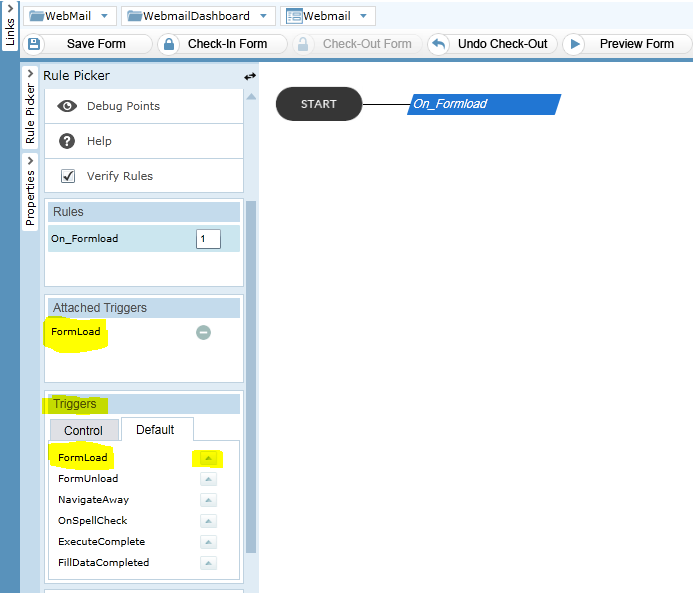
Rules in “WebmailDashboard” Form:
|
Rule No. |
Rule Name |
Trigger |
Functionality |
|
1 |
ComboMail |
imgbtnWebMail |
The visibility of combobox is set to true and “[Select]” is removed from the combobox. |
|
2 |
Visiblility |
cmbWebMail |
After Selecting a value in the combobox , it should not be seen so on cmbWebMail trigger the visibility of combobox is set to false. |
|
3 |
On_TreeView |
hdnSelectedItem |
On clicking each items on the TreeView , corresponding mails should be loaded in the External form. The external form used is “extMail”. While clicking on the TreeView the hidden control “hdnSelectedItem” will get the selected item of the tree and using ‘setform’ rule this value is passed to the hidden control “hdnStatus” in the form “frmMails” in the external form. |
|
4 |
On_ComposeBtn |
imgbtnComposeMail |
On clicking the image button for compose mail, the form “ComposeMail” is loaded in the external form. |
|
5 |
ViewMail |
hdnMailViewID |
On getting values in the hidden control “hdnMailViewID” we use the rule to load the form “MailView” in the external form and pass the value of hidden control “hdnID” to the hidden control “hdnMailViewID” in the form “MailView”. |
|
6 |
On_Formload |
FormLoad |
On formload external form is loaded with the form “frmMails”. And temporary variable ‘vTemp’ is set to zero. |
|
7 |
SelectedItem_Value |
tvWebMail |
On clicking TreeView control its selected item value is passed to the hidden control “hdnSelectedItem”. |
|
8 |
|
imgbtnPrint |
To print the page on clicking the image button of print. |
|
9 |
SetMailToValue |
hdnMailTo |
Rule to pass the value from the current form control “hdnMailTo” to the control “txtTo” in “MailView” which is loaded in the external form. |
Rule 1: ComboMail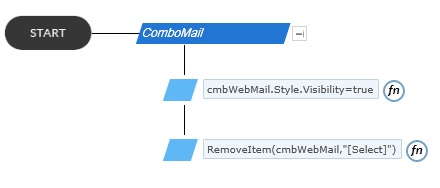
Rule 2: Visiblility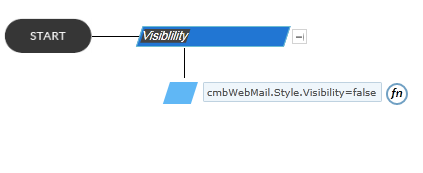
Rule 3: On_TreeView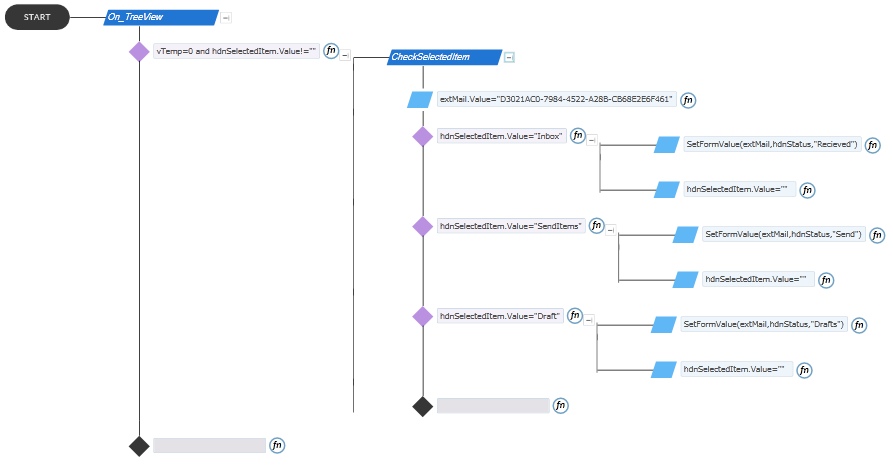
Rule 4: On_ComposeBtn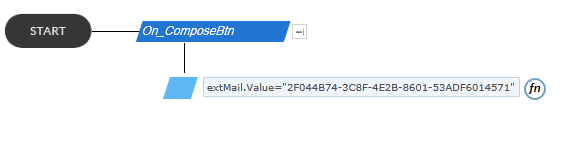
Rule 5: ViewMail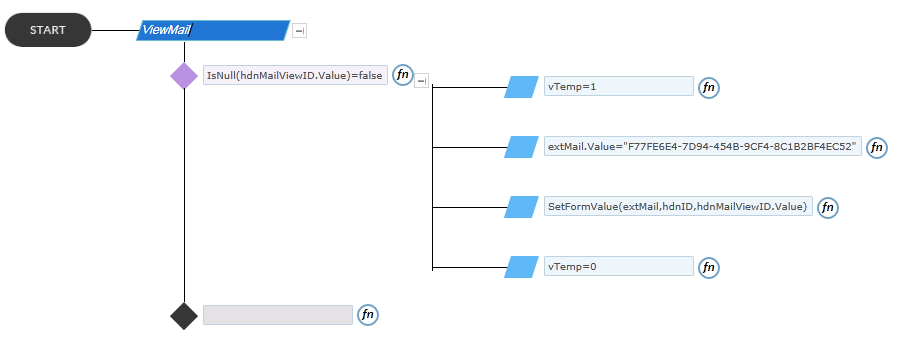
Rule 6: On_Formload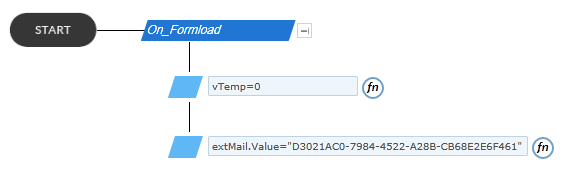
Rule 7: SelectedItem_Value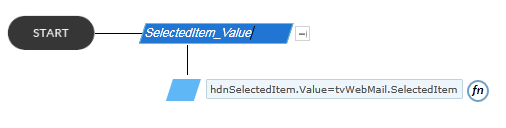
Rule 8: Print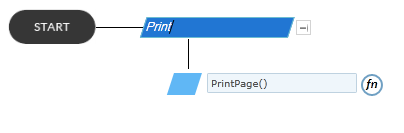
Rule 9: SetMailToValue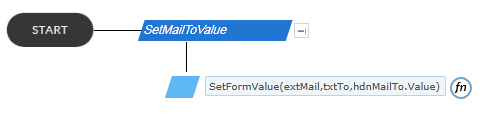
- Rules in “Address” Form:
|
Rule No. |
Rule Name |
Trigger |
Functionality |
|
1 |
On_Formload |
FormLoad |
FillDataSync(srcAddressBook) is the rule to fill the search control named srcAddressBook. |
|
2 |
On_OkBtn |
btnOK |
RunRule(On_srcSddressBook) and value is returned to hidden control “hdnMailTo”. The function to trim “,” at the end of “hdnMailTo” is written. Then value of “hdnMailTo” is passed to the hidden control “hdnMailTo” in the “WebmailDashboard” form. And this popup is closed. |
|
3 |
On_CancelBtn |
btnCancel |
On clicking Cancel button the tab is closed. |
|
4 |
On_srcSddressBook |
RunRule |
Loop is written to get the MailID from each row of the search to hidden control “hdnMailTo”. The total row count of the search is initially stored in to the variable “VRowCount”. This rule is called from the rule ”On_OkBtn”. |
Rule 1: OnFormLoad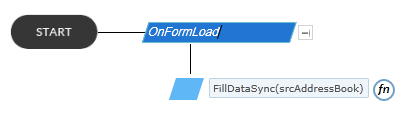
Rule 2: On_OkBtn
Rule 3: On_CancelBtn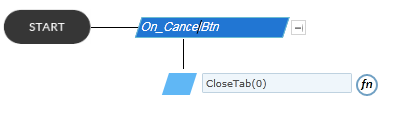
Rule 4: On_srcSddressBook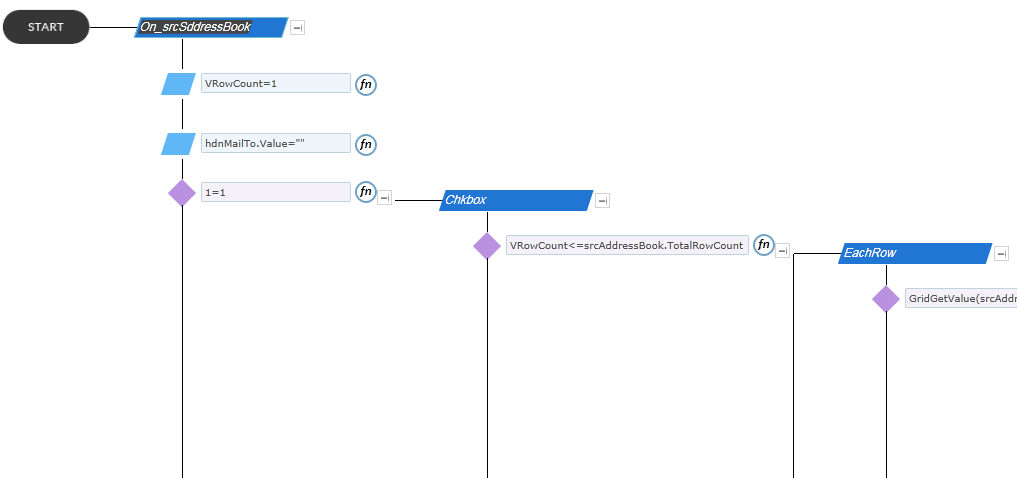
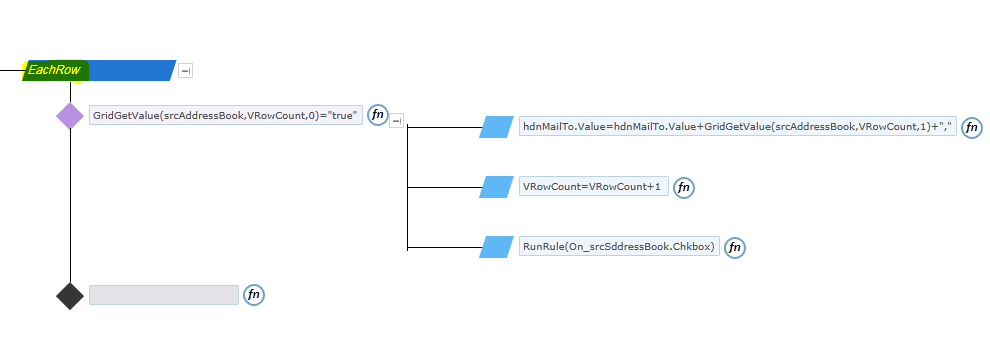
Above two images are the part of a single rule named ” On_srcSddressBook”. The sub rule named “EachRow” is shown in second image.
Rules in “frmAddNewAddress” Form:
|
Rule No. |
Rule Name |
Trigger |
Functionality |
|
1 |
OnSubmitBtn |
btnSubmit |
Rule for Executing the “Insert” command. And if you want to maintain the fileUpload name you can store it in the hidden control “hdnFupName”. |
|
2 |
On_ExecuteComplete |
Execute Complete |
Only after the successfull insertion of mail ID in the list , message box is to be shown and Popup window is to be closed. |
Rule 1: OnSubmitBtn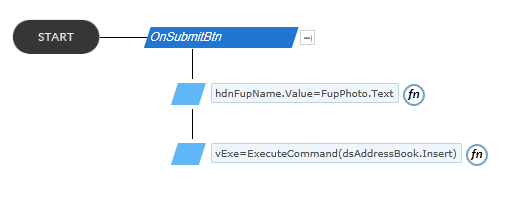
Rule 2: On_ExecuteComplete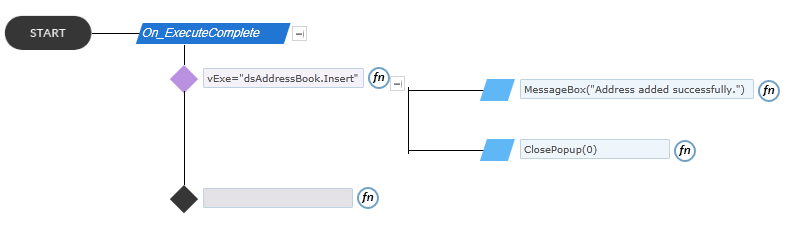
Rules in “frmMails” Form:
|
Rule No. |
Rule Name |
Trigger |
Functionality |
|
1 |
On_Formload |
FormLoad |
The value of hidden control “hdnStatus” is set to Recieved. |
|
2 |
FillSearch |
hdnStatus |
On getting value in the “hdnStatus” the search is to be filled based to the value in the “hdnStatus”. |
|
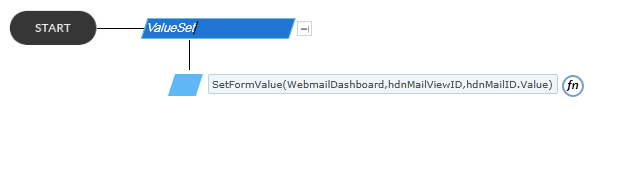
3 |
ValueSet |
hdnMailID |
The value in the “hdnMailID” is passed to “hdnMailViewID” in the form “WebmailDashboard”. |
Rule 1: On_Formload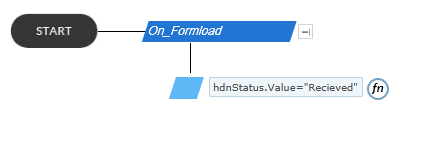
Rule 2: FillSearch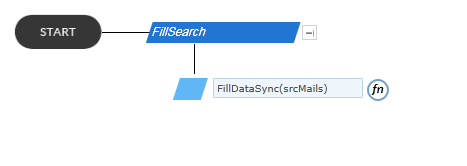
Rule 3: ValueSet
 Rules in “MailView” Form:
|
Rule No. |
Rule Name |
Trigger |
Functionality |
|
1 |
Select |
hdnID |
Execute the “select” command from list and shows the details of a mail. |
|
2 |
Send |
btnSendMail |
Functionality for sending mail |
|
3 |
SaveAsDraft |
btnSave |
Functionality for saving mail as draft. |
|
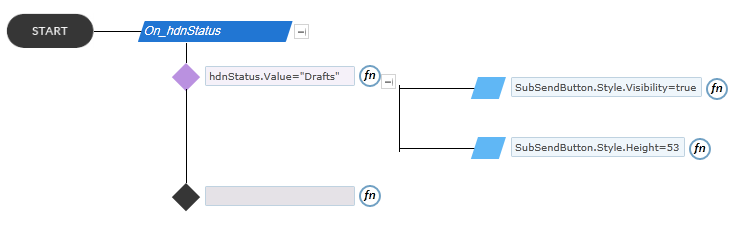
4 |
On_hdnStatus |
hdnStatus |
Checks whether the mail is a draft . if it is then only subform containing the send button etc. Should be visible. |
Rule 1: Select
Rule 2: Send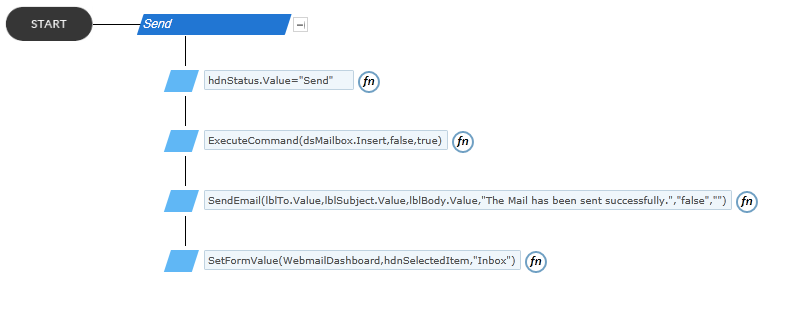
Rule 3: SaveAsDraft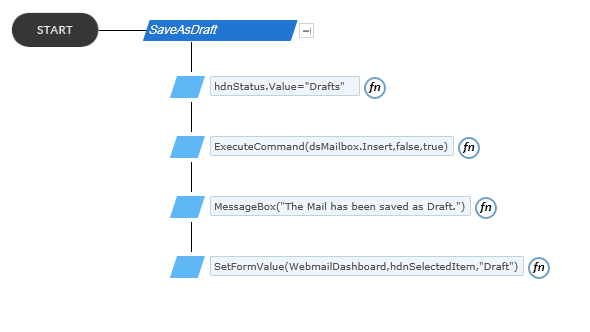
Rule 4: On_hdnStatus
- Rules in “ComposeMail” Form:
|
Rule No. |
Rule Name |
Trigger |
Functionality |
|
1 |
setMailTo |
hdnCmpMailTo |
Setting the value of hidden control “hdnCmpMailTo” to the textbox “txtTo”. This include the mail ID that we have selected from the Address book. |
|
2 |
SendMail |
btnSendMail |
Functionality for sending mail |
|
3 |
SaveAsDraft |
btnSave |
Functionality for saving mail as draft. |
Rule 1: setMailTo
Rule 2: SendMail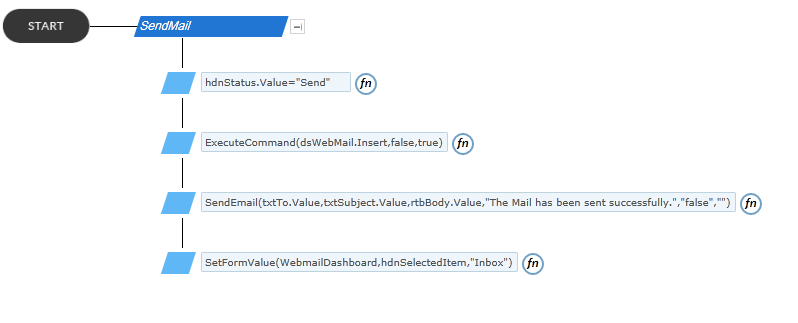
Rule 3: SaveAsDraft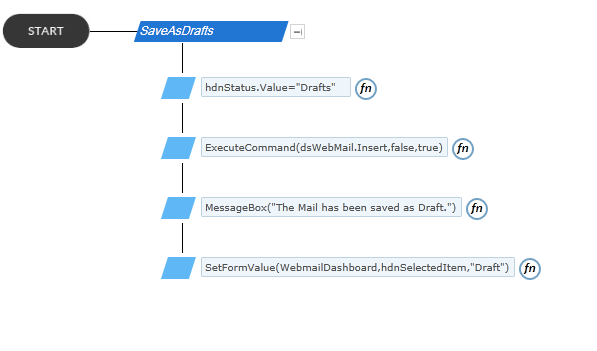
How To Use This Template
Steps To Upload list Template
- on the right corner of the window click on settings.

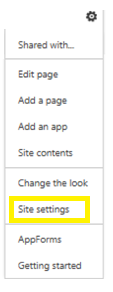
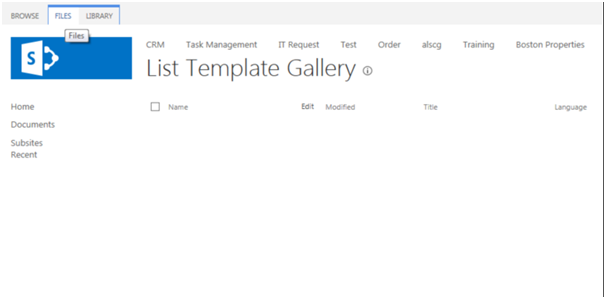
- Click on ‘Site settings’ from the drop down menu , then we can see the following window appearing.
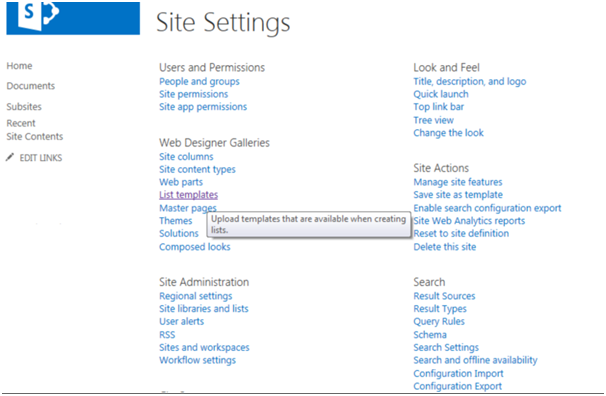
- Click on ‘List template’ option as shown in the above image. And we can see ‘List Template Gallery’. Click on ‘Files’ at the leftmost corner as shown in the following image.
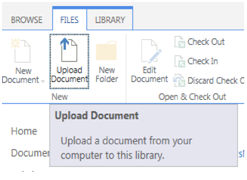
- Click on ‘Upload Document’.
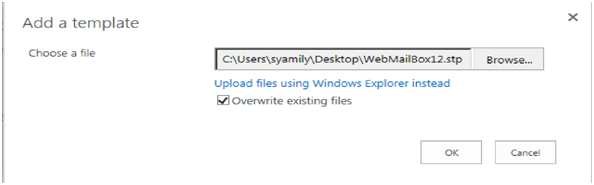
- Following Pop up will appear where we can browse a list template stored in our computer and click ‘OK’ button.
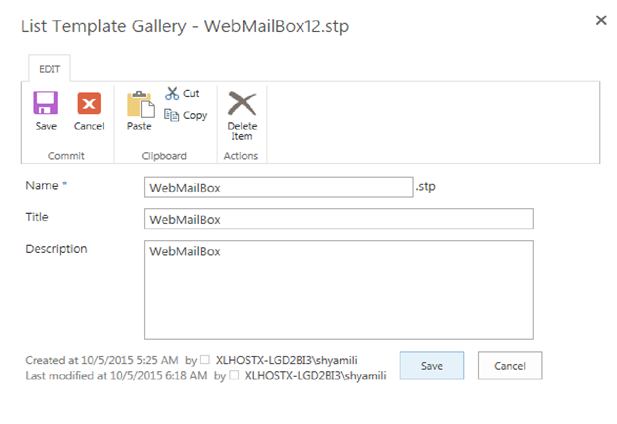
- Following Pop up will appear where we can change the name of the List Template and enter the Description as required and click on ‘Save button’.
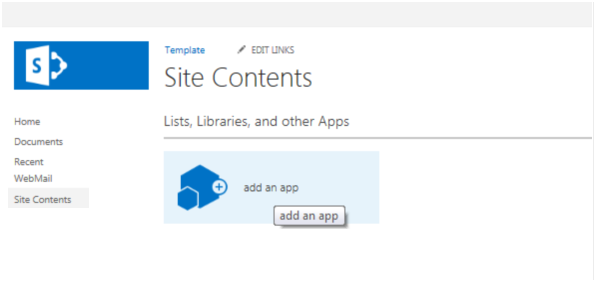
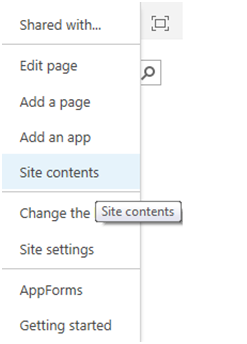
- Now go to the Required sub site, click ‘Settings’ on the right corner (as done in step ‘a’). Then click on ‘Site Contents’. Following Screen appears in which click on ‘add an app’.
- Following screen will appear where we can type the uploaded template name and click search.
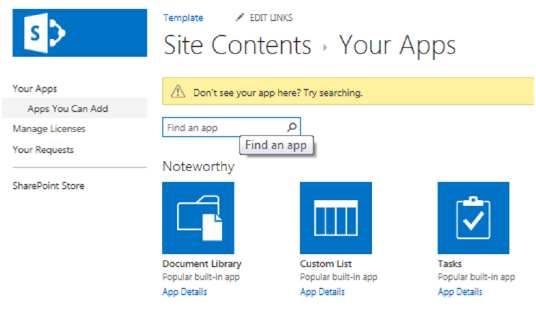
- Then you can see the Uploaded template ,Click on it .
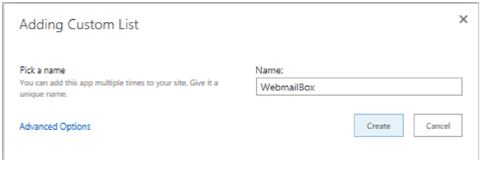
- On clicking it ,we will get following Pop up . Enter the name for the List template and click ‘Create’ button.
Steps to Upload Tenant
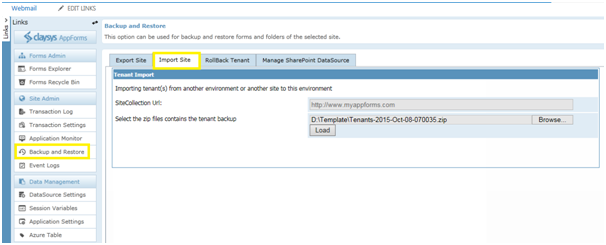
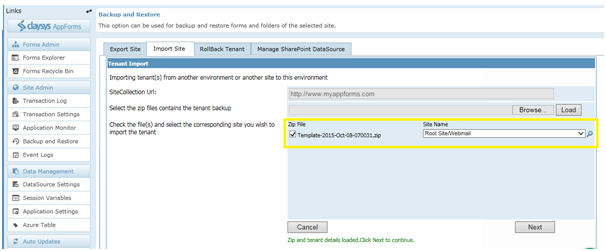
- Click on the “Back Up and Restore” on the left side of the AppForm Designer window. Then click on ‘Import Site’ -> Browse the Tenant and click Load.
- Select the ‘Zip File’ and ‘Site Name’ and click ‘Next’.
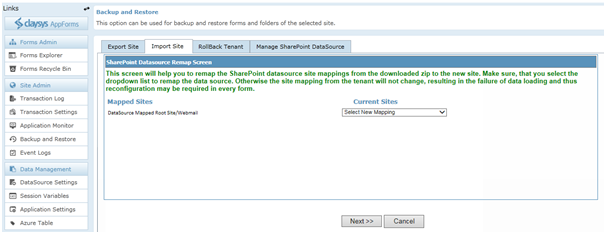
- Click ‘Next’ button.
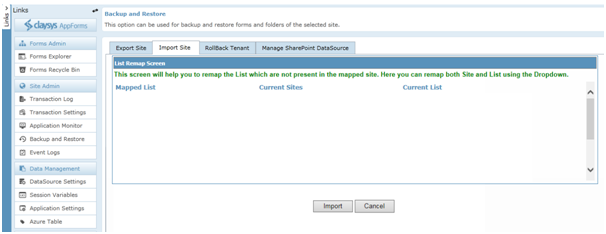
- Click on ’Import’ button . Once it done you are free to work with the form in the new site.
Step to Create a Web Part Page
Here are the steps for configuring External Data source referring to the form ‘frmAddNewAdresses’.
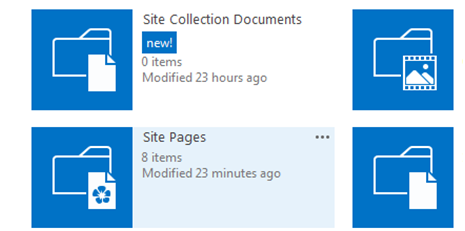
- Click on Site Settings Wheel in the upper right corner of your site and then select “Site Contents Page”.
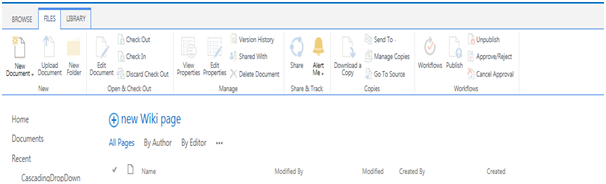
- select site pages or simply pages library on site content page.
- Click on “New Wiki Page” to add new site page.
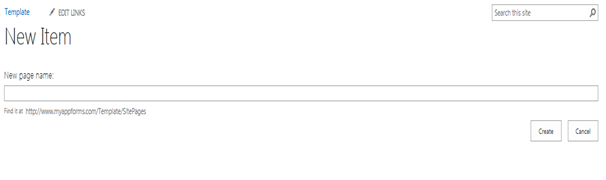
- Give the New page name into the pop-up window and click ‘Create’ to add new page.
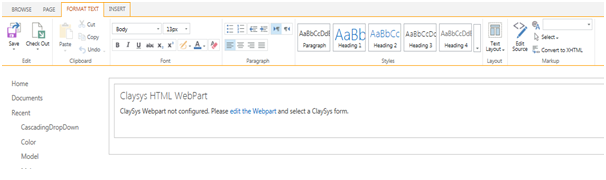
- To add a new web part, click on the ‘Insert’ tab and then click on the ‘Web Part’ button. Then select ClaySys -> ClaySys HTML Web Part.
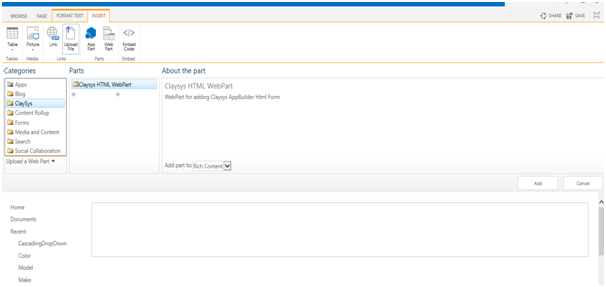
- Click ‘Add’ button to add the Web Part. Click on the ‘edit the Web part’ link to edit the page.
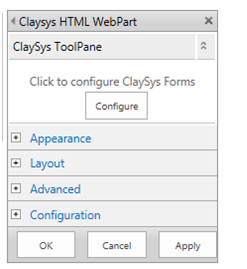
- A new pop-up window appears and here we can configure the ClaySys AppForms by clicking on the ‘Configure’ button.
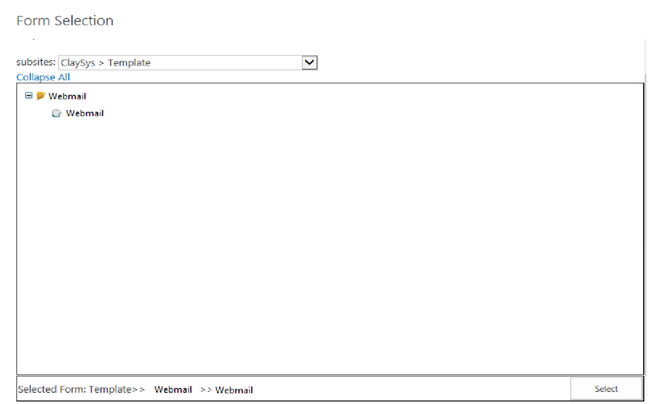
- Pop-up appears with listed published forms. We can select the appropriate form by click on the form and add the form by clicking on the ‘Select’ button.
- Once the configuration is finished, click on the ‘Apply’ button to see the changes. Click ‘OK’ button.
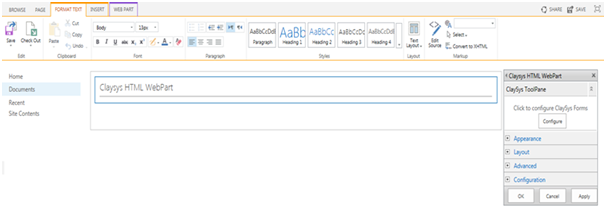
- Now you can see the web part page you just created, as shown in the following image. Click ‘Save’ button to save the changes.
Blogs by Category
AppForms Artificial Intelligence Blockchain Call Centers Chatbots Cloud Computing Data Management Design Digital Marketing Digital Transformation Enterprise Applications FinTech Insights LowCode Development Microsoft Mobile Apps News Office 365 Robotic Process Automation Security SharePoint Software Development Web ApplicationTop Use Cases of AI Agents Transforming Business in 2026
2026-06-29 15:16:38