Create Hotel Booking Platform Using AppForms

Design Document for Hotel Booking
Introduction
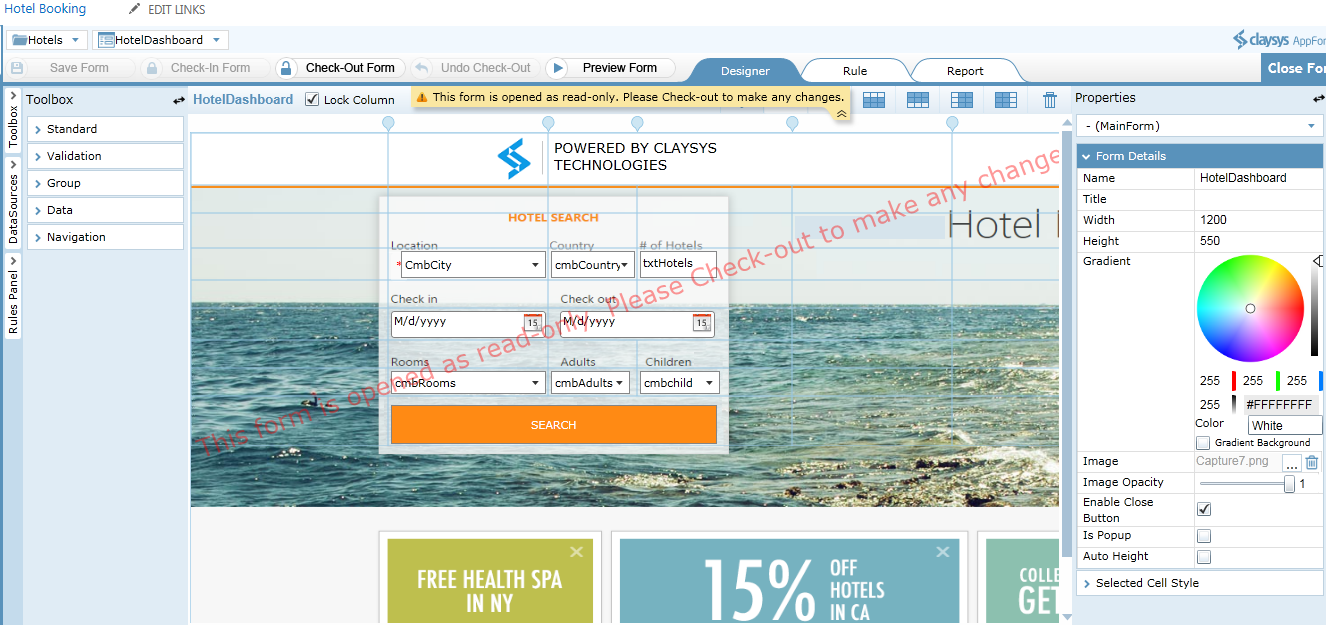
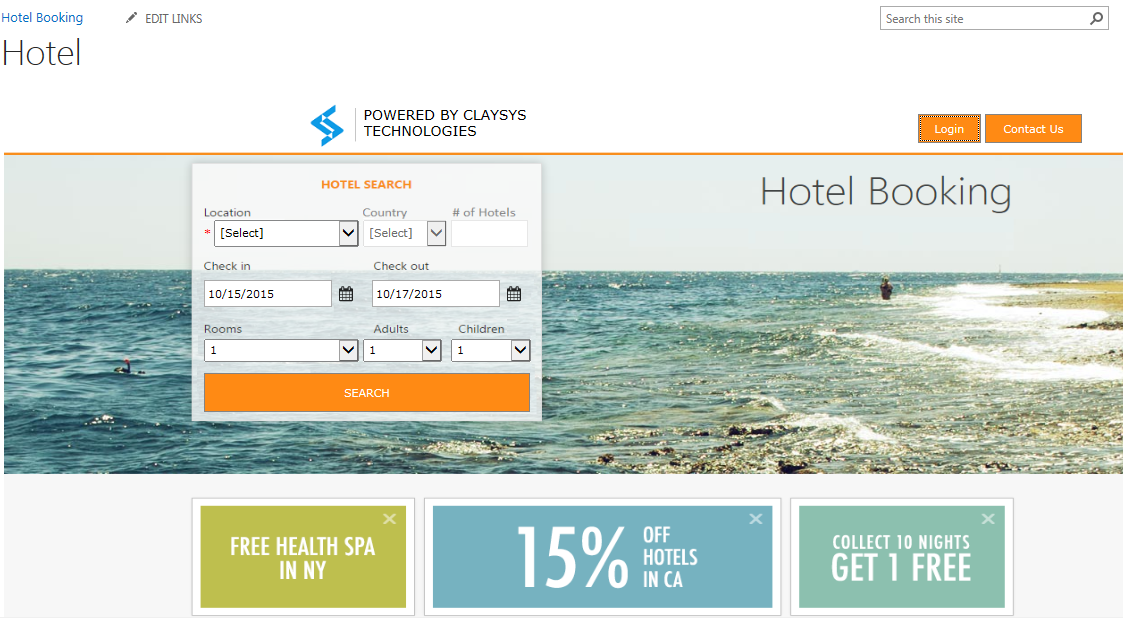
Online hotel booking system provides ample tolls that help hoteliers increase their online exposure and drive up revenue. One of the biggest advantages of our booking engine is the filtering of hotels with multiple criteria. The purpose of this document is designed to be a reference for any person wishing to implement or any person interested in the architecture of the controls for the ClaySys AppForms or how to configure the AppForms to create a hotel booking template. Please find below user view of hotel booking template:-
Dashboard:-
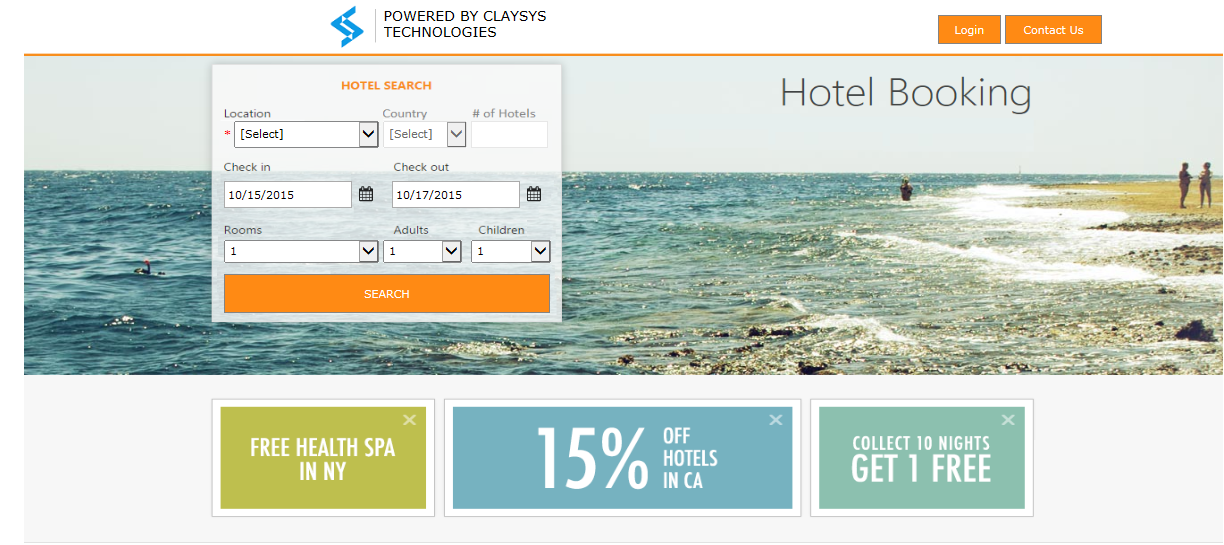
On the Dashboard following functionalities are being added:-
- Select Location of Hotel
- Country Automatic generate on the basis of Location
- Select Check in and Checkout date
- Select Rooms, Adults and Children
On clicking ‘Search’ button, following screen will be displayed
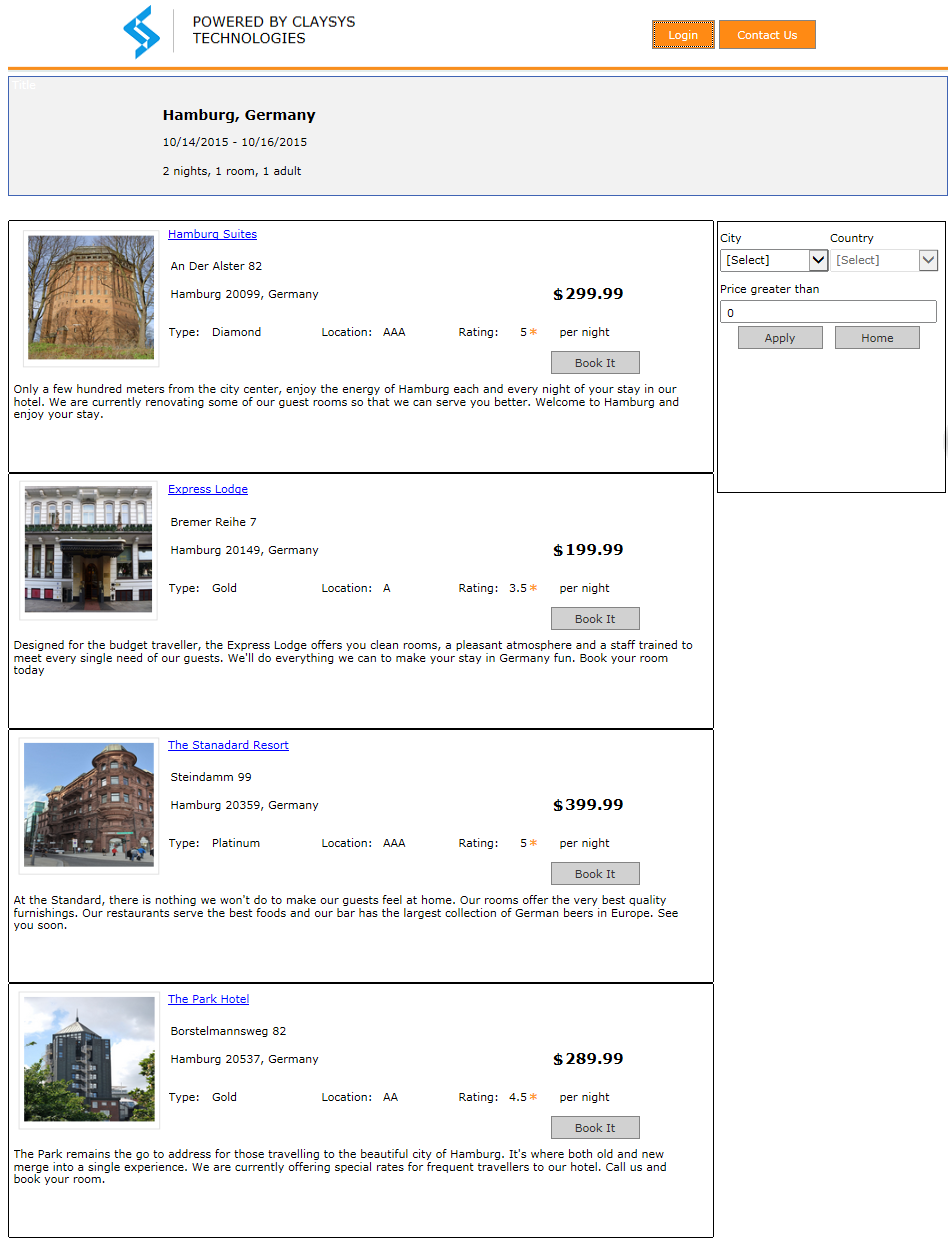
In Search result form, following functionalities are being added:-
Can search hotels with:-
- different rate
- different City and Country
It is designed to guide development and design in ClaySys AppForms, including:-
- Form design
- Data Source configuration
- Rules Configuration
- Uploading List Template
- Uploading Tenant
- Create a new web part page
Create the form
Form Designing
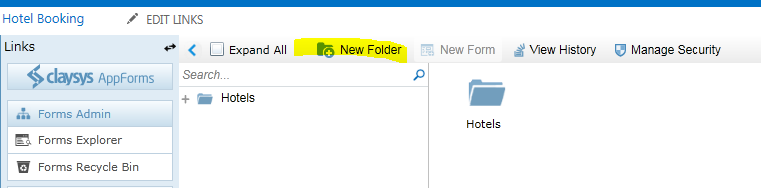
- Folders are used to store and organize forms that have a logical association or relationship. To create a new form click ‘New Folder’ button on the toolbar of the designer. On clicking the New Folder option, it will create a new folder and the name will be in the edit mode. You can type in the new name for the folder.
- Then click on the ‘New Form’ link on the toolbar. Give an appropriate name for the form. Click ‘Save’ to save the form.
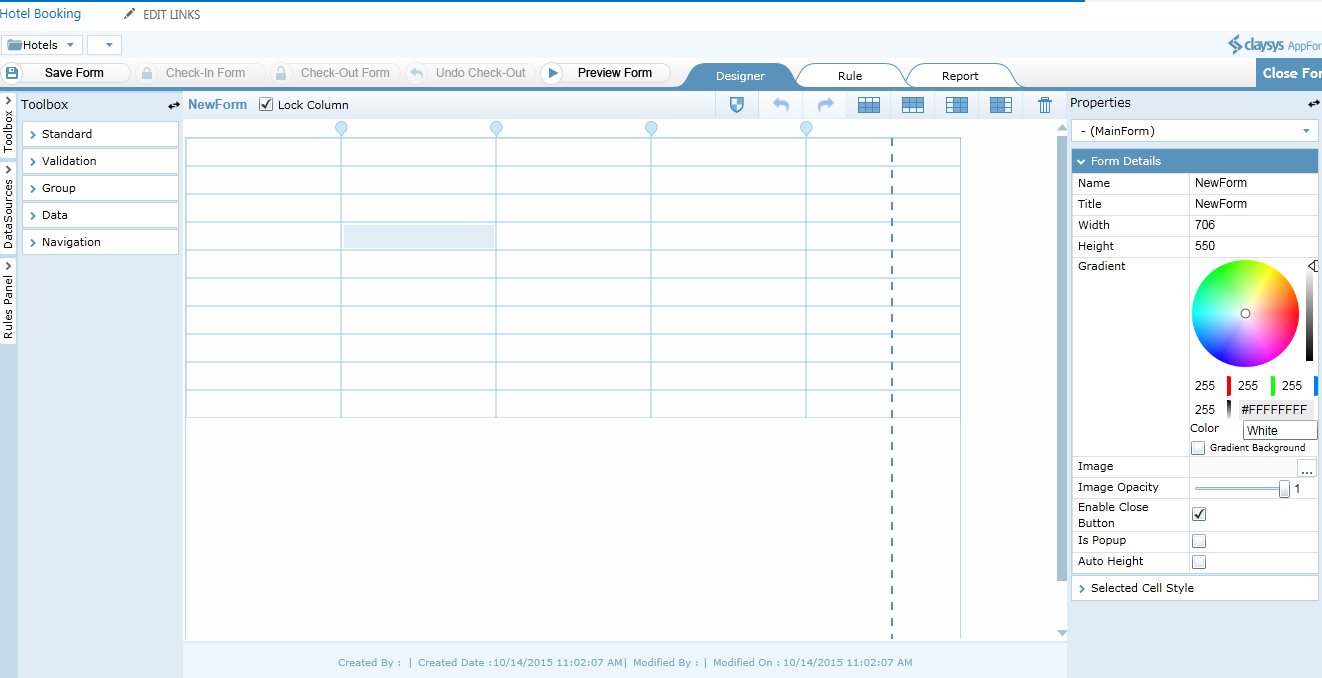
- You can drag and drop controls format the styles easily.

‘Check-In Form’ to save the changes and publish to get the completed form for the end user to use. A form must be checked-out to make modifications while all aspects of the form can be examined while checked-in.
There are three forms in this template. Named as:-
- “HotelDashboard”
- “SearchResult”
- “HotelDetail”
“HotelDashboard” form contains following controls:-
- Combo box
- TextBox
- DateTimePicker
- Button
“SearchResult” form contains following controls:-
- External form
- Subform
- Combo box
- TextBox
- Button
- Label
“HotelDetail” form contains following controls:-
- Image
- HyperlinkButton
- Subform
- Label
Data Source Configuration
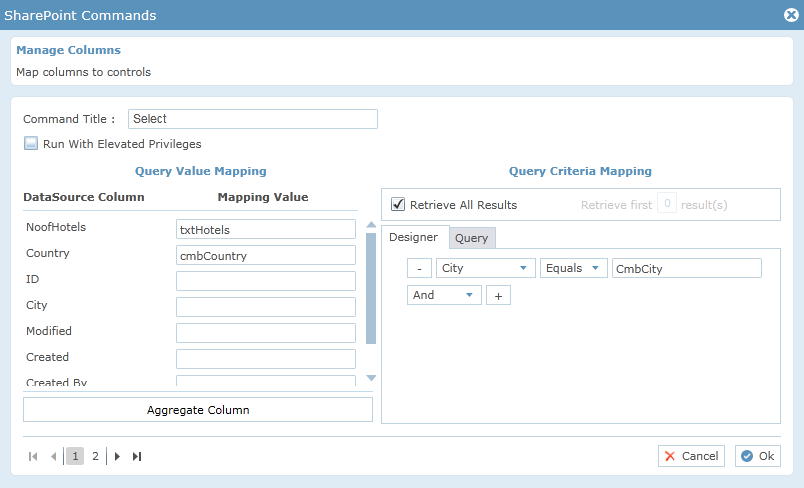
Following steps will explain about the Data Source configuration of Combo Box.
- Click on the Combo Box control and click the Data Sources tab to edit the Data Source.
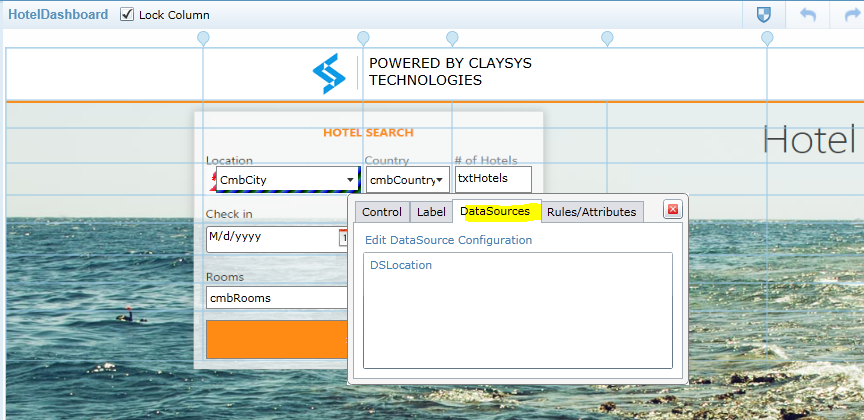
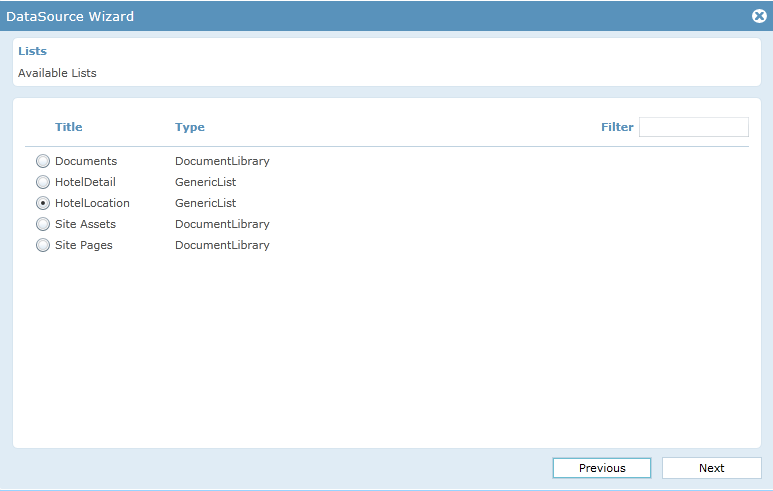
- A pop-up window appears to select the item source. Select the Item Source as ‘SharePoint’. From the Data source Wizard, select respective list name and click on ‘Next’ button.
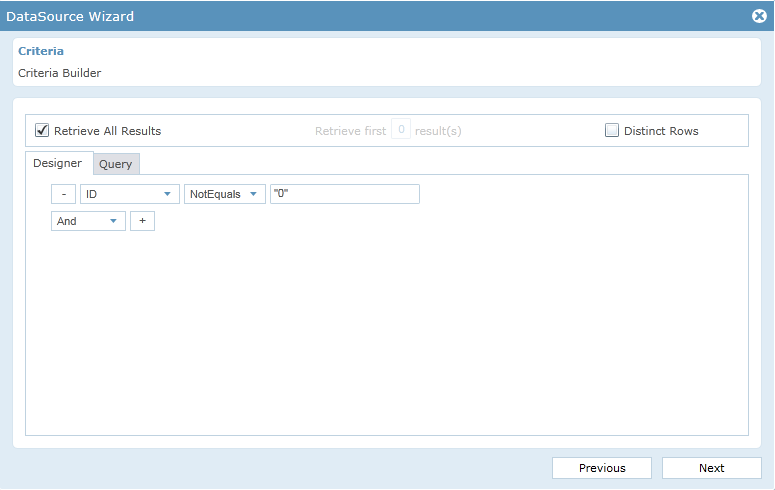
- While click on Next button getting below screen. Fill any criteria for the combo box.
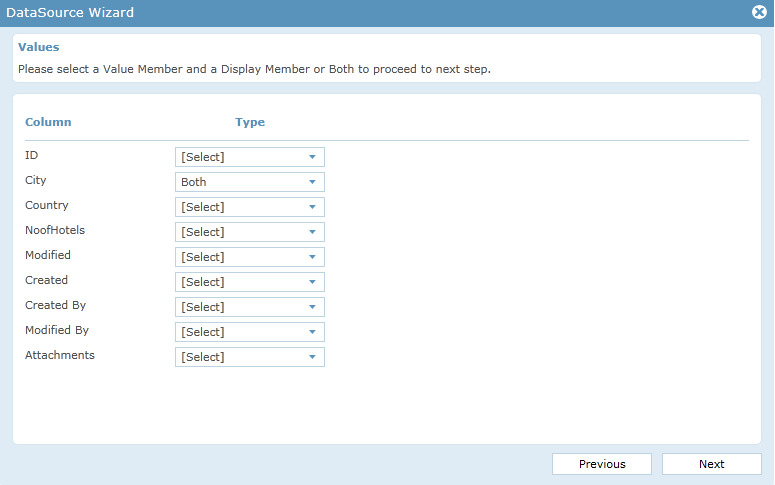
- While click on Next button getting below screen, we can select value member and display member for the data source
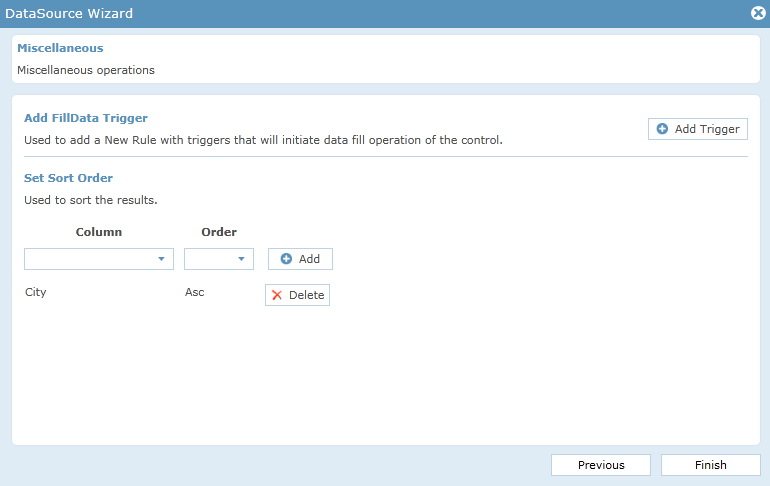
- While click on Next button getting below screen, we can add trigger and comb box sorting order. Click on ‘Finish’ button
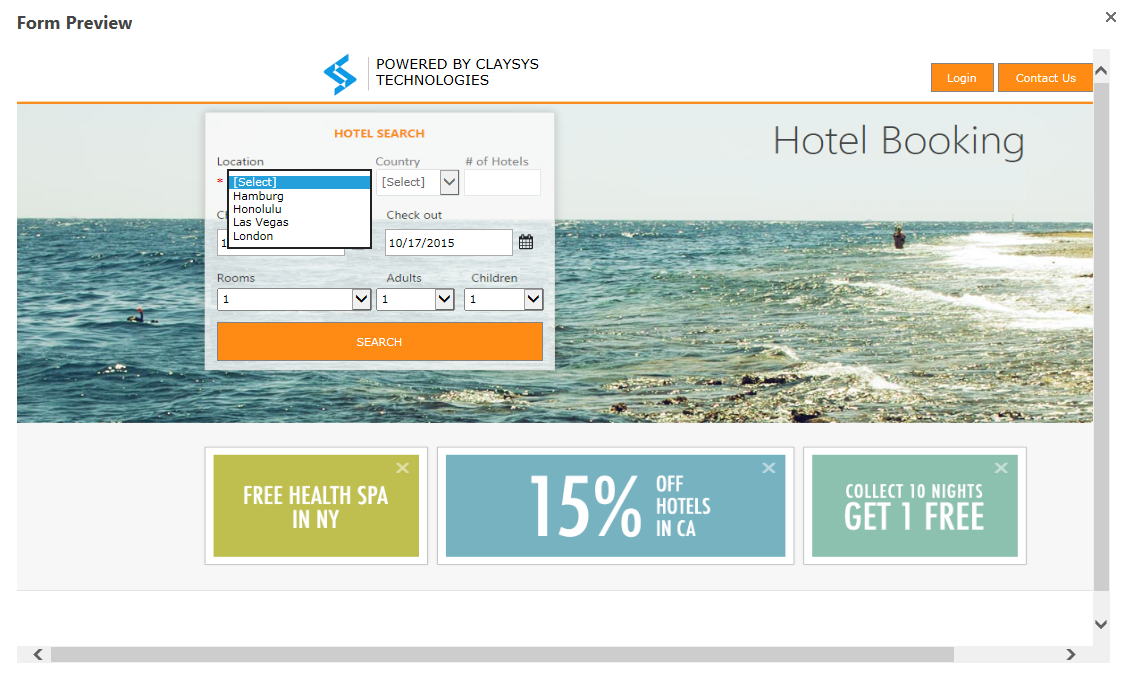
- Following data shows the combo box in preview.
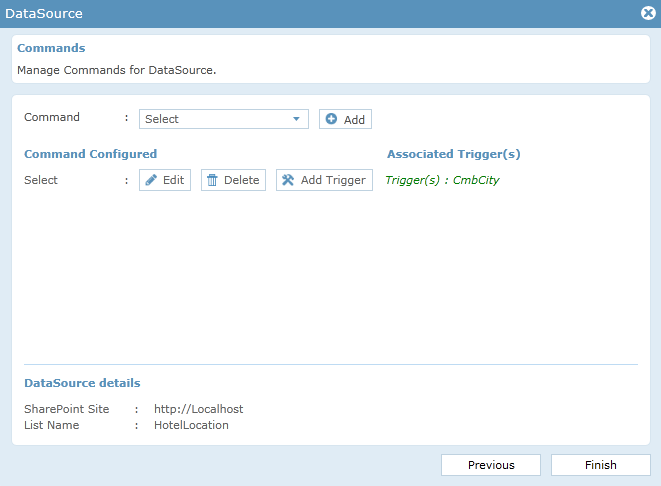
- Data Source operation for ‘Select’ is now defined.
Rules Configuration
- “HotelDashboard” contains following rules
|
Rule No |
Rule Name |
Trigger |
Functionality |
|
1 |
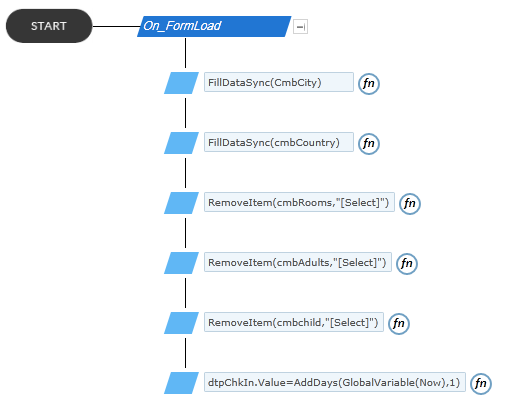
On_FormLoad |
FormLoad |
Value populated in ‘cmbcity’ and ‘cmbcountry’. Remove default value of ‘cmbRooms’, ‘cmbAdults’ and ‘cmbchild’. Add one day to ‘dtpChkIn’ date control |
|
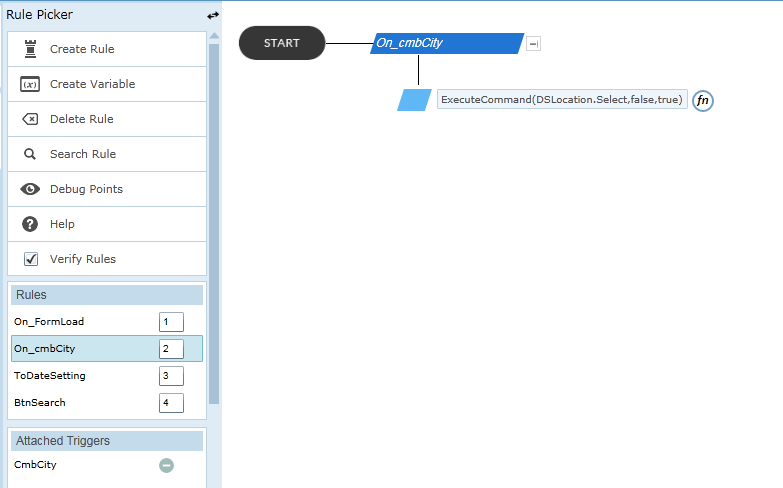
2 |
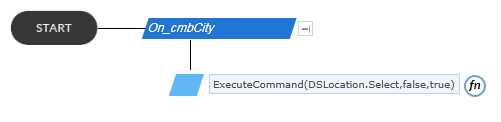
On_cmbCity |
CmbCity |
Finding Country name and Number of locations |
|
3 |
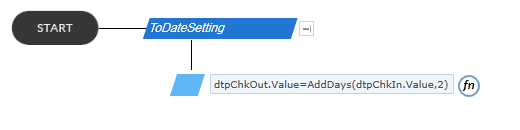
ToDateSetting |
dtpChkIn |
Adding two days to dtpchkIn and set this value to dtpChkOut |
|
4 |
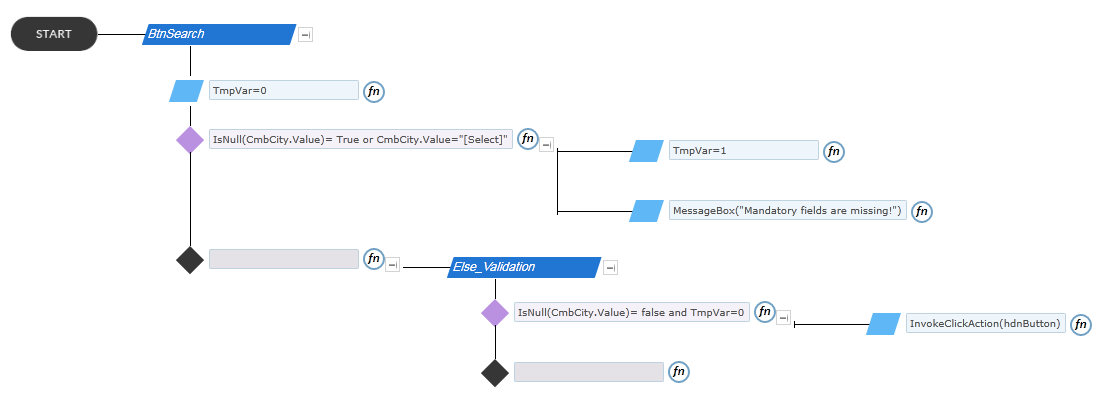
BtnSearch |
btnSearch |
If validation success, open resultant form |
Rule 1: On_FormLoad
Rule 2: On_cmbCity
Rule 3: ToDateSetting
Rule 4: BtnSearch
- “SearchResult” form contains following rules
|
Rule No |
Rule Name |
Trigger |
Functionality |
|
1 |
FormLoad |
FormLoad |
Loads ‘Hotel Details’ form by using an external form control. Combo boxes are filling by using Filldata function |
|
2 |
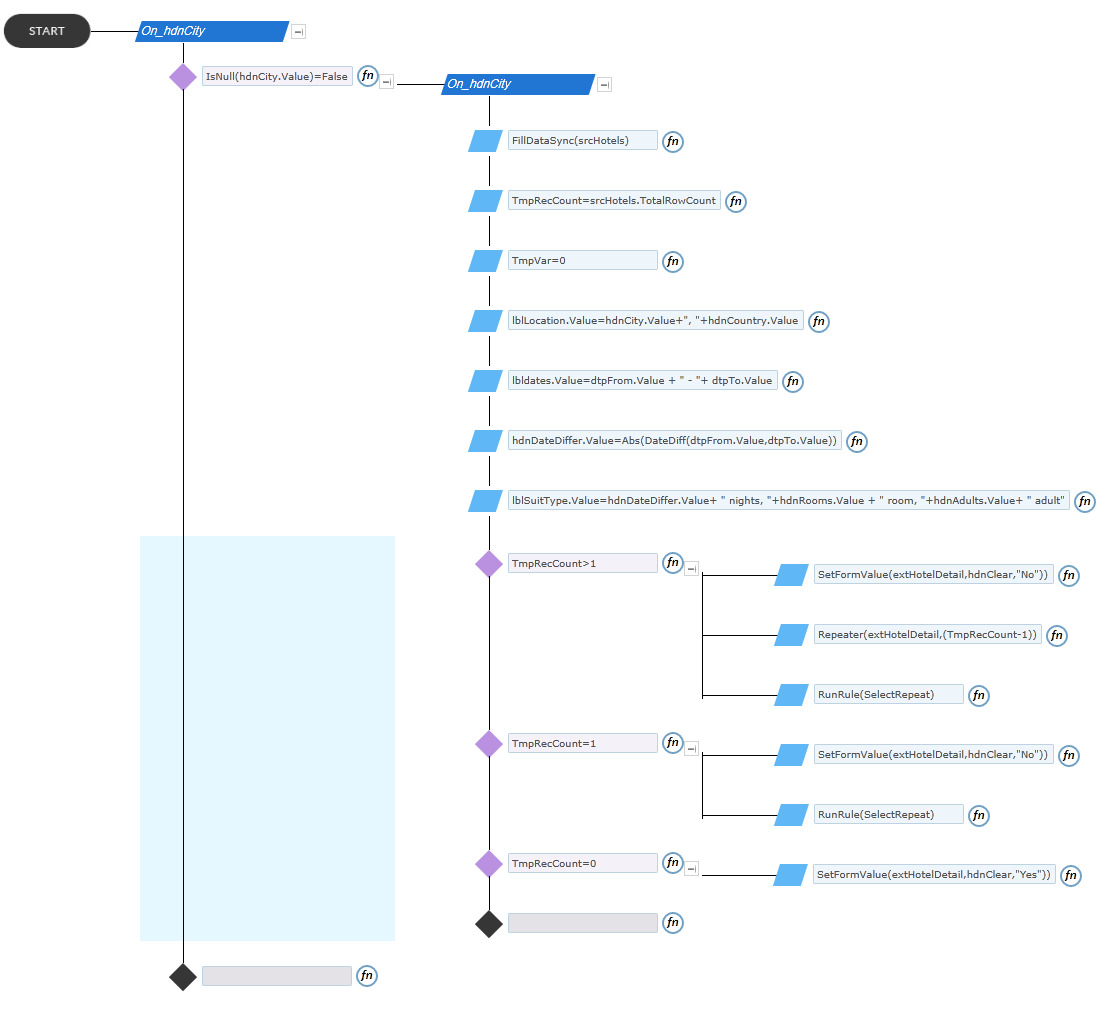
On_hdnCity |
hdnCity |
Loads repeating forms based on search criteria |
|
3 |
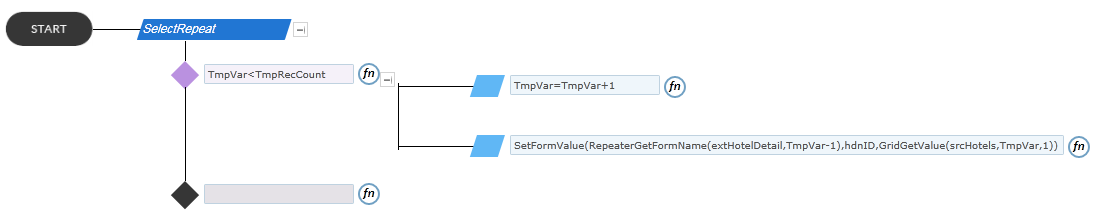
SelectRepeat |
hdnRepeatLoop |
Trigger set to ‘HotelDetail’ form on the basis of Hotel_ID |
|
4 |
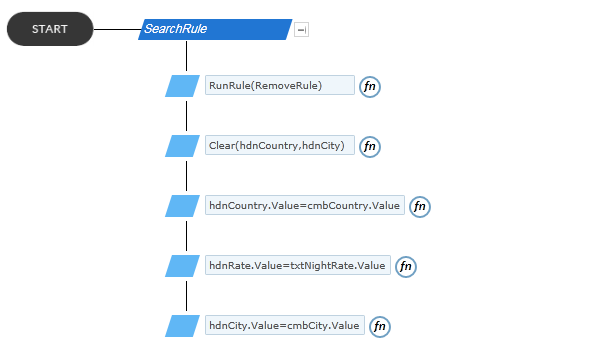
SearchRule |
btnApply |
Hotel searching based on City and Country |
|
5 |
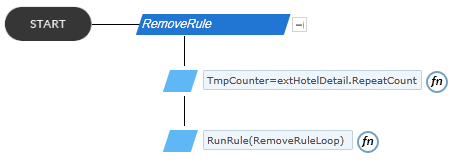
RemoveRule |
|
It will remove old repeated forms on the basis of new search criteria |
|
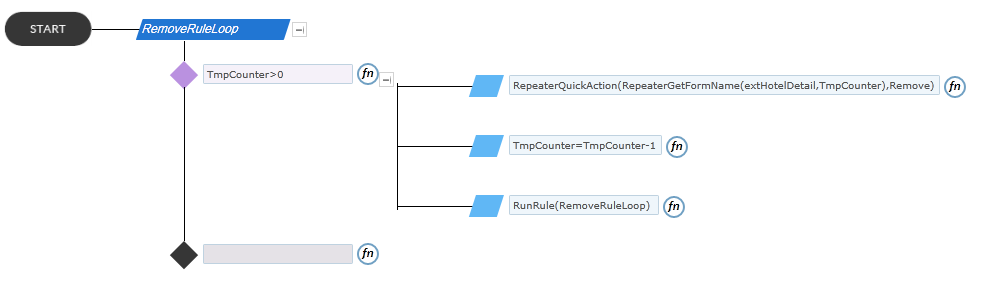
6 |
RemoveRuleLoop |
|
Part of Rule No 5 |
|
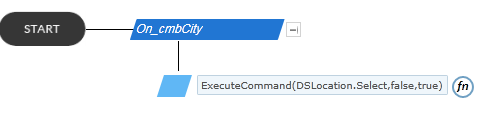
7 |
On_cmbCity |
CmbCity |
Country value select on the basis of City combo box |
|
8 |
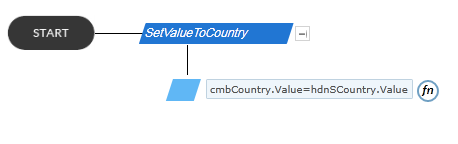
SetValueToCountry |
hdnSCountry |
Part of Rule No 7 |
|
9 |
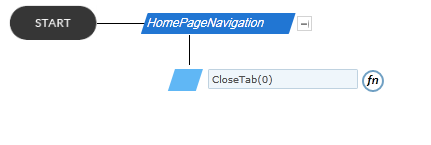
HomePageNavigation |
btnHome |
Navigate to Home page |
Rule 1: FormLoad

Rule 2: On_hdnCity
Rule 3: SelectRepeat
Rule 4: SearchRule
Rule 5: RemoveRule
Rule 6: RemoveRuleLoop
Rule 7: On_cmbCity
Rule 8: SetValueToCountry
Rule 9: HomePageNavigation
- “HotelDetail” form contains following rules
|
Rule No |
Rule Name |
Trigger |
Functionality |
|
1 |
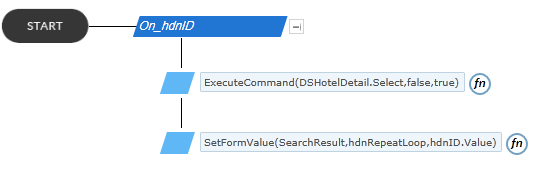
On_hdnID |
hdnID |
Data populated on the basis of hdnID |
|
2 |
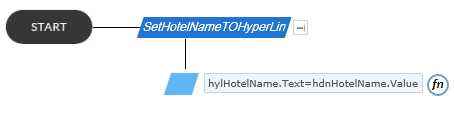
SetHotelNameTOHyperLink |
hdnHotelName |
Setting hotel name to Hyperlink control |
|
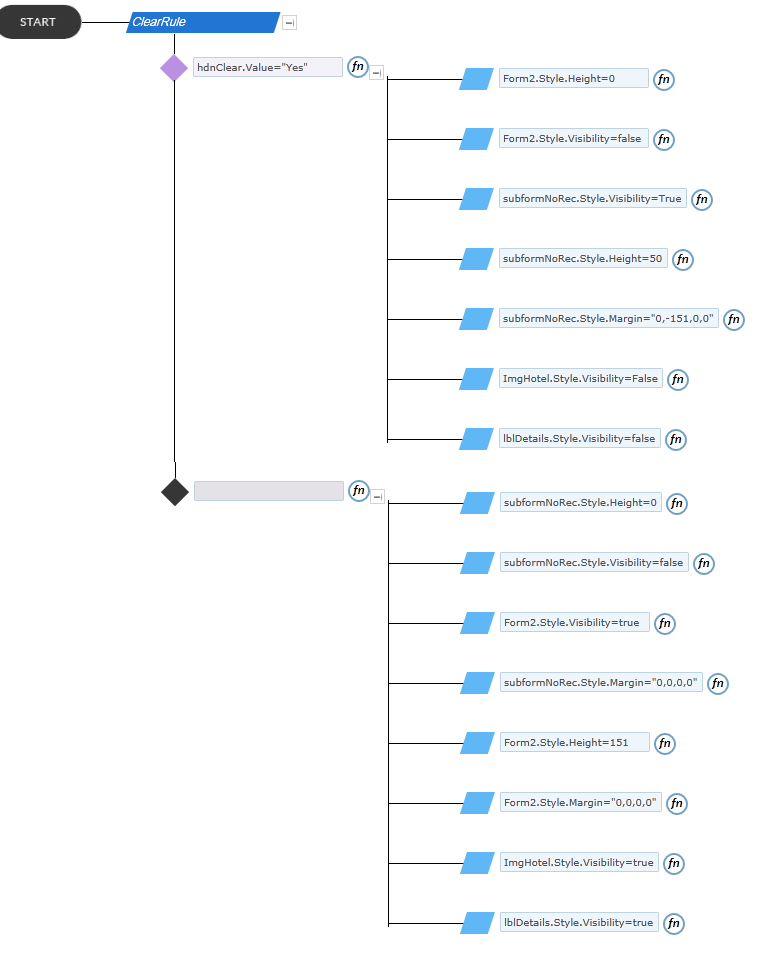
3 |
ClearRule |
hdnClear |
Clearing values on the basis of search result |
Rule 1: On_hdnID
Rule 2: SetHotelNameTOHyperLink
Rule 3: ClearRule
How to use this template
Uploading List Template
Following lists are used for creating the template form.
- HotelDetail
- HotelLocation
Please do the following steps for uploading list templates
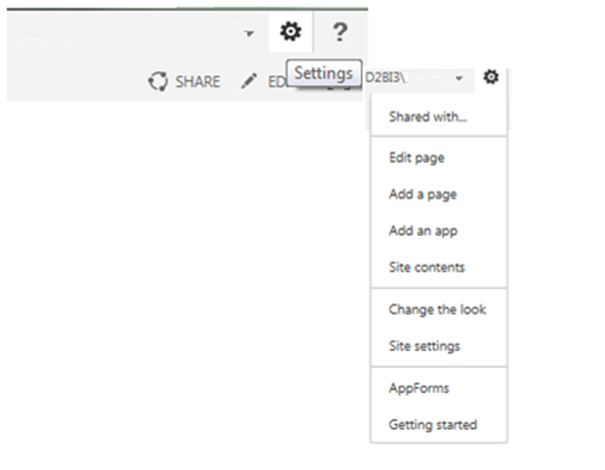
- Click on settings at the right corner of the window
- Click on ‘Site settings’ from the drop down menu, we can see the following window appearing.
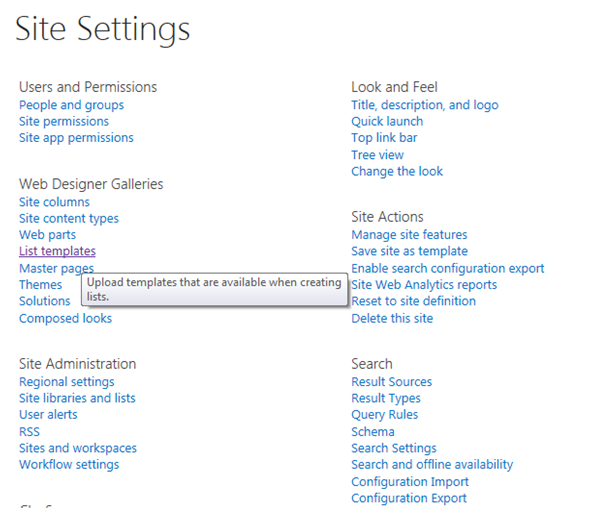
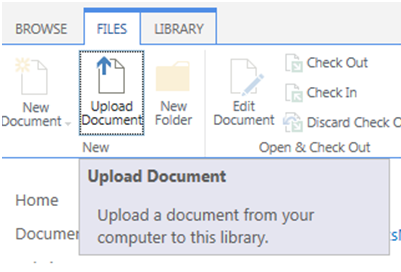
- Click on ‘List template’ option as shown in the above image. And we can see ‘List Template Gallery’. Click on ‘Files’ at the left most corner as shown in the following image.

- Click on ‘Upload Document’
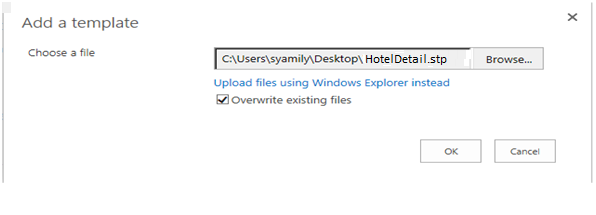
- Following Pop up will appear where we can browse a list template stored in our computer and click ‘OK’ button
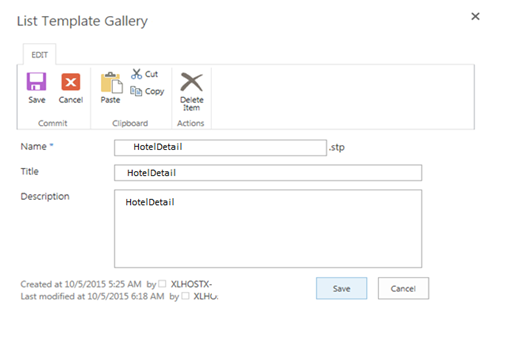
- Following pop up will appear where we can change the name of the List Template and enter the Description as required and click on ‘Save button’.
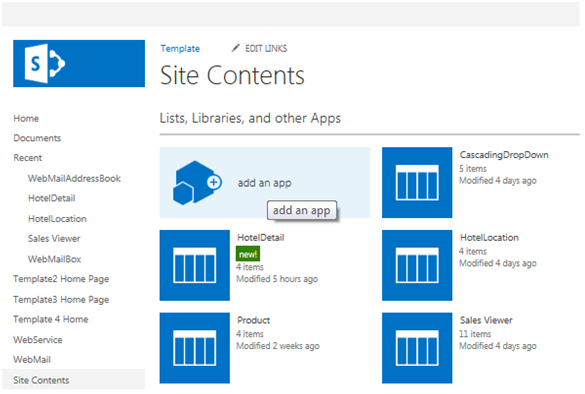
- Now go to the required sub site, click ‘Settings’ on the right corner. Then click on ‘Site Contents’. Following Screen appears in which click on ‘add an app’.
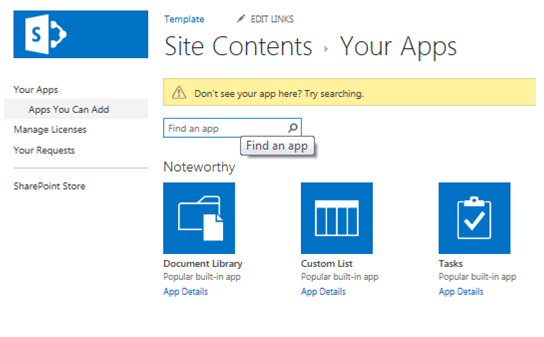
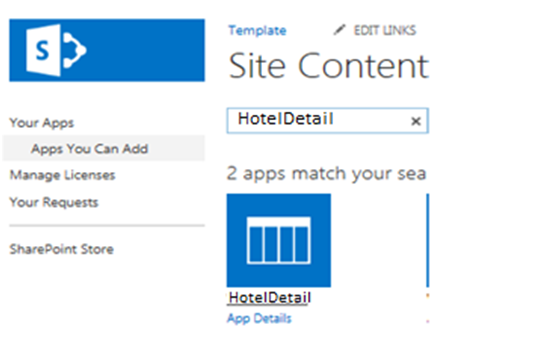
- Following screen will appear where we can type the uploaded template name and click search.
- Then you can see the Uploaded template, Click on it.
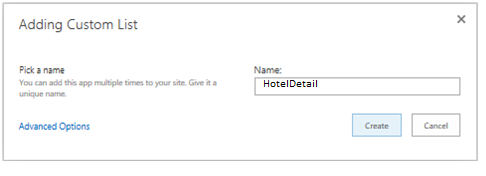
- On clicking it, we will get following Pop up. Enter the name for the List template and click ‘Create’ button
Uploading Tenant
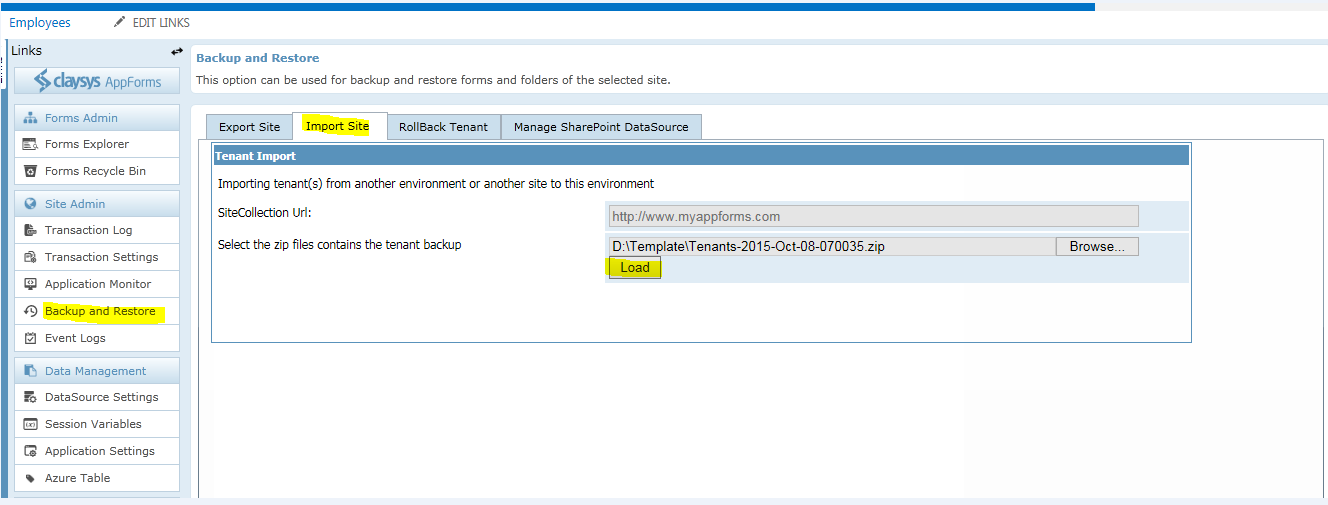
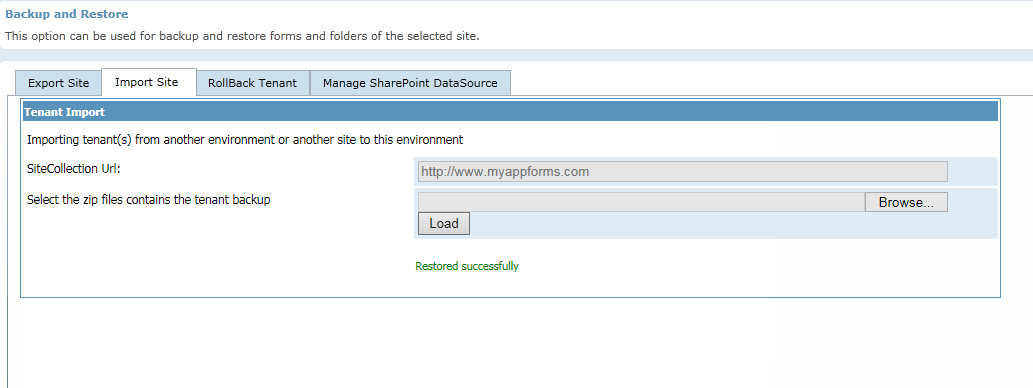
- Click on the ‘Backup and Restore’ on the left side of the App form Designer window.Then click on ‘Import Site’ -> Browse the Tenant and click Load.
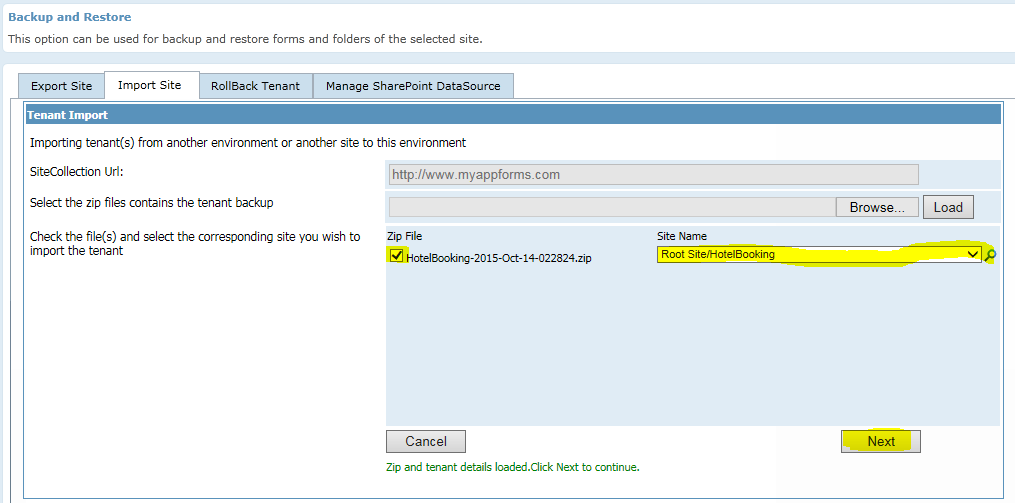
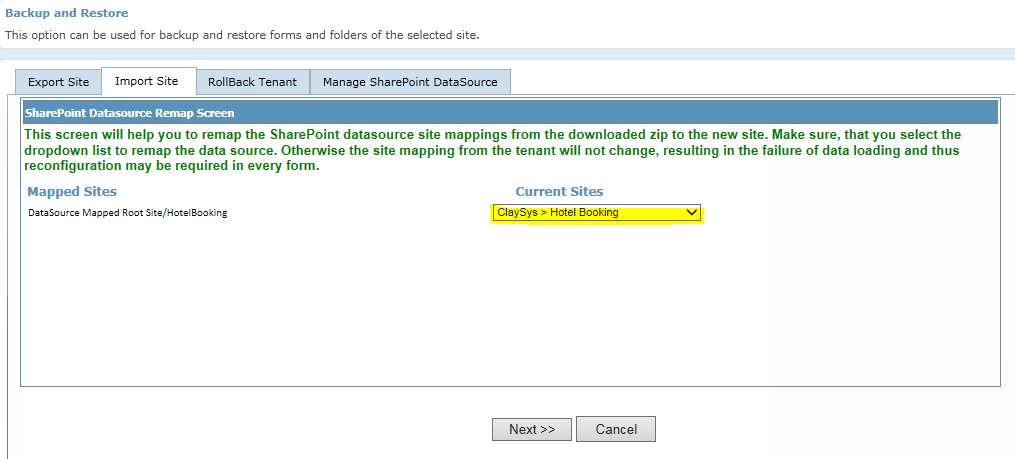
- Select the ‘Zip File’ and ‘Site Name’ and click ‘Next’
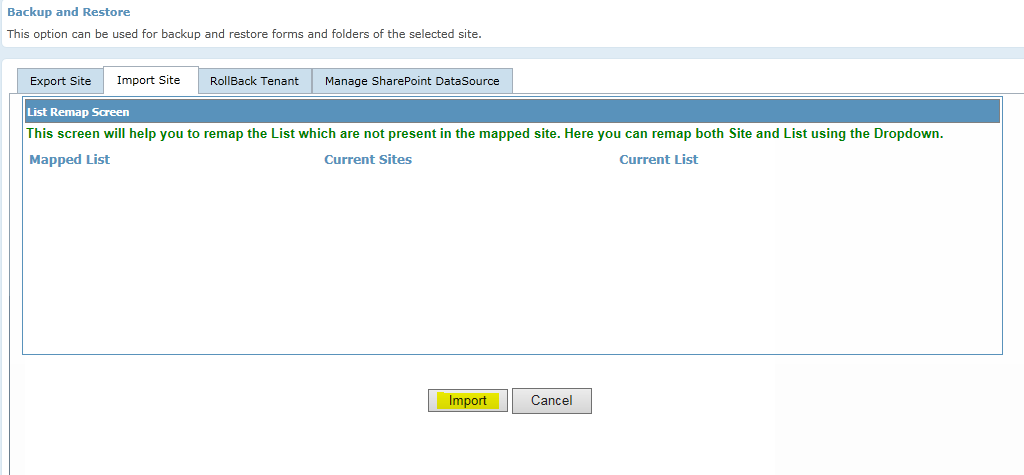
- Click ‘Next’ button
- Click on ’Import’ button
- Backup re stored successfully
Create a Web Part Page
Forms can be embedded on any SharePoint page by using the ClaySys AppForms Web Part, to create a web part page, follow these steps:-
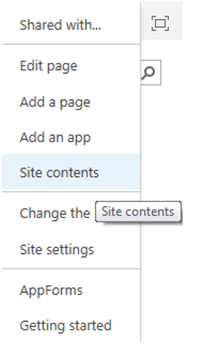
- Click on Site Settings Wheel in the upper right corner of your site and then select “Site Contents Page”.
- Select “Site Pages” or simply pages library on Site Contents Page.
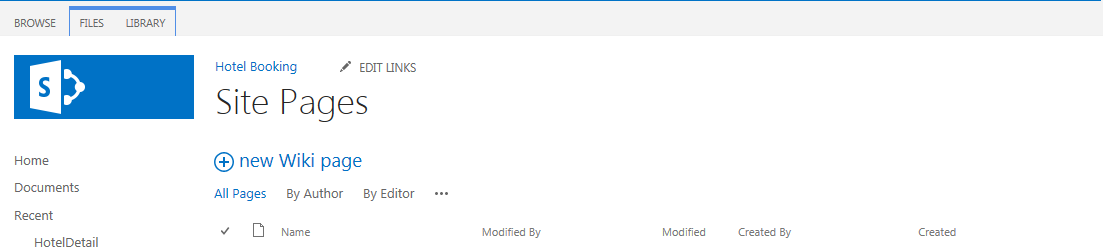
- Click on “New Wiki Page” to add new site page.
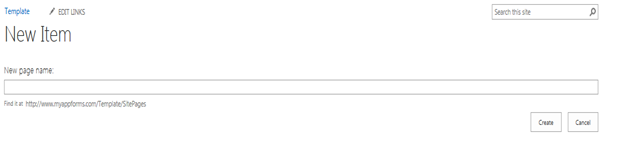
- Give the New page name into the pop-up window and click ‘Create’ to add new page
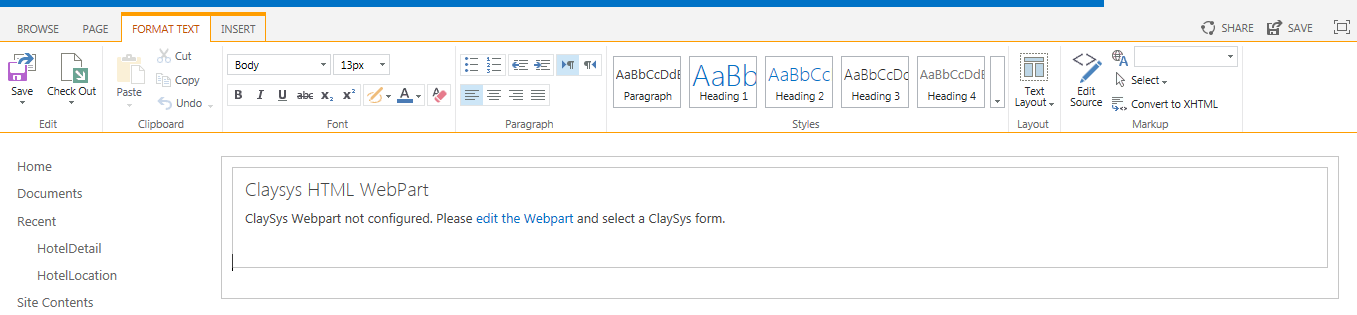
- To add a new web part, click on the ‘Insert’ tab and then click on the ‘Web Part’ button. Then select ClaySys -> ClaySys HTML Web Part.
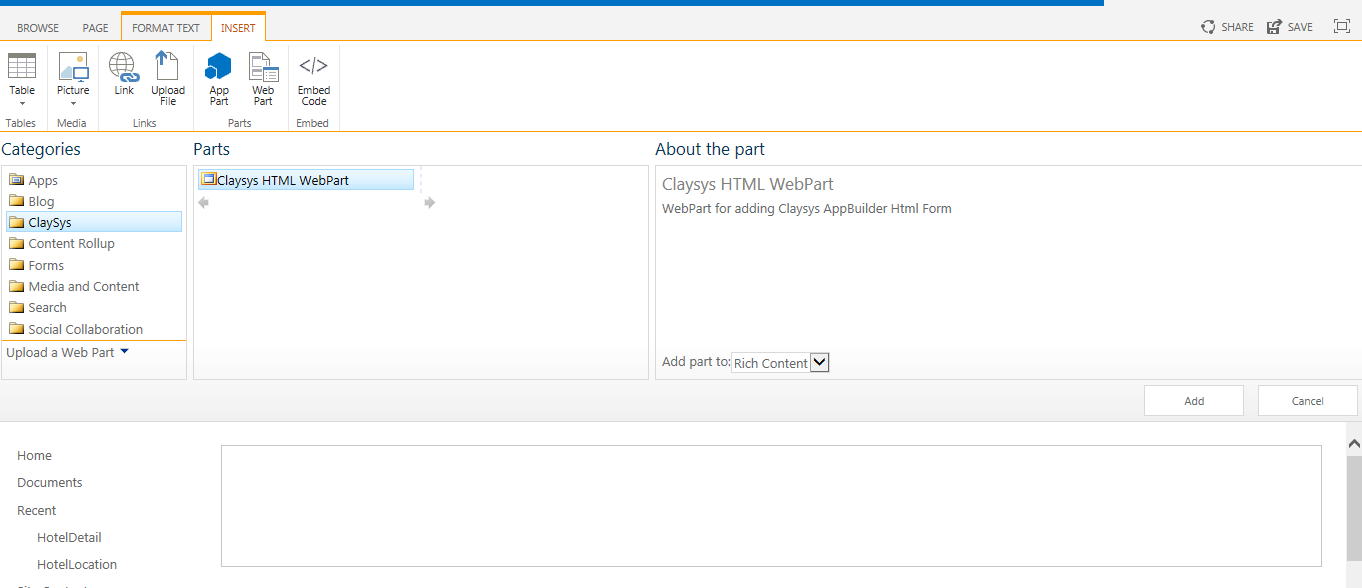
- Click ‘Add’ button to add the WebPart.
- Click on the ‘edit the WebPart’ link to edit the page.
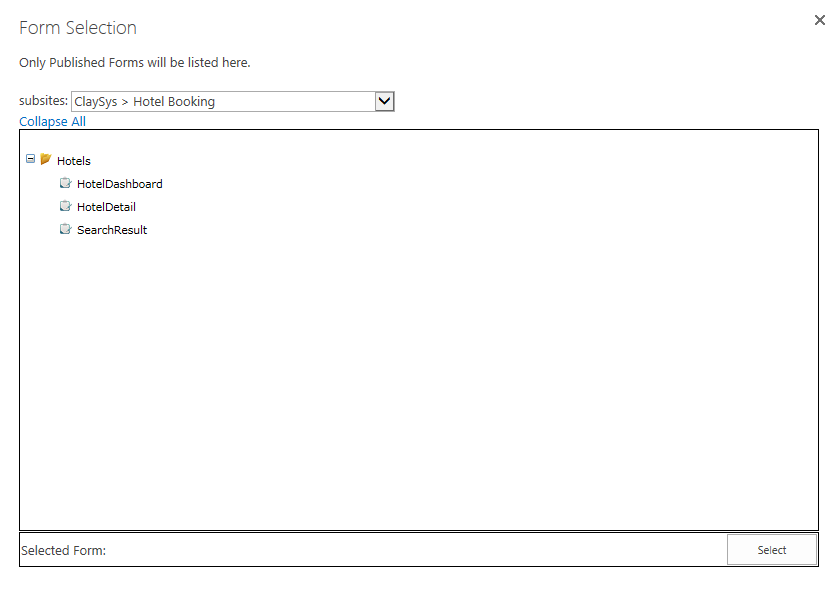
- A new pop-up window appears and here we can configure the ClaySys AppForms by clicking on the ‘Configure’ button

- Pop-up appears with listed published forms. We can select the appropriate form by clicking on the form and add the form by clicking on the ‘Select’ button.
- Once the configuration is finished, click on the ‘Apply’ button to see the changes. Click ‘OK’ to continue.
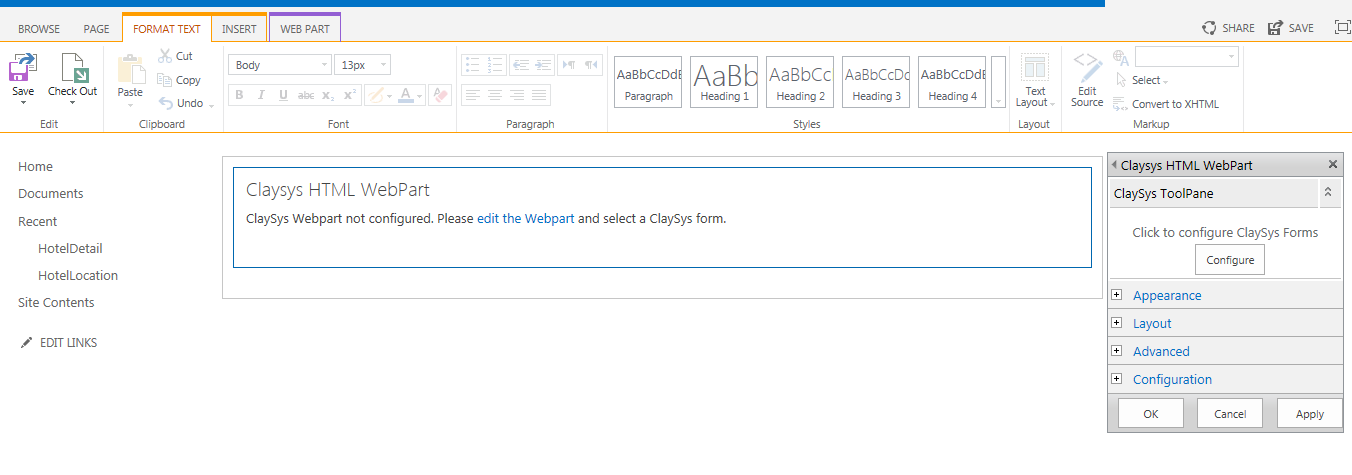
- Click ‘Save’ button to save the changes.
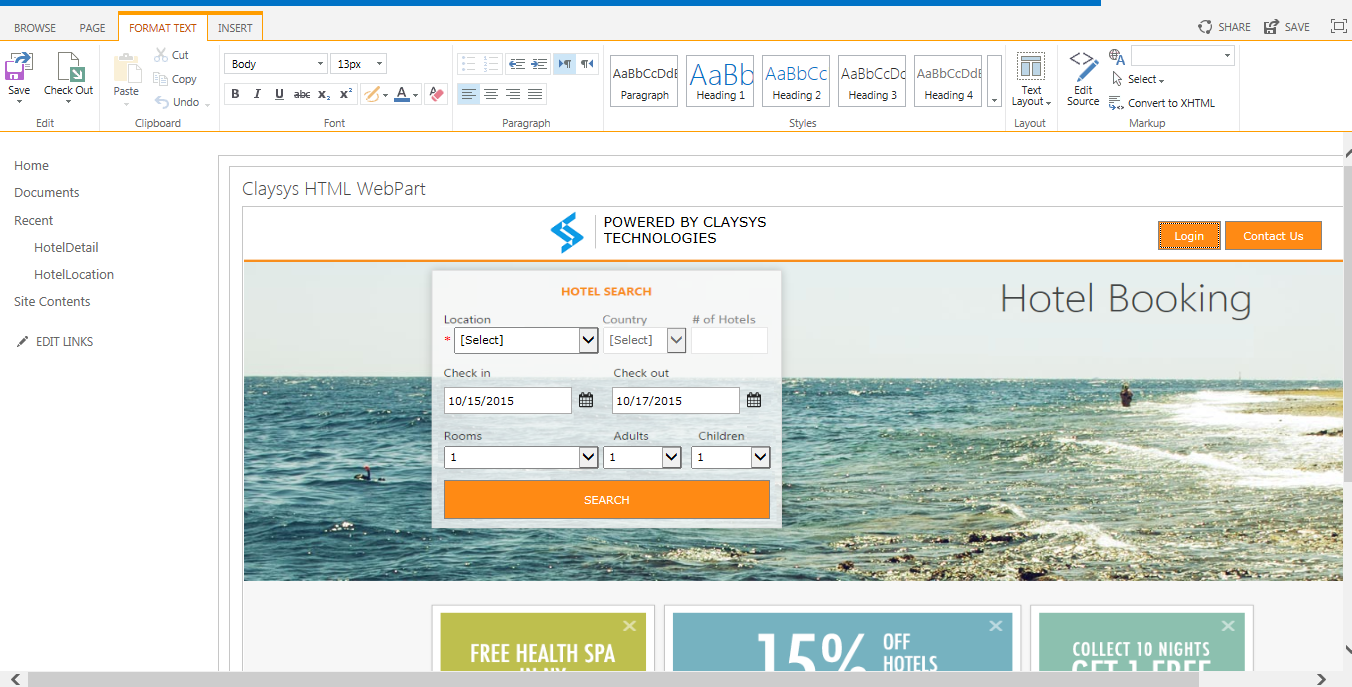
- Below figure shows the form after WebPart configuration.
Blogs by Category
AppForms Artificial Intelligence Blockchain Call Centers Chatbots Cloud Computing Data Management Design Digital Marketing Digital Transformation Enterprise Applications FinTech Insights LowCode Development Microsoft Mobile Apps News Office 365 Robotic Process Automation Security SharePoint Software Development Web ApplicationTop Use Cases of AI Agents Transforming Business in 2026
2026-06-29 15:16:38