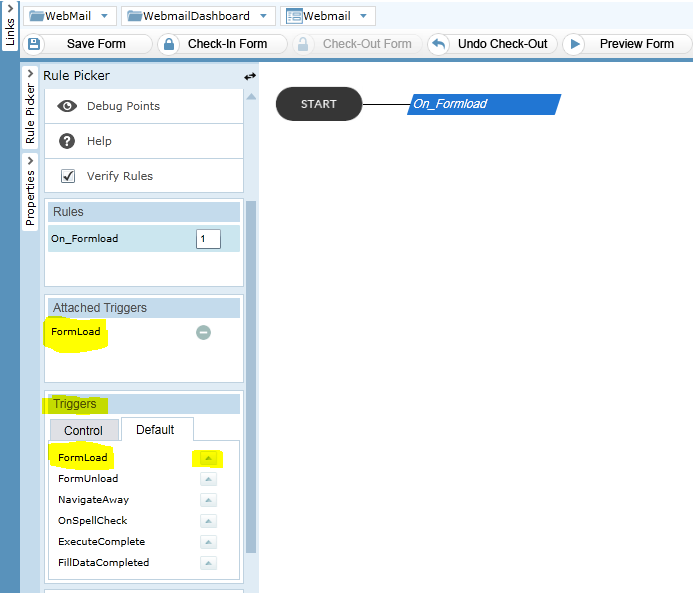
Overview
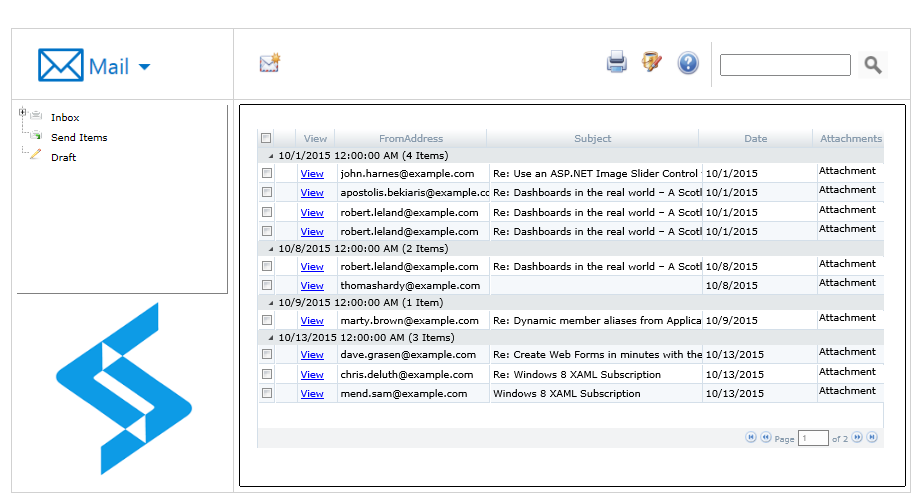
Webmail are web-based email accounts. These are usually free email accounts that are operated from a website. Webmail allows the users to access their emails as long as they have access to an Internet connection and a web browser. The purpose of this document is to be a reference for any person wishing to implement the Webmail Template using the ClaySys AppForms or any person interested in how to configure the AppForms to create a Webmail Template. Here is an image what the Webmail template dashboard we are going to be designing looks like.
Prerequisite(s)
- SharePoint 2010
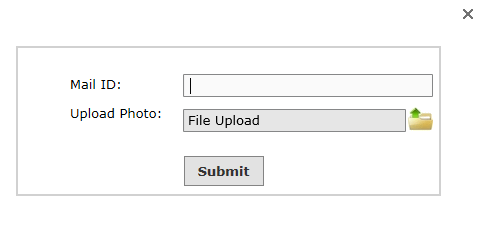
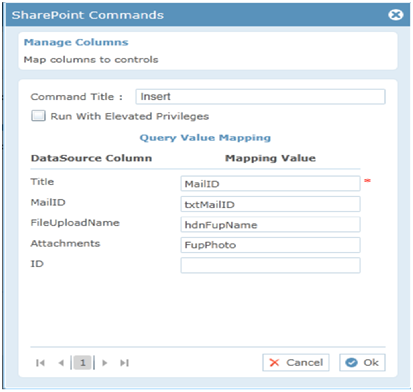
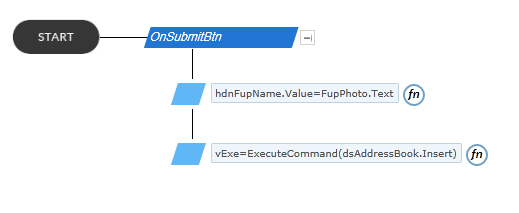
AddNew
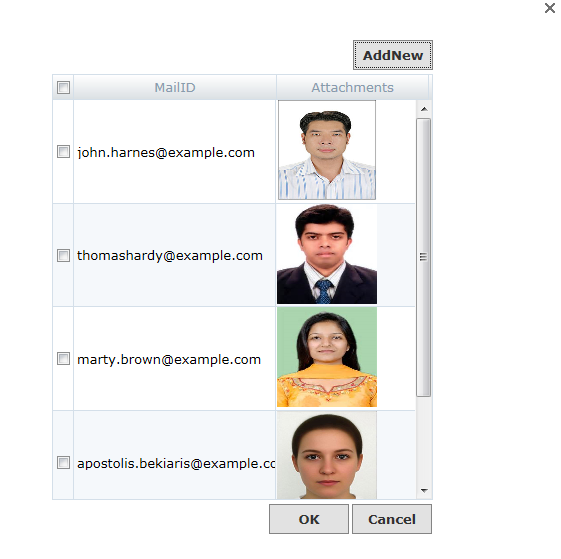
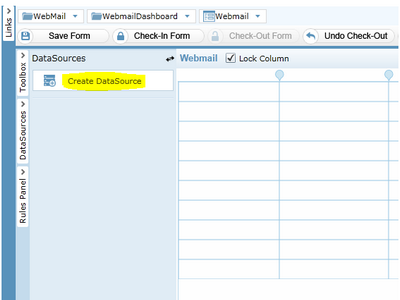
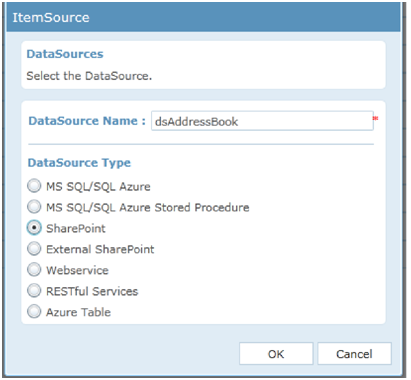
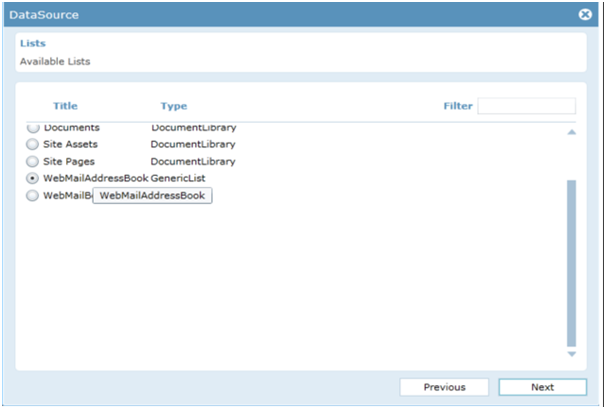
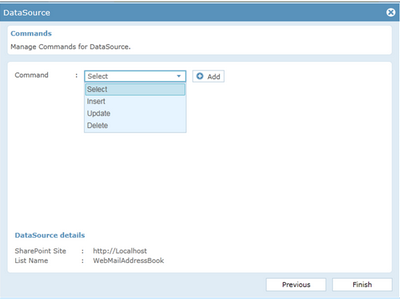
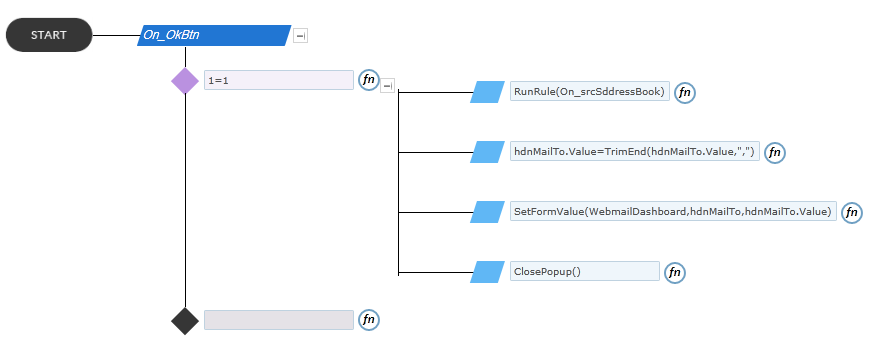
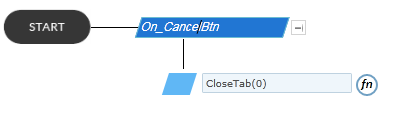
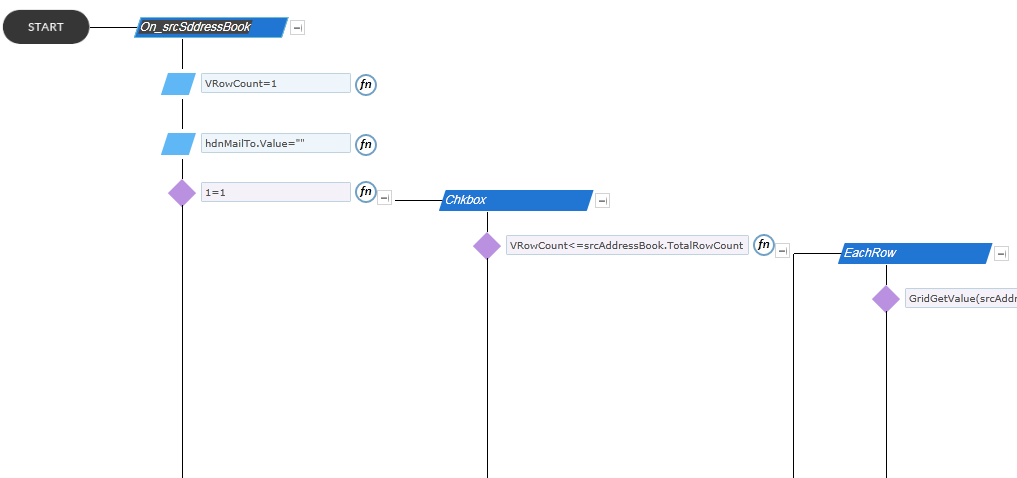
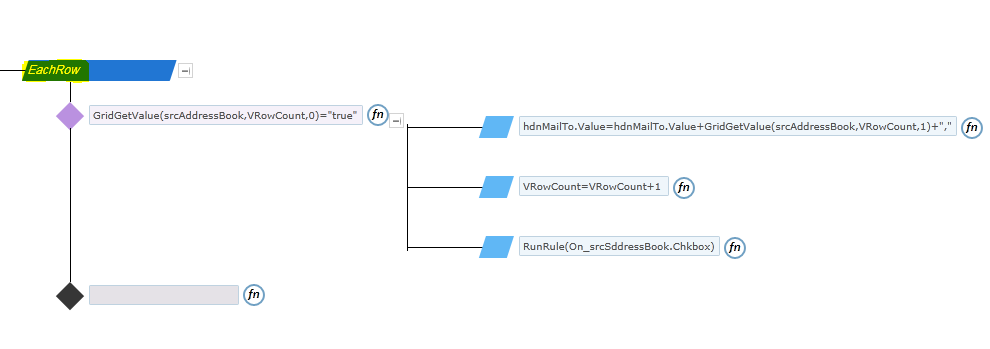
Address Book
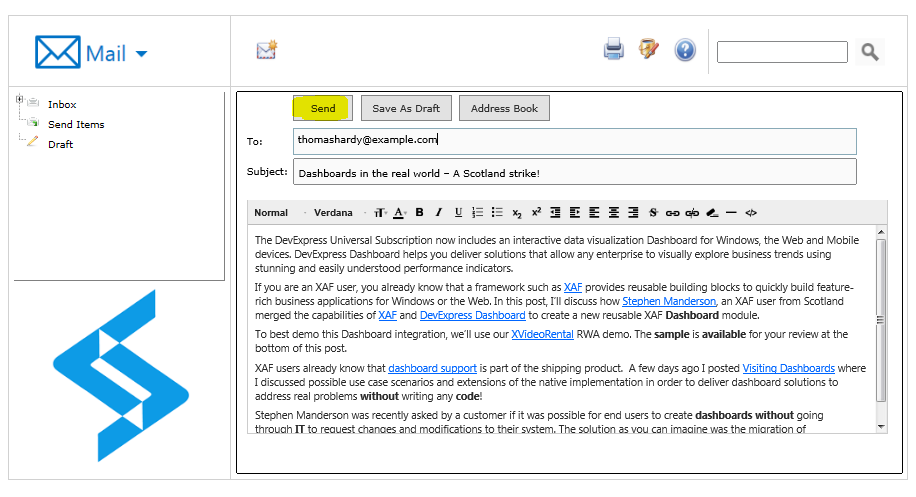
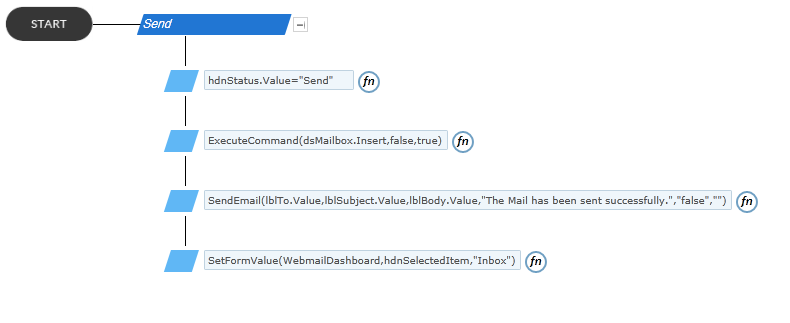
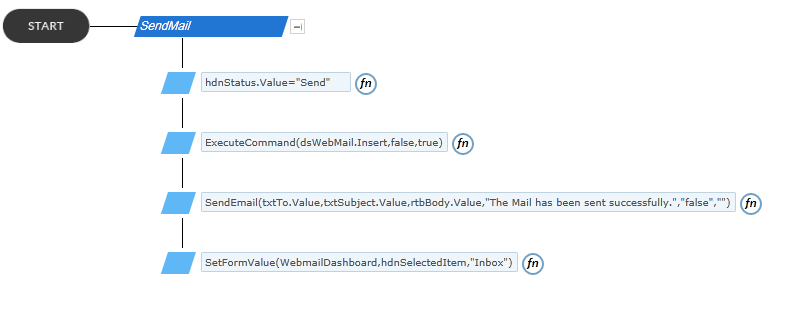
Send Button
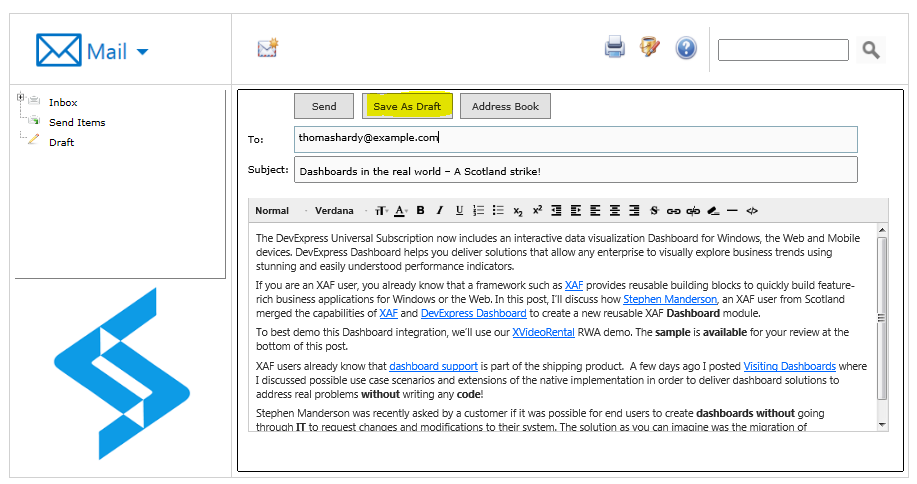
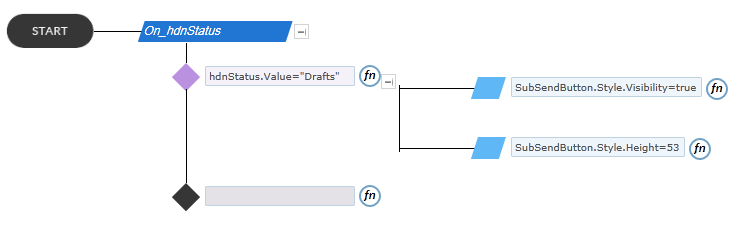
SaveAsDraft
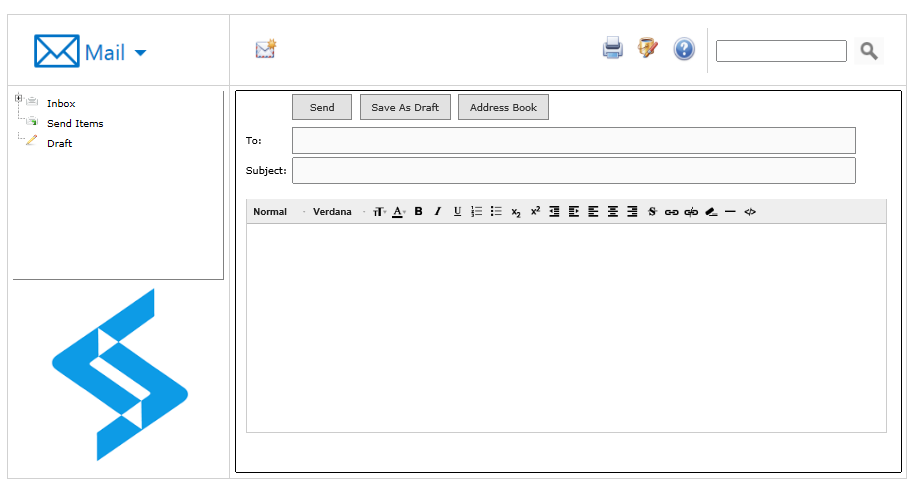
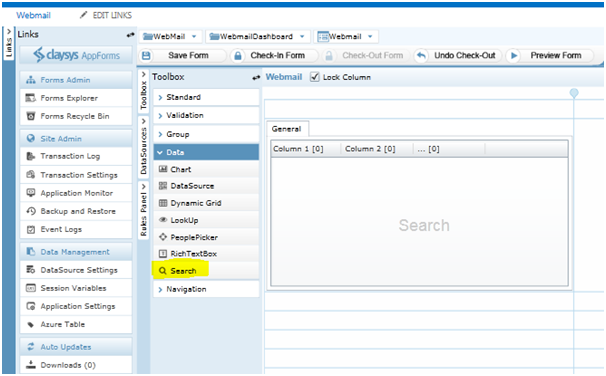
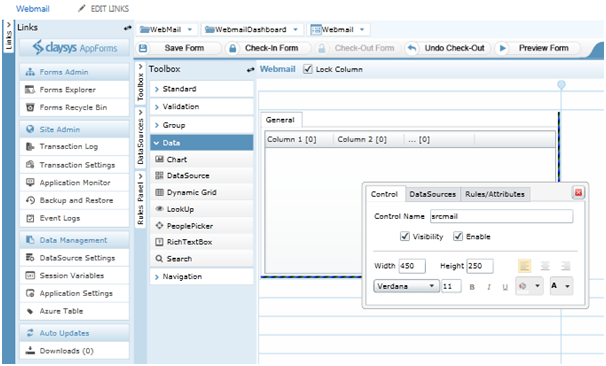
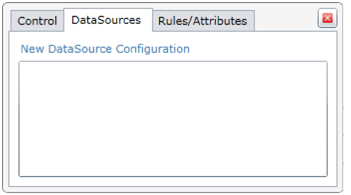
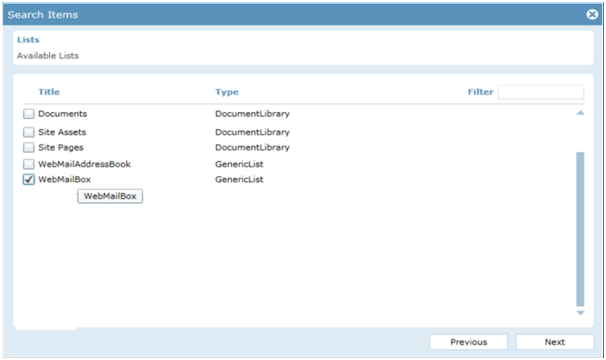
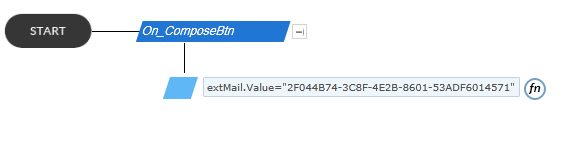
Compose Mail
Data Structure
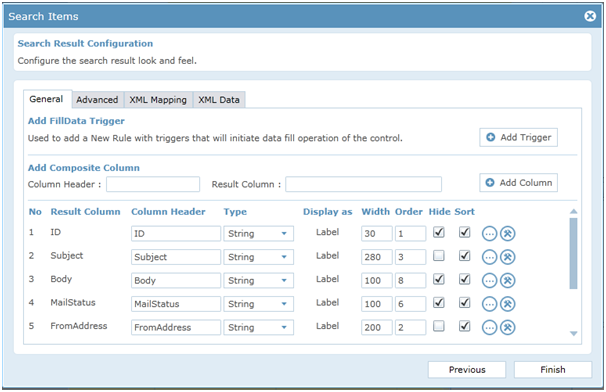
SharePoint lists consist of rows and columns that store data in a similar fashion to a traditional relational database management system such as SQL Server. However, a benefit of lists is that SharePoint includes Web Parts that provide simple methods for managing the data. If the data was stored in a database, it would require custom user interface components to access it and manipulate it. Also, specialized skills are required to design, implement, and maintain a custom database. Another advantage of using lists is that custom workflow and event handlers can easily be registered to them. By default the following columns are available in sharepoint list, ID, Title, Modified, Created, Modified By, Created By, Attachments. Apart from these default list columns , user can add more columns depending on the requirement.