The TreeView Control in ClaySys AppForms

ClaySys AppForms V 2.5
The Treeview control will allow the end users to create a menu of navigation to different forms. This new control can also invoke rules in the same form. This post is to explain the functionalities of the Treeview control.
Tree View Configuration
1. Drag the Tree View control under the Navigation option in Toolbox into the form.
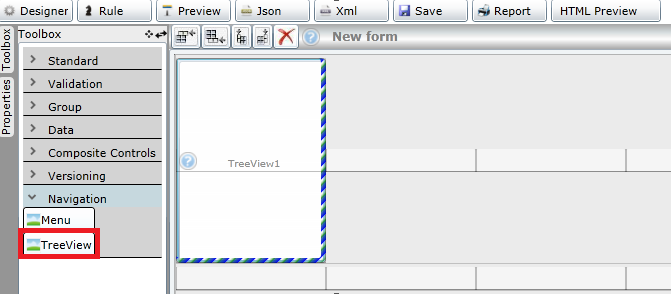
2. Click on the Tree View control in the form and then click Properties.
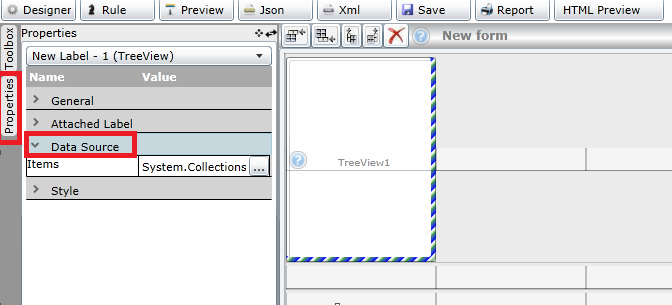
3. Choose Data Source for Tree View item/s by clicking the icon ![]() under Data Source.
under Data Source.
Tree View Static Data Source Configuration
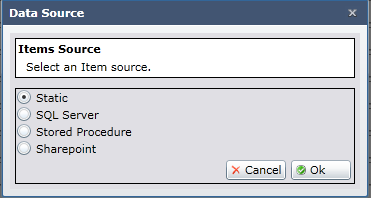
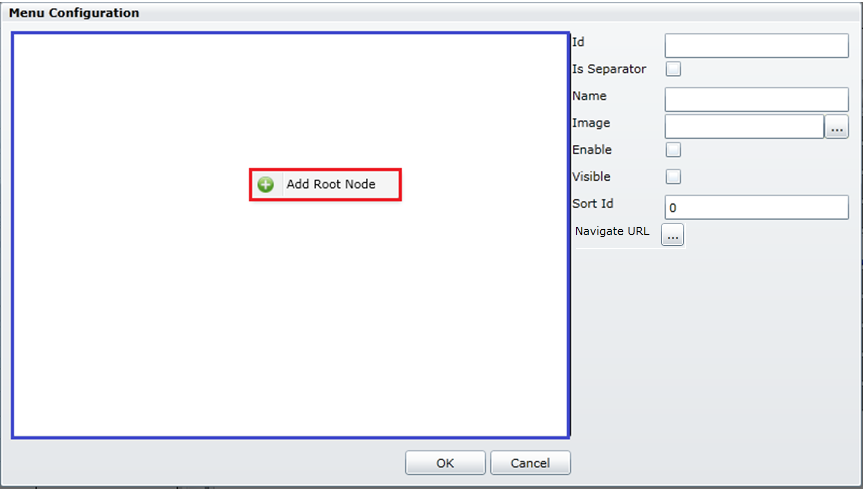
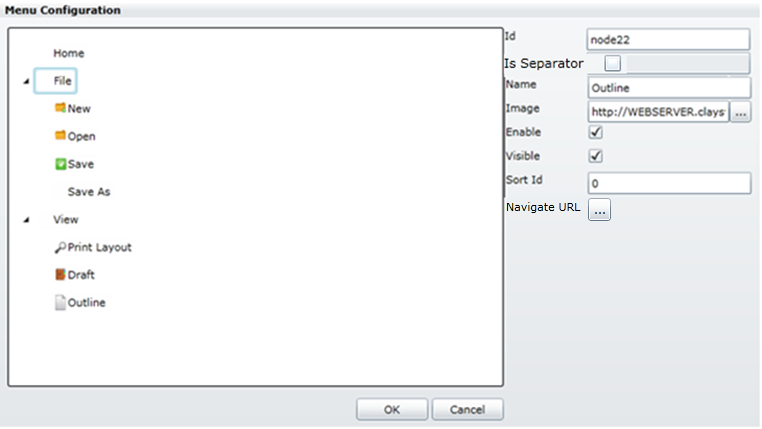
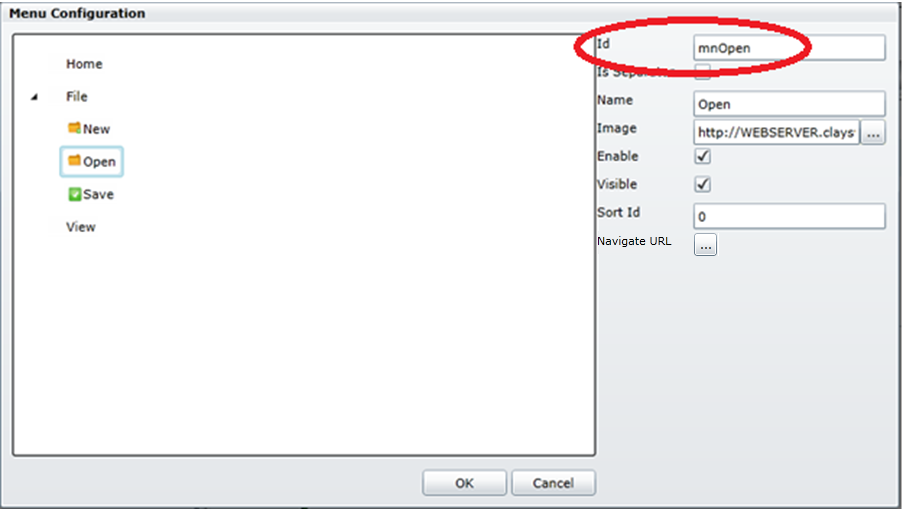
1. Select Static and Click on OK button in Data Source window and the Tree View Configuration form opens. The Tree View Configuration form has the following fields.
- Tree View Builder: The left pane in the window (marked Blue in the image) where nodes can be added.
- Id: A unique Id for the Nodes added in the Tree View Area is assigned automatically.
- Name: A meaningful string for the node created.
- Is Separator: Not required for Tree View.
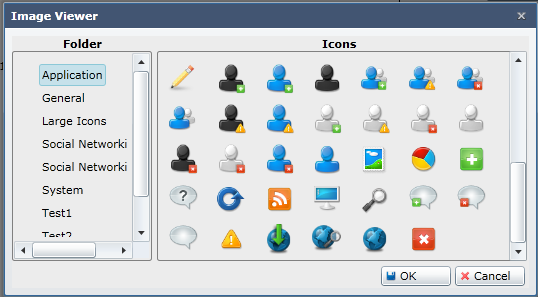
- Image: An image can be added for the node added by clicking on the
 icon though the Image Viewer window that pops up.
- Enable: The node added can be either enabled /disabled by choosing the checkbox.
- Visible: A node added can be made visible /invisible by choosing the checkbox.
- Sort Id: When there is more than one node available a positive number can be entered for the nodes according to which they will be ordered in the Tree View.
- Navigation URL: To provide navigation to a form from a Tree View item choose Navigation URL by clicking
 .
.
o A NavigateURLChildWindow opens from which a form (destination form on clicking the tree view item) can be chosen.
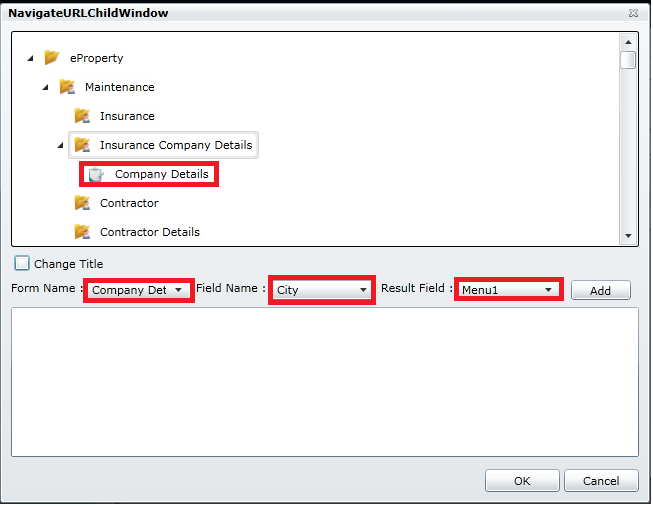
o Cancel: Click on Cancel button to cancel all the actions performed.
- OK: Click on OK button to apply the changes made in the Tree View Configuration form.
- Cancel: Click on Cancel button to cancel the changes made in the Tree View Configuration form.
2. To add a tree view item right click on the tree view area and select Add Root Node.
3. To add child node/s to the added Root node, right click on the Root node and choose Add Node.
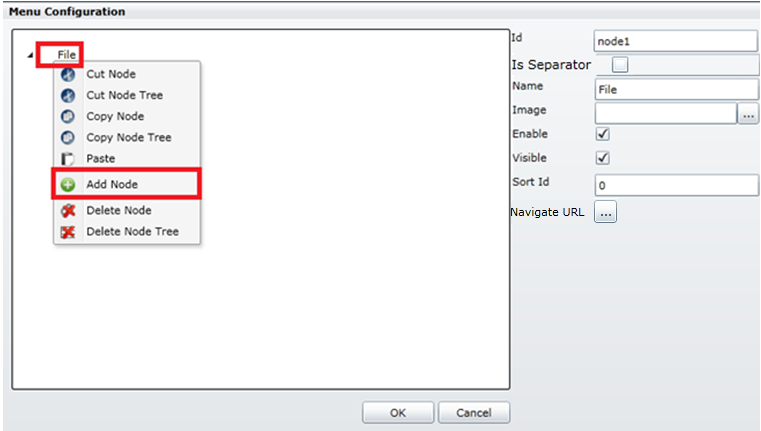
The context menu of a node has the following options: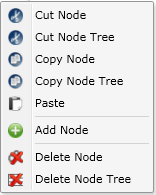
- Cut Node: A node can be cut by choosing this option.
- Cut Node Tree: When there is a node with child nodes right click on the parent node of the child nodes and select cut Node tree to cut the entire tree including parent and child nodes.
- Copy Node: An individual node can be copied by choosing this option.
- Copy Node Tree: To copy an entire tree consisting of parent and child nodes click on the parent node and choose copy tree.
- Paste: Cut/Copied node/node trees can be pasted on the Tree View Builder using this option.
- Delete Node: An individual node can be deleted by choosing this option.
- Delete Node Tree: A tree consisting of parent and child nodes can be deleted using this option.
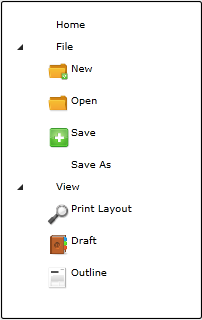
In the images below, three root nodes are created namely Home, File and View. The File node has four child nodes –New, Open, Save, Save As with images assigned to three of them. The Save As node has its Visible checkbox disabled as a result of which it is not seen in the Preview. The New node has its Enable check box unchecked and thus shown as disabled in Preview.
Tree View SQL Data Source Configuration
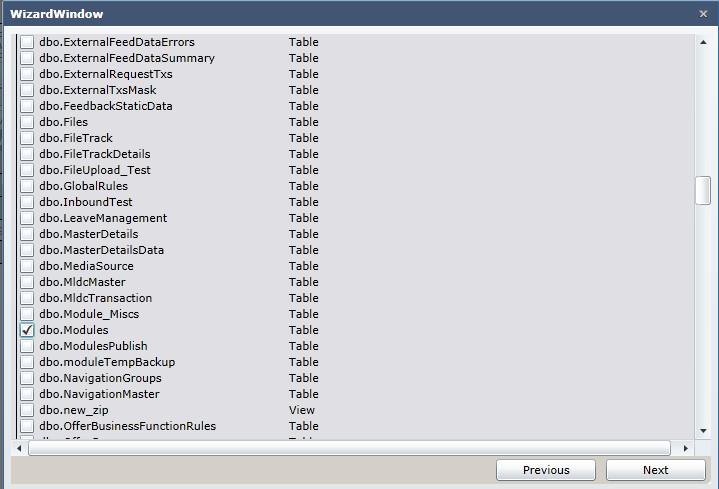
1. Select the required data source from the data source screen.

2. Select the table from where the data needs to be filled.
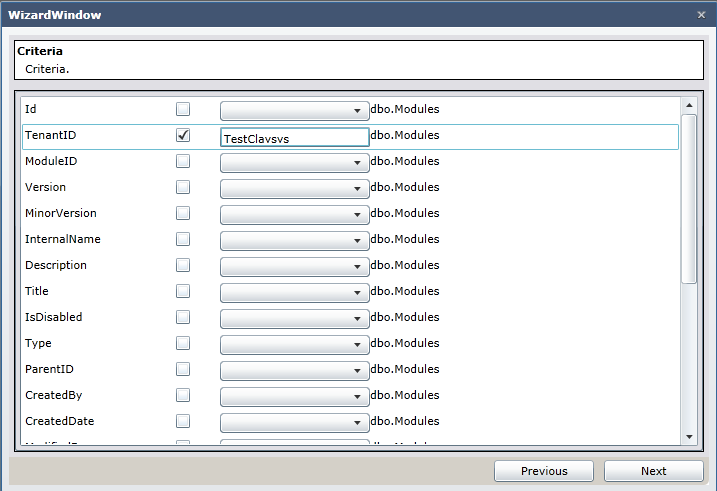
3. Select criteria if any.
4. Map the Id, Key, Text and Parent ID
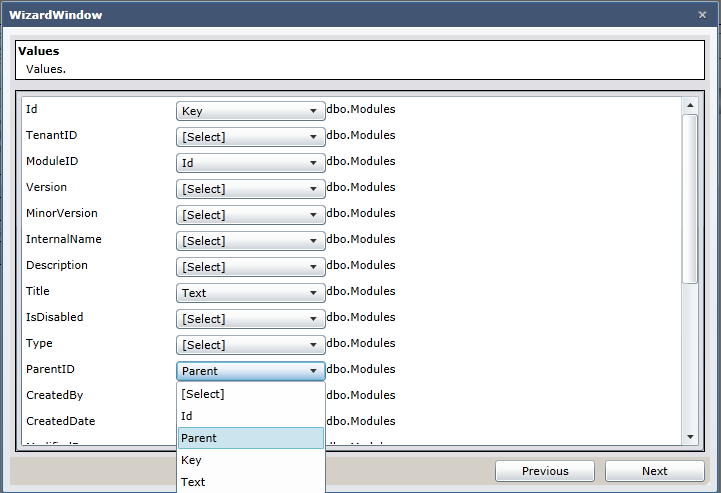
a. Id should be mapped to the unique Id columns for the data which is related to the parent id column for its child control.
b. Key should be mapped to the column which is the value member for the tree view item. If this is not mapped then the Id is taken as the value member.
c. Text should be mapped to the column which is the display member for the tree view item.
d. Parent id should be mapped to the column having its parent id.
e. Now continue with the wizard and click Finish.
5. Now continue with the wizard and click Finish.
6. Once data is configured the tree view control will be populated with SQL data once we call FillData(TreeViewControlID) from rules.
Tree View SP Data Source Configuration
1. The SP configuration for tree view control is same as that of other group controls like ComboBox, CheckBox Group etc. Except for the column mapping screen shown below:
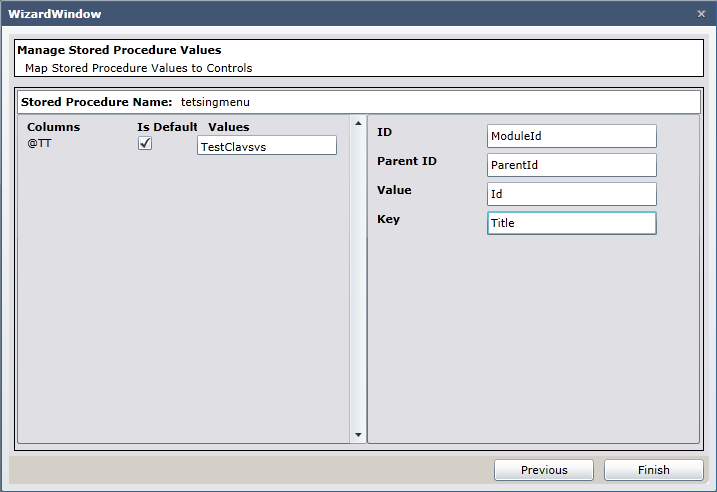
a. Id should be mapped to the unique Id columns for the result data which is related to the parent id column for its child control.
b. Key should be mapped to the column which is the value member for the tree view item. If this is not mapped then the Id is taken as the value member.
c. Text should be mapped to the column which is the display member for the tree view item.
d. Parent id should be mapped to the column having its parent id.
2. Once data is configured the tree view control will be populated with SP data once we call FillData(TreeViewControlID) from rules.
3. For SQL and SP the tree will be a simple tree without Image/Visible/Enable bindings compared to static data source.
HTML Preview: 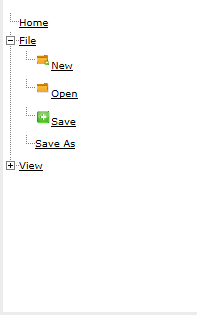
Tree View Event Handling
The Tree View click event can be handled using rules. If you want some actions to be performed on clicking a Tree View item the below steps would help you do so.
Create a rule with the Tree View control as the trigger.
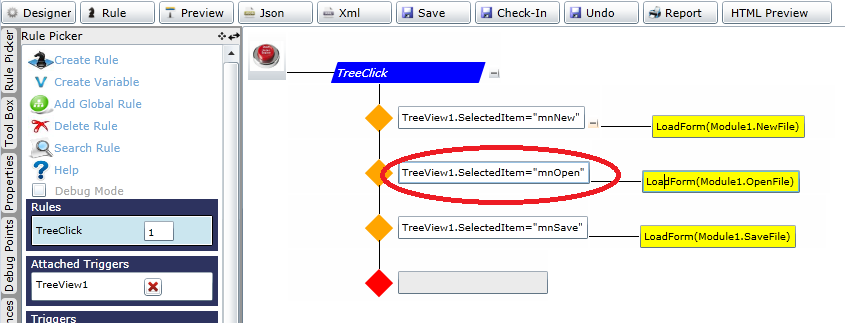
As you can see from screenshots we are comparing the Node ID in the decision to check for which node the user have clicked.
Blogs by Category
AppForms Artificial Intelligence Blockchain Call Centers Chatbots Cloud Computing Data Management Design Digital Marketing Digital Transformation Enterprise Applications FinTech Insights LowCode Development Microsoft Mobile Apps News Office 365 Robotic Process Automation Security SharePoint Software Development Web ApplicationTop Use Cases of AI Agents Transforming Business in 2026
2026-06-29 15:16:38