Clinical Management Portal Using AppForms

1.Introduction:
ClaySys AppForms Demo template document deals with, 1. Pre-Requisite 2. How to create a main form using different controls 3. How to create the home page to display patient details 4. How to rename a control 5. How to add a image to image control or image button 6. How to configure a search control 7.Adding a new patient Form 8. Query page 9.View comments page 10. To view daily schedule 11. How to use this template.
What are we going to create using this document?
Form1:

Form 2:
Form 3:
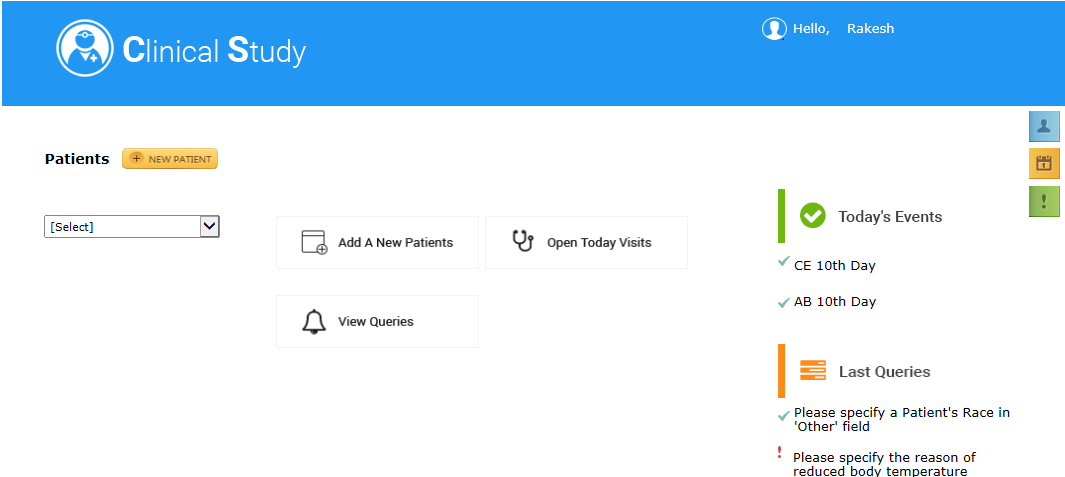
Form 4:
Form 5:
1 Pre-Requisite:

- Launch the AppForms URL.
- Create a New Folder by clicking on new Folder Tab.
- Inside the Folder create a new form by clicking on new Forms Tab.
- Browser Preferred – IE8,9,10,11.
2 How to create a main form using different controls
2.1 Controls used in the form are
- Image
- Image Button
- Sub Form
- Label
- Search Control
- Text box as hidden control (visibility is set as false).
3 How to create the home page to display patient details:
3.1 Steps to achieve the above UI
1.Select the first column and by using span option span it to n number of columns, eg: 5.
2.Drag Sub-Form from Group to the spanned column.
3.Inside the sub form add columns. In one of the columns add one image control.

4.Add one more Sub-form inside one of the columns of the first inserted Sub-form.
5.Add two columns to the second Sub-form.
6.Drag and drop one image control and label control to the added columns respectively.
7.Add another label control to the 1st Sub-form.
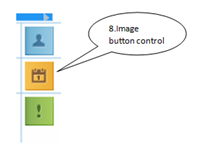
8.Drag and drop 3 Image button controls.
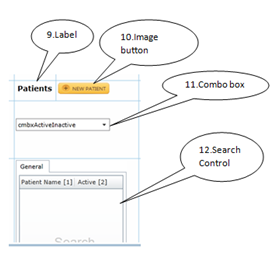
9.Drag and drop a label control and change the name as Patient.
10.Drag and drop an image button.
11.Drag and drop a combo box.
12.Drag and drop a search control.
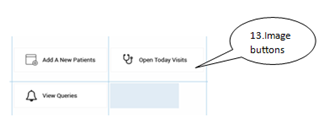
13.Image button controls are dragged and dropped.
14.Drag and drop the sub-form.
15./ 16. Drag and drop the image control.
17.Drag and drop the label control.
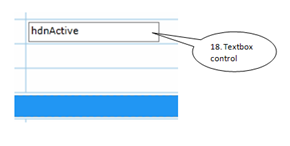
18.Drag and drop the textbox control.
4 How to rename a control:
4.1 Steps to Rename control.
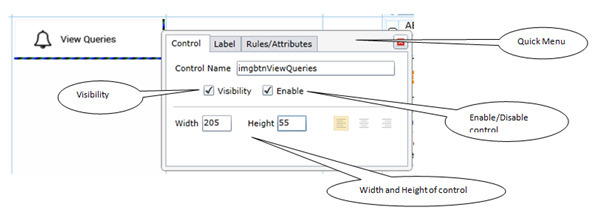
1.Click on the control.
2.A Quick menu will be displayed.
3.Edit the name of the control in the column name field.
4.We can make the control Visible/ Invisible by selecting the check box respectively .
5.The control can be enabled /disabled by selecting the check box respectively.
6.We can also set the Width and Height of the control.
5 How to add a image to image control or image button:
5.1 Steps to add a image to image control or image button.
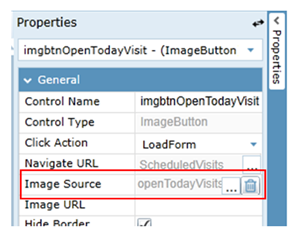
1.Select the image/image button control.
2.In the right side Properties drop down select Image source.
3.Browse and select the image from the stored location.
4.The image will be added to the image source and displayed in the image/image button control.
6 How to configure a search control:
6.1 Steps to configure a search control:
1.Create a list in share point with required field.
2.Click on the search control.
3.Quick menu will be opened.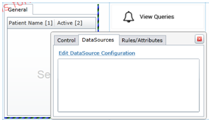
4.Select the Data Source tab.
5.Click on edit Data Sources Configuration hyperlink.
6.Select the Site by clicking the radio button from the pop-up and click on Next button.

7.Select the list created in the share point and click on next button.
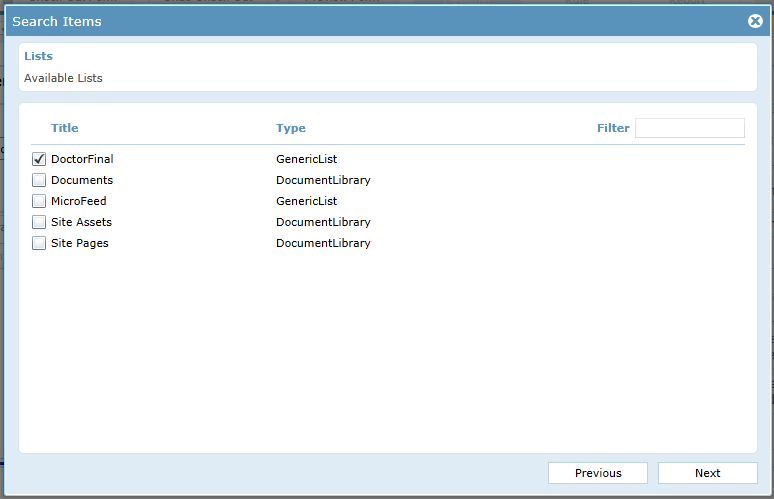
8.Select the columns in the list which should be displayed in the search control.
9.Select the criteria if necessary / click on next button.
10.Select the Relation , if you need to join 2 or more tables.
11.In search result configuration window, you will be allowed to edit the column header ,type and order to display the columns.
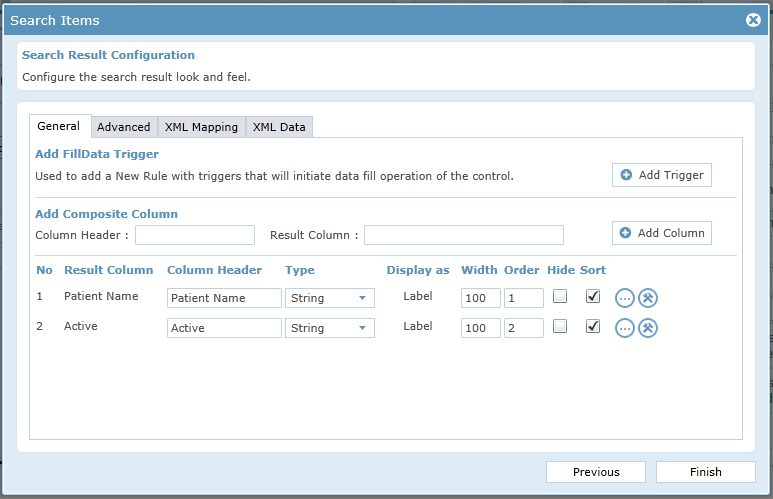
12.Click on finish button. The search control will be configured.
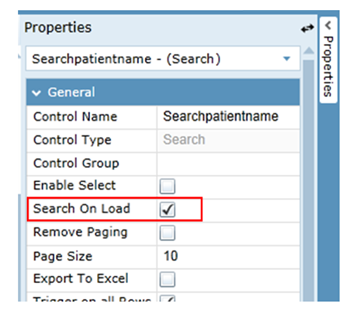
13.In general properties select the Search On load option and the search will be filled when the form is launched. Search can also be filled using various methods.
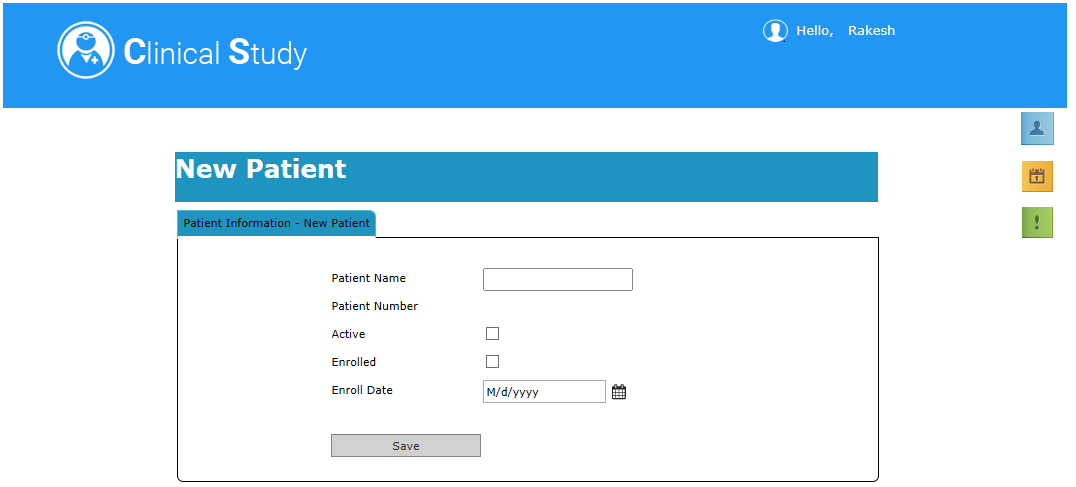
7.Adding a new patient Form:
7.1 Controls used in the form are
- Image
- Image Button
- Sub Form
- Label
- Tab Control
- Text box
- Check box
- Date Time Picker
- Button
7.2 Steps to create this form:
- Follow the same steps used in first form to create the header part.

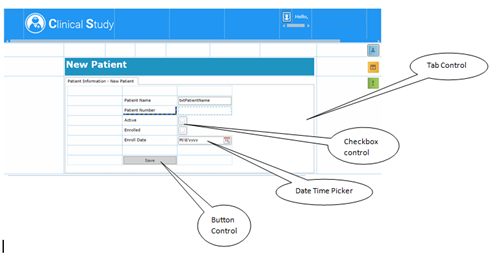
- Place a label control by spanning columns and change the name as New Patient.
- Change the header Name of the Tab control to Patient Information – New Patient.
- Properties –> Tab Collection –> Items –>
- Enter the name in Tab Item Name and click on OK button.
- The name of the tab control will be changed.
- Drag and drop controls as shown in the image above.
- The UI design of New Patient Form is completed.
7.3 Save Functionality in the Form:
- Button is dragged and dropped.
- Create a list in SharePoint.
- Add a data source to the form and name it.
Click On DataSources –> Create DataSource –> Enter Name –> Select the data source as SharePoint –> Click Ok –> Select the list created in the share point –> Click on Next button.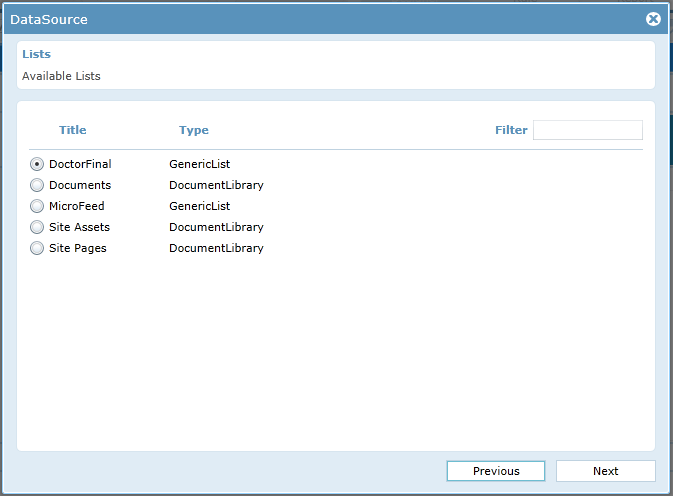
- Select Insert option from the drop down and click on add button.
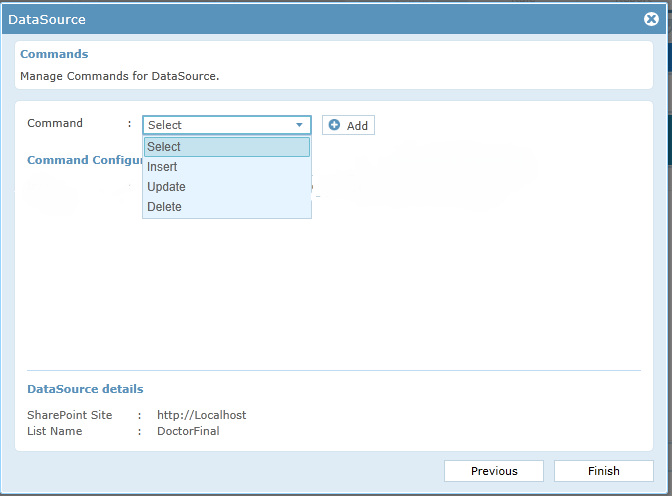
- Map the columns of list to the design controls and click on OK button.

- Click on Add Trigger Button:
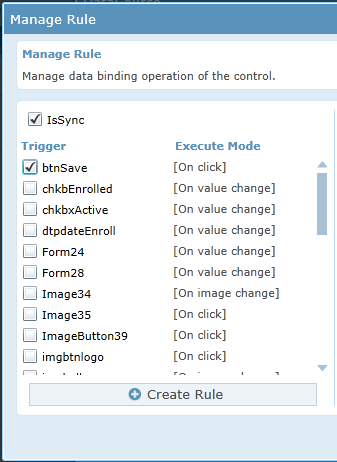
- We had named the save button as btnSave
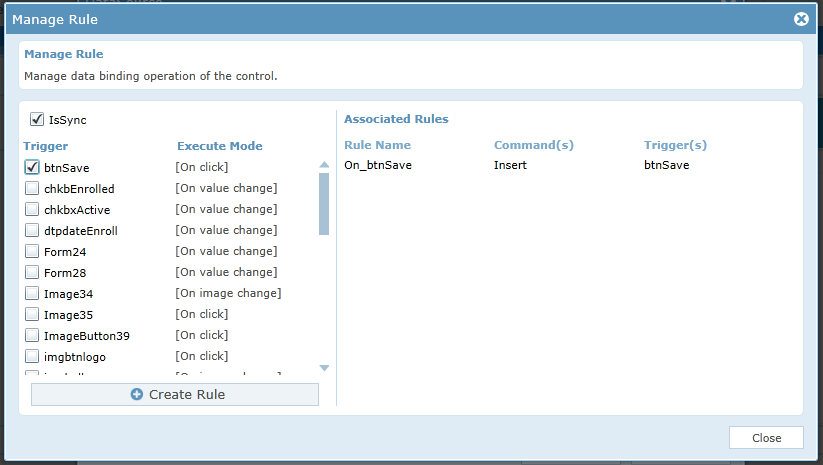
- Select btnSave as trigger and click on Create Rule button.
- The rule will be created–> Click on close button.
- Click on Finish button
- The data source will be added
- By using this form we will be able to insert the data into the List created in the share point. In this form New patient details will be added.
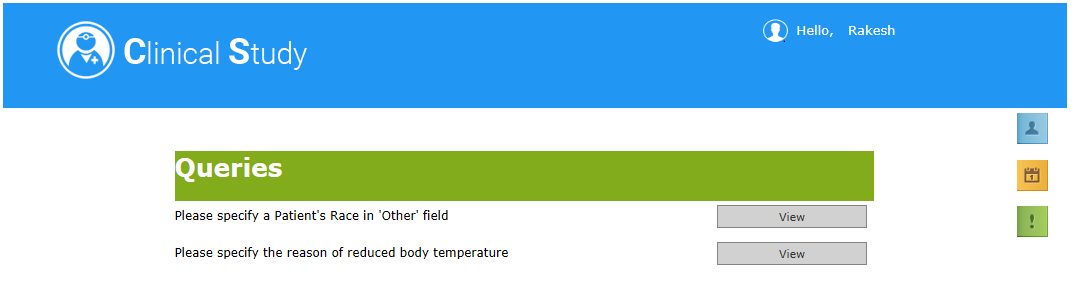
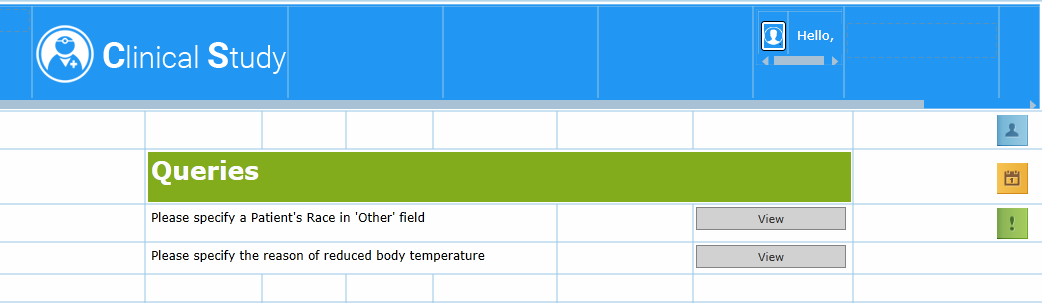
8 Query Form:
8.1 Controls used in the form are
- Image
- Image Button
- Sub Form
- Label
- Button
8.2 Steps to create this form:
- Create the header by using the same steps used in the above forms.
- Span columns and drop a label control. Name the label as Queries.
- Change the back ground color to eg: Green. The back ground color option is present in Properties–> Style –> Background color
- Complete the design as shown in the design.
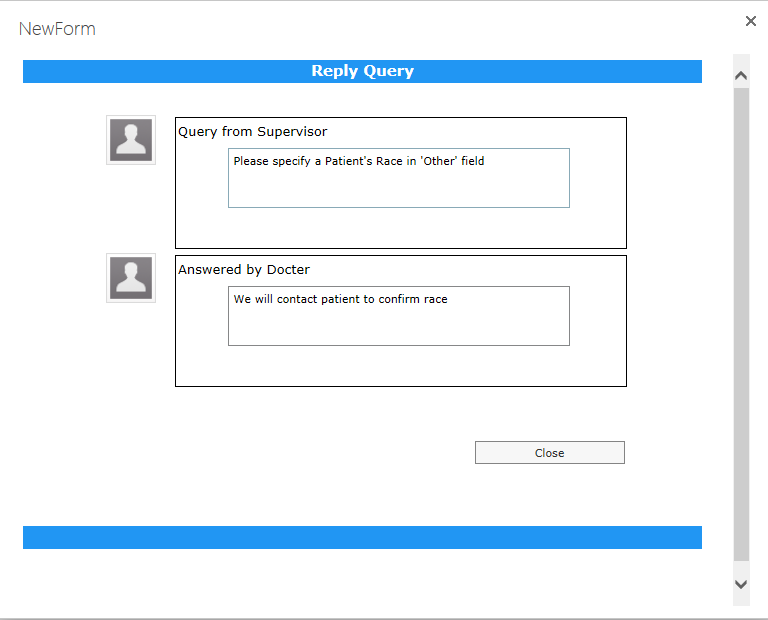
9.View comments page:
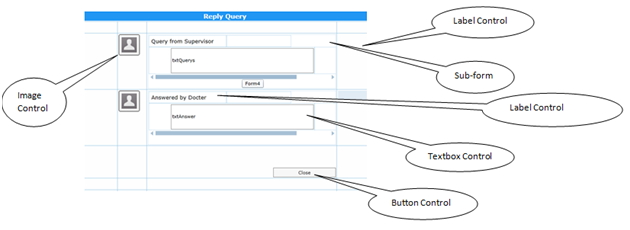
9.1 Controls used in the form are
- Image
- Sub Form
- Label
- textbox
- Button
9.2 Steps to achieve the above Form
- Drag and drop all the controls and achieve the Form UI design.
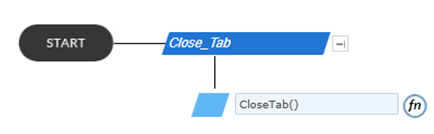
- For Close button, Click on the button –> Quick menu will be displayed–> Select Rule/Attributes –> Create rule –> Click on start –> Add an action –> Write rule CloseTab().
- This form should be shown as a pop-up when the VIEW button in Query Form Is Clicked. So Is Pop-Up option should be selected in this form. Click on any part of form–>Properties –> Form Details–> Is Popup =True.
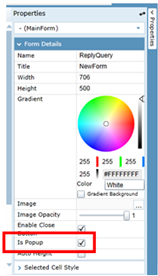
The Form will be displayed as popup.
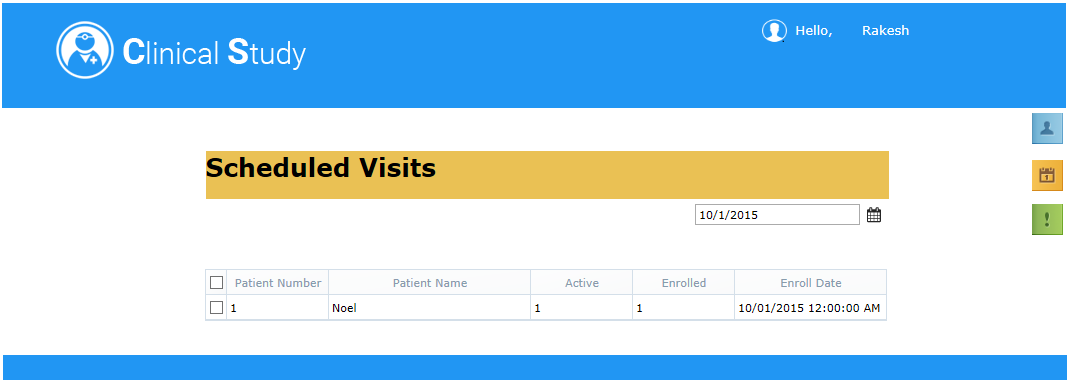
10 To view daily schedule Form:
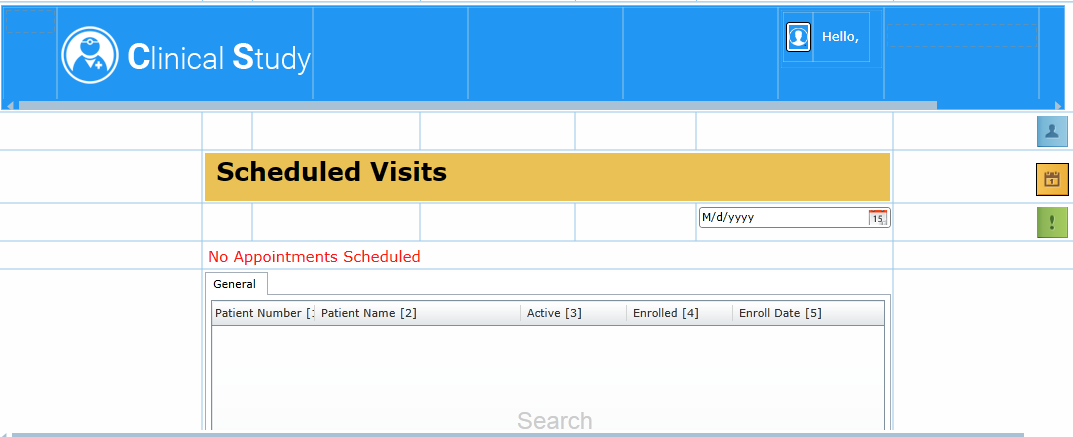
10.1 Controls used in the form are
- Image
- Image Button
- Date Time Picker
- Label
- Search Control
10.2 Steps to achieve the above Form
- Drag and drop all the controls and achieve the Form UI design.
- In this a label for error message and search control is placed and marked as Invisible.
- When the Form is loaded, the date time picker displays the current date. This is achieved using a rule.
Rules –> New Rule –> Add Action –> dtpselectdate.Value=GlobalVariable(Now)
dtpselectdate.Value=GlobalVariable(Now) means
dtpselectdate.Value – Value Of date time picker. the name of date time picker is given as dtpselectdate in form design.
GlobalVariable(Now) – this selects the current date.
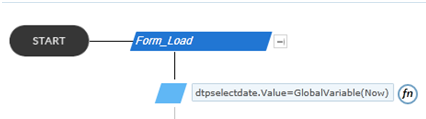
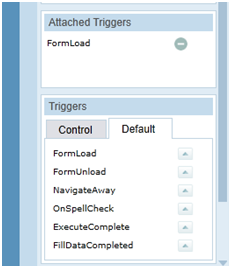
- FormLoad is set as trigger. In Default Tab –> form load will be displayed.
- When the Form is loaded, if there is any appointment scheduled for the current date the search control will be displayed with data.
- If there is no appointment scheduled for the current date, the error message will be displayed.
- This is achieved using rules.
- Have Date Time Picker as trigger .
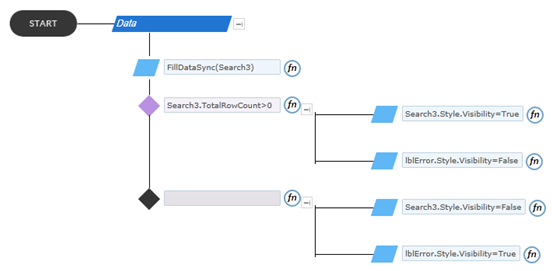
Rules:
Create a new Rule –> Add a Action Rule – FillDataSync(Search3)
Add a decision:
If
Search3.TotalRowCount>0 -> Search3.Style.Visibility=True
-> lblError.Style.Visibility=False
Else
-> Search3.Style.Visibility=False
-> lblError.Style.Visibility=True
- The Form Design is complete.
11 How to use this template:
11.1 Uploading List Template:
The below given list is used for creating the template form.
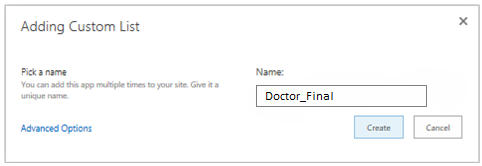
Doctor_Final
11.1.1 Steps for uploading list templates
- Click on settings at the right corner of the window.
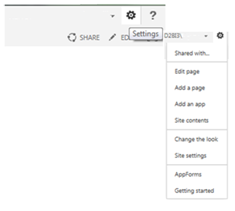
- Click on ‘Site settings’ from the drop down menu, we can see the following window appearing.
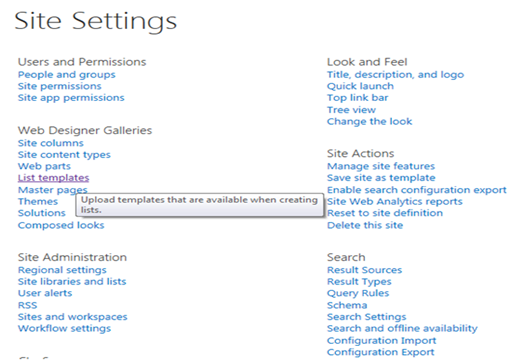
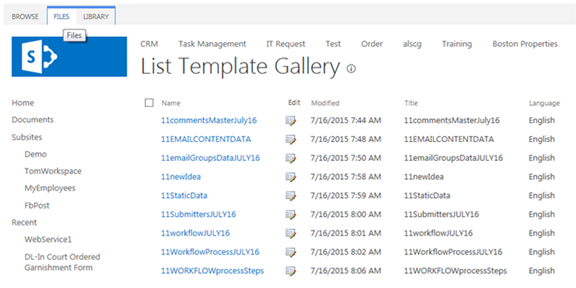
- Click on ‘List template’ option as shown in the above image. And we can see ‘List Template Gallery’. Click on ‘Files’ at the left most corner as shown in the following image.
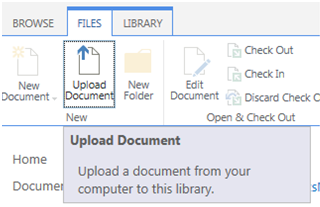
- Click on ‘Upload Document’
- Following Pop up will appear where we can browse a list template stored in our computer and click ‘OK’ button.

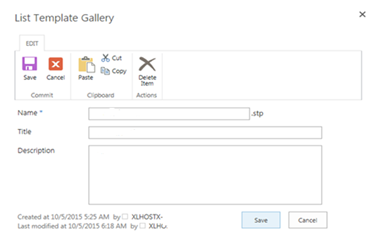
- Following pop up will appear where we can change the name of the List Template and enter the Description as required and click on ‘Save button’.
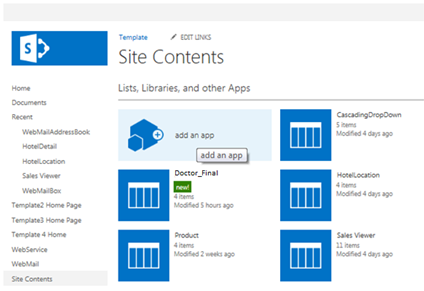
- Now go to the required sub site, click ‘Settings’ on the right corner. Then click on ‘Site Contents’. Following Screen appears in which click on ‘add an app’.
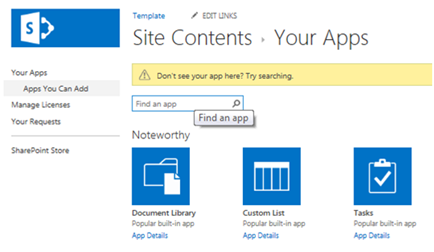
- Following screen will appear where we can type the uploaded template name and click search.
- Then you can see the Uploaded template, Click on it.
- On clicking it, we will get following Pop up. Enter the name for the List template and click ‘Create’ button
11.2 Uploading Tenant:
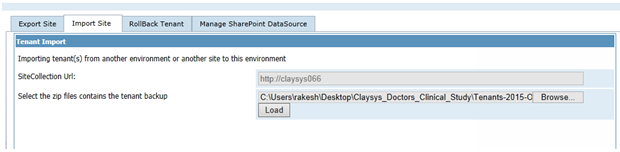
11.2.1 Steps for Uploading Tenant:
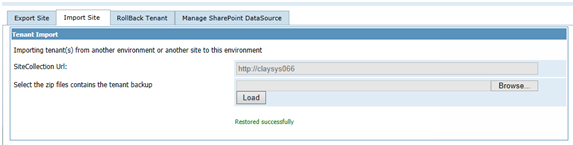
- Click on the ‘Backup and Restore’ on the left side of the App form Designer window .Then click on ‘Import Site’ -> Browse the Tenant and click Load.
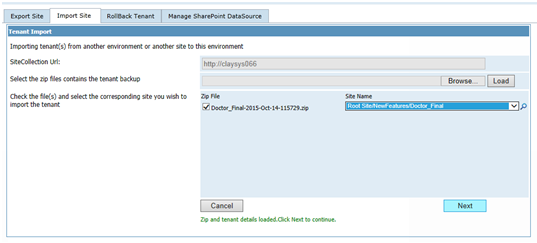
- Select the ‘Zip File’ and ‘Site Name’ and click ‘Next’
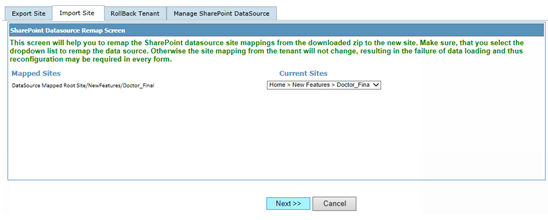
- Click ‘Next’ button
- Click on ’Import’ button

- Backup re stored successfully.
11.3 Creating a Web Part page:
Forms can be embedded on any SharePoint page by using the ClaySys AppForms Web Part, to create a web part page.
11.3.1 Steps to create a web part page:
- Click on Site Settings Wheel in the upper right corner of your site and then select “Site Contents Page”.

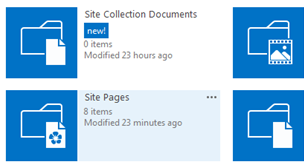
- Select “Site Pages” or simply pages library on Site Contents Page.
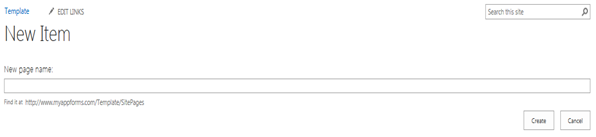
- Click on “New Wiki Page” to add new site page.

- Give the New page name into the pop-up window and click ‘Create’ to add new page.
- To add a new web part, click on the ‘Insert’ tab and then click on the ‘Web Part’ button. Then select ClaySys -> ClaySys HTML Web Part.
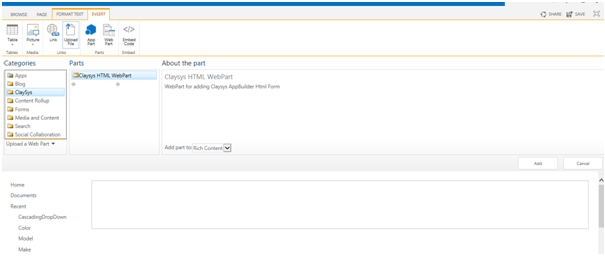
- Click ‘Add’ button to add the Web Part.
- Click on the ‘edit the Web part’ link to edit the page.
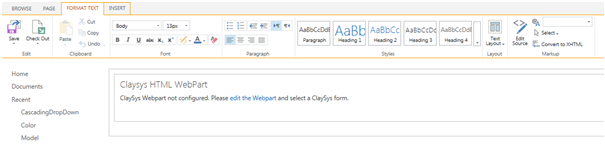
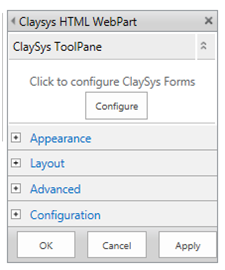
- A new pop-up window appears and here we can configure the ClaySys AppForms by clicking on the ‘Configure’ button.
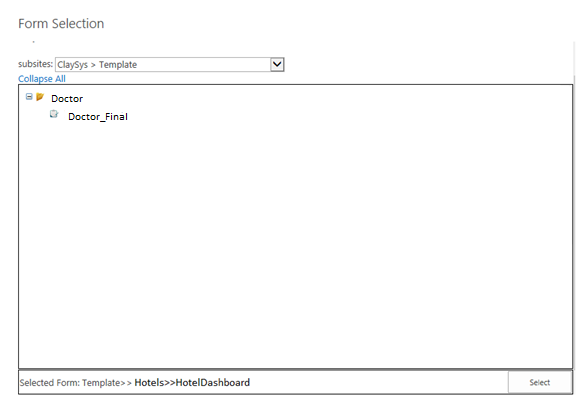
- Pop-up appears with listed published forms. We can select the appropriate form by click on the form and add the form by clicking on the ‘Select’ button.
- Once the configuration is finished, click on the ‘Apply’ button to see the changes. Click ‘OK’ to continue.
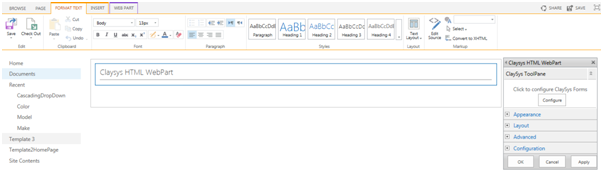
- Click ‘Save’ button to save the changes.
- Below figure shows the form after WebPart configuration.
Blogs by Category
AppForms Artificial Intelligence Blockchain Call Centers Chatbots Cloud Computing Data Management Design Digital Marketing Digital Transformation Enterprise Applications FinTech Insights LowCode Development Microsoft Mobile Apps News Office 365 Robotic Process Automation Security SharePoint Software Development Web ApplicationTop Use Cases of AI Agents Transforming Business in 2026
2026-06-29 15:16:38