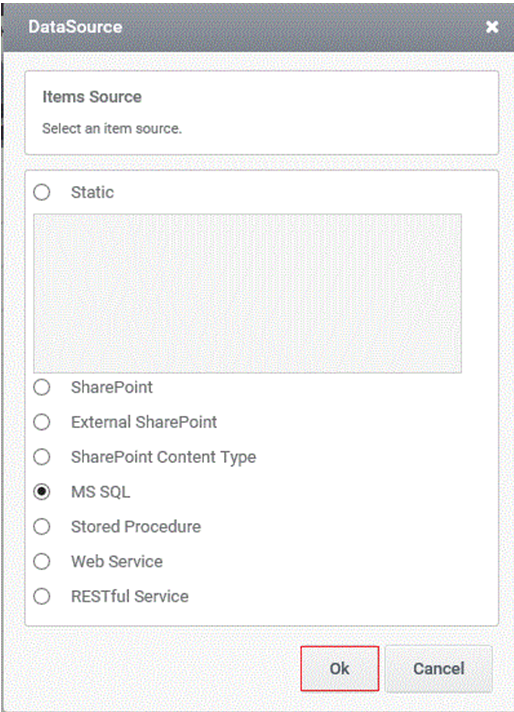
Configuring Collection Control with ‘MS SQL- Table/View’ datasource
- A ‘DataSource’ window will pop up. Select the datasource type as ‘MS SQL’ and click on ‘OK’ button to proceed with the wizard.
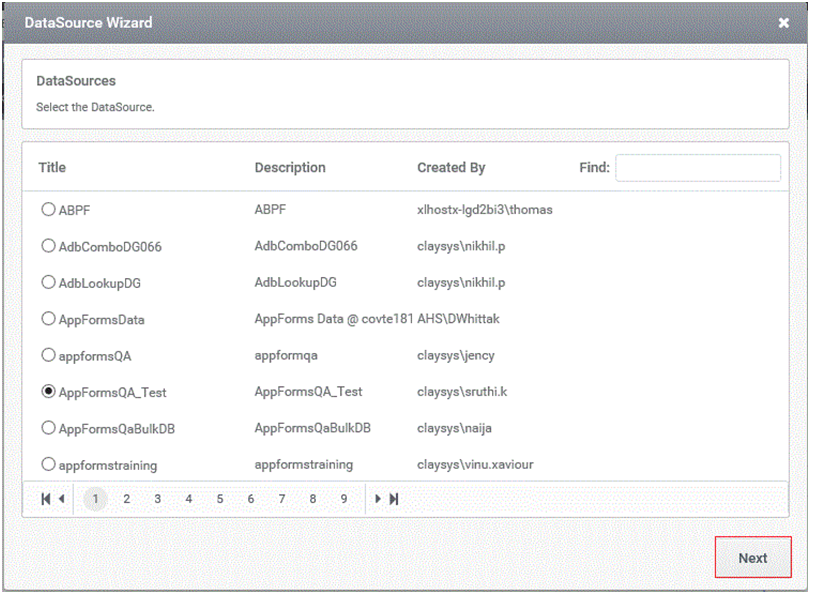
2. Select any of the SQL datasource and click on ‘Next’ button to proceed with the wizard.
3. Select the table name and click on ‘Next’ button to continue with the wizard. More than one table can be selected here.
- The user can also make use of ‘Filter’ option to search a particular Table from the tables listed in the window.

4.Manage the criteria based on which the ListBox control has to be loaded in preview.
- In this window the number of resultant rows that has to be displayed in the preview can also be managed.
- By default the checkbox against ‘Select All Results’ will be selected, so that all resultant rows will be loaded in the ListBox.
- On unchecking the same checkbox,the user can manually enter the desired number of resultant rows that has to be displayed.
- Manage the criteria by mapping the column with a control configured in the form. Here static values can also be assigned to column as criteria by selecting the checkbox against the header ‘Static/Variables’.
- Now click on ‘Next’ button to continue with the wizard.
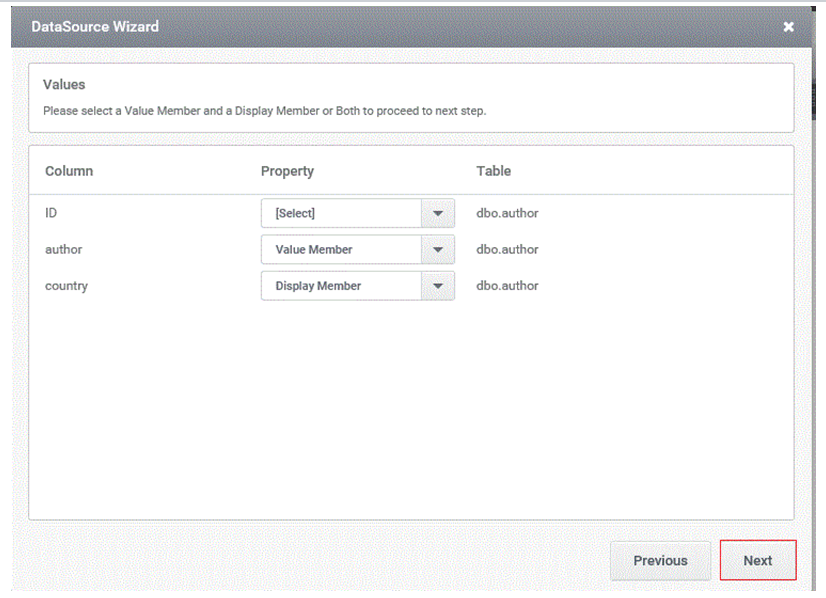
5.A ‘Values wizard’ will pop up.
- Set a column in the table as ’Value Member’.
- Set another column in the table as ‘Display Member’.
- A ‘Both’ option is also available to set a same column as both the’ Value Member’ and ‘Display Member’.
- Click on ‘Next’ button to proceed with the wizard.
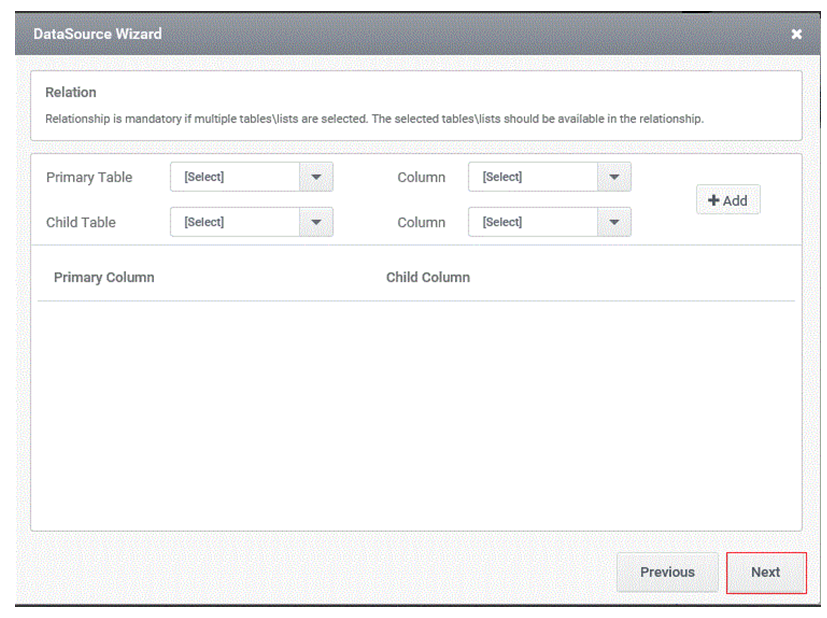
6. A ‘Relation wizard’ will pop up.
- Manage the relationship between columns of Primary and Secondary table if multiple tables are selected.
- On clicking ‘Add’ button, the relationship configured among multiple tables gets created.
- This wizard is mandatory only when multiple tables are selected.
- Click on ‘Next’ button to continue.
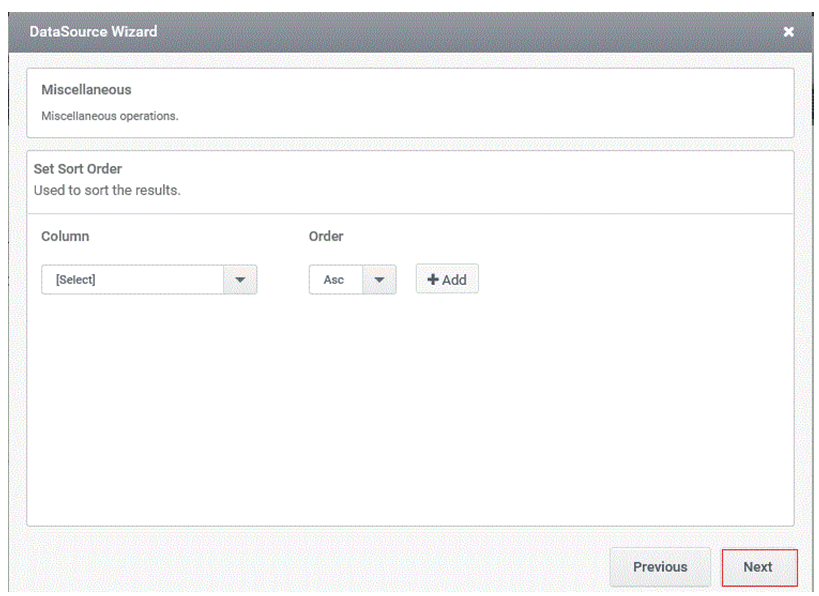
7. A ‘Miscellaneous window’ will pop up.
- Sort order for columns can be managed.
- Trigger to fill the control can also be managed using ‘Add Trigger’ button.
- Click on ‘Finish’ button.
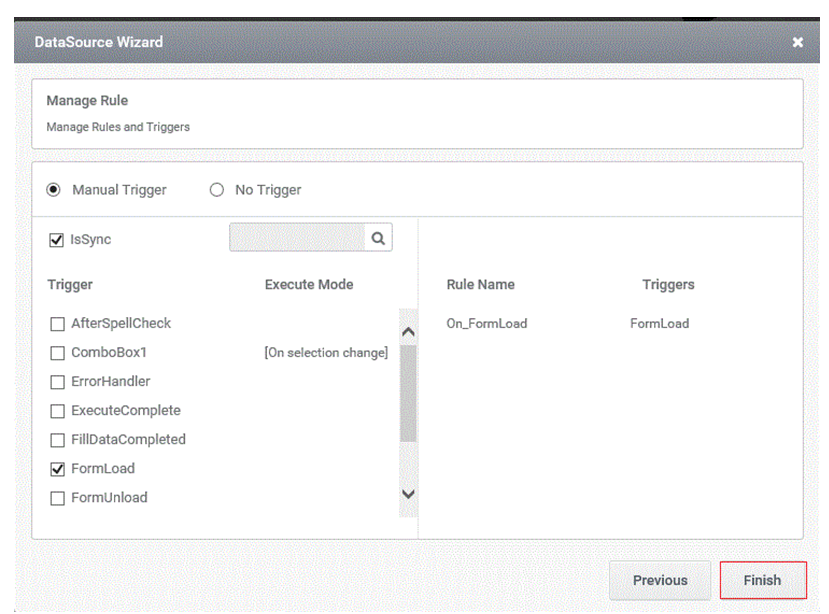
8. On clicking ‘Add Trigger’ button, a ‘Manage Rule’ window will pop up.
- Manage the FillData command as ‘Sync’ and ‘A-sync’.
- Manage the trigger on which the control has to be loaded in preview.
- View the FillData commands associated with the same control under section ‘Associated Rules’.
- Click on ‘Create Rule’ button. Now a rule to fill the control will be automatically generated in Rules Engine under the selected trigger.
- The pop up gets closed automatically on clicking the button ‘Create Rule’.
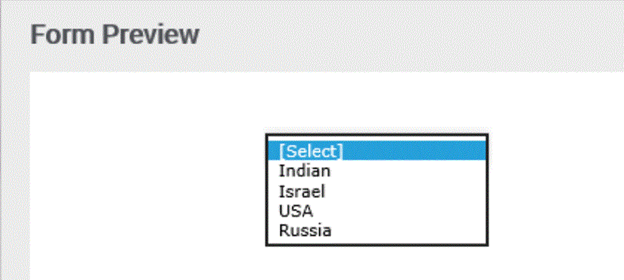
9. In Preview,
- ListBox control gets populated with the data based on the criteria.